

Quick Answer: How to Install a Lawn Mower Pull Cord
To install a lawn mower pull cord, remove the recoil starter housing from the engine, take out the rope pulley while keeping the recoil spring under control, thread the new starter rope through the pulley and handle, tie a secure knot, and wind the rope around the pulley before reinstalling the assembly on the engine. Always disconnect the spark plug wire first so the engine cannot accidentally fire while you work. The exact steps vary by brand and model, but the same basic process covers most common push mower recoil starters.
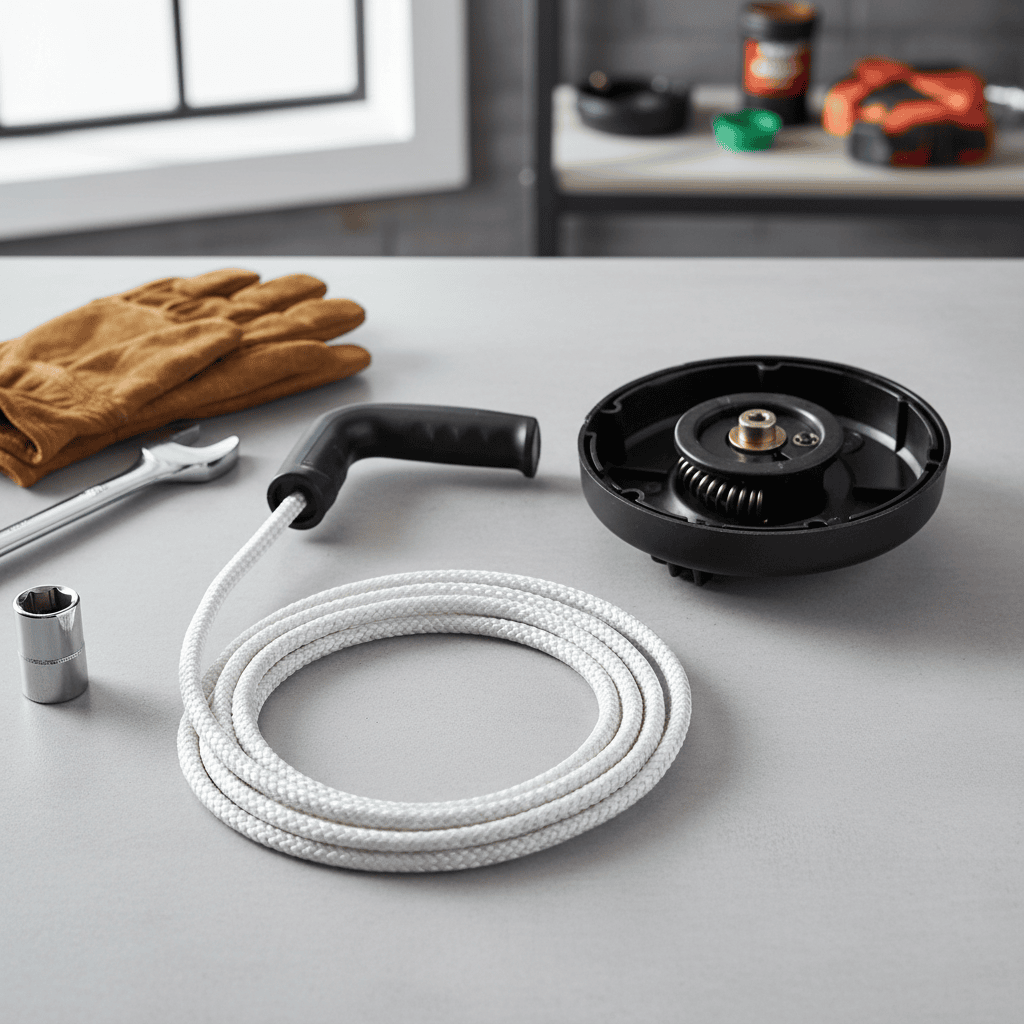
Understanding the Lawn Mower Pull Cord and Its Parts
Before you start the job, it helps to understand what you are actually replacing. People often use the term “pull cord” to mean several different parts, and confusing them can lead to buying the wrong component or taking the mower apart for no reason.

Pros
- Stated 1,600-pound capacity and 22 cubic feet
- Hand-pull or foot-pedal dumping options
- 16x8-inch pneumatic tires listed for grass, mud, and gravel
- Reinforced hitch and side rails per the listing
- Removable rear panel
Cons
- Heavy at about 118 pounds before loading
- Requires a hitch that accepts a 0.47-inch pin

Pros
- Manufacturer-rated 600 lb capacity and 17 cu. ft. storage
- Hand-pull and foot-pedal dumping options
- Three-sided guardrails to help contain loads
- 16-inch pneumatic tires for uneven ground
- Listed 0.47-inch (12mm) pin for hitch connection
Cons
- Listed weight of about 99 lb adds to towing load
- Capacity and build claims are manufacturer-stated, not verified

Pros
- 500-pound capacity and 10 cubic feet listed
- Hand-pull and foot-pedal dumping options
- 16-inch pneumatic tires listed for uneven ground
- 0.47-inch pin listed for various tractors and ATVs
Cons
- Listed weight is 59.92 pounds before loading
- No customer reviews are provided to confirm real-world durability
Pull Cord vs. Pull Handle vs. Recoil Starter Assembly
- Pull cord (starter rope): The braided nylon rope that you grab and pull to spin the engine.
- Pull handle: The plastic or rubber grip at the outer end of the rope, usually held on by a knot or a small plug that fits through a hole in the handle.
- Recoil starter assembly: The complete unit mounted on top of the engine, which includes the housing, the rope pulley, the recoil spring, the rope, and the handle.
When your rope snaps, you generally only need to replace the starter rope itself (and possibly the handle). If the housing is cracked, the pulley is broken, or the spring is worn out, you may need the whole recoil starter assembly instead.
How a Recoil Starter Works
When you pull the cord, the rope unwinds from a pulley and turns a drive mechanism that crank the engine. When you release the rope, a flat spiral spring inside the housing, called the recoil spring, rewinds the rope around the pulley so it is ready for the next pull. This is why a working starter rope must be wound with the correct amount of spring tension and in the correct direction, otherwise it will not retract.
What Is Inside the Starter Housing
- Starter housing: The round cover that protects the internal parts and bolts to the engine.
- Rope pulley: The disc the rope wraps around; it has a groove for the rope and a slot or hole where the inner end of the rope is anchored.
- Recoil spring: The flat spiral spring that stores energy and rewinds the rope.
- Starter rope: The cord itself, anchored at one end to the pulley and exiting through a grommet in the housing.
- Pull handle: The grip on the outer end of the rope.
Do Push Mowers and Riding Mowers Use the Same Method?
The pull cord installation process described here is for common push mower recoil starters. Most riding mowers use an electric starter motor plus a battery, and many larger mowers have no pull cord at all. If you have an electric-start engine with a pull cord backup, the starter housing still works on the same recoil principle, but the mounting and wiring are different. Always check your owner’s manual or the manufacturer’s service manual for your specific model before disassembling anything.
Tools and Materials You Will Need
Gather everything before you begin. Most of the required tools are basic household items, and the total cost of a new rope and handle is usually low. Before finalizing equipment decisions, refer to our comprehensive z890 vs x870e motherboard comparison.
Choosing the Right Starter Rope
Most common push mowers use braided nylon starter rope with a diameter of 3/16 inch or 5/32 inch, cut to a length of about 36 to 48 inches. However, published specifications vary by brand and model, so you should verify the correct diameter and length against your owner’s manual or the manufacturer’s parts diagram. Using rope that is too thick will bind in the pulley groove, while rope that is too thin can slip. A standard, dedicated starter rope is recommended instead of ordinary household string or clothesline, because starter rope is designed to resist fraying and stretching.
Tools Checklist
- Socket set or combination wrenches to remove the starter housing bolts
- Flathead or Phillips screwdriver
- Needle-nose pliers
- A new starter rope of the correct diameter and length
- A replacement pull handle (if the old one is cracked or missing)
- Utility knife or sharp scissors
- Work gloves and eye protection
- A clean, flat workbench or a towel to catch small parts
Step-by-Step Guide: How to Install or Replace the Pull Cord
Follow these steps in order. The process is the same for most push mower recoil starters, but the number of bolts and the exact shape of the housing can differ by brand. For broader ecosystem context, read through our operational guide on marshall stanmore iii vs harman kardon onyx studio 8.
Step 1: Safety First
Disconnect the spark plug wire from the spark plug and move it away from the plug so it cannot accidentally reconnect while you work. This prevents the engine from firing and the blade from spinning if the crankshaft is turned by hand. On a push mower, it is also wise to remove the spark plug entirely if you plan to tip the mower or turn the engine over by hand. Wear work gloves because the edges of the starter housing and the recoil spring can be sharp.
Step 2: Remove the Starter Housing
Locate the recoil starter housing on top of the engine. It is the round cover with the rope exiting through a grommet. Remove the bolts or screws that hold the housing to the engine using the appropriate socket or screwdriver. Set the fasteners aside in a small container so they do not get lost. Lift the housing straight up and away from the engine. Do not pull the rope while the housing is off, because the pulley and spring may release suddenly. For troubleshooting and reliability insights, consult our in-depth dyson v8 cyclone vs bissell featherweight stick report.
Step 3: Remove the Old Rope
With the housing upside down on your workbench, look for the anchor point where the inner end of the rope secures to the pulley. There will usually be a knot or a plug tucked into a slot in the pulley. Unthread the knot or use needle-nose pliers to free the rope from the anchor slot, then pull the old rope out through the grommet in the housing. If the rope is broken, simply remove the broken pieces from the pulley slot and pull any short remnant out of the handle.
Step 4: Thread the New Rope Through the Handle
Insert one end of the new starter rope through the hole in the pull handle. Tie a knot that is larger than the hole (a basic overhand knot works well) or use the manufacturer’s plug-style retainer if your handle has one. Pull the knot tight so the handle cannot slide off. You can hold the free end of the rope with a piece of tape to keep the strands from fraying while you work. Readers comparing setup options can review our technical analysis on bissell crosswave hydrosteam vs shark stainforce.
Step 5: Thread the New Rope Through the Pulley and Housing
Feed the free end of the rope through the grommet in the starter housing from the outside in, then place the end into the anchor slot or hole in the pulley. Tie a secure knot on the inner end of the rope and seat it firmly into the recessed slot in the pulley so it does not catch on the housing when the pulley spins. Trim any excess tag end of the knot with a knife so it lies flat and does not rub against the housing.
Step 6: Wind the Rope Around the Pulley
Before winding, make sure the recoil spring is engaged and tensioned according to the instructions in the section below. Pull the rope through the grommet so the handle sits against the housing, then wind the rope around the pulley by rotating the pulley by hand in the direction shown by an arrow on the pulley or housing, if one is present. The goal is to leave the handle resting against the grommet while the spring holds tension on the pulley. If you wind the rope without pre-loading the spring first, you will need to rotate the pulley several turns past the resting point to tension the spring (see “How to Rewind the Recoil Spring and Pre-Load the Rope” below).
Step 7: Reinstall the Starter Housing
Line up the starter housing over the engine mounting bosses and any centering tabs, then install the bolts or screws and tighten them evenly with a socket or screwdriver. Do not overtighten, since the housing is often plastic and can crack. Reconnect the spark plug wire when the job is finished. Pull the handle slowly to check that the rope extends smoothly and then retracts fully when you release it.
How to Rewind the Recoil Spring and Pre-Load the Rope
This is the trickiest part of replacing a pull cord. The recoil spring is what makes the rope snap back, so it must be handled carefully and wound in the correct direction.
Keeping the Recoil Spring Under Control
The recoil spring is under tension the moment you open the housing, and it can uncoil violently if the pulley is removed carelessly. The safest method is to keep the pulley in place while you swap the rope, removing the rope from the pulley anchor without lifting the pulley out of its seat. If you must remove the pulley, grip it firmly with one hand as you loosen it, and keep a gloved thumb over the spring pocket so the spring cannot jump out. Never pry at the spring with a screwdriver, and do not open the spring cup without need, because resetting a spiral spring is difficult and dangerous to the fingers.
How Much Tension and Which Direction to Wind
Look for an arrow on the pulley or inside the housing that shows the winding direction. Some pulleys are marked “wind,” “↑,” or show a curved arrow. Rotate the pulley by hand in the marked direction until the handle stops against the grommet. To pre-load the spring, continue rotating the pulley past that point for the number of turns specified in your manual (often two to four turns), then back off just until the rope handle seats against the housing. The result should be a rope that pulls out freely and retracts completely without leaving slack. If the rope retracts weakly or not at all, the spring is likely not tensioned enough; if it is nearly impossible to pull, the spring is wound backward or over-tightened.
What If the Spring Pops Out of Its Housing?
If the recoil spring escapes its pocket, stop and assess the damage. A clean spiral spring can often be re-seated by winding it back into its cup from the outer end, working the coil inward with your fingers and a pair of pliers, and hooking the inner tab into the slot on the pulley. If the spring is kinked, stretched, or rusted, do not try to reuse it; order a replacement spring or a complete starter assembly. Springs that have lost their shape will never retract the rope properly, no matter how carefully you reinstall them.
Troubleshooting: Rope Won’t Retract or Starter Won’t Engage
If something goes wrong after installation, work through the common causes below.
| Symptom | Likely Cause | Fix |
|---|---|---|
| Rope won’t retract after pulling | Recoil spring not tensioned, spring broken or unseated, or rope wound the wrong way | Re-open the housing, check the spring seating and winding direction, and pre-load the spring with the correct number of turns |
| Rope feels slack when pulled | Too little spring tension or the rope was wound without pre-loading | Rotate the pulley two to four extra turns in the winding direction before seating the handle |
| Rope slips or won’t pull the engine | Inner knot came loose from the pulley anchor, or the pawls (dogs) in the starter are worn | Re-seat the knot in the pulley slot and trim excess; inspect or replace worn starter pawls |
| Rope is hard to pull or binds | Rope too thick for the pulley groove, rope caught under the pulley, or housing bolts overtightened | Verify rope diameter, unwind and rewind the rope so it clears all edges, and loosen housing bolts slightly |
| Starter spins but engine won’t turn over | Broken pawls, damaged spring, or the starter isn’t engaging the flywheel | Inspect the pawl mechanism; replace the complete starter assembly if parts are worn or cracked |
If the housing itself is cracked or the pulley hub is stripped, repairing just the rope will not fix the problem. In that case, replace the whole recoil starter assembly, which is usually a bolt-on part sold by the engine manufacturer.
Safety Notes and When to Call a Professional
Working on a lawn mower starter is a safe DIY job if you respect two hazards: the ignition system and the recoil spring. Always disconnect the spark plug wire and keep it away from the plug while you work, and treat the recoil spring as a stored-energy part, just like a loaded spring in a garage door mechanism. Mower manufacturers and repair guides warn that a compressed or displaced recoil spring can cause hand and finger injuries, so use gloves, keep your face clear of the housing, and never force a spring back into place. If the spring has unwound, is badly tangled, or the starter is seized, stop and take the housing to a small-engine repair shop. Likewise, if your mower has an electric starter, battery, or safety interlock wiring near the starter, it is often cheaper and safer to let a professional handle the repair rather than risk damaging sensitive components.
Common Questions on How To Install Lawn Mower Pull Cord Answered
Can I use any rope as a lawn mower pull cord?
You should use a dedicated braided nylon starter rope rather than household string or clothesline. Starter rope is engineered to resist fraying, stretching, and breaking under the repeated snap of the recoil spring. Match the diameter to your pulley groove, usually 3/16 inch or 5/32 inch for common push mowers, and confirm the specification in your owner’s manual.
Why won’t my new pull cord retract?
The most common causes are the recoil spring is not tensioned enough, the spring is broken or unseated, or the rope was wound in the wrong direction. Re-open the housing, verify the spring is seated in its cup and hooked to the pulley, and wind the pulley two to four turns in the direction shown by the arrow on the pulley before seating the handle against the housing.
Should I replace just the rope or the whole starter assembly?
Replace just the rope if the housing, pulley, and spring are in good condition and only the cord snapped or frayed. Replace the whole recoil starter assembly if the housing is cracked, the pulley is stripped or chipped, the spring is kinked or rusted, or the starter pawls are worn. A complete assembly is typically a bolt-on part and avoids guesswork with spring tension.
How long should a lawn mower starter rope be?
Most common push mowers use a starter rope cut to roughly 36 to 48 inches, but the correct length depends on the pulley diameter and housing design. The best guide is the manufacturer’s parts diagram for your model, which lists both the rope diameter and the cut length. If you do not have the manual, measure the old rope before throwing it away, or use the rope length that lets the handle rest against the housing after the spring is pre-loaded.
Final Verdict: Choosing the Right How To Install Lawn Mower Pull Cord
Installing a lawn mower pull cord is a straightforward repair that most homeowners can finish in under an hour with a socket set, a screwdriver, and a few dollars’ worth of starter rope. The keys are to disconnect the spark plug first, keep the recoil spring under control, and wind the rope with the correct tension and direction. When in doubt about the exact procedure for your engine, consult the owner’s manual or the manufacturer’s service documentation, and do not hesitate to hand the job to a small-engine shop if the spring or housing is damaged.
Related Maintenance and Operating Guides
To keep your equipment running at peak operating efficiency, explore our related technical walkthroughs and maintenance tutorials:
- Consult our detailed breakdown on residential zero-turn lawn mower guide.
Pull Cord Installation Precautions
Pull cord installs are simple in principle, but the spring inside can snap if tension is released too quickly. Broader guidance on working safely with small engine components is one thing American National Standards Institute (ANSI) can provide.









