

Quick Answer: How to Lower a Lawn Mower
To lower a lawn mower’s cutting height, turn the engine off, wait for the blade to stop completely, and disconnect the spark plug wire on gas models. Then move the deck height adjustment lever, located on each wheel, at a single central point on walk-behind mowers, or on the sector plate to the left of the seat on riding mowers, to a lower notch or number. On reel mowers, turn the front and rear roller adjustment bolts counterclockwise by equal amounts. Confirm all adjustment points match before restarting.
What “Lowering a Lawn Mower” Actually Means
“Lowering the mower” means reducing the cutting height, the distance between the blade tip and the ground, so the mower cuts grass shorter. It does not refer to physically lowering a raised or stored deck.
Deck height is measured in inches from the ground to the underside of the mower deck. Every mower positions the cutting blade inside that deck, so the deck height directly controls how short the blade trims the turf. On most mowers, discrete notch positions correspond to specific cut lengths. A lower notch number equals a shorter cut across every mower type that uses this system.
- Notch 1, approximately 1 to 1.5 in (lowest setting on most walk-behind mowers)
- Notch 2, approximately 1.5 to 2 in
- Notch 3, approximately 2.5 to 3 in
- Notch 4, approximately 3 to 3.5 in
- Notch 5, approximately 3.5 to 4 in (highest setting on many models)
Exact inch values vary by manufacturer and model. Always cross-reference your owner’s manual for OEM-specified notch-to-inch conversions before cutting.
Safety Steps Before Adjusting Any Mower’s Cutting Height
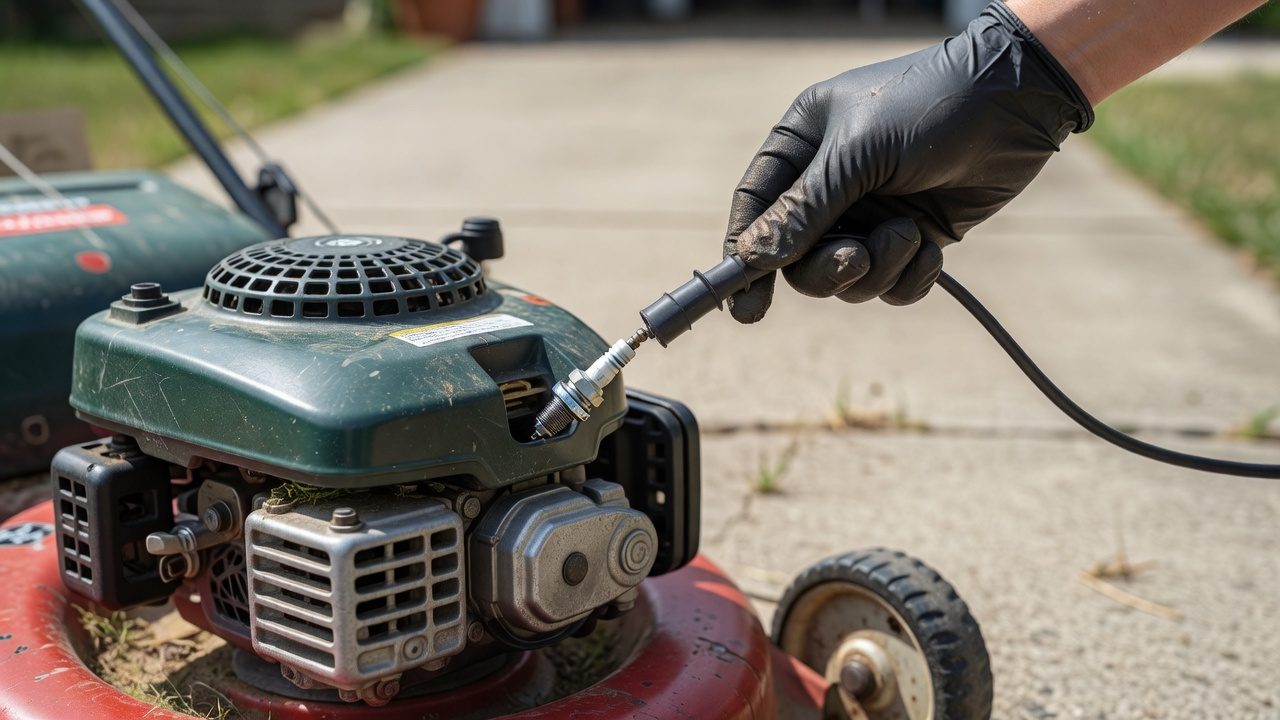
These steps apply to every mower type. Skipping them risks blade contact or accidental engine startup during adjustment.
- Turn the engine off and allow the blade to come to a complete stop, blades on gas walk-behind mowers can spin for several seconds after shutdown.
- Disconnect the spark plug wire on all gas-powered mowers (push and riding). Pull the rubber boot off the spark plug tip and tuck it away from the plug so it cannot accidentally reconnect.
- Engage the parking brake on riding mowers and lawn tractors before leaving the seat.
- Position the mower on flat, level ground. An uneven surface causes deck height measurements to read incorrectly after adjustment.
- Keep hands away from the blade opening. Even with the engine off, never reach under the deck near the blade during lever adjustment.
How to Lower a Push (Walk-Behind) Mower Cutting Height
Walk-behind mowers use one of two adjustment systems: per-wheel levers (one lever per wheel, four total) or a single-point central lever that adjusts all wheels simultaneously. Check which system your mower uses before starting.
Per-Wheel Lever System
- Park the mower on a flat surface, engine off, spark plug wire disconnected.
- Locate the wheel height bracket on the side of each wheel housing. A small lever or tab clips into a series of notched slots molded into the bracket.
- Squeeze or pinch the lever inward to release it from the current notch.
- Slide the lever down to the desired lower notch, then release it so it clicks firmly into place.
- Repeat on all four wheels, moving each to the same notch number. Mismatched wheel settings produce an uneven, scalped cut.
- Tug each lever gently upward to confirm it is locked in the notch before restarting.
Single-Point Central Lever System
- Locate the single lever on the mower’s body, typically mounted on the left side of the handle frame or on the top of the deck near the handle.
- Squeeze the lever’s release tab or lift the lever to disengage it from the current notch.
- Push or slide the lever toward the lower-numbered position on the height scale.
- Release the lever into the new notch and confirm it is seated by attempting to move it without engaging the release tab, it should not shift.
- Reconnect the spark plug wire and test-cut a small strip to verify the height before mowing the full lawn.
Lowest safe cutting height for push mowers: Most walk-behind gas and electric mowers bottom out between 1 and 1.5 inches. Cutting below that point risks scalping, removing the grass crown and exposing bare soil.
How to Lower a Riding Mower or Lawn Tractor Deck
Riding mowers and lawn tractors adjust deck height via a sector plate lever, a long handle that locks into a curved, toothed plate, almost always located to the left of the operator seat. Some models use a separate deck lift pedal or a hydraulic control; consult your owner’s manual if a sector plate lever is not present.
- Park on flat ground, set the parking brake, and turn the engine off. Disconnect the spark plug wire(s), many riding mowers have two cylinders with two plugs.
- Disengage the blade (PTO off) before making any deck adjustment. On most tractors, this is a dedicated PTO switch or lever near the left knee area. The deck must not be engaged while changing height.
- Locate the sector plate lever to the left of the seat. The lever sits in a notched, curved bracket with numbered or labeled positions.
- Lift the lever up or squeeze the release grip to disengage it from the current notch.
- Push the lever forward and down to move toward a lower-numbered cutting position. On most John Deere and Husqvarna tractors, lower numbers correspond to shorter cut heights, but confirm this on your specific model’s deck height scale.
- Release the lever into the new notch. It should click audibly and resist movement when you push it without using the release grip.
- Walk around the tractor and visually check that the deck hangs level, all four deck hanger arms should appear even. If the deck tilts, a hanger arm may be worn or a pin may have come loose (see Troubleshooting below).
- Reconnect the spark plug wire(s), release the parking brake, and test on a small area before full operation.
Riding mower cutting height typically spans 1 to 4 inches across 5 to 7 positions, though premium models extend this range. Never lower the deck on a riding mower while the blades are engaged or while the tractor is moving.
How to Lower a Reel Mower Cutting Height
Reel mowers use a mechanically distinct system. Instead of a lever-and-notch bracket, they rely on front and rear roller height adjustment bolts that raise or lower the rollers relative to the cutting blade cylinder. Lowering the rollers brings the blade closer to the ground, producing a shorter cut. When planning workspace deployment, consider the engineering criteria outlined in our marshall stanmore iii vs harman kardon onyx studio 8 guide.
- Lay the reel mower on its back on a clean, flat surface, a driveway or workbench works well. Ensure the blade has stopped moving.
- Locate the adjustment nuts on both the front roller (the roller ahead of the blade) and the rear roller (behind the blade). These are typically wing nuts or hex nuts on threaded bolts at each end of the roller axle.
- Use a wrench or your fingers (on wing nuts) to turn the adjustment nut. Counterclockwise rotation generally lowers the roller, which lowers the cutting bed, but confirm the direction in your mower’s manual, as thread orientation varies by brand.
- Adjust the front and rear rollers by equal amounts, the same number of turns on each side, to keep the cut bed level. Uneven roller adjustment produces a reel mower that scalps one edge while leaving the other too tall.
- After adjustment, place the mower upright on a flat concrete surface and slide a ruler or feeler gauge under the blade at multiple points across its width. The gap should be consistent across the full cutting width.
- Make small incremental adjustments (a quarter-turn at a time) rather than large changes, because reel mowers can cut as low as 0.5 inches, where precision matters significantly.
At low reel mower settings, run your hand (kept flat, away from the blade edges) along the blade-to-bedknife gap before mowing. The blade should not drag or bind. If it does, back off the adjustment by a quarter-turn before cutting.
Cutting Height Reference: How Low Should You Go?
Moving the lever to a lower notch without knowing your grass type’s minimum threshold causes scalping , cutting below the grass crown, killing the growing tissue and leaving brown, patchy areas. Use this reference table before selecting a lower setting. For additional operational safety benchmarks, see our published testing notes on dyson v8 cyclone vs bissell featherweight stick.
| Grass Type | Recommended Cutting Height Range | Minimum Safe Height |
|---|---|---|
| Bermudagrass | 0.5 to 1.5 in | 0.5 in |
| Zoysiagrass | 0.5 to 1.5 in | 0.5 in |
| Kentucky Bluegrass | 2 to 3.5 in | 2 in |
| Tall Fescue | 3 to 4 in | 2.5 in |
| St. Augustinegrass | 2.5 to 4 in | 2.5 in |
| Centipedegrass | 1 to 2 in | 1 in |
| Perennial Ryegrass | 1.5 to 2.5 in | 1.5 in |
The one-third rule: Never remove more than one-third of the grass blade’s current height in a single mowing session. If your lawn is currently 4.5 inches tall, cutting it to 3 inches removes exactly one-third, the safe maximum. Removing more than one-third stresses the plant, depletes carbohydrate reserves in the roots, and increases disease susceptibility. This rule applies regardless of mower type or adjustment system. Turfgrass extension programs at institutions including Purdue University and Penn State University consistently cite this threshold in their lawn management guidance.
Scalping risk: Cutting below the recommended minimum exposes the thatch layer and soil surface, invites weed seed germination in bare patches, and weakens the turf’s ability to recover from heat and drought stress. If you need to go significantly lower than the current height , for example, transitioning a tall fescue lawn from 4 inches down to 2.5 inches , do it in two or three separate mowing sessions spaced several days apart. To compare alternative configurations, check our hands-on review of bissell crosswave hydrosteam vs shark stainforce.
Troubleshooting: Mower Deck Won’t Lower or Lever Is Stuck
Lever Is Stuck and Won’t Move to a Lower Notch
Cause: Debris (compacted grass, mud, rust) packed into the notch slots prevents the lever from releasing or seating.
Fix: With the engine off and spark plug disconnected, spray the bracket and lever pivot point with a penetrating lubricant (such as WD-40) and allow it to soak for 5 to 10 minutes. Use a stiff brush or compressed air to clear debris from the notch slots. Work the lever back and forth manually to break up rust. If the bracket is visibly bent or cracked, the wheel height bracket requires replacement, bent brackets prevent proper seating at lower notch positions.
Mower Still Cuts Too High After Moving the Lever
Cause 1, Mismatched wheel settings: One or more wheels remained at the previous higher notch. Check all four wheel levers individually on per-wheel systems.
Cause 2, Worn cutting blade: A blade worn down significantly from sharpening or impact damage effectively raises the cutting height because less blade material extends toward the grass. Measure blade length against a new OEM blade and replace if worn beyond the manufacturer’s discard threshold.
Cause 3, Loose deck hanger pin (riding mowers): On riding mowers, the deck hangs from hanger arms connected to the frame by pins. A pin that has worked loose allows the deck to sit higher on one side than the lever position indicates. Inspect all hanger arm connection points with the deck lowered to its working position and replace missing or bent pins.
Mower Cuts Unevenly After Adjusting Height
Cause: Deck is not level side-to-side or front-to-back after adjustment.
Fix (walk-behind): Confirm all four wheel levers are at identical notch positions. Place the mower on a flat concrete surface and measure from the blade tip to the ground at four points around the blade circumference using a ruler, variance greater than ¼ inch across the cut width indicates a leveling issue or a bent blade.
Fix (riding mower): Most riding mowers have a deck leveling adjustment separate from the sector plate lever, typically a set of adjustable lift rods or turnbuckles on the deck hanger arms. Consult the tractor’s manual for the specific deck leveling procedure before adjusting those components. Worn deck hanger arms that have developed play in their pivot joints cause deck tilt that worsens at lower height settings and require replacement rather than adjustment.
Frequently Asked Questions About How To Lower Lawn Mower
Can I adjust the cutting height while the lawn mower is running?
No. Always turn the engine off and wait for the blade to stop completely before touching any height adjustment component. On riding mowers, also disengage the PTO (blade engagement switch) before moving the sector plate lever. Adjusting height on a running mower risks contact with a moving blade and can damage the adjustment mechanism under load.
Why does my mower leave uncut strips after I lowered the deck?
Uncut strips after a height adjustment almost always indicate that the wheels are set to different notch positions, causing the deck to tilt. On per-wheel lever systems, walk around the mower and verify each of the four levers sits at the same notch before mowing. On riding mowers, uncut strips can also result from a deck that needs re-leveling via the deck’s lift rod adjustment, a separate procedure from height selection.
What is the lowest cutting height a standard push mower can reach?
Most consumer-grade walk-behind gas and electric push mowers bottom out at 1 to 1.5 inches at their lowest notch. Reel mowers can reach as low as 0.5 inches, making them the appropriate tool for warm-season grasses like Bermudagrass and Zoysiagrass that are maintained at golf-course heights. Attempting to cut below a push mower’s mechanical minimum by removing wheels or bending the deck risks scalping the lawn and damaging the mower’s spindle and blade.
How often should I change the cutting height setting?
Raise the cutting height in summer heat (grass under heat stress benefits from more leaf surface for photosynthesis and shade over the root zone) and lower it gradually in spring and fall when growing conditions are optimal. Avoid dropping more than one full notch position per mowing session to stay within the one-third rule. Seasonal height changes, not weekly changes, are the standard practice recommended by turfgrass management programs.
Technical Standards and Compliance
Mechanical safety standards, operational tolerances, and protective gear guidelines align with benchmark specifications established by the American National Standards Institute (ANSI).









