Safety Precautions: The Non-Negotiable First Step
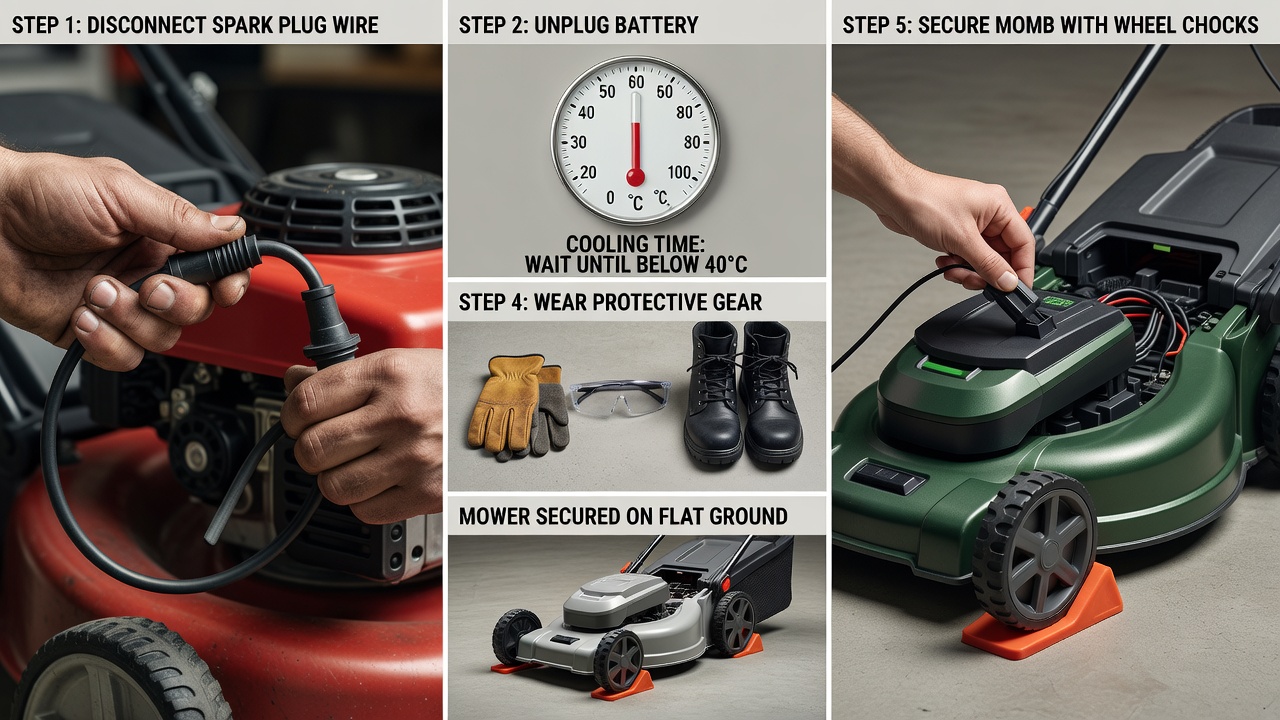
Removing a lawn mower blade without proper safety measures is one of the most common ways people injure themselves with yard equipment. Before touching anything underneath your mower, follow these critical steps:
- Disconnect the spark plug wire or battery. For gas mowers, remove the wire from the spark plug entirely—don’t just turn it off. For electric mowers, unplug the battery or power cord. This is the single most important step: it physically prevents the engine from starting accidentally while you’re working.
- Allow the engine to cool. If you’ve been mowing, wait at least 15–20 minutes before handling the blade. Friction heats the blade to dangerous temperatures.
- Secure the mower. Place the mower on a flat, level surface. For push mowers, consider having a second person steady it, or wedge the wheels with wood blocks. For riding mowers, engage the parking brake and consider placing wheel chocks behind the rear wheels.
- Wear protective gear. Put on heavy work gloves to protect against sharp blade edges, safety glasses to guard against debris, and closed-toe shoes. Never work in sandals or flip-flops.
- Position yourself safely. Work with the blade facing away from your body. Never position your hands directly under or over the blade where they could be cut if it shifts.
Identifying Your Mower Type and Blade Access
The blade removal process differs significantly depending on your mower type. Identifying which category your mower falls into will determine your next steps.
Rotary Push Mowers (Most Common)
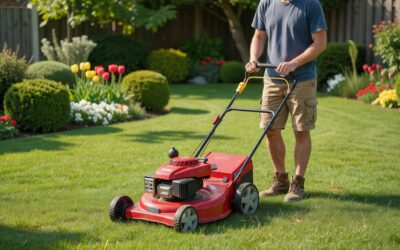
These are the standard push mowers found in most residential garages. They have a single horizontal blade that spins at high speed. Blade removal is straightforward: tip the mower on its side (with the carburetor facing up so fuel and oil don’t leak into the air filter), and you’ll see the blade bolt and blade directly underneath the deck.
Riding Mowers
Riding mowers typically have one to three blades depending on the deck width, mounted on a larger undercarriage. These require more space to work and often benefit from lifting the mower on jack stands or a hydraulic lift. Multiple blades are removed individually following the same process as push mowers, but you’ll need to work in a larger space.
Reel Mowers
Less common in residential use, reel mowers have multiple curved blades that rotate like scissors. These typically require specialized knowledge and tools. If you have a reel mower, consult your owner’s manual for removal instructions.
Mulching vs. Standard Blades
Mulching blades have a curved or wave-like design and are thicker than standard blades. The removal process is identical, but note that mulching blades cannot be swapped with standard blades—they’re designed specifically for your mower deck.
Tools and Materials You’ll Need
Gather these items before you start, so you won’t have to search mid-project:
- Socket wrench or open-end wrench: Most lawn mower blade bolts range from 3/8″ to 9/16″. Check your mower’s manual or measure the bolt head to determine the correct size. A socket wrench is preferable because it grips the bolt more securely.
- Penetrating oil (optional but helpful): Products like WD-40 or PB Blaster help loosen corroded or stuck bolts. If the bolt doesn’t turn easily, spray it and wait 5–15 minutes.
- Blade holder or vice: While holding the blade by hand works, a cloth or rubber-lined vice prevents damage to the blade and gives you better control when loosening a tight bolt.
- Marker or paint pen: Used to mark blade orientation so you reinstall it correctly.
- Work gloves and safety glasses: Essential personal protective equipment.
- Clean cloth: For wiping dirt and debris from the blade and work area.
Step-by-Step Blade Removal for Push Mowers
Follow these detailed steps if you have a standard rotary push mower:
Step 1: Position the Mower Safely
Place your mower on a flat surface. If it has a rear discharge chute, angle it toward you for easier access. Tip the mower onto its side with the carburetor and air filter facing upward. This prevents fuel and oil from leaking into the air filter, which would require extensive cleanup and could damage the engine. If you’re uncomfortable tipping the mower, use a hydraulic floor jack to lift one side, placing jack stands underneath for safety.
Step 2: Locate the Blade Bolt
Look underneath the mower deck. You’ll see the blade—a flat or slightly curved metal strip with sharp edges on the ends. In the center of the blade is a single bolt that holds it to the spindle shaft. This bolt is typically in the range of 1/2″ to 5/8″, though some mowers use metric sizes.
Step 3: Mark Blade Orientation
This step prevents a common reinstallation error. Most blades are stamped with directional markings or have one side painted. Some blades have a curved or angled shape that only works in one direction. Use your marker to draw an arrow on the top of the blade pointing toward the front of the mower, or mark which side faces down. Take a photo with your phone as backup.
Step 4: Loosen the Bolt
Place your wrench on the bolt. Determine which direction loosens it—typically counterclockwise, but some mowers use reverse-threaded bolts (clockwise to loosen). Check your manual if unsure. Apply steady, even pressure. If the bolt doesn’t budge after 10–15 seconds of firm pressure, spray it with penetrating oil, wait 10 minutes, and try again. Never force it, as you risk stripping the bolt or breaking your wrench.
Step 5: Stabilize the Blade and Remove the Bolt
Once the bolt begins to turn, use your other hand to hold the blade steady. Hold it firmly but carefully—the edges are sharp. As the bolt loosens, keep turning the wrench until you can remove the bolt by hand. Set it aside in a safe place where you won’t lose it.
Step 6: Remove the Blade
Carefully lift the blade away from the spindle shaft. If it’s stuck due to rust or grass buildup, gently tap it with a rubber mallet or wiggle it side to side. Once free, inspect the blade for damage, buildup, or dullness before cleaning or sharpening.
Step-by-Step Blade Removal for Riding Mowers
Riding mowers are larger and more complex, but the blade removal principle remains the same.
Step 1: Lift the Mower Safely
Most riding mowers have multiple blades (typically three for standard decks, more for wide-cut decks). You’ll need to access the deck from underneath. The safest approach is to use a hydraulic floor jack or drive the mower onto ramps. Never work under a mower supported only by the wheels. Once elevated, place heavy-duty jack stands on both sides of the frame for additional support.
Step 2: Locate Each Blade
Riding mower decks typically have blades positioned at different points. Mark each blade’s position (front-left, front-right, center, etc.) on your phone or notebook. This ensures you know which blade is which when reinstalling.
Step 3–6: Follow the Same Process as Push Mowers
Mark orientation, loosen bolts, stabilize blades, and remove one at a time. Work on one blade fully (removal, cleaning, and reinstallation) before moving to the next, so you don’t confuse them.
Troubleshooting Stuck or Corroded Bolts
If a bolt refuses to budge, don’t force it. Forcing a stuck bolt can strip the threads or break your tool, leaving you with an even bigger problem.
The Penetrating Oil Approach
Spray the bolt generously with penetrating oil. Wait 15–30 minutes for the oil to work into the rust. Spray again and wait another 10 minutes. Gently tap the bolt head with a hammer to help break corrosion. Then try turning the wrench with steady, patient pressure. If it still won’t move, wait another hour and repeat.
Heat and Tap Method
If penetrating oil fails, try carefully heating the bolt area with a heat gun (not a blowtorch—you don’t want to damage the mower deck). Heat causes metal to expand, which can help break corrosion. After 2–3 minutes of gentle heating, spray with penetrating oil and attempt removal again.
When to Seek Professional Help
If you’ve spent more than 30 minutes on a single stuck bolt, or if your wrench begins to slip or damage the bolt head, stop. A damaged bolt head is extremely difficult to remove. Take your mower to a professional repair shop at this point. The cost of a service call is worth avoiding more expensive damage.
Blade Maintenance and Reinstallation
Cleaning and Inspecting
Once removed, clean dried grass and dirt from the blade using a stiff brush or wire brush. Inspect for damage: cracks, bent edges, or severe wear indicate the blade should be replaced rather than sharpened. A slightly dull blade can be sharpened using a metal file or grinder, but only if it’s otherwise undamaged.
Sharpening Guidelines
If sharpening, maintain the existing blade angle and remove equal amounts of metal from both ends to keep the blade balanced. Unbalanced blades cause vibration and uneven cutting. Many people prefer to purchase a replacement blade rather than sharpen, as new blades are inexpensive (typically $15–40) and ensure perfect balance.
Reinstallation: Critical Orientation
This is where most mistakes happen. Reinstalling a blade backward or upside-down severely reduces cutting performance and can damage the mower. Refer to the mark you made before removal. Most blades have a stamped arrow or text reading “This Side Up” or “Discharge.” The cutting edge should face downward (toward the ground), and the blade should rotate in the direction that propels clippings out the discharge chute.
Torque Specifications
When reinstalling, tighten the bolt firmly but not excessively. For push mowers, typical torque is 35–90 foot-pounds depending on the manufacturer. If you have a torque wrench, consult your manual for the exact specification. If not, tighten until snug and then give it one additional quarter-turn. Overtightening can strip threads; undertightening can cause the blade to come loose during operation.
Frequently Asked Questions
Can I remove a lawn mower blade without disconnecting the spark plug?
Technically, you might be able to, but you shouldn’t. The risk isn’t worth it. Even with the mower off, a blade can accidentally engage if someone bumps the pull cord, gas lever, or ignition. Disconnecting the spark plug completely eliminates this risk. It takes 10 seconds and could prevent a serious injury.
How often should I remove and inspect my blade?
For regular mowing, inspect your blade every 20–30 hours of operation, typically once or twice per season for residential lawns. If you mow over rocky terrain or hit tree branches, inspect more frequently. Many people sharpen or replace blades at the beginning of each mowing season as part of regular maintenance.
What happens if I reinstall the blade backward?
A backward blade will cut poorly and may cause severe vibration. The mower will sound unusual—rougher and more aggressive than normal. Some mowers have a safety switch that detects an improperly installed blade and disables the engine. If you suspect your blade is backward, stop mowing immediately, disconnect the spark plug, and check the orientation.
Is it safe to work on a mower blade by myself, or should I have someone else present?
You can safely work alone if you follow all safety precautions: disconnect the spark plug, secure the mower, wear gloves, and work carefully. However, having a second person nearby (not necessarily watching, just in the vicinity) is a good practice. In case of an accident, they can call for help. Never work on a mower alone in a remote location without cell service.
Final Thoughts: Regular Maintenance Prevents Problems
Removing a lawn mower blade becomes much easier if you maintain it regularly. Grass buildup, rust, and corrosion develop over time and make every removal harder. At the end of each mowing season, remove the blade, clean it thoroughly, sharpen or replace it as needed, and reinstall it with fresh oil on the bolt threads. This seasonal ritual takes 30 minutes but saves you significant frustration and potential injury in the long run.
Most importantly, never rush the process. A blade removal that takes an hour of careful, methodical work is infinitely better than a five-minute job that lands you in an emergency room. Safety, not speed, is the goal.