

Quick Answer: How To Remove Lawn Mower Tire From Rim?
To remove a lawn mower tire from the rim, first deflate the tire completely, then break the bead (the seal between tire and rim) by applying pressure around the tire’s edge. Use tire irons or pry bars to systematically work the tire bead away from the rim, then lever the tire off the rim carefully to avoid damaging either component….

Pros
- Broad compatibility covering rim sizes from 4 to 16.5 inches
- Integrated manual bead breaker separates beads without shop air
- Reinforced rectangular steel base enhances operational stability
- Adjustable locking collar secures wheels during service
Cons
- Heavy 66-pound unit is cumbersome to transport or store
- Full manual operation requires significant physical effort

Pros
- Screw-driven foot unseats beads without needing heavy shop presses
- Works on equipment wheels while still mounted when clearance allows
- Compatible with standard hand wrenches and air ratchets
- Includes a pair of work gloves for added convenience
Cons
- Cannot be used with impact wrenches
- Only breaks beads; demounting spoons are required to remove tires

Pros
- Complete 3-piece set includes a bead breaker and two tire spoons
- Durable carbon steel build withstands tough mechanical stress
- Rounded spoon tips help safeguard rims against scratching
- Versatile fit for motorcycles, lawn mowers, and utility equipment
Cons
- Manual lever design requires significant user strength for stiff beads
Deflating and Preparing the Tire
Before you attempt any physical removal, the tire must be completely deflated. This is the single most important safety step, as a fully inflated tire holds substantial energy and can cause serious injury if the bead suddenly releases. Removing a tire from a rim while it still holds air pressure is also nearly impossible because the bead remains firmly seated against the rim edge.
How to Safely Deflate a Lawn Mower Tire
Start by locating the valve stem, which is the small metal or rubber fitting protruding from the rim. Remove the valve cap and press the small pin inside the valve core with a valve stem tool, a small screwdriver, or even the edge of a key. You will hear air escaping as the tire deflates. Continue pressing until no more air is released, and confirm the tire is completely flat by pressing on the tread with your hand. For tube-type tires, the air is inside the inner tube, but deflating through the same valve stem is all that is required.
Preparation Before Removal
Once the tire is flat, clean the area around the rim and tire bead with a wire brush or rag. Dirt, grass clippings, and rust can make the bead stick more firmly and can interfere with your tools. If the tire is mounted on a mower, remove the wheel from the machine by loosening the lug nuts or hub bolts and sliding the wheel off the axle. Place the wheel on a sturdy, flat work surface. A workbench or a piece of plywood on the ground works well. Having the wheel at a comfortable working height reduces strain and gives you better leverage with your tools.
Gather your tools before you begin. At a minimum, you will need two tire irons or pry bars, a rubber mallet or hammer, and a lubricant such as soapy water or a commercial tire mounting lubricant. A bead breaker tool is helpful but not strictly required for small lawn mower tires, as you can often break the bead with a pry bar and a hammer. If the tire has an inner tube, you will also want a valve core removal tool to fully deflate the tube and make it easier to pull out later.
Breaking the Tire Bead
Breaking the bead is the critical first step in separating the tire from the rim. The bead is the reinforced edge of the tire that sits inside the rim’s lip and creates an airtight seal. On a tubeless tire, this seal is what holds air. On a tube-type tire, the bead holds the tire in place on the rim while the inner tube carries the air. Breaking the bead means forcing this seal to release so the tire edge can be lifted over the rim lip.
What Does Breaking the Bead Mean?
The bead is a thick, rigid ring of steel wire or Kevlar embedded in the tire’s inner edge. It is designed to seat tightly against the rim, and over time, dirt, rust, and age can make it stick even more firmly. Breaking the bead is the process of pushing the tire edge inward and away from the rim lip, breaking that seal so the tire can be pried off. For a lawn mower tire, the bead is usually not as stubborn as a car tire, but it can still require significant force, especially on older or rusted rims.
Tools and Methods to Break the Bead
The simplest method for a lawn mower tire is to place the wheel flat on the ground and stand on the tire’s sidewall. Your body weight pressing down on the tire edge can often be enough to break the seal. If that does not work, use a pry bar or a flat-bladed screwdriver. Insert the tip between the tire and the rim lip, then press down firmly to lever the bead away from the rim. Work your way around the entire circumference, moving the tool a few inches at a time. A rubber mallet can help by striking the sidewall near the rim to loosen the bead before you pry. Commercial bead breaker tools are available and clamp onto the rim, using a lever or screw mechanism to press the tire down, but for most lawn mower tires, a pry bar and a hammer are sufficient.
Once you break the bead on one side, flip the wheel over and repeat the process on the other side. Both beads must be released before you can remove the tire. If the tire is particularly stubborn, apply a lubricant around the bead area and let it sit for a few minutes. Soapy water works well and is safe for both the tire and rim. Avoid using petroleum-based lubricants, as they can degrade the rubber over time.
Removing the Tire with Tire Irons
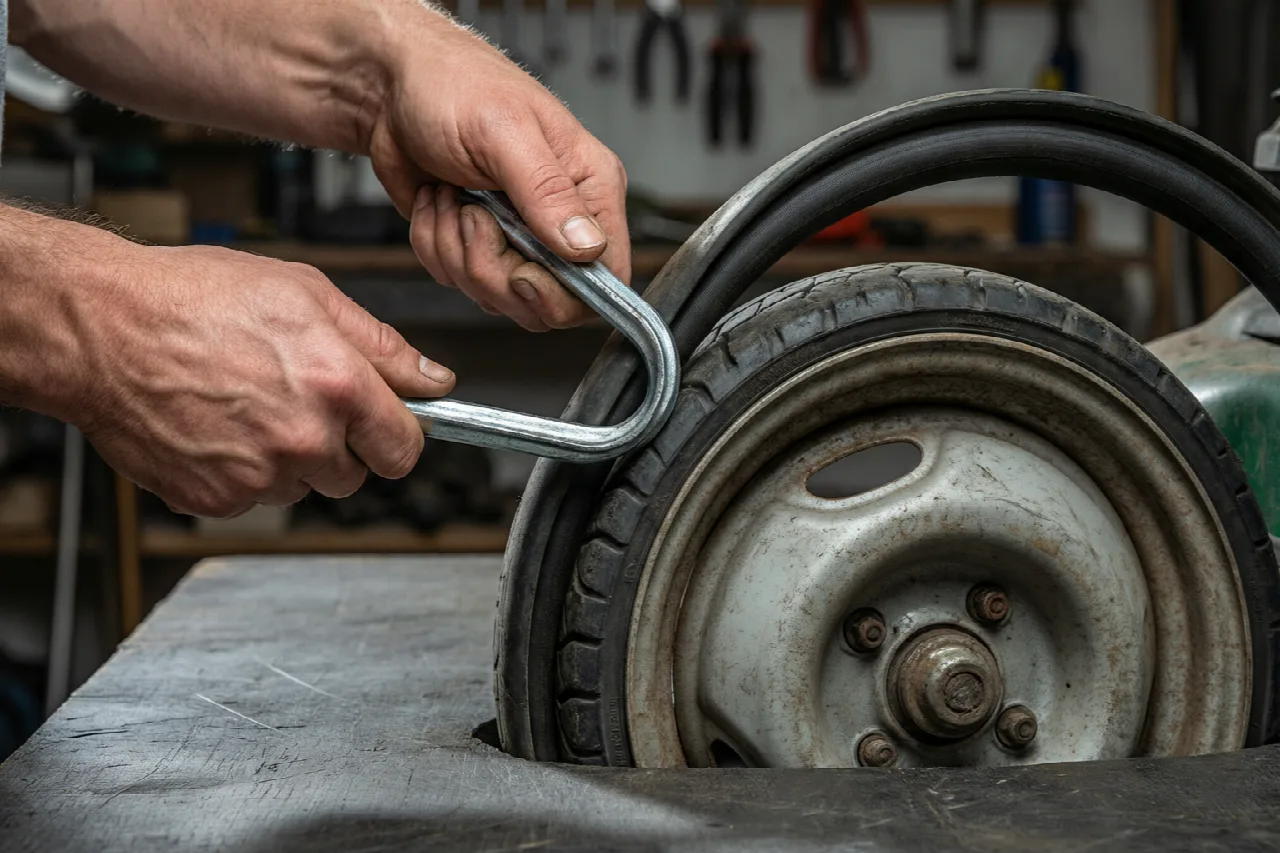
With both beads broken, you can now work the tire off the rim using tire irons or pry bars. This step requires patience and a systematic approach. Rushing or using excessive force can damage the rim, the tire, or the inner tube if one is present. The goal is to work the tire bead over the rim lip gradually, section by section, until the entire tire is free. To evaluate matched hardware tolerances, consult our detailed overview of marshall stanmore iii vs harman kardon onyx studio 8.
How to Use Tire Irons to Remove the Tire
Start by positioning the wheel so the side you are working on is facing up. Insert the flat end of a tire iron between the tire bead and the rim lip, at a point that is already loosened. Push the tool down to lever the bead up and over the rim edge. Once the bead is over the lip, hold it in place by hooking the tire iron onto the rim or by keeping it wedged between the tire and rim. Insert a second tire iron a few inches away and repeat the levering motion. Work around the rim, moving each iron a short distance at a time, gradually pulling more of the bead over the lip. Do not try to remove the entire tire in one motion. Instead, work in small increments, moving the irons around the circumference until the bead is fully over the rim on one side.
Proper Sequence for Working Around the Rim
Once the first bead is completely over the rim lip, the tire is partially free. If the tire has an inner tube, now is the time to remove it. Reach inside the tire and pull the tube out through the opening between the tire and rim. Be careful not to pinch or tear the tube, especially around the valve stem. With the tube removed, you can now work the second bead off the rim. Push the tire down into the center well of the rim on the opposite side. This creates slack, making it easier to lever the second bead over the lip. Insert your tire irons and repeat the same incremental process until the second bead is free and the tire slides off the rim completely. When planning workspace deployment, consider the engineering criteria outlined in our dyson v8 cyclone vs bissell featherweight stick guide.
If the tire is tubeless, you can skip the tube removal step and simply work the second bead off the rim directly. However, the same technique applies: create slack by pushing the tire into the rim’s center well, then lever the bead over the lip a little at a time. Always use two tire irons so one can hold the progress you have made while the other advances the work. This prevents the bead from slipping back under the rim lip.
Differences Between Tubeless and Tube-Type Tires
Lawn mower tires come in two basic configurations: tubeless and tube-type. The removal process is similar, but there are important differences to understand before you start. Knowing which type you have will help you avoid damaging the inner tube or struggling with a stubborn bead. For additional operational safety benchmarks, see our published testing notes on bissell crosswave hydrosteam vs shark stainforce.
How Removing a Tubeless Tire Differs
A tubeless tire has no inner tube. The tire itself forms the airtight seal against the rim, so the bead must seat very tightly to hold air. This means the bead can be more difficult to break, especially if the tire has been mounted for a long time. When removing a tubeless tire, you do not need to worry about a tube, so you can use more direct force with your pry bars. Once the bead is broken and the tire is off the rim, there is nothing else to remove. The rim may have some residue from the tire sealant or old rubber, which you can clean before installing a new tire.
How to Handle the Inner Tube During Removal
With a tube-type tire, the inner tube sits inside the tire and holds the air. The tube is delicate and can be easily punctured or pinched during removal. The key difference is that you must remove the tube before you attempt to pull the second bead off the rim. After breaking both beads, work the first bead over the rim lip as described. Then, reach inside and carefully pull the tube out. Start by pulling the valve stem through the hole in the rim, then work the rest of the tube out through the gap between the tire and rim. Do not pull hard or twist the tube, as this can tear the rubber or damage the valve stem. Once the tube is free, you can finish removing the tire from the rim. If you are replacing the tire, you will need a new tube as well, since the old tube is often stretched or damaged from use.
Another practical difference is that tube-type tires are often easier to remove overall because the bead does not need to form as tight an airtight seal as on a tubeless tire. The bead still holds the tire in place, but the air pressure is contained by the tube, not the bead. This means the bead may release more readily. However, the presence of the tube adds a handling step and requires more care to avoid damaging the tube during removal.
Safety Considerations and Avoiding Rim Damage
Removing a lawn mower tire from the rim is a straightforward task, but it involves sharp metal edges, significant force, and the potential for injury if done carelessly. Taking proper safety precautions protects both you and your equipment. The most common injuries from this task are pinched fingers, cuts from pry bars, and eye injuries from debris. The most common equipment damage is a bent or scratched rim, which can cause air leaks or poor tire seating later.
What Safety Precautions Should Be Taken
Always wear safety glasses to protect your eyes from dirt, rust, and small metal fragments that can fly off when you pry or hammer. Wear sturdy work gloves to protect your hands from sharp rim edges and from slipping tools. Make sure the wheel is stable and cannot roll or shift while you work. If you are working on the ground, place the wheel on a flat surface and consider wedging it with a block of wood. Never place your fingers between the tire and rim while prying, as the tools can slip and pinch you hard. When using a hammer, strike the pry bar or sidewall with controlled force, and keep your free hand clear of the striking area.
If you are removing a tire that still has some air pressure, always deflate it completely first. Never attempt to break the bead on a partially inflated tire, as the sudden release of air can cause the tire iron to slip violently. Also, be aware that some older tires may have steel belts or wires that can protrude and cause cuts. Inspect the tire before handling it and be cautious around any exposed wires.
How to Avoid Damaging the Rim
The rim is a metal component, and it can be bent, scratched, or dented if you use improper tools or excessive force. Use pry bars or tire irons with flat, blunt ends rather than sharp screwdrivers, which can gouge the rim lip. Apply lubricant to the bead area before prying to reduce friction and make the tire slide more easily. When levering the bead over the rim, work in small increments around the circumference rather than forcing one section all at once. This distributes the stress evenly and reduces the risk of bending the rim.
If the rim is rusted or corroded, clean it gently with a wire brush before removal. Do not use a hammer directly on the rim to loosen the tire, as this can dent the metal. Instead, strike the tire sidewall with a rubber mallet. If the bead is extremely stubborn, apply more lubricant and let it soak in, rather than increasing force. A bent rim is difficult to repair and may require replacement, so it is worth taking your time to avoid damage. After the tire is removed, inspect the rim for any cracks, bends, or sharp edges before installing a new tire.
Common Questions on How To Remove Lawn Mower Tire From Rim Answered
Can I remove a lawn mower tire without tire irons?
Yes, you can use a flat-bladed screwdriver or a pry bar as a substitute, but tire irons are safer and less likely to damage the rim. For very small tires, a screwdriver may work, but you should be careful not to gouge the rim lip.
How do I know if my lawn mower tire has a tube?
Look at the valve stem. If it is a rubber stem that is flexible and has a small hole in the rim around it, it is likely a tube-type tire. A metal valve stem that is rigid and sits flush against the rim usually indicates a tubeless tire. You can also check the tire sidewall for markings that say “tubeless” or “tube type.”
What should I do if the tire bead will not break?
Apply a generous amount of soapy water or tire lubricant around the bead and let it sit for several minutes. Then try pressing down with your body weight or use a pry bar with more leverage. If it still will not break, a commercial bead breaker tool may be necessary.
Is it worth repairing a lawn mower tire or should I replace it?
If the tire has a small puncture in the tread and the sidewalls are in good condition, a repair may be worthwhile. However, if the tire is cracked, dry-rotted, or the sidewalls are damaged, replacement is usually the better option. Lawn mower tires are relatively inexpensive, and a new tire often provides better performance than a repaired one.
Related Maintenance and Operating Guides
To keep your equipment running at peak operating efficiency, explore our related technical walkthroughs and maintenance tutorials:
- Consult our detailed breakdown on heavy-duty chainsaw buyer guide.
Technical Standards and Compliance
Mechanical safety standards, operational tolerances, and protective gear guidelines align with benchmark specifications established by the American National Standards Institute (ANSI).









