

Quick Answer: How to Remove a Lawn Mower Spark Plug
Let the engine cool for at least 30 minutes, then pull the spark plug boot straight off the terminal. Fit a 5/8-inch or 13/16-inch spark plug socket onto a ratchet, turn counterclockwise to break the plug loose, then unthread it by hand. Total time: under 10 minutes.

Pros
- Large-size design named in product title
- Sharpening and balancing functions listed
- Listed as a new upgraded version

Pros
- Adjustable 15-to-45-degree range in title
- Sharpening and balancing functions listed
Pros
- Includes replacement gaskets and a 98079-55846 spark plug
- Matches Honda HRR216 and HRS216 lawn mower models
- Designed around the 16100-Z8B-901 carburetor specification
Cons
- Restricted to select Honda GCV160 mower applications
- Installation requires basic mechanical tools and skills
What You Need Before You Start (Tools & Safety)
Gathering the right tools before you begin prevents mid-job trips to the garage and reduces the risk of rounding the plug hex or cracking the porcelain insulator.
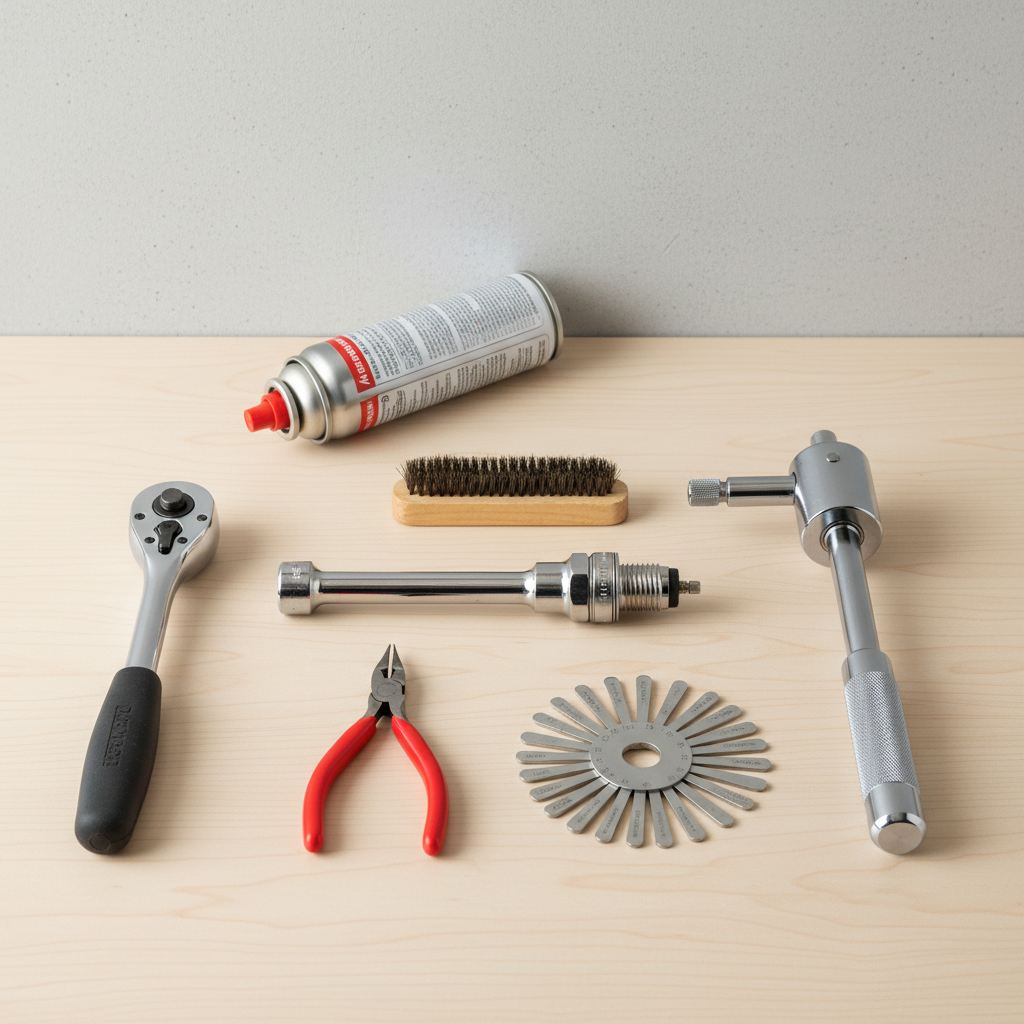
Tools Required
- Spark plug socket, 5/8-inch (most common) or 13/16-inch, with rubber insert to grip the plug
- Ratchet wrench, 3/8-inch drive is standard for push mowers
- Extension bar, 3-inch or 6-inch, useful when the plug sits deep in the engine block
- Needle-nose pliers, optional, for gripping a stubborn boot
- Wire brush and compressed air, to clear debris around the plug before removal
- Spark plug gap tool, needed if you are reinstalling or setting a new plug
- Torque wrench, required for proper reinstallation (typically 15 to 30 ft-lbs depending on engine)
Safety Checks Before You Touch the Plug
- Engine must be completely cool. A hot engine block can cause burns, and thermal expansion makes plugs harder to remove without damage. Allow at least 30 minutes after shutdown.
- Disconnect the spark plug boot first, always. This eliminates any accidental-start risk before your hands are near the blade or engine.
- Work on a flat, stable surface with the mower on level ground. For push mowers, do not tilt the mower with the air filter side down, oil can flood the carburetor.
- No need to drain the gas for plug removal alone, but if you plan extended maintenance, draining or stabilizing fuel is recommended.
- Remove the ignition key on riding mowers before accessing any engine components.
How to Remove a Spark Plug on a Push Mower (Step-by-Step)
These steps apply to the vast majority of single-cylinder push mowers, including those powered by Briggs & Stratton, Honda GCV160/GCV190, Kawasaki, and Kohler engines.
- Let the engine cool completely. Wait a minimum of 30 minutes after the last use. A warm plug seated in an aluminum block is under thermal stress, forcing it out risks stripping the threads in the block, which is an expensive repair.
- Locate the spark plug. On a push mower, the spark plug is mounted on the front or side of the engine block, near the top. It has a rubber boot and wire attached to it. Trace the thick ignition wire from the engine housing to find it if it is not immediately visible.
- Clear debris around the plug. Use compressed air or a dry brush to remove grass clippings, dirt, and oil buildup from the area around the plug base. This prevents debris from falling into the cylinder when the plug is removed.
- Disconnect the spark plug boot. Grip the rubber boot, not the wire, and pull it straight off the plug terminal with a firm, steady motion. Twisting the boot slightly while pulling can help if it is stuck. Never yank the wire itself; this can tear the wire from the boot connector and require ignition wire replacement.
- Attach the correct socket. Fit the spark plug socket onto your ratchet, adding an extension bar if needed for clearance. Push the socket straight down onto the plug hex until it seats fully. A proper spark plug socket has a rubber or foam insert that grips the plug and prevents it from dropping once loosened.
- Break the plug loose counterclockwise. Apply steady, firm pressure counterclockwise (righty-tighty, lefty-loosey). If the plug has not been removed in several seasons, it may be tight, apply slow, even pressure rather than sudden force. Do not use penetrating oil inside the cylinder; a brief spray around the external base threads on a cooled engine is acceptable for a seized plug, but allow it to penetrate for 15 minutes before trying again.
- Unthread the plug by hand. Once loose, switch from the ratchet to hand-threading to avoid cross-threading or dropping the plug into the engine bay. Keep the socket on to hold the plug as you lift it clear.
- Inspect and set aside. Place the plug on a clean surface for inspection. Do not set it where it can roll and crack the ceramic insulator. Proceed to the inspection section below before deciding to clean, reinstall, or replace.
Spark Plug Socket Size by Engine Brand (Quick-Reference Chart)
Using the wrong socket size is the fastest way to round the plug hex and turn a 10-minute job into an engine-shop visit. Socket size varies by engine design, not by mower brand, the same Husqvarna mower sold in different years may carry different engines.
| Engine Brand | Common Engine Series | Spark Plug Socket Size |
|---|---|---|
| Briggs & Stratton | 450E, 500E, 550EX, 675EXi, 725EXi, Intek V-Twin | 5/8-inch (16 mm) |
| Honda | GCV160, GCV190 | 13/16-inch (21 mm) |
| Kohler | XT6, XT7, XT775, Courage SV Series | 5/8-inch (16 mm) |
| Kawasaki | FJ180V, FR Series, FS Series | 5/8-inch (16 mm) |
| Tecumseh | LEV, LVSK Series (older mowers) | 5/8-inch (16 mm) |
| Husqvarna (branded engine) | Series 550ex, 675EXi-powered units | 5/8-inch (16 mm) |
| Craftsman (Briggs-powered) | Most walk-behind and entry riding models | 5/8-inch (16 mm) |
Tip: Always confirm the socket size against your engine’s owner manual before starting. The model and type numbers are stamped directly on the engine block, typically near the oil fill cap or on a metal tag above the muffler.
How to Remove a Spark Plug on a Riding Mower
The removal procedure per plug is identical to a push mower once you have access. The differences are in locating the plug(s) and, on V-twin engines, the number of plugs involved.
How Many Spark Plugs Does a Riding Mower Have?
- Single-cylinder engines (common on smaller riding mowers and lawn tractors under ~18 HP): one spark plug.
- V-twin engines (standard on most riding mowers above ~18 HP, including popular Husqvarna, Craftsman, and John Deere tractors with Briggs & Stratton or Kawasaki V-twins): two spark plugs, one per cylinder. Both must be serviced together.
Accessing the Spark Plug on a Riding Mower
- Park on a level surface, set the parking brake, and remove the ignition key.
- Open the engine hood. Most riding mowers have a hood that hinges forward or lifts off entirely. Refer to your owner manual if the hood latch is not obvious, forcing it can break plastic mounting tabs.
- Locate the plug(s). On a V-twin, the two plugs are on opposite sides of the engine block, one on the left cylinder and one on the right. Both are accessible once the hood is open, though on some tightly packaged engines a short extension bar is necessary to reach the plug on the rear-facing side.
- Disconnect both boots before removing any plug. On a V-twin, label or photograph which boot connects to which plug terminal if there is any risk of confusion, incorrect boot seating can cause a misfire.
- Follow steps 3 to 8 from the push mower procedure for each plug individually.
Deck access note: Spark plug removal on a riding mower does not require removing or raising the cutting deck. The plugs are on the engine block above the deck level.
What to Do After Removal: Inspect, Clean, or Replace?
Removal is often the first step in diagnosing a no-start condition or completing scheduled maintenance. Reading the plug condition before discarding it provides direct information about engine health.
How to Read a Spark Plug
- Light tan or gray deposit on the electrode: Normal combustion. Clean and reinstall if the gap is within spec and the plug has fewer than 100 hours of use.
- Black, sooty, dry deposits (carbon fouling): Rich fuel mixture or prolonged low-speed running. Replace the plug; also inspect the air filter and carburetor settings.
- Black, wet, oily deposits: Oil is entering the combustion chamber, worn piston rings or valve seals are common causes. Replace the plug; investigate the oil leak source before returning the mower to service.
- White or chalky deposits, blistered insulator: Lean fuel mixture or overheating. Replace the plug; check the cooling fins for blockage and the carburetor for lean jetting.
- Cracked insulator or damaged electrode: Replace immediately regardless of hours.
Checking and Setting the Electrode Gap
Most small lawn mower engines specify a gap of 0.030 inches (0.76 mm), but this varies by engine. Briggs & Stratton commonly specifies 0.030 inches for most residential engine series. Honda GCV160 and GCV190 engines specify 0.028 to 0.031 inches. Always verify against your specific engine manual.
Use a feeler gauge or wire-type gap tool , not a coin-style gauge , for accurate measurement. Adjust by carefully bending the side electrode only; never apply pressure to the center electrode or ceramic insulator. For troubleshooting and reliability insights, consult our in-depth marshall stanmore iii vs harman kardon onyx studio 8 report.
Replace or Reinstall?
- Replace if the plug shows fouling, a cracked insulator, a worn or eroded electrode, or if it has accumulated more than 100 hours of use or one full season of regular mowing.
- Reinstall if the plug is clean, the electrode is square-edged with minimal wear, and the gap measures within spec. Thread in by hand first to avoid cross-threading, then torque to the engine manufacturer’s specification, typically 15 ft-lbs for aluminum blocks and up to 22 ft-lbs for cast iron, but always confirm with the OEM service manual for your specific engine.
Common Mistakes and How to Avoid Them
Using the Wrong Socket Size
A standard deep socket will fit over the plug but lacks the rubber insert that centers and grips it. Without that grip, the socket can rock slightly under torque and round the hex corners. Always use a dedicated spark plug socket. If the hex is already rounded from a previous improper removal, a bolt extractor socket set can grip it for removal, but the plug should be discarded afterward.
Removing the Plug While the Engine Is Hot
Aluminum engine blocks expand when hot. A plug threaded into a hot aluminum block is under compression from the surrounding metal. Removing it in this state dramatically increases the risk of thread galling , where aluminum threads tear and bind against the steel plug threads, destroying the block threads. The 30-minute cool-down is a minimum; longer is better after extended mowing sessions. Readers comparing setup options can review our technical analysis on dyson v8 cyclone vs bissell featherweight stick.
Pulling the Ignition Wire Instead of the Boot
The wire crimps into a metal terminal inside the rubber boot. Yanking the wire pulls that crimp joint apart. The repair, replacing the ignition wire or the entire ignition coil lead, costs significantly more than a new plug. Always grip the boot at its base where it meets the plug terminal.
Removing a Seized or Stuck Spark Plug
If the plug will not break loose with normal ratchet pressure, do not apply sudden impact force. Options in order of preference: For complementary field maintenance guidelines, examine our breakdown of bissell crosswave hydrosteam vs shark stainforce.
- Apply a small amount of penetrating lubricant around the external plug base threads. Wait 15 minutes and try again with slow, steady counterclockwise pressure.
- Use a breaker bar instead of a ratchet for additional leverage, but apply pressure smoothly, not with a jerk.
- If the plug is still immovable, take the engine to a small engine repair shop. Forcing a seized plug risks snapping it off in the block, which requires a thread extraction (Helicoil) repair.
Cross-Threading on Reinstallation
Always start the plug by hand, rotating counterclockwise first until you feel it drop into the thread start, then switch to clockwise. This seats the plug in the first thread correctly before you engage the ratchet. Cross-threading strips aluminum block threads in seconds and is not covered under engine warranties.
Skipping the Debris Clear Before Removal
Any dirt, grass, or grit sitting around the plug base falls directly into the open cylinder once the plug is out. A small amount of abrasive debris in the cylinder causes accelerated ring and bore wear. Thirty seconds with a brush and compressed air prevents this entirely.
Everything You Need to Know: How To Remove Spark Plug On Lawn Mower FAQ
How do I know which direction to turn to loosen a lawn mower spark plug?
Turn counterclockwise to loosen, the same as any standard right-hand thread fastener. Facing the top of the plug (the end the boot connects to), rotate the ratchet handle to the left. If you are struggling to remember: lefty-loosey, righty-tighty applies universally to spark plugs.
Can I remove a lawn mower spark plug without a spark plug socket?
Technically a standard deep socket of the correct size (5/8-inch or 13/16-inch) will unthread the plug, but without the rubber insert the plug can drop, crack its insulator, or become difficult to retrieve from a deep plug well. A spark plug socket costs under $10 and eliminates these risks. Do not attempt plug removal with an adjustable wrench, the jaw geometry will round the hex immediately.
How often should I remove and replace the spark plug on my lawn mower?
Briggs & Stratton recommends replacing the spark plug every 100 hours of operation or once per season, whichever comes first, for residential push mowers. Honda’s maintenance schedule for GCV160 and GCV190 engines also specifies annual inspection and replacement as needed. For most homeowners mowing weekly through a 6-month season, an annual replacement at the start of each mowing season is the practical standard.
What happens if I over-tighten the spark plug when reinstalling it?
Over-tightening compresses the sealing washer (on gasket-seat plugs) past its crush limit and can stretch or crack the plug body, or, more seriously, strip the aluminum threads in the engine block. Always reinstall to the torque specification in your engine manual. As a field reference for gasket-seat plugs in aluminum blocks: finger-tight plus 1/2 turn additional with a torque wrench set to 15 ft-lbs is appropriate for most residential small engines, but OEM specs take precedence.
Related Maintenance and Operating Guides
To keep your equipment running at peak operating efficiency, explore our related technical walkthroughs and maintenance tutorials:
- Consult our detailed breakdown on residential zero-turn lawn mower guide.
Technical Standards and Compliance
Mechanical safety standards, operational tolerances, and protective gear guidelines align with benchmark specifications established by the American National Standards Institute (ANSI).









