

Quick Answer: How to Remove a String Trimmer Head
Turn off and disconnect power completely. Lock the drive shaft using the arbor-lock button or insert a screwdriver through the shaft hole to stop it from spinning. Locate the center retaining bolt or hub nut — because most trimmer heads use reverse (left-hand) thread, turn the bolt CLOCKWISE to loosen it (the normal “righty-loosey” rule is reversed here). Once the fastener is free, slide the head straight off the shaft. If there is no separate bolt, grip the head body and rotate it clockwise until the entire unit unthreads.
Before You Start: Safety Checklist
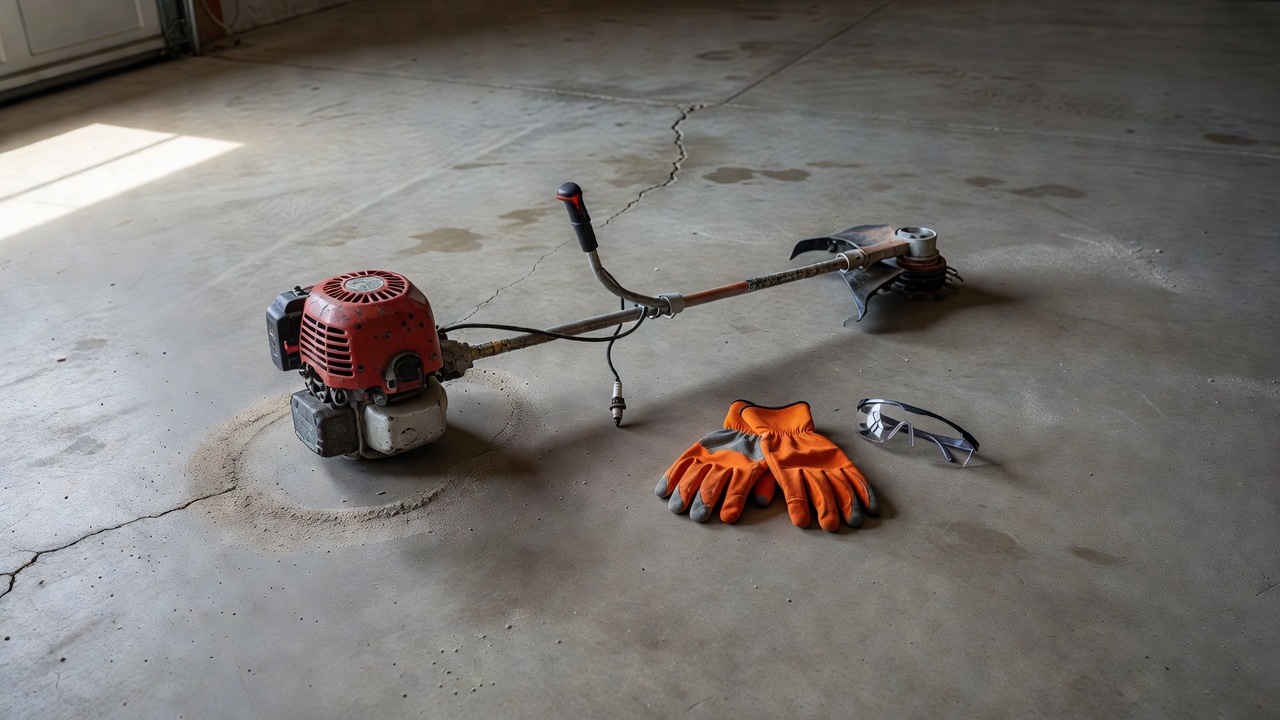
Skipping the safety steps below causes the most serious trimmer injuries. Complete every item before touching the head.
- Gas trimmers: Move the kill switch to OFF, then pull the spark plug boot off the plug. This prevents accidental starts even if the engine is jostled.
- Corded electric trimmers: Unplug the power cord from the outlet — do not rely on the power switch alone.
- Battery trimmers: Remove the battery pack from the trimmer body before doing anything else.
- Wait at least two minutes after shutdown for any spinning parts to come to a complete stop.
- Put on safety glasses and cut-resistant gloves before handling the head, especially blade-type heads.
- Work on a flat, stable surface with the trimmer shaft resting securely — a workbench or the ground with the head facing away from your body.
Identify Your Trimmer Head Type Before Removing It
The removal sequence differs by head type. Identify yours before proceeding. Before finalizing equipment decisions, refer to our comprehensive jbl partybox club 120 vs sony srs xv500 comparison.
| Head Type | What It Looks Like | Common On |
|---|---|---|
| Bump-feed spool head | Round plastic housing, 4–5 inches across, with a rubber bump knob on the bottom center; line feeds when you tap it on the ground | Most consumer gas, corded, and battery trimmers |
| Fixed-line (pre-cut) head | Smaller, disc-shaped head with pre-cut line segments inserted through holes around the perimeter; no bump knob | Battery trimmers, lightweight corded models |
| Blade or metal disc head | Solid metal or plastic blade, often 8–10 inches across; three or four cutting edges; no line visible | Heavy-duty gas trimmers and brush cutters |
If you see a round plastic housing with a bump knob at the bottom, you have a bump-feed head. If the head is flat with line inserted into holes and no knob, it is a fixed-line head. A solid disc or star-shaped metal piece is a blade head. Before finalizing equipment decisions, refer to our comprehensive jbl partybox club 120 vs sony srs xv500 comparison.
Understanding Reverse Thread: The Most Common Removal Mistake
Why reverse thread? During normal operation, the drive shaft rotates counter-clockwise (when viewed from below). A standard right-hand thread would self-loosen under that rotation. Reverse thread uses the shaft’s own rotational force to keep the head snug during use.
How to confirm your thread direction: For broader ecosystem context, read through our operational guide on z890 vs x870e motherboard.
- Check for an “R” (reverse) or “L” (left-hand) stamped or molded on the center hub or bolt head.
- An arrow on the hub or head body indicating the rotation direction for removal is also common — follow that arrow.
- Consult your owner’s manual: the thread specification is listed in the head replacement or maintenance section.
- Notable exception: Some Ryobi and Echo models use standard right-hand thread. When in doubt, apply moderate force clockwise first; if the bolt doesn’t move after firm pressure, try counter-clockwise.
How to Remove a Bump-Feed Trimmer Head
This is the most common head type across all power-source categories.
Tools needed: Hex/Allen key (commonly 8 mm) or open-end wrench matching the retaining bolt size; flat-head screwdriver (for shaft-hole locking method). For troubleshooting and reliability insights, consult our in-depth marshall stanmore iii vs harman kardon onyx studio 8 report.
- Power off and disconnect per the safety checklist above.
- Lock the drive shaft. Press the arbor-lock button on the trimmer housing (usually a small button near the motor head) and hold it. If your trimmer has no arbor-lock, insert a flat-head screwdriver or a pin through the small hole in the drive shaft to prevent rotation.
- Locate the center retaining bolt. It sits in the center of the bump knob on the underside of the head. On some models, you must first pull off the bump knob (it snaps or threads off counter-clockwise) to expose the bolt underneath.
- Turn the bolt clockwise to loosen (reverse thread). Use the correct hex key or wrench. Apply steady pressure — do not jerk the tool, as this can round the bolt head.
- Remove the bolt and any washers. Set them aside in order so reinstallation is straightforward.
- Slide the outer hub and spool off the shaft. Note the spool winding direction and any internal spring orientation before you set everything down — photograph it if needed.
If the bolt has no hex socket and is a plain nut, use an open-end wrench of the correct size (10 mm and 8 mm are the most common on consumer trimmers).
How to Remove a Fixed-Line (Pre-Cut) Trimmer Head
Fixed-line heads usually thread off as a single unit with no separate retaining bolt. Readers comparing setup options can review our technical analysis on dyson v8 cyclone vs bissell featherweight stick.
- Power off and disconnect.
- Lock the drive shaft using the arbor-lock button or screwdriver-through-shaft method.
- Grip the head body firmly with both hands. Rotate the entire head clockwise (reverse thread convention) to unthread it from the shaft adapter. It may take two to three full rotations before it releases.
- Pull the head straight off the shaft adapter once it is fully unthreaded.
Snap-clip or push-pin variants: Some lightweight fixed-line heads, particularly on cordless models, do not thread on at all. Instead, a plastic tab or push-pin locks the head to the adapter. Depress the tab inward with a screwdriver while pulling the head body outward, and it will slide free. Refer to your model’s manual if the head does not respond to clockwise rotation.
Can you replace a fixed-line head with a bump-feed head? Often yes, provided the shaft adapter diameter and thread specification match. Confirm compatibility using the replacement head’s packaging or the trimmer manufacturer’s accessory compatibility chart before purchasing. For complementary field maintenance guidelines, examine our breakdown of bissell crosswave hydrosteam vs shark stainforce.
How to Remove a Blade or Metal Disc Head
Tools needed: Combination wrench or socket matching the retaining nut (commonly 10 mm or 19 mm); wooden block or blade-brake tool.
- Power off. For gas trimmers, pull the spark plug boot. For battery trimmers, remove the battery pack.
- Immobilize the blade. Wedge a block of wood between the blade and the blade guard to prevent rotation. Some heavy-duty brush cutters include a blade-brake or spanner wrench for this purpose — use it if available.
- Locate the center retaining nut. On most blade heads, this nut uses standard right-hand thread — turn counter-clockwise to loosen. Verify with your manual, as some models do use reverse thread.
- Remove the nut and any washers or flanges in the order they come off.
- Lift the blade straight off the shaft adapter. The blade will slide free once the retaining hardware is removed.
Store removed blades flat in a safe location — never stack them loosely where an edge is exposed.
Brand-Specific Removal Notes
Major brands implement proprietary attachment mechanisms that differ from the generic steps above. Check this section before assuming the standard method applies to your trimmer.
STIHL AutoCut C-Series Heads
STIHL AutoCut C heads (such as the AutoCut C 5-2 and C 26-2) use a tab-press release system with no separate retaining bolt. Press both side tabs on the spool housing simultaneously and pull the spool out. To remove the entire head from the shaft, you still need to unthread the hub nut — on STIHL models this nut typically uses a standard Allen bolt accessed after the spool is removed, and thread direction varies by model (check the STIHL operator’s manual for your specific product number).
Husqvarna T25 Head
The Husqvarna T25 uses a push-button spool release: press the center button and pull, and the spool ejects without tools. The head body itself unthreads from the shaft using the standard clockwise-to-loosen reverse thread convention common to Husqvarna products. Consult the T25 documentation or the trimmer’s operator manual to confirm the wrench size for the hub nut on your specific trimmer model.
Ryobi Speed Winder Head
Some Ryobi models — particularly older corded models — use standard right-hand thread rather than reverse thread. Turn the retaining bolt counter-clockwise to loosen on these models. Ryobi’s owner’s manuals are available on the Ryobi Tools website by model number and specify thread direction explicitly. Do not assume reverse thread on Ryobi; verify first.
Echo Speed-Feed 400 Head
The Echo Speed-Feed 400 uses a single push-button eject to release the spool for reloading — the spool does not require tools to remove. To remove the entire head assembly from the shaft, unthread the central bolt; Echo recommends using the two wrenches supplied with the unit (one holds the shaft, one turns the bolt). Consult Echo’s official product documentation for the correct thread direction for your specific trimmer model, as Echo manufactures both standard- and reverse-thread variants across their product line.
Greenworks and Other Battery Brands
Most Greenworks battery trimmer heads attach via a standard Allen-bolt (hex-key) fastener. The thread direction is typically reverse (clockwise to loosen), but Greenworks publishes model-specific manuals on their support site — confirm before applying force.
Troubleshooting: Trimmer Head Won’t Come Off
Turning in the wrong direction
This is the most common cause. Stop, recheck the thread direction for your model, and try the opposite direction with firm, controlled pressure before concluding the head is seized.
Corroded or seized threads
Apply a penetrating oil (such as WD-40 or equivalent) directly to the joint between the hub and the shaft adapter. Wait 10 minutes to allow it to work into the threads, then attempt removal again. Repeat up to three times for heavily corroded threads. Do not use heat on plastic components.
Overtightened bolt
Use a breaker bar extension on your wrench for additional torque leverage. Do not use an impact driver at high torque settings — this can crack the hub or damage shaft threads. Apply steady, increasing pressure rather than sudden jerking force.
Stripped or damaged bolt head
If the hex socket is rounded out and the key no longer grips, use a bolt extractor set appropriate to the bolt diameter. As a last resort, a rotary cutting tool can cut a slot into the bolt head to accept a flat-head screwdriver. If the shaft adapter threads are damaged, the adapter itself may need replacement — these are available from most trimmer parts suppliers by model number.
After Removal: What to Check Before Installing a New Head
Removing the head is an opportunity to inspect and clean components that are otherwise hidden during normal use.
- Inspect the shaft adapter: Look for worn, cracked, or corroded threads. A damaged adapter will not hold a new head securely and should be replaced before reinstalling.
- Clean the threads: Use a small wire brush or an old toothbrush to remove grass debris, dried lubricant, and corrosion from both the shaft adapter threads and the inside of the new head’s hub.
- Confirm replacement head compatibility: Match the shaft adapter diameter and thread specification (thread pitch and direction) to the new head’s specifications. This information is on the trimmer’s specification plate or in the owner’s manual. Universal adapter kits are available for mismatched threads.
- Reinstallation torque: Hand-tighten the retaining bolt until snug, then apply only a quarter to half turn with a wrench. Overtightening causes seized threads and makes future removal harder. Most trimmer manufacturers do not publish a specific torque value for head bolts; the OEM service manual for your model is the authoritative reference if a precise torque spec is required.
- Test before full use: Reconnect power and run the trimmer at low throttle for 10–15 seconds in a safe open area. Confirm the head runs true (no wobble) before returning to full-throttle operation.
Frequently Asked Questions About How To Remove String Trimmer Head
Which direction do I turn to loosen a string trimmer head?
On most trimmers, turn the retaining bolt or hub clockwise to loosen it, because the thread is reverse (left-hand). This is the opposite of standard fastener convention. Some models — including certain Ryobi and Echo trimmers — use standard right-hand thread and loosen counter-clockwise. Check your owner’s manual or look for an “R” or “L” stamped on the hub to confirm before applying force.
Why won’t my trimmer head come off even after I loosen the bolt?
The most common causes are corroded threads binding the head to the shaft adapter, or debris packed around the joint. Apply penetrating oil to the hub-shaft junction, wait 10 minutes, and try again while wiggling the head slightly side to side as you pull. If the threads are seized, repeat the oil treatment up to three times before escalating to a breaker bar.
Do I need special tools to remove a trimmer head?
Most bump-feed heads require only a hex (Allen) key — commonly 8 mm — or an open-end wrench. Fixed-line heads that unthread as a unit need no tools beyond hand grip and a shaft-locking method (arbor-lock button or a screwdriver through the shaft hole). Blade heads require a wrench sized to the retaining nut (10 mm or 19 mm are common) and a blade-immobilization block. Brand-specific tools (STIHL two-wrench set, Husqvarna T25 spanner) are sometimes supplied with the trimmer or available from the manufacturer.
Can I replace any trimmer head type with a different type?
In many cases yes — a fixed-line head can be replaced with a bump-feed head or vice versa — provided the shaft adapter diameter and thread specification match. Blade heads often require a different shaft adapter entirely and are not interchangeable with line heads without an adapter change. Confirm compatibility using the trimmer manufacturer’s accessory chart or the replacement head’s compatibility list before purchasing.

Pros
- Six-pack bundle listed in the product title
- Square profile line named in the product title
- Commercial 5 lb size listed for heavier use
Cons
- Trimmer compatibility is not verified in supplied data

Pros
- Six-pack bundle listed in the product title
- Star profile line named in the product title
- Commercial 5 lb size listed for heavier use
Cons
- Line length and trimmer fit are not stated in supplied data

Pros
- Title lists 1280 feet of line length
- Square profile named in the product title
- Lists a 5 lb line rating
- Title describes it as commercial-style line

Pros
- Title lists .095-inch square nylon line
- Lists 1280 feet of line length
- Manufacturer states fit with most string trimmers
- Lists a 5 lb line rating
For more detailed testing breakdowns and top recommendations, check our in-depth guide to residential zero-turn lawn mower guide.
For more hands-on benchmarks and buying recommendations, consult our guides on heavy-duty chainsaw buyer guide, as well as durable ride-on lawn tractor guide, as well as automated robotic lawn mower guide.
Mechanical safety standards, operational tolerances, and protective gear guidelines align with benchmark specifications established by the American National Standards Institute (ANSI).









