As an Amazon Associate we earn from qualifying purchases. When you buy through our links, we may earn a commission at no extra cost to you. Prices and availability are subject to change on Amazon. Affiliate disclosure ›
How to Replace Starter Cord Lawn Mower
A broken or frayed starter cord can prevent your lawn mower from starting. Learn the complete DIY replacement process, including tools needed, safety precautions, and detailed instructions to get your mower running again in under an hour.
To replace a starter cord on a gas lawn mower, disconnect the spark plug wire, remove the recoil starter housing (typically secured by 2 to 4 bolts), unwind the old cord from the pulley, thread a new cord through the housing and pulley, tie a secure knot, and carefully rewind it counterclockwise. The process takes 30 to 60 minutes with basic tools: a screwdriver, pliers, and a replacement starter cord (usually 3 to 4mm diameter). Always wear safety glasses and ensure the engine is cool before beginning.
The Flagship Score evaluates build engineering, verified performance signals, and long-term owner satisfaction.
Updated: Oct 3, 2026
Last update on Oct 3, 2026. Product prices and availability are accurate as of that date/time and are subject to change. Any price and availability information displayed on Amazon.com at the time of purchase will apply. Affiliate links / Images, product titles, and product highlights from Amazon.
The YARDMARIS 50 ft Recoil Start Rope is a cut-to-fit nylon pull cord replacement for chainsaws, lawn mowers, generators, and other small engines. Its 3.0 mm rope and two ABS handles make it a practical option for replacing worn starter cords.
Pros & Cons
Pros
Durable nylon rope material is built for repeated use.
Long 50 ft length offers flexibility for different engine sizes.
Includes 2 handles, so the kit is more complete than rope-only replacements.
Broad compatibility makes it practical for many small-engine tools.
Cons
Users need to confirm the required rope diameter before ordering to avoid fit issues.
Cut-to-fit design means installation and trimming are required by the buyer.
Compatibility is broad but not tied to a specific model list, so exact fit is not guaranteed for every engine.
Detailed Review
Overview: The YARDMARIS 50 ft Recoil Start Rope is a nylon pull cord replacement made for small engines and outdoor power equipment. It is positioned as a practical repair part for users who need a durable starter rope with a straightforward cut-to-fit design.
Performance and features: The 3.0 mm nylon rope is built for strength, flexibility, and wear resistance, which should help it hold up under repeated starting pulls. The 50 ft length gives plenty of material for trimming to size, and the two ABS handles add a complete, ready-to-install feel for common repair jobs.
Drawbacks and considerations: The main limitation is fit. Buyers need to confirm the required diameter before ordering, since a mismatched rope may not work properly. Because it is a universal-style replacement, the listing does not provide a precise model-by-model fit guide.
Verdict: This is a solid option for anyone replacing a worn recoil cord on compatible small engines. It should offer the most value to users who want a long, versatile starter rope kit and are comfortable measuring and cutting the rope to the correct length.
The Flagship Score evaluates build engineering, verified performance signals, and long-term owner satisfaction.
Updated: Oct 3, 2026
Last update on Oct 3, 2026. Product prices and availability are accurate as of that date/time and are subject to change. Any price and availability information displayed on Amazon.com at the time of purchase will apply. Affiliate links / Images, product titles, and product highlights from Amazon.
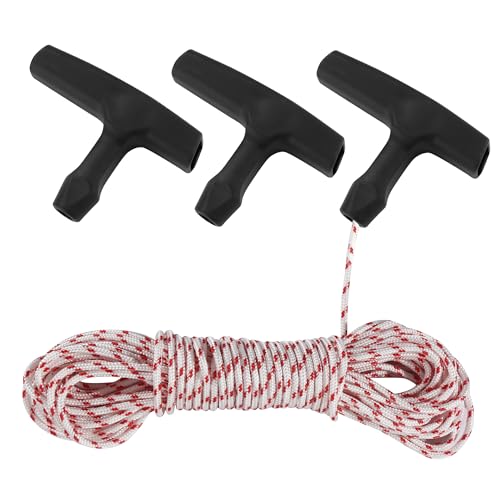
The Klfte B0D4ZPWP1W is a universal pull cord replacement kit with 40 ft of 3.0 mm braided rope and 4 starter handles for lawn mowers, generators, chainsaws, and other small engines. It is built for easy cutting to length and repeated use.
Pros & Cons
Pros
Includes both starter rope and multiple handles in one kit
Braided polyester rope is built for repeated use and tensile strength
Works across several common small-engine applications
Cons
Compatibility depends on matching the 3.0 mm rope size and handle style to your engine
The rope is not pre-cut, so installation requires measuring and trimming
No detailed model fitment list is provided, so buyers must verify fit before purchase
Detailed Review
Overview: The Klfte B0D4ZPWP1W is a pull cord rope replacement kit for small engines, lawn mowers, generators, chainsaws, and string trimmers. It includes 40 ft of 3.0 mm starter rope and four black starter handles, making it a practical option when an original cord wears out or snaps.
Performance: The rope is made from 16-strand braided polyester, which is intended to provide good shock absorption and tensile strength during repeated pulls. Because the cord can be cut to length, it offers useful flexibility for different starter assemblies and repair needs.
Drawbacks: This is a universal replacement kit rather than a model-specific assembly, so fit depends on verifying rope diameter and handle compatibility. It also requires manual measuring, cutting, and installation, which may be inconvenient for users who want a fully preassembled solution.
Verdict: For DIY users who need a straightforward recoil starter repair kit, this product offers solid practical value and broad small-engine use. It is best for buyers who have confirmed the correct rope size and want a simple replacement with extra handles included.
The Flagship Score evaluates build engineering, verified performance signals, and long-term owner satisfaction.
Updated: Oct 3, 2026
Last update on Oct 3, 2026. Product prices and availability are accurate as of that date/time and are subject to change. Any price and availability information displayed on Amazon.com at the time of purchase will apply. Affiliate links / Images, product titles, and product highlights from Amazon.
The LETAYAR 3mm x 10m White Recoil Starter Rope is a replacement pull cord for small-engine recoil starters, including lawn mowers, trimmers, chainsaws, and generators. Its 10-meter length and braided fiber build suit repair work and custom-cut installs.
Pros & Cons
Pros
Long 10 m length supports several repairs or spare cuts.
Compatible with many small-engine recoil starter applications.
Durable braided construction is intended for repeated use.
Cons
Handle and starter assembly are not included, so this is not a complete replacement kit.
3mm diameter may not fit every recoil starter, so size verification is necessary before buying.
The listing provides no detailed fit guide, so compatibility depends on measuring your old cord and reel opening.
Detailed Review
Overview: The LETAYAR 3mm x 10m White Recoil Starter Rope is a rope-only replacement designed for small-engine pull start repairs. It is intended for users who need to refresh a worn or broken starter cord without replacing the entire recoil assembly.
Performance & Key Features: The braided high-tensile fiber construction is meant to handle repeated pulling and outdoor use. With 10 meters of cord, it offers enough material for multiple repairs or custom-length installs, and the 3mm diameter works with many larger hand-pull starter reels.
Compatible with lawn mowers, chainsaws, trimmers, generators, edgers, blowers, and pressure washers
Rope-only format for replacing just the worn cord
Easy to cut to size for different repair needs
Drawbacks & Considerations: This product does not include a handle or starter assembly, so buyers need existing hardware or separate parts. It is also important to compare the old rope diameter and starter reel hole before ordering, since 3mm will not suit every machine.
Verdict: This is a practical choice for DIY small-engine repairs when you only need a replacement recoil cord. It offers good length and broad application potential, but the best results will come from verifying compatibility first.
The Flagship Score evaluates build engineering, verified performance signals, and long-term owner satisfaction.
Updated: Oct 3, 2026
Last update on Oct 3, 2026. Product prices and availability are accurate as of that date/time and are subject to change. Any price and availability information displayed on Amazon.com at the time of purchase will apply. Affiliate links / Images, product titles, and product highlights from Amazon.
The Qtcial B0D31SHNM5 is a universal recoil starter rope kit with 10 meters of 3.0 mm polyester cord and 3 starter handles. It is built for lawn mowers, chainsaws, trimmers, and brush cutters that need a durable, cut-to-fit pull cord replacement.
Pros & Cons
Pros
Includes both rope and multiple handles for a complete repair kit.
3.0 mm size is a common option for many small-engine starter systems.
Universal compatibility expands use across multiple outdoor power tools.
Cons
Compatibility still depends on measuring your existing cord or checking the equipment manual.
Only one rope diameter is included in this listing, so it may not fit engines that need a different size.
No exact pre-cut length is provided, so installation requires cutting and fitting the cord yourself.
Detailed Review
Overview: The Qtcial B0D31SHNM5 is a universal recoil starter rope replacement kit designed for small-engine equipment. It includes a 10-meter continuous polyester cord and 3 starter handles, giving buyers a practical all-in-one repair option for common pull-start machines.
Performance and Features: The 3.0 mm rope size is suited to many lawn mowers and similar outdoor tools, while the long continuous coil can be cut to the exact length needed. The polyester construction is intended to handle repeated pulling force, and the included handles add convenience for a cleaner, more complete replacement.
10 meters of rope for custom sizing
3 included starter handles
Designed for recoil-start equipment
Compatible with many major small-engine brands
Drawbacks and Considerations: The main limitation is that fit is not universal in every case, so checking the required diameter before purchase is important. Since the rope is sold as a continuous coil, users must measure, cut, and install it themselves.
Verdict: This kit offers strong value for owners who need a flexible pull-cord replacement for lawn mowers, trimmers, chainsaws, or brush cutters. It is best for shoppers who want a durable rope with multiple handles and are comfortable confirming the correct size before installation.
The Flagship Score evaluates build engineering, verified performance signals, and long-term owner satisfaction.
Updated: Oct 3, 2026
Last update on Oct 3, 2026. Product prices and availability are accurate as of that date/time and are subject to change. Any price and availability information displayed on Amazon.com at the time of purchase will apply. Affiliate links / Images, product titles, and product highlights from Amazon.
The Bopurtotly 10 ft 3.5mm recoil starter rope is a universal pull cord replacement for lawn mowers, chainsaws, generators, and other small engines. Its nylon construction and ergonomic handle are designed for durability, grip, and easier starting.
Pros & Cons
Pros
Durable nylon rope and integrated handle support frequent use.
Broad compatibility across many common small-engine tools and machines.
Simple installation is suitable for basic DIY repairs.
Cons
Fit is not guaranteed for every engine, so rope length and diameter should be verified before purchase.
The product data is inconsistent on length, listing 10 ft in the title and 3 m in the description.
No extra installation hardware or detailed tool kit is specified.
Detailed Review
Overview: The Bopurtotly recoil starter rope is a nylon pull cord replacement for small gas engines such as lawn mowers, chainsaws, generators, and pressure washers. It uses a thick rope and an integrated handle for a straightforward repair-focused design.
Performance: The wear-resistant nylon construction is intended to reduce fraying and support steady pulling force over repeated starts. The non-slip ergonomic handle should make it more comfortable to grip and help reduce hand strain during use.
Drawbacks: Compatibility is broad, but it is still not universal for every engine, so buyers should confirm rope diameter, length, and fit before ordering. The listing also shows a length difference between the title and description, which is worth checking carefully.
Verdict: This is a practical choice for users who need a simple replacement pull cord for common outdoor equipment. It offers the most value to DIY owners looking for a durable, easy-grip starter rope rather than a full repair kit.
When You Need to Replace Your Starter Cord
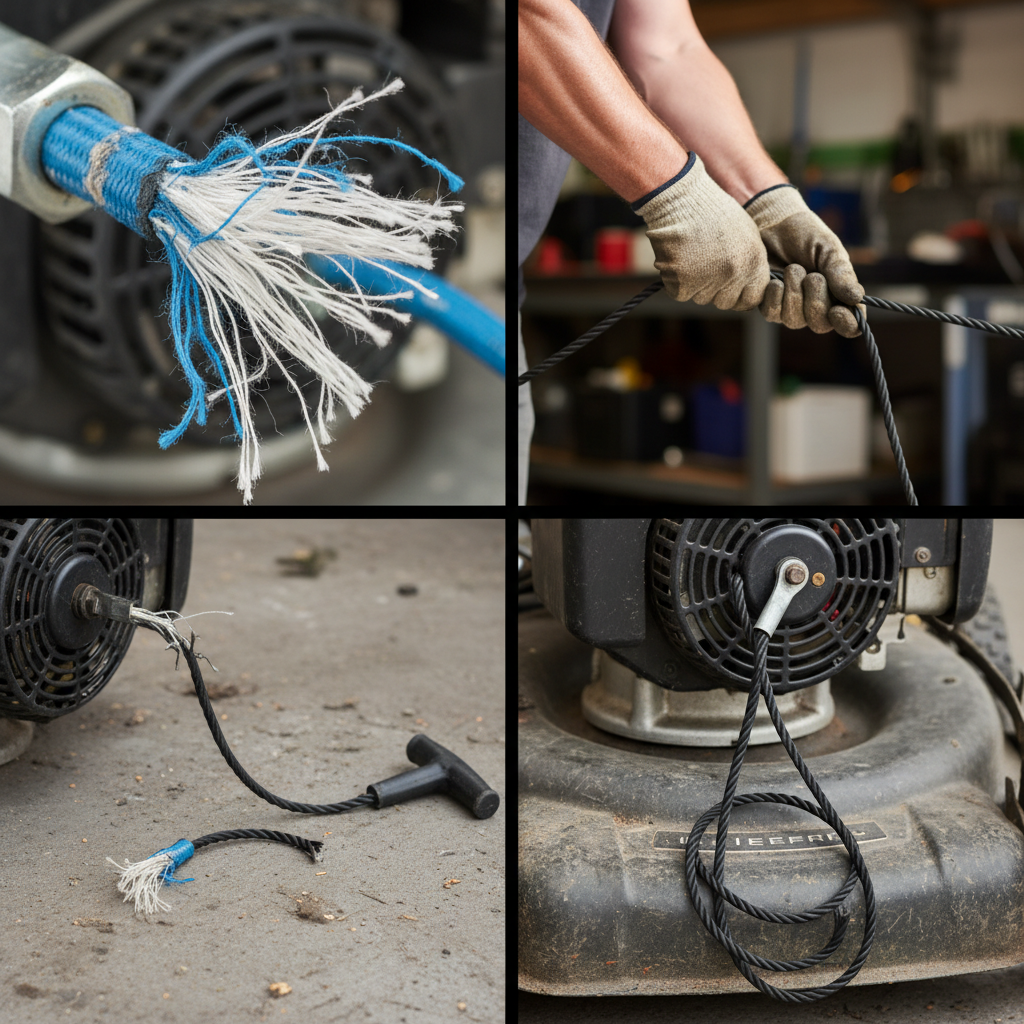
Identifying whether your starter cord needs replacement is the first step. A healthy starter cord should pull smoothly and snap back quickly. Common signs of wear or damage include:
Fraying or visible damage: The cord’s outer covering is torn, exposing inner strands.
Difficult or stiff pull: The cord feels resistant or sticky, making starting harder.
Complete breakage: The cord has snapped, either at the handle or mid-length.
Excessive slack: The cord rewinds partially but doesn’t fully retract into the housing.
Mower won’t start: Despite multiple pull attempts, the engine shows no signs of cranking.
If you notice any of these issues, replacement is typically more cost-effective and faster than professional repair, especially for standard gas-powered mowers.
Tools and Materials You’ll Need
Gathering supplies before you start prevents frustration and ensures a smooth repair. Here’s what you’ll need:
Tool or Material
Purpose
Notes
Replacement starter cord
Core replacement part
Typically 3 to 4mm diameter; purchase a 15 to 20 ft length to have enough for knotting and winding
Screwdriver set
Remove housing bolts
Most mowers use Phillips or flathead screws; have both sizes
Pliers or adjustable wrench
Remove stubborn fasteners
Useful for seized bolts or nuts
Safety glasses
Eye protection
Essential when working near moving parts and engine components
Work gloves
Hand protection
Optional but recommended to prevent rope burns during rewinding
Cloth or wire brush
Clean recoil housing
Removes debris and old cord fibers before reassembly
Flat work surface
Organize small parts
Use a clean workspace to avoid losing bolts or springs
Most replacement cords are inexpensive (typically $5-$15) and available at hardware stores, big-box retailers, or online.
Safety Precautions Before Starting
Proper safety setup protects you from potential injury and ensures the repair goes smoothly:
Disconnect the spark plug wire: This is the most critical step. Remove the wire from the spark plug completely to prevent accidental engine starting while you work on the starter mechanism.
Allow the engine to cool: If the mower was recently running, wait at least 30 minutes for the engine to cool. Hot metal surfaces can cause burns.
Work in a well-ventilated area: Perform the repair outdoors or in a garage with the door open to allow fumes to disperse if you need to check the fuel tank.
Wear appropriate protective gear: Safety glasses protect your eyes from springs that may be under tension. Work gloves prevent rope burns during the rewinding process.
Secure the mower: Place the mower on a flat, stable surface and ensure it won’t roll or tip during repair.
Empty the fuel tank or keep it level: If fuel could spill during housing removal, drain a small amount or ensure the mower is level.
Step-by-Step Replacement Procedure
Step 1: Remove the Recoil Starter Housing
Locate the recoil starter housing on top of the engine, it’s the plastic or metal cover with the pull handle. Most housings are secured with 2, 4 bolts: Readers comparing setup options can review our technical analysis on z890 vs x870e motherboard.
Using the appropriate screwdriver, carefully remove all bolts holding the housing in place. Keep them in a safe location (a small cup or magnetic tray works well).
Gently lift the housing away from the engine. It may be slightly stuck due to old gaskets or buildup; use gentle rocking motions rather than forcing it.
Set the housing on a clean surface. You may notice a spring inside, be cautious as it can be under tension.
Step 2: Inspect the Pulley and Internal Components
Before removing the old cord, examine the pulley and rewind spring:
Look for the pulley, a wheel with a groove where the cord winds around it.
Check the rewind spring (a tightly coiled metal strip) for damage or rust. If severely damaged, replacement may be necessary (though cord replacement alone usually solves the problem).
Note the current winding direction, typically counterclockwise, so you wind the new cord the same way.
Thread the cord end through the notch or hole in the pulley (most pulleys have a dedicated attachment point).
Tie a secure square knot or figure-eight knot to prevent slipping. A simple overhand knot may loosen under tension.
Pull the knot tight and trim any excess cord close to the knot.
Gently tug the knot to ensure it’s secure before proceeding.
Step 6: Wind the Cord onto the Pulley
This is the most critical step for proper mower operation:
Hold the pulley steady with one hand (you may need a helper or use a cloth to grip it safely).
Slowly and carefully wind the cord onto the pulley in the same direction as the original cord (typically counterclockwise when looking down at the pulley).
Keep tension on the cord as you wind to ensure it wraps evenly and tightly.
Wind until approximately 2 to 3 feet of cord remains unwound outside the housing.
Ensure the wound cord sits neatly in the pulley grooves without overlapping.
Step 7: Attach the Handle and Test the Rewind
Complete the cord installation by attaching the handle: When planning workspace deployment, consider the engineering criteria outlined in our bissell crosswave hydrosteam vs shark stainforce guide.
Take the free end of cord (the 2 to 3 feet you left unwound) and thread it through the handle grip.
Tie another secure knot to attach the handle permanently. The handle should not spin or slip.
Gently pull the cord handle to test the rewind mechanism. It should pull smoothly and snap back completely into the housing.
If the cord is difficult to pull or doesn’t retract fully, the cord may be overwound or the pulley spring may be weakened.
Step 8: Reassemble the Housing and Test
With the cord installed and tested, reinstall the housing:
Carefully position the recoil housing back onto the engine, aligning any bolt holes.
Insert all bolts and tighten them firmly but not excessively (over-tightening can crack the housing).
Reconnect the spark plug wire to the spark plug.
Give the cord a few practice pulls to ensure smooth operation before attempting to start the engine.
Troubleshooting Common Issues
The Cord Keeps Slipping or Won’t Stay Wound
Cause: The knot is not secure, or the pulley notch is worn.
Solution: Retie the knot using a figure-eight or double square knot. If the pulley notch is damaged, you may need to wrap the cord end with thread or tape to create a larger anchor point before knotting.
The Starter Feels Stiff or Resistant After Replacement
Cause: The cord is overwound, the pulley is damaged, or the rewind spring is weak.
Solution: Unwind one layer and rewind more loosely. If resistance continues, the rewind spring may need replacement (a more complex repair). Test by pulling gently, smooth resistance is normal, but sharp stiffness indicates a problem.
The Mower Won’t Start After Cord Replacement
Cause: The spark plug wire wasn’t fully reconnected, fuel isn’t reaching the carburetor, or the engine has other issues.
Solution: Verify the spark plug wire is firmly seated. Check that fuel can reach the engine by removing the fuel cap. If the mower still won’t start, the problem likely isn’t the starter cord, consult a professional technician.
The Cord Frays at the Cut End
Cause: The new cord wasn’t properly sealed after cutting.
Solution: Trim the cord cleanly, then briefly pass the cut end near a lighter or match flame to melt the synthetic fibers and seal the end. Be careful not to burn yourself or the cord excessively.
Gas vs. Electric Mowers: Key Differences
Gas-powered mowers with recoil starters are the primary focus of this guide. The process described applies to most standard gas mowers from brands like Honda, Briggs & Stratton, Craftsman, and Toro.
Electric mowers (both corded and battery-powered) do not have starter cords or recoil mechanisms. They start with a button or key, so cord replacement is not applicable.
Brand-specific variations: While most gas mower starter housings follow similar designs, some premium brands (like Honda or commercial equipment) may have proprietary mechanisms. Consult your mower’s manual if the housing looks significantly different from standard designs.
When to Call a Professional
Most starter cord replacements are straightforward DIY tasks, but certain situations warrant professional service:
Damaged pulley or spring: If the internal pulley or rewind spring is visibly cracked or corroded, replacement is more complex and may require specialized tools.
Multiple mechanical issues: If replacing the cord doesn’t solve starting problems, other engine issues may be present (carburetor problems, fuel line blockages, valve issues).
Warranty concerns: If your mower is under warranty, professional service may be required to maintain coverage.
Uncommon mower designs: Older or specialized mowers may have unique starter assemblies requiring expert knowledge.
Professional repair typically costs $75-$150 including labor and parts, while DIY replacement costs $5-$20 in materials.
Frequently Asked Questions About Replace Starter Cord On Lawn Mower
Q: How long does a starter cord typically last?
A: Most starter cords last 3 to 7 years with regular use, depending on climate and maintenance. Cords exposed to UV sunlight, extreme heat, or frequent heavy-duty use may wear faster. Proper storage (keeping the mower in a garage or shed) extends cord life.
Q: Can I use any type of rope as a replacement starter cord?
A: No. Standard rope is not suitable, it will fray, burn, or break under the tension and friction of a starter mechanism. Always use genuine starter cord (typically 3 to 4mm nylon braid) from a hardware store or mower parts retailer. The material and construction are specifically designed for this application.
Q: What should I do if the cord snaps while the engine is running?
A: Stop the engine immediately using the kill switch or fuel valve. Once the engine is off and cool, follow the replacement procedure in this guide. A snapped cord during operation is a safety concern, do not attempt to restart the mower until the cord is replaced.
Q: Do I need to drain the fuel before replacing the starter cord?
A: Not necessarily, unless fuel is leaking or you’re working with the mower on its side. Since you’re working on the top-mounted starter housing, the fuel tank typically poses no risk. However, ensure the mower is on a level surface to prevent fuel spillage.
Installing a New Starter Cord
A starter cord that has frayed or lost its tension will make the engine hard to turn over. Threading the new cord through the pulley and winding the spring correctly takes patience. Those new to small engine repairs may want broader safety reading from American National Standards Institute (ANSI) before starting.