

Quick Answer: How To Sharpen A Mower Blade With A File?
Disable a rotary mower so it cannot start, remove the blade, and clamp it so the existing bevel is easy to reach. Restore that bevel with a mill-style hand file, using firm push strokes and similar work on both cutting ends. Check that the edge looks even and the blade hangs close to level, then reinstall it in the original…

Pros
- Large-size design named in product title
- Sharpening and balancing functions listed
- Listed as a new upgraded version

Pros
- Adjustable 15-to-45-degree range in title
- Sharpening and balancing functions listed
Pros
- Includes replacement gaskets and a 98079-55846 spark plug
- Matches Honda HRR216 and HRS216 lawn mower models
- Designed around the 16100-Z8B-901 carburetor specification
Cons
- Restricted to select Honda GCV160 mower applications
- Installation requires basic mechanical tools and skills
What a file can and cannot restore
A hand file will not put a factory-ground edge back on a rotary lawn mower blade. What it can do is restore a usable chopping edge on a blade that is merely dull or lightly nicked. After a careful filing job, grass should shear more cleanly instead of looking shredded or bruised. That is a serviceable home edge, not a like-new one.
This approach covers the common steel blades on walk-behind rotary mowers and many riding mowers. It does not cover reel mowers, whose cutting cylinders and bed knives need a different process. It also does not cover professional machine grinding or any method that uses heat.
Filing is still reasonable when the blade is blunt, the shine on the bevel is gone, or small nicks can be blended without cutting a deep notch into the steel. Stop and replace the blade if you see a bend, a crack (including hairline cracks at the center hole or along the edge), a missing chunk, a wobbling or egg-shaped mounting hole, or a cutting edge that has worn paper-thin or much shorter than the rest of the blade. Those defects are not file-repairable. A cheap replacement blade is safer than an original that has been filed past its useful steel.
Tools and protective gear
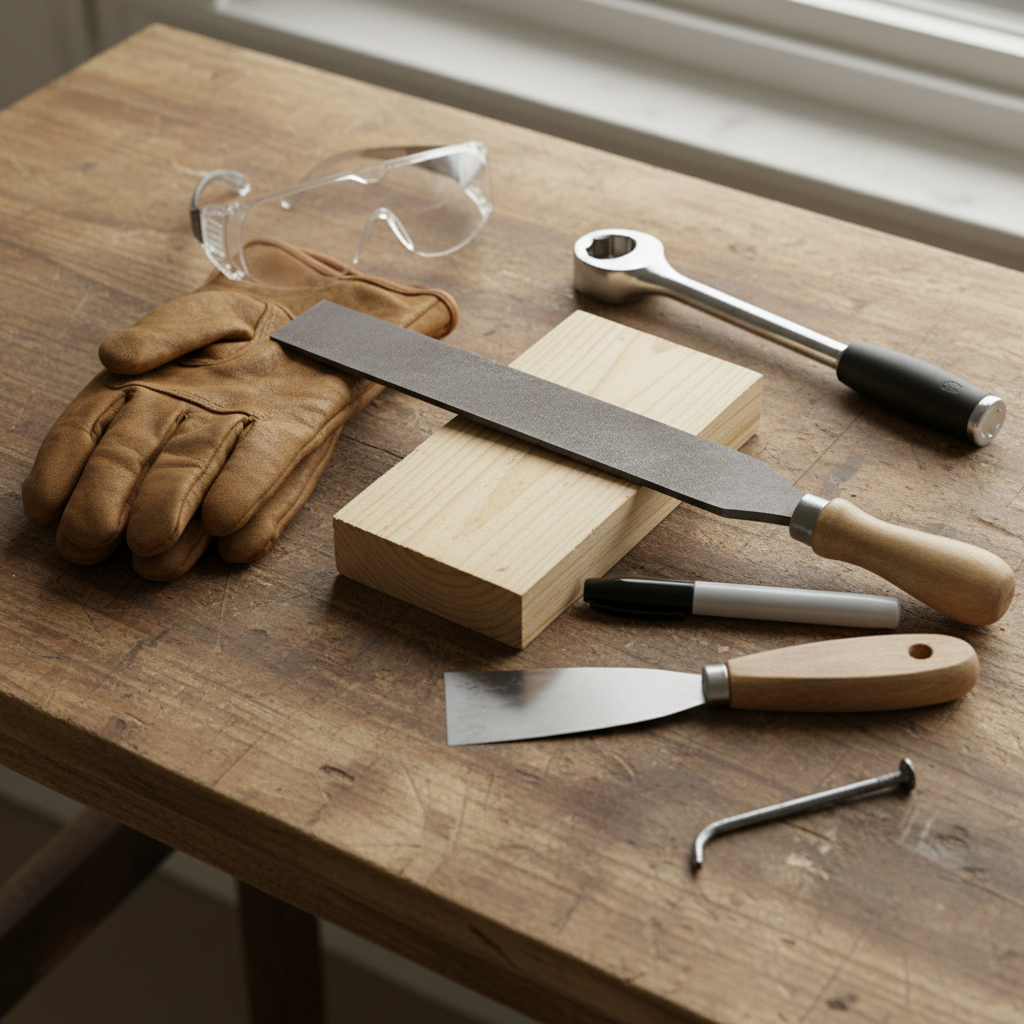
You do not need a bench grinder or an angle grinder for this job. Those tools can overheat the steel, remove metal unevenly, and change the blade in ways a homeowner cannot easily undo. Stay with a hand file.
A single-cut mill file, or a similar flat hand file, is the usual match. A medium-coarse mill file bites mild steel and leaves a controllable surface. A round file does not sit flat on a bevel. An extra-fine file cuts too slowly on a nicked mower edge and invites you to overwork one spot. You do not need a specific length or branded “mower” file; you need a flat file that you can keep fully on the bevel.
Also gather:
- Sturdy work gloves and eye protection. The blade can cut or crush even when it looks dull, and filings can fly.
- A way to isolate power: spark-plug boot on many gasoline walk-behinds; key removed and battery disconnected on many riders and battery mowers. Follow the owner’s manual for your machine.
- The correct wrench or socket for the blade bolt, plus a block of wood or similar scrap to keep the blade from spinning.
- A vise or a sturdy clamp and a solid bench.
- A marker or paint pen, and a phone for a photo of the fastener stack.
- A simple balance check: a nail, a screwdriver shaft through the center hole, or a cone-style balancer if you already have one.
Optional and useful: a putty knife or wire brush to clear packed grass, and a light wipe of oil on bare steel if you will store the blade before reinstalling it. Replace a damaged bolt, washer, or adapter rather than reusing it. You do not need threadlocker, a torque tool, or a grinder to complete this method, though the manual may specify a fastener torque when you put the blade back on.
Disable the mower before you touch the blade
Treat power isolation as mandatory. A blade that can still turn under power can cause severe cuts. Details vary by machine, so use the pattern below and then follow the owner’s manual for tipping direction, fuel and oil handling, blade-brake notes, and any safety-switch warnings.
Gasoline walk-behind mowers
Wait until the engine is cool enough to touch the relevant parts safely. Remove the spark-plug boot from the plug so the ignition cannot fire. Do not rely on the throttle or a blade-brake handle alone. If you must tip the mower to reach the blade, check the manual for the recommended side or direction. Tipping the wrong way can spill fuel or run oil into places it does not belong. Keep the fuel cap secure and avoid tipping a full tank. Chock wheels if the machine can roll.
Battery, corded-electric, and typical riding mowers
Remove the key if the machine has one. Disengage the blades and set the parking brake on a rider. Disconnect the battery or remove the battery pack on battery machines; unplug a corded mower at the outlet and at the machine if it has a detachable cord. Do not leave a power source connected “just in case.” Stabilize the machine on level ground. Raise the deck only as the manual allows, and never reach under a deck that can still start.
Wear eye protection and gloves before you put hands near the blade. A dull rotary blade is still a heavy, sharp-enough piece of steel. It can drop, swing, or pinch fingers against the deck.
Remove the blade without rounding the bolt or losing orientation
Block the blade so it cannot spin while you loosen the center fastener. A scrap of wood wedged between the blade and the deck, or braced against a solid part of the housing in a way that does not crush thin sheet metal, is the usual home method. Do not hold the cutting edge with your hand. If the bolt will not budge, stop rather than hammering the blade or rounding the fastener. Penetrating oil on a cool, isolated machine and the correct socket are safer than impact on the cutting end.
Before the blade comes free, record orientation. Mark the grass-side versus the deck-side. Photograph or sketch the stack: bolt, washer or washers, any adapter or stiffener, and the blade itself. On many rotary blades a lift wing or sail—the bent fin that helps lift clippings—faces the deck. Cutting edges typically lead in the direction of rotation, so the sharpened face meets the grass first. Treat that as typical, not universal. Mulching blades, high-lift blades, and some multi-blade riders use adapters or stacked parts that only the manual or your photo will put back correctly.
Inspect the bolt, washer, adapter, and the blade’s center hole. Replace a stretched, rounded, or damaged fastener. A worn, cracked, or enlarged center hole is a replace-the-blade condition, not a filing problem. Walk-behind mowers often use a single blade on one bolt. Some riders use two or three blades on separate spindles; remove and file one blade at a time so parts do not get mixed, and keep each blade with its own hardware.
Clean the blade and lock it in a vise
Scrape or brush off packed grass, mud, and loose rust until you can see the existing bevel, the underside of the edge, and the steel around the center hole. You are cleaning enough to inspect and to keep the file from skating on debris, not restoring a showroom finish. Look again for cracks, bends, and thin spots now that the blade is off the mower. If damage shows up here, switch to replacement.
Clamp the blade so one cutting edge is accessible and the file can travel the full bevel. Do not crush the lift wing or sail in the vise jaws. Do not clamp only the thin cutting edge; that can bend the steel and makes an uneven stroke more likely. Support the body of the blade. Work one end until that bevel is even, then reverse the blade and match the other end. If you have no vise, a last-resort sturdy clamp on a solid bench can hold the blade, but poor support makes a wavy edge more likely. Take extra care to keep the file flat.
Good light helps. You want to see the shiny line of the old bevel and any nick that is actually a crack.
File the existing bevel with even push strokes
Do not invent a new angle. Find the remaining factory bevel—the sloped face that forms the cutting edge—and keep the file flat on that face. Lawn-mower bevels vary by maker and by how much steel is already gone. If you see a common shop range mentioned elsewhere, treat it as approximate and manufacturer-dependent. Matching what is left on your blade is the reliable home rule.
A mill file typically cuts on the push stroke. Set the file on the bevel, apply firm even pressure, and push along the edge so the file stays fully seated. Lift or ease pressure on the return so you do not dull the file or rock the angle. The file should rasp with a biting sound, not skate or chatter. Skating usually means the file is too fine, the steel is glazed with debris, or you are not keeping the file flat. Chatter often means the blade is not clamped well.
Work from the inner part of the cutting edge toward the tip so you follow the whole bevel. Count or otherwise match effort on both ends. Equal metal removal is a balance rule of thumb, not a guarantee that a fixed number of strokes will make the blade perfect. Pause and look: both ends should lose a similar amount of dull metal and keep a similar bevel width.
Leave the underside almost alone. Most rotary blades are filed on the bevel only. A light pass to knock off a wire-edge burr is enough. Do not file the underside into a knife-like secondary bevel. A mower blade is a chopping edge. A needle-thin edge chips the first time it hits a twig or the soil.
Blend small nicks by staying on the bevel and taking a few extra strokes through the nick until it no longer makes a deep catch. If a nick is a crack, a fold, or a bite so deep that blending it would notch the blade, stop. That end is not a filing project. Deep damage plus more metal removal is how blades get weak and noisy.
Do not grind until the blade is thin. Do not use heat, a torch, or an angle grinder to “speed up” the edge. Heat can change the steel in ways you cannot see. Keep both ends in the same condition as you go rather than finishing one end to a razor and then trying to catch up.
Judge sharpness without over-thinning the steel
Stop when the dull, rounded shine is gone, the bevel looks continuous and fairly even from the inner edge to the tip, and light nicks are mostly blended. The edge should look like a clean line, not a polished knife and not a chewed strip of steel. You should still see a sturdy thickness behind the edge. If the steel at the edge is becoming foil-thin, you have gone too far for safe use.
Prefer visual checks. Look down the edge in good light. Compare both ends. A dramatic “shave hair” or kitchen-knife test is a poor match for a rotary blade and an easy way to get cut. If you use a scrap of paper or a careful glove-on thumbnail check at all, treat it as optional and risky. A mower blade only needs to chop grass; it does not need to slice paper like a chef’s knife. The real field test comes later, on a small patch of lawn, after the blade is balanced and reinstalled.
More filing will weaken the blade when you are only chasing a mirror finish, when you are trying to erase a deep nick that should have ended the job, or when the remaining bevel is already narrow. Filing does not restore whatever hardness the edge had when it was new. Nicks and prior impacts already tell you the steel has been stressed.
Check balance and correct a heavy end
An unbalanced rotary blade vibrates. Vibration is hard on the spindle, the deck, fasteners, and the operator. It can also leave a poor, uneven cut. Filing one end more than the other is a common cause. Hitting a root or curb with one tip is another.
A simple center-hole check is a reasonable home approximation, not a shop spin-balance. Clean the center hole. Hang the blade from a horizontal nail, a screwdriver shaft, or a cone balancer through that hole so the blade can tilt freely. It should rest close to level. A clearly drooping end is the heavy end.
Remove a little metal from the heavy end only. Stay on the back of that bevel or another non-structural area of the same end—do not file a new notch into the cutting edge, and do not thin the sail so much that you change how the blade lifts. Recheck the hang often. Small changes are enough. You are looking for “no obvious droop,” not a laboratory tolerance.
If the blade will not come close to level, look again for a bend. A bent blade should be replaced, not hammered straight and not filed until the numbers pretend to match. Never drill balance holes, cut the sail off, or grind large pockets out of the blade. Those shortcuts create new stress points.
Reinstall the blade and verify the mower
Reassemble the fastener stack in the recorded order. Typical orientation: cutting edges lead in the direction of rotation, and lift wings or sails face the deck. Use your marks and photo when the stack includes an adapter or extra washer. If the bolt, washer, or adapter is damaged, replace it before the blade goes back on. Tighten the blade fastener firmly to the manufacturer’s specification. Do not guess a universal torque number, and do not assume every mower uses the same thread direction. If the manual calls for a specific procedure, follow it.
Confirm that tools, wood blocks, and hands are clear of the deck. Only then reconnect the spark-plug lead or the battery, or restore power on an electric machine. Keep bystanders away for the first start.
A brief test should include a start, blade engagement if the machine has a separate control, and a few seconds of listening and feeling. New vibration, scraping, a crooked-looking blade, or a sound that was not there before means shut down immediately. Isolate power again and recheck orientation, tightness, balance, and whether the blade is sitting flat on the adapter. Do not “run it in.”
If the machine sounds normal, cut a small patch and look at the clippings. Cleanly cut ends are the goal. Ragged, shredded grass can mean the edge is still dull, the height of cut is too low for the conditions, the deck is packed with debris, or the blade is the wrong type for the job. A filed blade does not come with a promised number of hours or seasons. Inspect it again after you hit debris or when the lawn starts looking torn.
Replace the blade instead of filing it again
Some blades are designed as replaceable wear parts. Filing is a touch-up, not an endless rebuild. Replace rather than file when you find:
- Cracks at the center hole, through the body, or along the edge
- A visible bend or a blade that will not hang near level because it is warped
- Large missing pieces or a tip that has been eroded or broken away
- A cutting edge worn so thin or short that blending nicks would leave little steel
- A center hole that is worn, cracked, or no longer fits the adapter snugly
A new blade that fits the mower is safer than an over-filed original that looks sharp in the vise and shakes on the lawn. You do not need a remaining-width measurement or a hardness rating to make that call. Visual damage and poor balance are enough.
How often you inspect is qualitative. Check the edge when grass starts tearing instead of cutting, after you strike a rock, root, or edging, and whenever you scrape the underside of the deck. There is no universal calendar of hours, acres, or seasons that fits every yard and every soil.
If the cut is still poor or the mower vibrates
After a careful filing job, recheck the simple things first:
- Blade orientation and the fastener stack against your photo
- A loose blade bolt or missing washer
- A nick you treated as dullness that is actually a crack or fold
- Balance, especially if one end received more strokes
- Grass and mud packed in the deck, which can unbalance the rotating assembly and block airflow
Dull-looking results are not always a dull blade. Cutting too low on wet, thick, or sandy turf can tear grass even with a decent edge. A bent blade, a damaged adapter, or a spindle problem can also leave a poor cut and vibration. Do not diagnose a bent crankshaft or a failed bearing as a certainty from vibration alone. If vibration continues after a balanced, correctly installed, undamaged blade is in place, stop using the mower and have the spindle and deck inspected by someone equipped for that work.
Hand filing is the right tool-minimal method when you want a safer, cleaner cut from a sound rotary blade. It rewards patience on the bevel, equal work on both ends, and the discipline to replace steel that is already spent.









