How to Sharpen Your Lawn Mower Blade (Quick Overview)
A sharp lawn mower blade is one of the simplest upgrades you can make for a healthier lawn. The basic process involves disconnecting the spark plug, removing the blade, sharpening the cutting edge at its original bevel angle (typically 30–45°), restoring balance, and reinstalling the blade correctly. Most homeowners can complete the task in 20–30 minutes with a few basic tools.
Signs Your Lawn Mower Blade Needs Sharpening
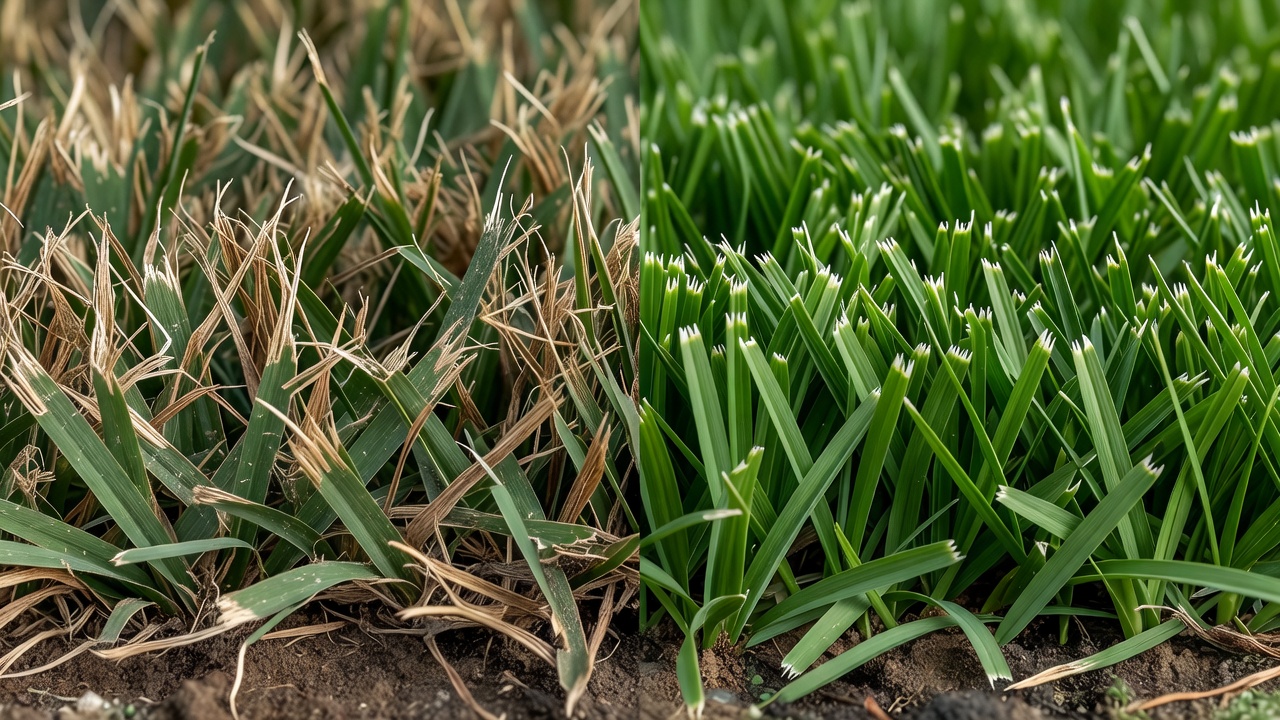
Before you pull out any tools, confirm that dullness is actually the problem. A blade that has passed its useful sharpening life will produce recognizable symptoms across your lawn.
Visual and Physical Clues
- Torn or shredded grass tips — Instead of a clean, snipped edge, grass blades appear torn, ragged, or frayed. This is the most reliable indicator of a dull blade.
- Discolored grass — Torn grass tips turn brown within hours of mowing because the plant loses moisture and becomes susceptible to fungal infection.
- Uneven cutting height — A mower that leaves stripes of longer grass between passes often has a blade that cannot maintain a consistent cutting plane.
- Excessive vibration — While vibration can stem from other mechanical issues, an unbalanced blade after sharpening or general wear is a common cause.
- Increased mowing resistance — A mower that suddenly feels harder to push may have a blade that is no longer slicing efficiently.
How Often Should You Sharpen?
Frequency depends on usage and conditions, but a general guideline is every 20–25 hours of mowing time or roughly once per season for average homeowners. Blades dull faster when mowing over sandy soil, gravel, or frequently colliding with tree roots and sticks. If you mow a small lawn, sharpening once per year may be sufficient. If you mow commercially or on rough terrain, inspect the blade after every 2–3 uses.
Tools and Materials You Need
Gather everything before you begin. Having tools on hand reduces the temptation to take shortcuts that compromise safety or quality.
- Socket wrench or adjustable wrench — Sized to fit the blade retention bolt (commonly 5/8″ or 3/4″).
- Screwdriver or wooden block — Used to prevent the blade from spinning while loosening the bolt.
- Vise or clamps — Securely holds the blade steady during sharpening.
- Metal file, angle grinder, or blade sharpening drill attachment — Each method is covered in detail below.
- Blade balancer — A commercial balancer or a simple nail driven into a wall works equally well.
- Penetrating oil — Helpful if the blade bolt is seized or rusted.
- Work gloves — Protect hands from the sharp cutting edge and any burrs.
- Safety glasses — Essential when using an angle grinder or drill attachment.
- Towels or rags — For cleaning the blade deck and blade surface.
Safety Precautions Before You Begin
Lawn mower blade sharpening involves a rotating cutting tool. Neglecting safety steps can result in serious injury.
- Disconnect the spark plug wire — This is the single most important safety step. It prevents the engine from accidentally starting while you are working near the blade. Pull the wire off the spark plug and tuck it away from the terminal.
- For battery-powered or electric mowers — Remove the battery pack entirely and keep it in a separate location from the work area.
- Tip the mower correctly — For a four-stroke engine, always tip the mower with the air filter and carburetor side facing up. Tipping the wrong way can allow oil to enter the combustion chamber and cause engine damage. Consult your operator’s manual for the manufacturer-recommended tipping orientation.
- Allow the mower to cool — Never attempt blade removal or sharpening on a hot engine. Heat softens metal and makes precise filing more difficult.
- Wear gloves and eye protection — Even a dull blade has a sharp edge, and sharpening creates metal fragments and sparks (with a grinder).
- Work in a well-lit, stable space — A garage floor or paved driveway with good lighting gives you the control and visibility you need.
How to Remove the Lawn Mower Blade
Step 1: Stabilize the Mower
Park the mower on a flat, level surface. Chock the wheels if needed. Confirm the spark plug is disconnected and, for electric mowers, the battery is removed.
Step 2: Prevent Blade Rotation
Insert a wooden block, a screwdriver, or a blade stop tool between the blade and the mower deck. This immobilizes the blade so you can break the bolt free without the blade spinning.
Step 3: Loosen the Blade Bolt
Determine which direction loosens the bolt. On most mowers, the bolt has standard right-hand threading — turning it counter-clockwise loosens it. Apply penetrating oil if the bolt is seized and let it sit for 5–10 minutes before attempting again. Use a breaker bar or length of pipe over the wrench handle for additional leverage if needed.
Step 4: Mark Blade Orientation
Before removing the blade, use a marker or a piece of tape to note which side faces the deck and which faces upward. Reinstalling a blade upside down will produce a poor cut and can be dangerous. You can also take a quick photograph for reference.
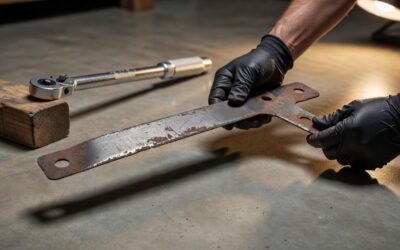
Step 5: Remove and Inspect the Blade
Slide the blade off the spindle. Lay it flat and inspect for:
- Cracks — Any visible crack radiating from the center hole or along the blade body requires immediate replacement.
- Bends or warping — A bent blade will not cut evenly regardless of how sharp it is.
- Excessive wear — If the blade has been sharpened many times and the cutting edge is very short, replacement is more cost-effective than further sharpening.
- Gouges or missing sections — Metal loss from hitting rocks or roots may compromise structural integrity.
If the blade shows any of these conditions beyond minor wear, see the section on replacement below.
How to Sharpen the Blade: Three Methods
Each method has its own advantages. Choose based on the tools you have, your comfort level, and how much blade material you need to remove.
Method 1: Metal File (Best for Beginners)
A flat mill file or bastard file is the most accessible option and provides excellent control.
- Clamp the blade securely in a vise, with the cutting edge facing outward and accessible.
- Identify the original bevel angle — most mower blades are sharpened at 30–45 degrees. This angle is visible on the unsharpened side of the blade as a beveled edge running along the full length of the cutting side.
- Position the file against the bevel at its original angle. Push the file in one direction only — away from your body — applying steady, even pressure. Do not use a back-and-forth sawing motion.
- Count your strokes. For a moderately dull blade, 20–40 strokes per section is typically sufficient. Lift the file on each return pass to maintain consistency.
- Work along the entire cutting edge from the center toward each tip, maintaining the same angle throughout.
- Stop when you see a clean, bright edge forming along the full length of the blade.
A file produces a burr on the opposite side of the edge — this is normal and does not need to be removed.
Method 2: Angle Grinder (Fastest, Requires Caution)
An angle grinder with a 4½” grinding disc removes material quickly and is ideal for blades with significant dullness or minor damage.
- Secure the blade in a vise as described above.
- Don safety glasses and, if available, a face shield. Grinding produces sparks and metal fragments.
- Set the grinder to a moderate speed. Hold it at the blade’s original bevel angle.
- Make light, controlled passes along the cutting edge. Let the grinder do the work — pressing too hard overheats the metal and shortens the blade’s useful life.
- Move continuously from one end of the edge to the other. Check your progress frequently to avoid over-sharpening.
- Aim for a consistent, sharp edge. You do not need a razor-thin edge — a sturdy, clean bevel is more durable for mowing conditions.
Method 3: Drill Attachment with Sharpening Stone (Good for Touch-Ups)
A conical sharpening stone that fits into a standard drill chuck offers a middle ground between a file and a grinder.
- Clamp the blade firmly.
- Insert the conical stone into your drill chuck and tighten securely.
- Set the drill to a slow-to-moderate speed.
- Hold the stone at the blade’s bevel angle and apply it to the cutting edge with light pressure. Move along the edge gradually.
- This method is best for routine maintenance rather than restoring a heavily dulled blade.
How to Check and Restore Blade Balance
An unbalanced blade is one of the most commonly skipped steps after sharpening, yet it is critical for mower longevity. An unbalanced blade creates vibration that wears out the spindle, bearings, and engine mount bolts over time.
The Nail or Hang Test
- Drive a nail into a wall or a sturdy vertical surface at a comfortable working height.
- Hang the blade by its center hole on the nail. The blade should hang horizontally.
- If one end drops lower than the other, that side is heavier and needs more material removed.
Balancing the Blade
Focus additional filing or grinding on the heavy side of the blade — the side that hangs lower. Remove small amounts at a time, rechecking balance after each pass. The goal is for the blade to remain roughly horizontal when suspended.
A dedicated blade balancer tool works on the same principle but provides greater precision. Either method is acceptable for home use.
How to Reinstall the Blade and Test the Mower
Step 1: Clean Before Reinstalling
Remove any grass clippings, debris, or rust from the blade and the mower deck. A clean deck and blade seating surface ensure proper contact and even cutting height.
Step 2: Orient the Blade Correctly
Reinstall the blade with the cutting edge facing the correct direction — the edge should face the direction of rotation when the mower is in use. Most blades have a stamped label indicating “bottom” or an arrow showing rotation direction. If you marked the blade during removal, use that reference.
Step 3: Torque the Blade Bolt Properly
Hand-thread the blade bolt to start, then tighten with your wrench. The bolt should be snug but not over-tightened. Most mower blade bolts are torqued to approximately 45–75 ft-lb — check your operator’s manual for the specific specification. Over-tightening can damage the threads or the spindle.
Step 4: Reconnect and Test
- Reconnect the spark plug wire (or reinsert the battery for electric mowers).
- Start the mower and let it run for 30–60 seconds. Listen for unusual sounds and watch for excessive vibration.
- Mow a small test area of grass. A properly sharpened blade produces a clean, crisp cut with even grass tips. Inspect a few cut blades — they should be cleanly severed, not torn.
When to Replace a Blade Instead of Sharpening
Sharpening extends blade life, but every blade has a finite service window. Replace the blade if you observe:
- Cracks anywhere on the blade body — Cracks create failure points that can cause the blade to fragment during operation, a serious safety hazard.
- Bent or warped blade body — A bent blade cannot produce a level cut and stresses the mower’s drivetrain.
- Excessive material loss — Most blades can be sharpened safely 2–4 times before reaching minimum thickness specifications. If the cutting edge is very short or the center hole is elongated, replacement is warranted.
- Deep gouges or pitting — Surface damage that extends below the cutting edge cannot be resolved by sharpening alone.
Replacement blades are inexpensive (typically $10–$30) and installing a new, sharp blade is often more practical than repeatedly resharpening a heavily worn one.
Blade Maintenance Tips to Extend Sharpness
- Clean the blade after each use — Removing grass clippings and moisture prevents corrosion that dulls the edge faster.
- Avoid mowing over debris — Rocks, sticks, pet toys, and tree roots are primary causes of premature dulling and blade damage.
- Keep the underside of the deck clean — Grass buildup under the mower deck increases resistance and forces the blade to work harder.
- Store blades properly — In a dry environment, ideally hanging or wrapped to protect the cutting edge.
- Maintain mower deck height — Cutting at the correct height for your grass species reduces stress on the blade and produces healthier turf.
- Consider a spare blade — Having a second sharpened blade on hand lets you swap quickly and continue mowing while you sharpen the first.
Frequently Asked Questions
Can I sharpen my lawn mower blade without removing it?
While it is technically possible to file the edge while the blade is still attached, this approach is unsafe and makes it nearly impossible to achieve the correct bevel angle or test balance. Removing the blade is the only method that meets safety standards and produces a quality result.
What angle should a lawn mower blade be sharpened at?
Most residential lawn mower blades are sharpened at an angle between 30° and 45°. The exact angle is set by the manufacturer and visible as the beveled edge on the unsharpened side. Match this angle during sharpening — do not create a new bevel. Consult your mower’s operator manual or the blade manufacturer if you are unsure of the original angle.
Can I use a file instead of an angle grinder?
Yes. A flat mill file or bastard file works very well for sharpening mower blades and is safer for beginners because it provides precise control and does not generate heat that can alter the blade’s hardness. An angle grinder is faster but requires more skill to maintain a consistent angle and avoid over-sharpening.
What happens if I reinstall the blade upside down?
An upside-down blade will not cut grass — it will push and tear it instead. You will see the same poor cut quality as a dull blade. Additionally, the blade’s aerodynamic lift profile is designed for one orientation, so an upside-down blade can cause excessive vibration that damages the mower’s spindle and bearings. Always confirm orientation before tightening the bolt.