


Pros
- Large-size design named in product title
- Sharpening and balancing functions listed
- Listed as a new upgraded version

Pros
- Adjustable 15-to-45-degree range in title
- Sharpening and balancing functions listed

Pros
- Sharpener and balancer functions in title
- 15-to-45-degree adjustable setting listed
- Built for lawn mower blade maintenance
Pros
- Includes replacement gaskets and a 98079-55846 spark plug
- Matches Honda HRR216 and HRS216 lawn mower models
- Designed around the 16100-Z8B-901 carburetor specification
Cons
- Restricted to select Honda GCV160 mower applications
- Installation requires basic mechanical tools and skills
What You Need Before You Start (Tools & Safety Gear)
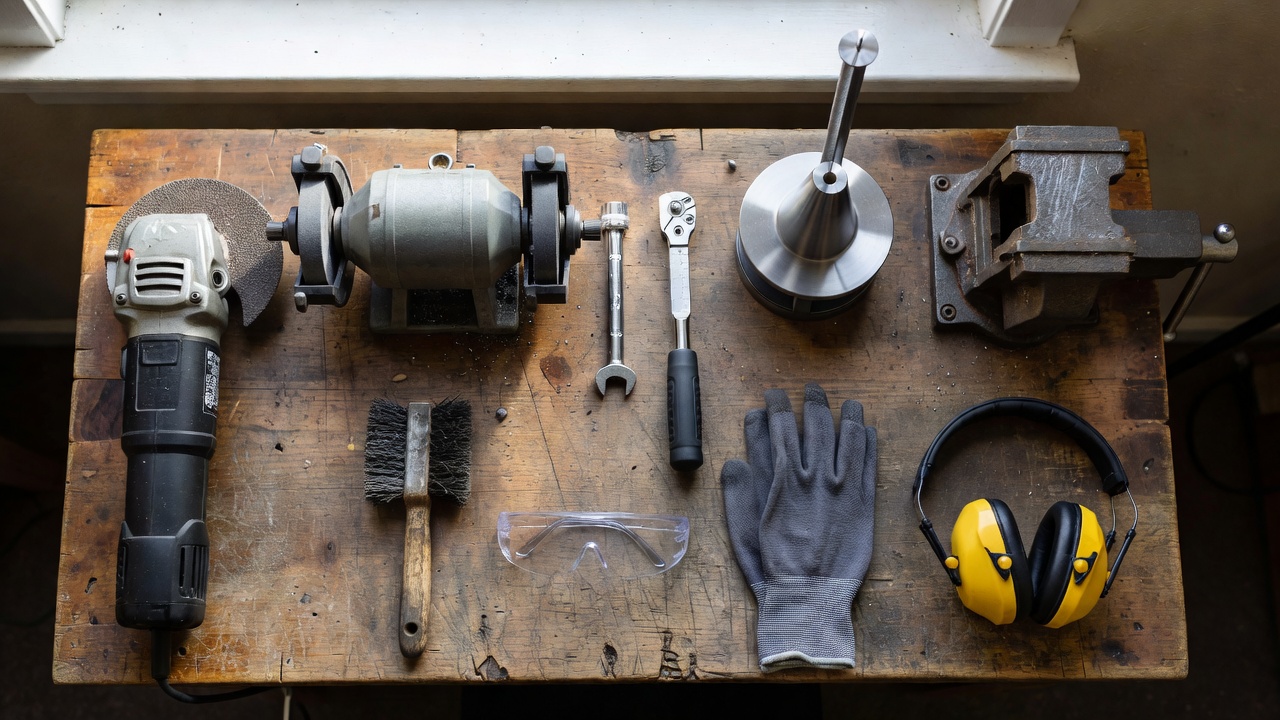
Gathering everything before you begin prevents mid-task scrambling and keeps the work area safe. The list below covers both angle grinder and bench grinder workflows.
Tools
- Angle grinder with a metal grinding disc (4.5-inch, 36–60 grit flap disc or dedicated blade-sharpening disc) — primary tool covered in this guide
- Bench grinder (optional alternative) with a medium-grit aluminum oxide wheel (36–60 grit)
- Socket wrench or breaker bar (typically 5/8-inch socket for push mowers)
- Torque wrench (for reinstallation)
- Bench vise or blade-holding clamp
- Blade balancer — cone-style magnetic balancer recommended; a nail driven horizontally into a wall stud works as a free alternative
- Wooden block or blade removal wedge (to immobilize the blade during bolt loosening)
- Wire brush or rag (to clean the blade before grinding)
Safety Gear (PPE — Required, Not Optional)
- Eye protection: ANSI-rated safety glasses or a full face shield — grinding throws sparks and metal fragments
- Cut-resistant gloves: a freshly sharpened blade edge is razor-capable
- Hearing protection: angle grinders exceed 90 dB; extended exposure causes permanent hearing damage
- Long sleeves and closed-toe shoes: spark and metal chip protection
Angle grinder vs. bench grinder: An angle grinder is more accessible, portable, and better for beginners working at a vise. A bench grinder offers more control over the sharpening angle once the tool rest is set correctly, but requires the operator to move the blade across a fixed wheel — a technique that takes practice. This guide leads with angle grinder technique and provides a dedicated bench grinder section below.
How to Remove the Lawn Mower Blade Safely
Blade removal is where most injuries occur. Follow this sequence exactly. To evaluate matched hardware tolerances, consult our detailed overview of jbl partybox club 120 vs sony srs xv500.
Step 1 — Disconnect the Spark Plug
Pull the spark plug wire off the plug terminal and tuck it away from the plug before touching the blade. Even with the ignition off, the engine can fire if the blade is rotated and the plug is connected — a risk confirmed by mower manufacturers including Husqvarna and Honda in their operator safety manuals. This step is non-negotiable. To evaluate matched hardware tolerances, consult our detailed overview of jbl partybox club 120 vs sony srs xv500.
Step 2 — Drain or Stabilize the Fuel (for Push Mowers)
If tipping the mower on its side, keep the carburetor side up (air filter facing up) to prevent oil from entering the combustion chamber and fuel from leaking. Alternatively, run the tank dry or use a fuel shutoff valve if fitted.
Step 3 — Tip the Mower and Secure It
Tip a push mower onto its side on a flat, stable surface. For a riding mower, use a mower lift or drive the front wheels onto ramps — do not work under a riding mower supported only by a floor jack. When planning workspace deployment, consider the engineering criteria outlined in our z890 vs x870e motherboard guide.
Step 4 — Block the Blade and Loosen the Bolt
Wedge a piece of scrap wood between the blade and the mower deck to prevent the blade from spinning while you break the bolt free. Most mower blade bolts are standard right-hand thread (turn counter-clockwise to loosen), but confirm with your mower’s owner manual — some older or non-US models differ. Use a breaker bar if a standard wrench cannot break the torque.
Step 5 — Riding Mower Differences
Riding mowers with multiple blades require a blade removal tool (a strap wrench or dedicated blade holder) to hold each blade while loosening its individual bolt. Each blade should be sharpened and balanced separately. Mark each blade’s position and orientation with a paint marker before removal to simplify reinstallation. For additional operational safety benchmarks, see our published testing notes on marshall stanmore iii vs harman kardon onyx studio 8.
Step 6 — Note the Blade Orientation
Before the blade comes fully off, note which face points downward (toward the ground). The blade wings curve upward toward the deck; the cutting edges face the direction of rotation. Taking a phone photo at this stage prevents reinstallation errors.
How to Sharpen a Lawn Mower Blade with an Angle Grinder
The angle grinder is the fastest and most versatile method. The key skill is maintaining a consistent bevel angle throughout each pass. To compare alternative configurations, check our hands-on review of dyson v8 cyclone vs bissell featherweight stick.
Step 1 — Clean the Blade
Use a wire brush to remove caked grass, dirt, and rust from the cutting edge. Grinding over debris wastes disc life and produces unpredictable results.
Step 2 — Clamp the Blade in a Vise
Secure the blade horizontally in a bench vise with one cutting edge facing up and accessible. The blade must not flex or shift during grinding — any movement changes the angle and produces an uneven edge. Users looking for related component recommendations can explore our bissell crosswave hydrosteam vs shark stainforce breakdown.
Step 3 — Select the Correct Disc
Use a 36–60 grit flap disc or a metal grinding disc. Flap discs remove material more gradually and are forgiving for beginners. Standard grinding discs remove material faster but require more angle control. Do not use a cutting disc — these are not designed for surface sharpening and can shatter under lateral load.
Step 4 — Match the Existing Bevel Angle
Examine the blade’s existing bevel — the factory-ground angled surface behind the cutting edge. This angle is typically 30–45 degrees, a range confirmed by blade manufacturers including Oregon Products and Husqvarna in their blade maintenance documentation. Place the grinding disc flat against that bevel surface before switching the grinder on. Your wrist angle at that moment is the angle you maintain throughout.
Step 5 — Grind in Smooth, Even Strokes
Switch the grinder on and move it along the bevel from the center of the blade toward the tip in one smooth stroke, maintaining constant contact with the bevel face. Work heel-to-tip, not tip-to-heel — this pushes the burr to the back face rather than the cutting edge. Apply light, consistent pressure. Let the disc do the work; pressing hard generates excess heat.
Step 6 — Manage Heat (Critical)
Overheating the blade during grinding destroys the steel’s temper — the heat treatment that gives the metal its hardness and durability. A temper-destroyed blade becomes brittle and loses its edge rapidly. Signs of overheating: the blade metal turns blue or purple at the edge. To prevent this, grind in 10–15 second bursts, then pause to let the blade cool. Dipping the blade in water between passes accelerates cooling. OSHA’s grinding safety guidelines identify heat management as a primary concern in metal grinding operations.
Step 7 — Determine When to Stop
The goal is a sharp, consistent edge — not a razor’s edge. A lawn mower blade cuts by impact at high speed, not by fine slicing. Stop grinding when the bevel is uniformly bright metal with no nicks, chips, or dull spots visible along the full length of the cutting edge. Three to six passes typically suffice for a blade that is dull but undamaged. A severely nicked blade may take significantly more material removal.
Step 8 — Repeat on the Other Cutting Edge
Re-clamp the blade to expose the second cutting edge and repeat Steps 3–7. Remove an equal amount of material from both sides to preserve balance — this is the most important preparation for the balance check that follows.
How to Sharpen a Lawn Mower Blade with a Bench Grinder
A bench grinder delivers consistent results once the tool rest is configured correctly. The technique differs from angle grinding in one key way: the blade moves across a fixed wheel rather than the tool moving across the blade.
Wheel Selection
Use a 36–60 grit aluminum oxide grinding wheel. A 36-grit wheel removes material faster and suits heavily damaged or deeply nicked blades. A 60-grit wheel works better for routine maintenance sharpening where minimal material needs removal. Do not use a wire wheel for sharpening — it polishes rather than cuts.
Tool Rest Setup
Set the bench grinder’s tool rest to match the blade’s bevel angle — again, 30–45 degrees is the standard range. Place the blade’s bevel flat on the tool rest against the wheel face before switching on the grinder. The rest must be adjusted to within 1/8 inch of the wheel face to prevent the blade from being pulled between the rest and wheel, a recognized bench grinder hazard.
Sharpening Technique
Hold the blade firmly against the tool rest with both hands (gloves on). Switch on the grinder and slide the blade across the wheel face from heel to tip in a single, steady pass. Maintain even pressure across the full bevel. Lift the blade clear of the wheel at the end of each pass — do not reverse direction while in contact with the wheel. Pause between passes to manage heat using the same 10–15 second rule as the angle grinder method.
Key Difference from Angle Grinding
The bench grinder requires you to hold the correct angle manually through the entire pass while moving the blade laterally. This demands more focus on consistent hand position. The angle grinder approach is generally more forgiving for occasional DIY users because the grinder can be adjusted mid-pass to follow the bevel visually.
How to Check and Correct Blade Balance After Sharpening
Blade balance is the step most DIY guides minimize. An unbalanced blade vibrates excessively at operating speed, and that vibration transfers directly to the mower’s spindle bearings and deck. Mower manufacturers including Toro and Briggs & Stratton identify unbalanced blades as a primary cause of premature spindle bearing failure in their service documentation. Rebalancing takes under five minutes and costs nothing if you use the nail method.
Method 1 — Blade Balancer (Recommended)
A cone-style or magnetic blade balancer mounts on a workbench or wall. Hang the blade’s center hole on the balancer cone. A balanced blade sits level; an unbalanced blade tips toward the heavier end. These balancers cost under $10 at any hardware store and are the most reliable method.
Method 2 — Nail Method (Free Alternative)
Drive a 16d nail horizontally into a wall stud so it protrudes 2–3 inches. Hang the blade’s center hole on the nail. Same result: a balanced blade sits level, an unbalanced blade tips toward the heavy end.
Correcting Imbalance
The heavy end is the end that drops. Remove small amounts of material from the heavy end’s bevel using the grinder — two to three light passes typically corrects moderate imbalance. Re-check on the balancer after each correction. Continue until the blade hangs level. Do not remove material from the light end — that removes good blade steel unnecessarily and shortens the blade’s usable life.
How to Reinstall the Blade and Test the Mower
Step 1 — Confirm Blade Orientation
The blade’s cutting edges must face the direction of rotation, and the blade wings must curve upward toward the deck (not toward the ground). Refer to the photo taken during removal. Installing the blade upside down produces zero cutting action and can damage the deck at speed.
Step 2 — Reinstall and Torque the Bolt
Thread the blade bolt back in by hand first to avoid cross-threading. Tighten with a torque wrench to the manufacturer’s specification — typically 35–50 ft-lbs for push mowers, but consult your owner’s manual for the exact figure. Your specific mower’s spec takes precedence over any general range. Under-torqued bolts allow blade movement; over-torqued bolts can strip the crankshaft threads.
Step 3 — Reconnect the Spark Plug Wire
Push the spark plug wire firmly back onto the plug terminal until it seats. Confirm the mower is on a flat surface with all four wheels on the ground before starting.
Step 4 — Test Cut
Run the mower over a small section of lawn at normal operating speed. A correctly sharpened and balanced blade produces a clean, even cut with no torn or ragged grass tips. Excess vibration through the handle indicates a balance issue — stop immediately and recheck balance before continuing.
How Often Should You Sharpen Lawn Mower Blades?
Husqvarna’s seasonal maintenance documentation recommends sharpening mower blades every 20–25 hours of mowing use, which translates to approximately once per mowing season for a typical residential lawn. Heavy-use scenarios — large properties, frequent mowing, or terrain with gravel and debris — may require sharpening two to three times per season.
Signs the Blade Needs Sharpening
- Torn or ragged grass tips after mowing — the clearest visual signal; a sharp blade cuts cleanly, a dull blade tears
- Uneven cut height across the lawn despite correct deck adjustment
- Increased mowing time needed to cover the same area
- Grass tips turning brown 24–48 hours after mowing (torn cells desiccate faster than cut cells)
- Visible nicks, chips, or flat spots on the blade edge
When to Replace Rather Than Sharpen
Sharpen the blade if the damage is limited to dullness and minor nicks. Replace the blade when:
- The blade has deep gouges or cracks — cracks are a catastrophic failure risk at operating RPM
- The blade is bent — a bent blade cannot be safely straightened for mower use and will never balance correctly
- The cutting edge is worn so thin that sharpening would remove structural blade material
- The center hole is elongated or damaged — the blade cannot be secured safely
Replacement blades for most common mower models cost $15–$40 and are the correct choice when any of the above conditions are present. No sharpening technique compensates for structural blade damage.
Buyer FAQs: Sharpen Lawn Mower Blades With Grinder Solved
What angle do I sharpen a lawn mower blade at with a grinder?
Match the existing factory bevel, which is typically 30–45 degrees for most rotary mower blades — a range confirmed by blade manufacturers including Oregon Products and Husqvarna. Place the grinding disc or wheel flat against the existing bevel before you begin; that surface tells you the correct angle. Deviating significantly from the factory angle reduces cutting efficiency and blade longevity.
Can I ruin a mower blade by overheating it with an angle grinder?
Yes. Excessive heat from continuous grinding destroys the blade’s temper — the metallurgical hardening that gives the steel its strength and edge retention. A blade that turns blue or purple at the cutting edge during grinding has been overheated. Prevent this by grinding in 10–15 second bursts, pausing between passes, and dipping the blade in water to cool it. OSHA grinding safety guidelines identify heat management as a critical concern in metal grinding operations.
How do I know if my mower blade is balanced after sharpening?
Hang the blade’s center hole on a cone blade balancer or a nail driven horizontally into a wall stud. A balanced blade sits level. If one end drops, that end is heavier — remove small amounts of material from the heavy end’s bevel using the grinder and retest. Repeat until the blade hangs level. Never reinstall a blade that tips to one side; an unbalanced blade causes spindle bearing damage confirmed by mower service documentation from Toro and Briggs & Stratton.
Which way does the blade bolt turn to loosen it?
Counter-clockwise (standard right-hand thread) on most push mowers and riding mowers sold in North America. Wedge a scrap piece of wood between the blade and deck to stop the blade from spinning, then turn the socket wrench counter-clockwise. Confirm thread direction in your mower’s owner manual before applying heavy force — some models differ. A breaker bar may be necessary to break a bolt that has been torqued and exposed to heat cycles.
For more detailed testing breakdowns and top recommendations, check our in-depth guide to residential zero-turn lawn mower guide.
For more hands-on benchmarks and buying recommendations, consult our guides on heavy-duty chainsaw buyer guide, as well as high-CFM commercial leaf blower guide, as well as durable ride-on lawn tractor guide, as well as automated robotic lawn mower guide.
Mechanical safety standards, operational tolerances, and protective gear guidelines align with benchmark specifications established by the American National Standards Institute (ANSI).









