

Direct Answer: How to String a Trimmer
To string a trimmer, remove the trimmer head by unscrewing or unclipping it from the shaft, wind new trimmer line onto the spool in the correct direction (typically counterclockwise), thread the line through the guides in the head assembly, and reassemble. The exact process depends on your trimmer type, bump feed models have a removable spool where you wind line manually, while fixed-head models have pre-drilled guides where you insert line and secure it. Most trimmers use 0.080 to 0.095-inch diameter line, and proper winding prevents tangling and ensures consistent automatic feed.
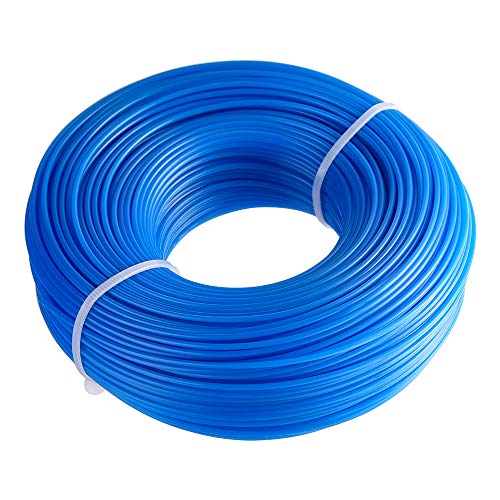
Pros
- Common .065-inch round line size improves compatibility with many trimmer models.
- Long 328-foot spool supports multiple refills from one package.
- Nylon material is positioned as a budget-friendly option for basic lawn maintenance.
- Useful for light trimming and edging around typical residential yards.
Cons
- Round .065-inch line is designed for light trimming, so it is not ideal for heavy weeds or thick overgrowth.
- Compatibility is broad but not universal, so users still need to confirm their trimmer calls for .065-inch line.
- No extra accessories or prewound spool system are included in the product information provided.
Overview: The FEPITO Round .065-Inch String Trimmer Line is a nylon replacement line designed for garden string trimmers and edgers. It is positioned as a straightforward, economical option for routine home yard maintenance.
Performance: With a 0.065-inch round profile and 328 feet of total line, this spool is meant for light trimming of small to medium grass. The longer length can provide around 16 refills, which is useful for users who want a supply that lasts through repeated mowing and edging sessions.
Drawbacks: This is not a heavy-duty trimmer line, so it may be less effective on thick weeds, dense brush, or tougher landscaping jobs. Buyers also need to check compatibility, since it is only suitable for trimmers that specifically call for .065-inch round line.
Verdict: The best value will be for homeowners who need a basic, budget-conscious replacement line for regular light trimming. If your yard work is mostly routine edging and grass cleanup, this FEPITO spool is a practical fit.
Understanding Your Trimmer Type
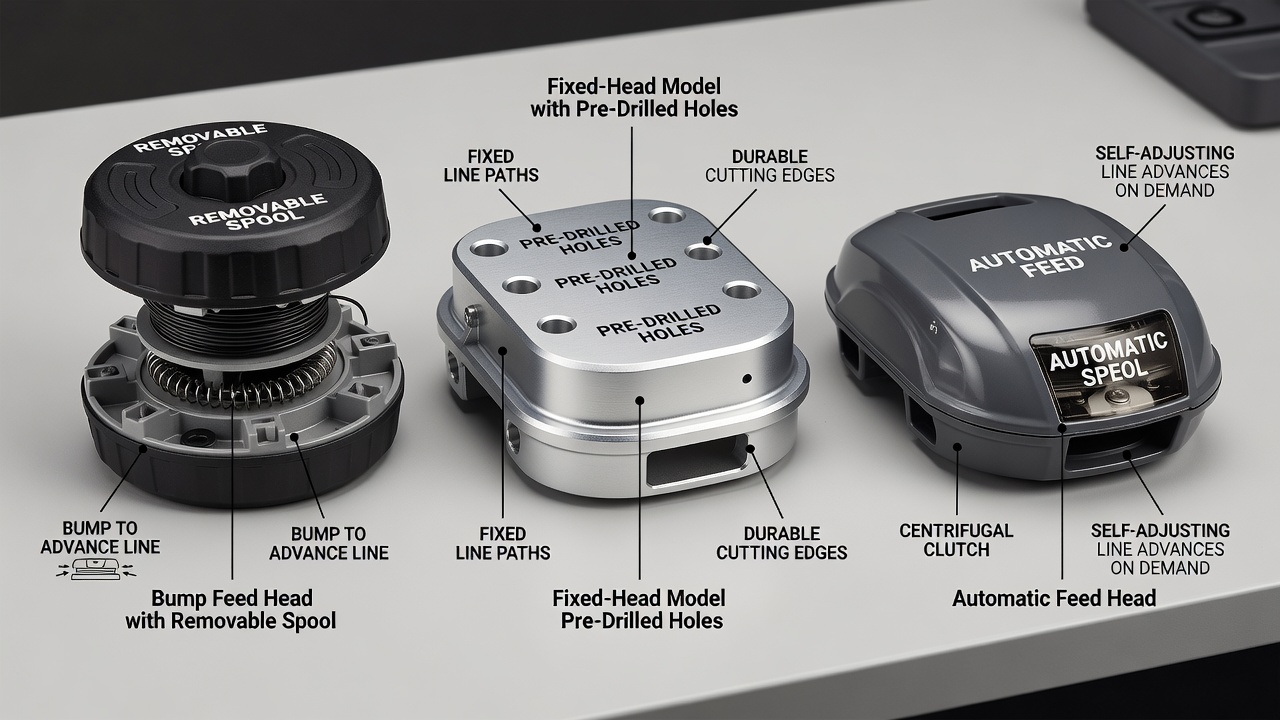
Before you begin, identify which trimmer head design you have, as the stringing method differs significantly.
Bump Feed Trimmer (Most Common)
Bump feed heads are the standard on residential string trimmers. They feature a removable spool inside a plastic housing. When you tap the head on the ground while the trimmer is running, a spring-loaded mechanism advances the line. This design is user-friendly and allows easy line replacement.
Fixed-Head Trimmer
Fixed-head trimmers have a permanent head with two or four pre-drilled holes for threading line. The line is manually inserted and secured, then cut to length. These heads are common on commercial equipment and don’t require spool removal.
Automatic Feed Trimmer
Automatic feed models advance line continuously as you trim without requiring bumping. Line is wound on a spool similar to bump feed models, but the feeding mechanism is motorized or spring-driven. Consult your manual before stringing, as the winding direction may differ.
Gathering Materials and Tools
Prepare the following before starting: For broader ecosystem context, read through our operational guide on z890 vs x870e motherboard.
- Trimmer line: Typically 0.080, 0.085, or 0.095 inches in diameter. Check your trimmer manual or the head housing for the correct gauge.
- Line quantity: Most bump feed spools require 15 to 25 feet of line, though capacity varies by model. Consult your manual for exact specifications.
- Screwdriver or wrench: Often a Phillips or flathead screwdriver, depending on your trimmer model’s fasteners.
- Needle-nose pliers (optional): Helpful for guiding line through tight guides or removing stubborn spool fasteners.
- Work surface: A flat, clean area to prevent losing small parts.
How to String a Bump Feed Trimmer: Step-by-Step
Follow these steps for the most common trimmer design:
Step 1: Remove the Trimmer Head
Unplug the trimmer or ensure the engine is off and cool. Locate the fastener holding the head to the shaft, usually a single screw or bolt on the bottom of the housing. Use your screwdriver or wrench to remove it. Gently pull the head away from the shaft. Set the fastener aside where you won’t lose it. For troubleshooting and reliability insights, consult our in-depth marshall stanmore iii vs harman kardon onyx studio 8 report.
Step 2: Remove the Spool
Once the head is off, locate the spool inside. Most spools are held by a central post or small clip. Press or twist the spool counterclockwise (or follow your manual’s direction) to release it. Lift the spool out of the head housing. Discard any remaining old line.
Step 3: Prepare the New Line
Unwind approximately 15 to 25 feet of new trimmer line from the spool or package. Cut a clean edge using scissors or a utility knife. Some users cut two equal lengths and wind each side of the spool separately; others wind the full length as one piece. Both methods work, check your manual for preference. Readers comparing setup options can review our technical analysis on dyson v8 cyclone vs bissell featherweight stick.
Step 4: Wind the Line Onto the Spool
Inspect the spool for directional arrows indicating the correct winding direction, typically counterclockwise when viewed from above. Insert the line into the small notch or hole at the edge of the spool. Begin winding smoothly and evenly, keeping tension on the line to prevent loose wraps. Wind until approximately 4 to 6 inches remain unwound. The spool should feel snug but not overstuffed; overfilled spools jam and prevent proper feed.
Step 5: Secure the Line on the Spool
Most spools have small slots or notches on the outer rim designed to hold the line end during installation. Insert the unwound end into one of these slots to secure it temporarily. This prevents the line from unwinding while you reassemble the head. For complementary field maintenance guidelines, examine our breakdown of bissell crosswave hydrosteam vs shark stainforce.
Step 6: Reinstall the Spool in the Head
Lower the loaded spool back into the head housing, aligning the center post with the spool’s central hole. Press or twist the spool clockwise until it seats firmly. The spool should not wobble.
Step 7: Thread the Line Through the Guides
Locate the two line guides, small notches or eyelets on opposite sides of the head housing. Pull the line out of the retention slot and thread one end through one guide. Pull the other end through the opposite guide. Both ends should extend equally and symmetrically from the head. If using a single long line, the line naturally splits into two ends as it exits the guides.
Step 8: Cut the Line to Proper Length
Trim both line ends to approximately 4 to 6 inches each. Some users measure against the head’s perimeter or consult the manual for exact length. Uneven lengths reduce cutting efficiency. Use scissors or your trimmer’s integrated line cutter (if equipped) to cut cleanly.
Step 9: Reassemble and Test
Reinstall the head onto the shaft by aligning it with the shaft post and tightening the fastener securely. Plug in the trimmer (or refill fuel and check the engine) and test on low vegetation in a safe area. The line should feed smoothly when you tap the head on the ground. If line doesn’t feed, the spool may be overfilled or the line may be incorrectly wound; revisit step 4.
How to String a Fixed-Head or Automatic Trimmer
Fixed-head and automatic models use different mechanisms:
Fixed-Head Installation
Remove the trimmer head by unscrewing or unclipping it. Locate the pre-drilled holes or slots in the head (typically two or four). Cut two equal lengths of line (usually 12 to 18 inches each for a four-hole head). Insert one end of the first length into a hole and push it through until it exits the opposite side. Repeat with the second length through the remaining holes. Ensure all line is secure in the holes, some models have retaining clips or epoxy to prevent slipping. Cut excess line flush with the head’s perimeter. Reinstall the head and test.
Automatic Feed Installation
Follow the bump feed steps (1-9 above), but consult your manual for winding direction, as some automatic models wind clockwise instead of counterclockwise. Automatic feeds may also have different line capacities or spool designs. After reinstalling the head, test the automatic feed by holding the trimmer over grass and activating the feed mechanism (usually a switch or trigger) rather than bumping the head on the ground.
Common Mistakes to Avoid
- Winding in the wrong direction: If line doesn’t feed after stringing, winding direction is the most common culprit. Consult your manual or the arrows molded into the spool.
- Overfilling the spool: Too much line prevents the spool from rotating smoothly and causes jams. Fill until snug, not stuffed.
- Using incorrect line diameter: Using line thicker than specified can jam the head; line thinner than specified may not cut effectively. Check your manual.
- Leaving unequal line lengths: Uneven ends reduce cutting power and create imbalance. Trim both sides to the same length.
- Not securing the line during reassembly: If the line slips from the retention slot while you work, it can unwrap partially, requiring you to restart.
- Forgetting to remove the old line: Leaving fragments of old line on the spool reduces new line capacity and can cause tangling.
Troubleshooting After Stringing
Line Won’t Feed
If the line doesn’t advance when you tap the head on the ground, first ensure the spool is installed correctly and rotates freely. Check that the line is wound in the correct direction per your manual. If the line is wound correctly but still won’t feed, the bump feed mechanism inside the head may be worn or damaged; replacement may be necessary.
Line Tangles or Bunches
Tangling usually results from improper winding, loose wraps, overlapping loops, or line not lying flat on the spool. Unwind the line, inspect the spool for damage, and rewind carefully, maintaining even tension. Ensure wraps don’t cross or overlap.
Line Feeds Too Slowly or Too Quickly
Line feed speed is controlled by the bump feed mechanism and line tension, not winding technique. If feed speed is incorrect, check the manual for adjustment procedures (some trimmers have adjustable feed mechanisms) or consider replacing the spool or head.
Head Leaks Line Constantly
If line continuously advances without bumping, the bump feed mechanism may be stuck or faulty. Clean the head of debris and try reinserting the spool. If the problem persists, replacement is typically required.
Everything You Need to Know: How To String A Trimmer FAQ
What Diameter Trimmer Line Should I Use?
The correct diameter depends on your trimmer model and engine power. Most residential trimmers use 0.080 to 0.095-inch line. Check your trimmer’s manual, the packaging from the original line, or look for size markings on the head housing. Using the wrong diameter can reduce cutting efficiency or cause feeding problems.
How Often Should I Restring My Trimmer?
Restring when the line is visibly worn, frayed, or broken, or when you notice reduced cutting power. For frequent users, this may be every 1-2 weeks during the growing season. For occasional users, once per season often suffices. Some users restring before each mowing season as preventive maintenance.
Can I Use the Same Line on Multiple Trimmers?
Yes, as long as the diameter matches your trimmer’s specifications. Trimmer line is standardized by diameter, so 0.085-inch line works on any trimmer rated for that size. Always verify your trimmer’s manual or head housing before purchasing line.
Why Does My New Line Break Frequently?
Frequent breakage usually results from striking hard objects (rocks, roots, or concrete). However, if breakage occurs even in grass, check that the line diameter matches your trimmer’s specification, undersized line is weaker and breaks more easily. Also ensure the spool is wound evenly without kinks or weak spots.
Safety Reminders
- Always turn off and unplug the trimmer before removing the head.
- Allow the engine to cool if recently used.
- Wear gloves when handling fresh-cut trimmer line edges, which can be sharp.
- Test the trimmer briefly in a safe, open area away from people, pets, and property before resuming normal use.
Technical Standards and Compliance
Mechanical safety standards, operational tolerances, and protective gear guidelines align with benchmark specifications established by the American National Standards Institute (ANSI).









