

Quick Answer: How To Take Lawn Mower Tire Off?
To take a lawn mower tire off, start by disconnecting the spark plug and securing the mower so it cannot roll. Lift the mower using a jack or blocks to access the wheel. Determine whether the wheel is attached with a bolt, lug nut, or a cotter pin and clip. Remove the fastener with the correct socket or wrench, then…

Pros
- Broad compatibility covering rim sizes from 4 to 16.5 inches
- Integrated manual bead breaker separates beads without shop air
- Reinforced rectangular steel base enhances operational stability
- Adjustable locking collar secures wheels during service
Cons
- Heavy 66-pound unit is cumbersome to transport or store
- Full manual operation requires significant physical effort

Pros
- Screw-driven foot unseats beads without needing heavy shop presses
- Works on equipment wheels while still mounted when clearance allows
- Compatible with standard hand wrenches and air ratchets
- Includes a pair of work gloves for added convenience
Cons
- Cannot be used with impact wrenches
- Only breaks beads; demounting spoons are required to remove tires

Pros
- Complete 3-piece set includes a bead breaker and two tire spoons
- Durable carbon steel build withstands tough mechanical stress
- Rounded spoon tips help safeguard rims against scratching
- Versatile fit for motorcycles, lawn mowers, and utility equipment
Cons
- Manual lever design requires significant user strength for stiff beads
Preparing the Mower for Tire Removal
Before you begin, gather the right tools and take a few safety precautions. Proper preparation makes the job easier and helps prevent injury or damage to the mower.
Safety Steps Before You Begin
Disconnect the spark plug wire first. This prevents the engine from accidentally starting while you work near the blade or moving parts. If you are working on a riding mower, remove the ignition key as an extra precaution. Wear sturdy work gloves to protect your hands from sharp edges and grease, and use safety glasses if you will be prying on the tire or rim.
How to Lift and Support the Mower Safely
To access the wheel, you need to lift the mower off the ground. Use a floor jack or a set of sturdy jack stands rated for the weight of your mower. Never rely on a cinder block or an unstable stack of objects to support the mower while you work underneath it. Place the jack under a solid frame point, not under the deck or a plastic housing. Once lifted, set the mower on jack stands and give it a gentle shake to confirm it is stable before you begin. For push mowers, you can often tip the mower onto its side, but check the owner’s manual first, as some models require the carburetor side to face up to avoid oil or fuel leaks.
Determining the Wheel Attachment Type
Before removing the wheel, identify how it is attached to the axle. The method varies between push mowers and riding mowers, and even between models.
How to Tell If Your Wheel Is Bolted On or Held by a Clip
Look at the center of the wheel where it meets the axle. Some wheels are held by a single bolt or nut in the center, which you can remove with a socket or wrench. Others use a cotter pin and a retaining clip that slides over the axle. If you see a small pin through a hole in the axle, it is likely a cotter pin setup. Remove the pin and the clip, then slide the wheel off. On some push mowers, the wheel is held by a plastic cap or a spring clip that you can pry off with a flathead screwdriver.
Push Mower vs. Riding Mower Wheel Attachments
Push mower wheels are often smaller and may use a simple cotter pin, a clip, or a single bolt. Riding mower wheels are typically larger and are usually secured with lug nuts or bolts, similar to a car. Riding mower front wheels may use a spindle and a bolt, while rear wheels often have multiple lug nuts. Knowing your mower type helps you choose the right tools and approach. If you are unsure, consult your owner’s manual for the specific attachment method.
Removing the Wheel from the Mower
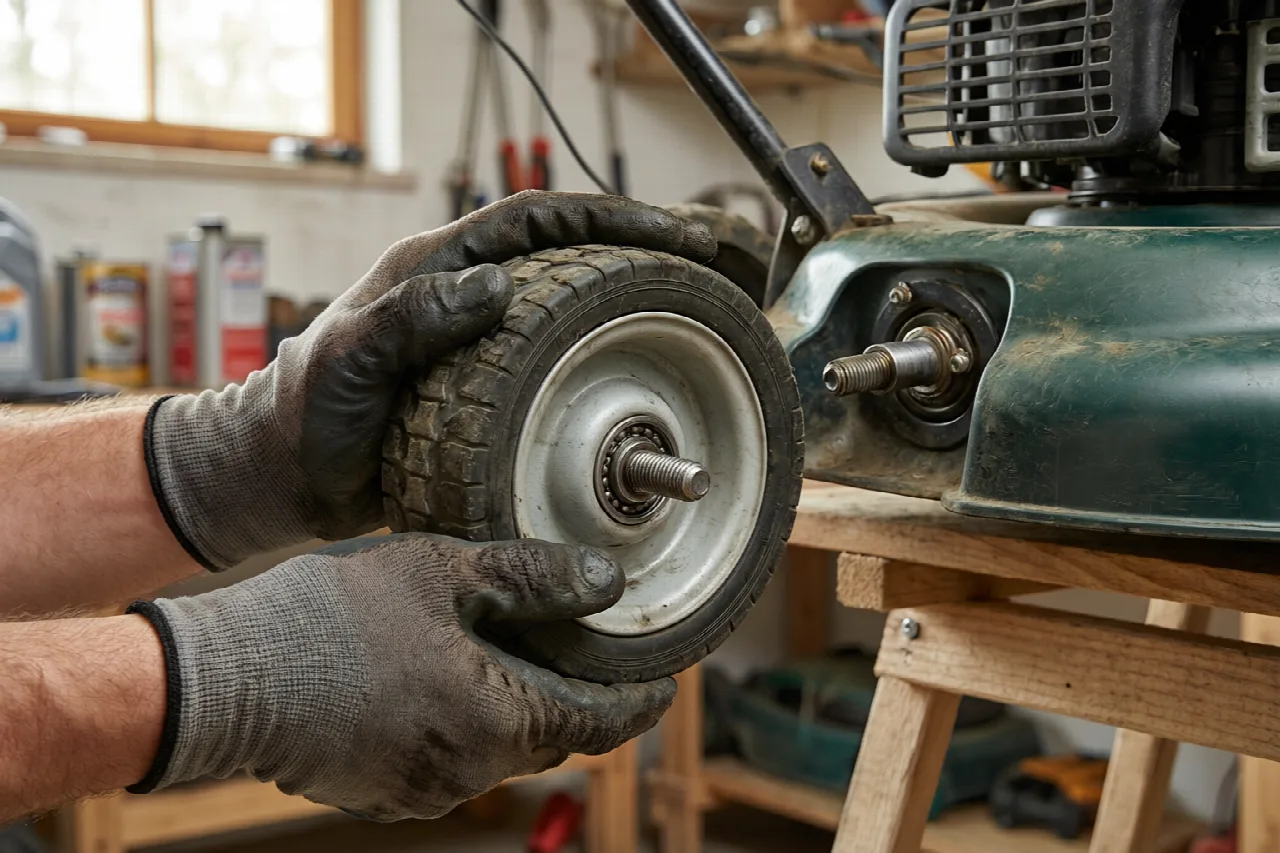
Once the mower is supported and you know the attachment type, you can remove the wheel. The process is straightforward but requires the correct tools.
How to Remove the Axle Bolt or Hub
If the wheel is held by a center bolt or nut, use the correct socket or wrench to loosen it. Turn the fastener counterclockwise to loosen. If it is tight, apply penetrating oil and let it sit for a few minutes before trying again. On riding mowers, you may need to remove a hub cap to access the lug nuts underneath. For rear wheels on riding mowers, you may need to remove multiple lug nuts. Keep the removed fasteners in a safe place so you do not lose them. For complementary field maintenance guidelines, examine our breakdown of marshall stanmore iii vs harman kardon onyx studio 8.
How to Pull the Wheel Off the Axle
After removing the fastener, grasp the wheel with both hands and pull it straight off the axle. If the wheel is stuck, do not force it with excessive force, as this can damage the axle or wheel. Gently rock the wheel back and forth while pulling to break it free. On some riding mowers, the rear wheel may be keyed to the axle and require a puller tool to remove. If you encounter this, you may need a wheel puller or professional assistance.
Removing the Tire from the Rim
If your goal is to replace the tire itself, you will need to separate the tire from the rim. This requires a bit more effort and the right tools. To evaluate matched hardware tolerances, consult our detailed overview of dyson v8 cyclone vs bissell featherweight stick.
How to Deflate the Tire and Break the Bead
First, remove the valve stem cap and press the valve core to release all the air from the tire. Once the tire is fully deflated, you need to break the bead, which is the edge of the tire that seals against the rim. Place the tire flat on the ground and press down on the sidewall near the rim edge, or use a tire bead breaker tool if you have one. A pry bar or a large flathead screwdriver can also be used to push the bead away from the rim. Work around the entire circumference of the tire until the bead is loose on both sides.
How to Pry the Tire Off the Rim
With the bead broken, insert a tire pry bar between the tire and the rim. Pry the tire edge up and over the rim lip, working your way around the wheel. Use a second pry bar to hold the section you have already lifted while you move to the next section. Be careful not to pinch your fingers between the tire and the rim. Once one side of the tire is off the rim, you can push the tire down and work the other side off. This process can be labor-intensive, so patience is key. When planning workspace deployment, consider the engineering criteria outlined in our bissell crosswave hydrosteam vs shark stainforce guide.
Common Problems and Fixes
Even with the right approach, you may run into a stuck wheel or a rusted fastener. Here are some common issues and how to handle them.
What to Do If the Wheel Won’t Come Off the Axle
If the wheel will not slide off the axle, it may be rusted or corroded in place. Apply a penetrating oil around the axle and let it soak for 15 to 30 minutes. Then try rocking the wheel back and forth while pulling outward. On riding mowers, the rear wheel may be splined to the axle, and corrosion can make it very difficult to remove. In this case, a wheel puller tool is often necessary. If you do not have one, a professional may be able to remove it without damaging the axle.
How to Handle a Rusted or Stuck Fastener
For a rusted bolt or lug nut, apply penetrating oil and let it sit before attempting to loosen it. Use a six-point socket rather than a twelve-point one, as it grips the fastener better and is less likely to round off the corners. If the fastener is still stuck, you can apply heat with a propane torch, but do so carefully and keep flammable materials away. As a last resort, you may need to use a breaker bar for extra leverage. If the fastener is badly rounded, a bolt extractor or professional help may be required.
Related Maintenance and Operating Guides
To keep your equipment running at peak operating efficiency, explore our related technical walkthroughs and maintenance tutorials:
- Consult our detailed breakdown on heavy-duty chainsaw buyer guide.
- Consult our detailed breakdown on durable ride-on lawn tractor guide.
Technical Standards and Compliance
Mechanical safety standards, operational tolerances, and protective gear guidelines align with benchmark specifications established by the American National Standards Institute (ANSI).









