Direct Answer: How to Winterize a Lawn Mower
Winterizing a lawn mower prepares the engine and components for dormancy by stabilizing or draining fuel, changing the oil, servicing the spark plug and air filter, cleaning the blade, and storing the mower in a dry, climate-controlled location. For gas-powered mowers, the most critical step is fuel treatment—either adding stabilizer to fuel that will sit in the tank or draining the tank completely—to prevent gum and varnish buildup that clogs carburetors. The full process takes 30 minutes for basic winterization (fuel treatment + storage) or 2+ hours for thorough maintenance (oil change, spark plug inspection, blade cleaning, detailed inspection).
Why Winterize Your Lawn Mower?
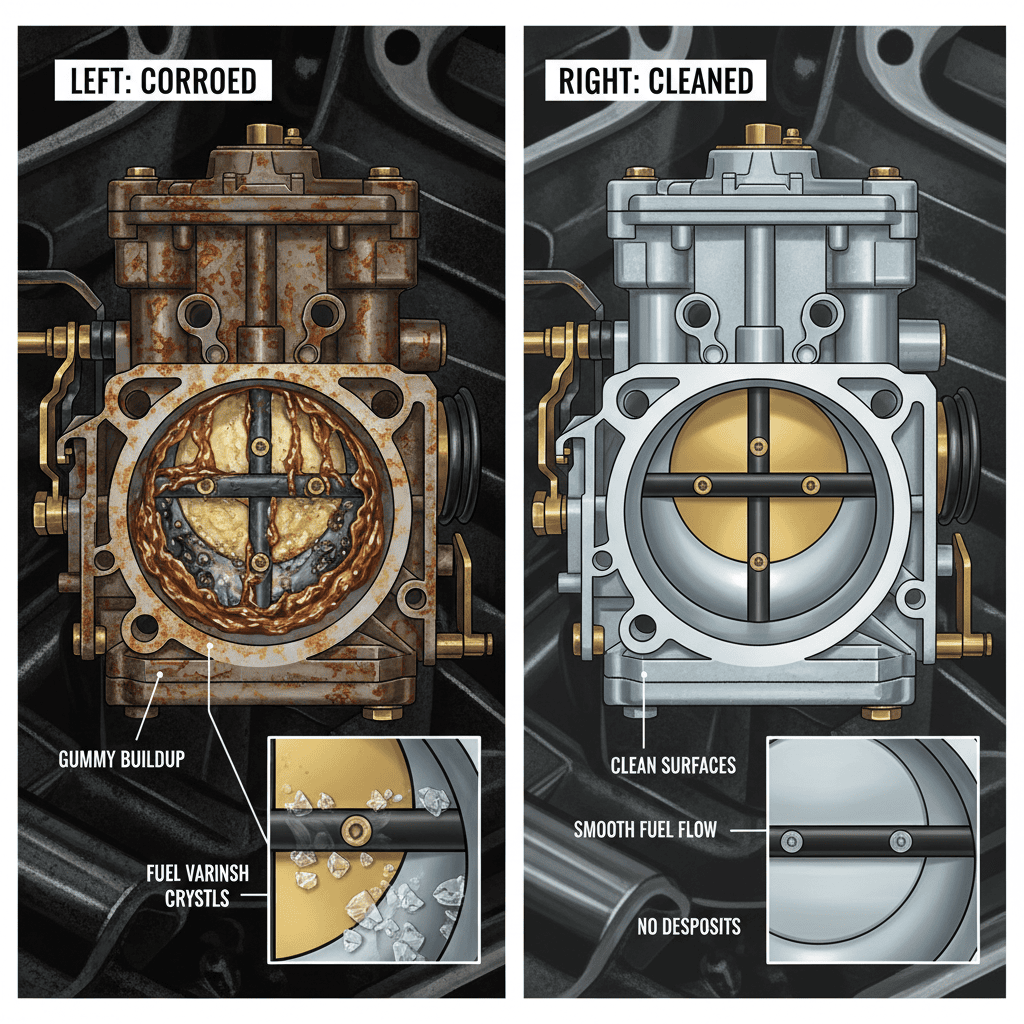
Skipping winterization causes preventable damage that emerges when you try to start the mower in spring. Untreated gasoline left in the tank degrades over winter months, forming sticky gum and varnish deposits that clog the carburetor, fuel injectors, and fuel lines. This buildup makes the engine difficult or impossible to start and can require costly carburetor cleaning or replacement. Stale fuel also corrodes internal engine components and can damage the fuel system if the mower sits unused for 4+ months.
Beyond fuel issues, old oil left in the engine over winter accumulates acids and moisture that corrode pistons, cylinders, and other metal surfaces. Exposed metal surfaces on the blade and deck rust without protection. Dirty air filters and spark plugs reduce engine efficiency when restarted. Proper winterization takes a few hours now but prevents hundreds of dollars in repair bills and weeks of downtime when spring arrives.
When to Winterize: Timeline and Triggers
Winterize your mower before the first hard freeze in your region and ideally after the last mow of the season. In most of the United States, this window falls between September and November, depending on your climate zone:
- Northern regions (zones 3–5): Winterize in late September or early October, before the first hard freeze (below 28°F / -2°C).
- Temperate regions (zones 6–7): Winterize in October or early November, after several weeks of dormant or minimal mowing.
- Mild climates (zones 8–10): Winterize in November or December, or if the mower will sit unused for 4+ months, even if mowing continues intermittently.
Don’t wait until the day snow arrives. Cold temperatures, high humidity, and wet conditions make outdoor winterization work uncomfortable and create poor conditions for fuel mixing and engine oil draining. Complete winterization on a dry day with temperatures above 50°F (10°C).
Key trigger: If your mower will sit unused for more than 30 days, winterization is necessary regardless of season. Even summer storage for 4+ weeks benefits from fuel stabilization.
Pre-Winterization Inspection: What to Check
Before beginning winterization, spend 10 minutes inspecting your mower to identify any maintenance needs:
- Check oil level and condition: Pull the dipstick or oil level plug and note the color. Fresh oil is amber or brown; dark or black oil indicates it’s due for a change. If the oil level is low, top it off before running the engine to assess the full condition.
- Inspect the spark plug: Remove the spark plug wire (or on modern mowers, follow the manual) and unscrew the spark plug. Look for deposits, corrosion, or wear. A dark or fouled plug suggests carburetor issues or oil fouling. A worn plug (gap too wide, damaged electrode) should be replaced.
- Check the air filter: Open the air filter cover and inspect the filter element. A dust-caked or dark filter reduces engine efficiency and should be cleaned or replaced before storage.
- Examine the blade: With the spark plug removed (to prevent accidental starting), tip the mower carefully on its side and inspect the blade for rust, dents, or significant dullness. Note any debris wrapped around the shaft.
- Look for fuel leaks: Inspect the tank, fuel line, and carburetor bowl for cracks or seeping fuel. Address leaks before adding fresh fuel.
- Run the engine briefly: If the mower has been unused for several weeks, run it for 5–10 minutes to warm the oil and assess starting and performance. This also preps the engine for fuel treatment.
Fuel Treatment: Stabilization vs. Drainage
The fuel system is the most critical winterization focus. You have two primary approaches:
Option 1: Fuel Stabilizer (Recommended for Most Users)
Fuel stabilizer is a chemical additive that slows fuel oxidation, preventing gum and varnish formation. This approach is ideal if you want to keep fuel in the tank without hassle.
How to use fuel stabilizer:
- Purchase a quality fuel stabilizer (Sta-Bil, PRI-G, or equivalent) at any hardware or outdoor equipment store.
- If the tank is more than half full, drain fuel until it’s at the half-full mark (optional but recommended to reduce the volume of treated fuel needed).
- Fill the tank with fresh gasoline (preferably ethanol-free 91–93 octane if available, as ethanol can absorb moisture over winter).
- Add the stabilizer according to the bottle’s instructions—typically 1 ounce per gallon of fuel. For a 2-gallon tank, add 2 ounces.
- Run the engine for 5–10 minutes to distribute the stabilizer throughout the fuel system and carburetor.
- Turn off the engine and allow it to cool.
Effectiveness: Properly stabilized fuel can remain in the tank for 12–24 months without degrading significantly. Stabilizer does not restore already-gummed fuel; it only prevents future gum formation.
Option 2: Fuel Drainage (Most Thorough)
Draining the fuel tank and carburetor completely eliminates the risk of fuel-related damage but requires more effort and precision.
How to drain fuel:
- Run the engine until it’s nearly out of fuel and stalls (this empties most of the tank).
- Turn off the engine and allow it to cool for 15 minutes.
- Locate the fuel drain plug or valve (consult your mower’s manual; not all models have this feature). On some push mowers, you may need to tip the mower to drain the tank into a container.
- Place a container underneath and slowly open the drain to release fuel. Gasoline is flammable; work outdoors and away from ignition sources.
- Once the tank is empty, close the drain and dispose of the fuel properly at a hazardous waste facility or gas station.
- To drain the carburetor, locate the carburetor bowl (usually at the bottom of the carb) and unscrew the drain plug or bolt. Fuel will drip out; catch it in a container.
- Leave the tank and carburetor empty during storage. Before spring startup, refill with fresh fuel.
Benefit: This approach eliminates all stale fuel and is the most reliable way to prevent carburetor clogs. It’s especially recommended for riding mowers or mowers that will sit for 6+ months.
Ethanol vs. Ethanol-Free Fuel
Most gasoline sold in the U.S. contains 10% ethanol (E10), which absorbs moisture and can gum up carburetors faster than pure gasoline. For winterization, ethanol-free fuel (available at some gas stations and outdoor equipment dealers) is preferable because it’s more stable during long storage. If you use stabilized ethanol-blend fuel, ensure your stabilizer is formulated for ethanol blends (most modern products are).
Oil Change: Fresh Oil Protects Dormant Engines
Old engine oil left in the mower over winter absorbs moisture and forms acids that corrode internal engine components. Changing the oil before storage is one of the highest-value winterization steps.
How to change oil:
- Warm the engine: Run the mower for 5 minutes to warm the oil (warm oil drains more completely and carries contaminants better than cold oil).
- Turn off and cool: Stop the engine and let it cool for 5 minutes.
- Access the drain plug: Consult your manual to locate the oil drain plug (typically underneath or on the side of the engine). Place a container underneath.
- Remove the plug and drain completely: Slowly unscrew the drain plug and let all oil drain into the container. This may take 2–3 minutes. Dispose of old oil at a recycling center or auto parts store (many accept used oil for free).
- Replace or clean the oil filter (if equipped): Some mowers have spin-on or cartridge-style oil filters. If your model has one, replace it per the manual.
- Reinstall the drain plug: Screw the drain plug back in gently; do not over-tighten. Wipe away any spilled oil.
- Add fresh oil: Locate the oil filler cap (usually on top or side of the engine). Remove it and slowly pour in the recommended oil type and weight (check your manual; most small engines use SAE 30 or 10W-30). Fill until the oil reaches the maximum line on the dipstick or level indicator.
- Run the engine: Start the mower and let it run for 1–2 minutes to circulate the new oil. Turn it off and check the level again after 5 minutes; top off if needed.
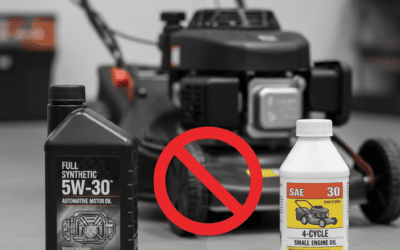
Oil type: Always use the oil weight specified in your mower’s manual. For most push mowers and small riding mowers, this is SAE 30 (single-weight) or 10W-30 (multi-weight). For mowers used in very cold climates, 0W-30 or 5W-30 provides better cold-start flow. Do not use automobile motor oil; small-engine oils are formulated differently and are required.
Oil change frequency: If you’ve changed the oil during the season (typically recommended every 50 hours of operation or annually), a final change before winter storage tops off good maintenance. If you skipped season-end maintenance, winterization is the time to do it.
Spark Plug and Air Filter Maintenance
Spark plug inspection and replacement:
- Remove the spark plug wire or boot by gently twisting and pulling (do not yank the wire itself).
- Unscrew the spark plug using a spark plug socket.
- Examine the spark plug for carbon deposits, oil fouling, or wear. A new plug is shiny with a slight gap; a worn plug has eroded electrodes or a black, crusted appearance.
- If the plug is fouled or worn, replace it with an exact match (check your manual for the part number). Gap the new plug to the manufacturer’s specification (typically 0.028–0.032 inch) using a gap tool if needed.
- If the plug is only moderately dirty, clean it with a soft brush or wire brush, but replacement is safer.
- Reinstall the spark plug, hand-tightening first, then using the socket wrench to snug it (not overly tight). Reconnect the wire boot, pressing until it clicks or seats fully.
Why replace before storage: A fouled or worn spark plug causes hard starting and poor engine performance in spring. A new plug is inexpensive ($5–15) and ensures reliable startup after winter dormancy.
Air filter cleaning:
- Locate the air filter cover (usually a plastic or metal box on top of or to the side of the engine).
- Remove the cover by unclipping or unbolting it.
- Pull out the filter element (foam or paper). If it’s paper, tap it gently on a hard surface to dislodge dust, or use compressed air (avoid pressing the air stream directly into the filter, which forces dust deeper into the media). If it’s foam, rinse it gently under cool water and squeeze out excess moisture—do not wring it.
- If the filter is heavily soiled, compacted, or damaged, replace it with a new one (typically $10–20).
- Reinstall the clean or new filter and secure the cover.
A clean air filter improves spring startability and engine efficiency.
Blade Cleaning and Preparation
The blade is exposed to moisture, dirt, and salt (in northern regions) during storage. Cleaning and protecting it prevents rust and preserves blade life.
How to clean and protect the blade:
- Disconnect the spark plug wire to prevent accidental starting (this is critical for safety).
- Tip the mower carefully: Tilt the mower on its side to access the blade. Note which side the carburetor is on and tip away from it (to prevent oil from draining into the carburetor). On rear-wheel-drive push mowers, tip toward the handle. For riding mowers, consult the manual for the proper tipping direction.
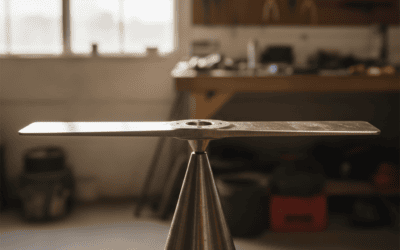
- Scrape away dried grass and caked-on material: Use a plastic scraper or wooden dowel to remove buildup. Do not use a metal tool, which can dull the blade.
- Wash the blade with a hose: Rinse away remaining debris and allow to dry completely.
- Inspect for damage: Look for cracks, deep dents, or significant dulling. Minor dullness is normal; severe dulling or damage warrants replacement before storage.
- Apply a light coat of oil or rust preventative: Wipe a thin layer of machine oil, 3-in-1 oil, or a spray lubricant (like WD-40) on the blade and underside of the deck to prevent rust. Do not over-apply; excess oil attracts dust.
- Return the mower to upright position.
Blade sharpening: If the blade is dull, you can sharpen it before storage or in spring before first use. Some users prefer sharpening before storage so the mower is ready to go in spring. Sharpen using a hand file or angle grinder, maintaining the original blade angle (typically 30–45 degrees). Keep the blade balanced—if one side is noticeably heavier than the other, it will cause vibration and uneven cutting. After sharpening, re-apply rust preventative oil to the blade.
Storage Location and Environmental Conditions
Where you store the mower directly impacts how well it survives the winter and how easily it starts in spring.
Ideal Storage Conditions
- Location: An unheated garage, shed, or pole barn is ideal. These provide protection from moisture, UV light, and extreme temperature swings without exposing the mower to heat that can degrade fuel and oil.
- Temperature: Stable temperatures between 32°F and 60°F (0–15°C) are optimal. Extreme cold is less damaging than freeze-thaw cycles, which cause condensation inside fuel tanks and carburetors.
- Humidity: Dry conditions are essential. High humidity leads to rust and corrosion. If your storage space is damp (a basement with a dehumidifier or a barn prone to moisture), place desiccant packs (silica gel) inside the mower’s air filter housing or near the fuel tank.
- Avoid outdoor storage: Tarping a mower outdoors exposes it to moisture from condensation, freeze-thaw cycles, and UV degradation. If outdoor storage is your only option, use a breathable cover (not plastic, which traps moisture) and elevate the mower on blocks to allow airflow underneath.
Storage Preparation
- Clean the mower: Remove grass clippings, dirt, and debris from the deck, underneath the mower, and around the engine. Trapped moisture and dirt accelerate rust.
- Cover the mower: Use a light, breathable cotton or canvas cover. Avoid plastic tarps, which trap moisture and can cause condensation.
- Elevate the mower: Place wood blocks or pallets underneath to lift the mower off the floor, allowing air circulation and preventing moisture from pooling underneath.
- Top off the fuel tank (if using stabilizer): A full tank reduces the air space inside the tank, which slows oxidation of the treated fuel.
Winterization by Mower Type
Gas-Powered Push Mowers
Push mowers are the most common and follow the standard winterization steps outlined above: fuel treatment, oil change, spark plug service, blade cleaning, and dry storage. The main consideration is fuel drainage, as small tanks are prone to fuel gumming. If using stabilizer, run the engine afterward to distribute it through the carburetor.
Riding Mowers and Zero-Turn Mowers
Larger machines benefit from more thorough maintenance before storage:
- Change the oil and replace the oil filter (if equipped).
- Change or clean the air filter.
- Inspect and service or replace spark plugs (riding mowers may have multiple plugs).
- Drain the fuel tank completely or use stabilizer; riding mower tanks are larger and more prone to long-term fuel degradation.
- Check the battery (if electric-start): Disconnect the battery terminal or remove the battery entirely and store it in a cool, dry place indoors. Cold temperatures and inactivity can discharge batteries; storing indoors helps preserve charge.
- Inspect belts and hoses for wear or cracks; note any that need replacement in spring.
- Sharpen and oil the deck blades (riding mowers typically have multiple blades).
- Clean the deck thoroughly; caked-on grass and debris trap moisture.
Electric and Battery-Powered Mowers
Electric mowers (corded or battery-powered) have minimal winterization needs compared to gas mowers:
- Remove and store the battery: Lithium-ion batteries are damaged by cold temperatures and deep discharge. Remove the battery and store it indoors at room temperature. Charge it to 50% capacity before storage (not fully charged or fully depleted) to maximize longevity.
- Clean the deck and blades: Rinse and dry thoroughly; apply light oil to blade surfaces to prevent rust.
- Inspect for damage: Check the power cord (if corded), charging port, and motor housing for damage.
- Store indoors: Keep electric mowers in a dry, temperature-stable location. Extreme cold or humidity degrades electronics and batteries.
Electric mowers do not require fuel treatment, oil changes, or spark plug service, making them much lower-maintenance for winter storage.
Robotic Mowers
Robotic mowers are usually stored indoors over winter since they operate during the growing season and do not tolerate freezing temperatures:
- Clean the undercarriage and blades thoroughly.
- Inspect blades for wear and replace if needed.
- Remove the battery and store it indoors (follow manufacturer guidance for long-term battery storage).
- Store the charging dock and base station indoors as well.
- Check the manufacturer’s manual for any seasonal storage recommendations specific to your model.
Spring Startup: Reversing Winterization
After winter storage, prepare your mower for the new mowing season:
- Reconnect the battery (riding mowers): If you removed and stored the battery, recharge it fully before reconnecting to the mower.
- Check the oil: Verify the oil level is full and the oil color is acceptable. If the oil is dirty, perform another oil change.
- Remove the spark plug and inspect: If the plug was replaced before storage, it should be clean. If issues arise during startup, replace again.
- Check fuel: If you drained the fuel tank, refill with fresh gasoline. If you used stabilizer and left fuel in the tank, the fuel should be usable; start the mower to verify.
- Prime the engine (small engines): Some mowers have a primer bulb. If the engine doesn’t start immediately, squeeze the primer bulb 3–5 times to help fuel reach the carburetor.
- Attempt startup: Pull the recoil cord or press the electric starter. The engine may run roughly for 30 seconds as it clears the fuel system; this is normal. Let it run for 2–3 minutes to warm up.
- If the engine won’t start: Confirm the fuel shut-off valve (if equipped) is open, the choke is engaged, and the spark plug wire is fully seated. If problems persist, the carburetor may be clogged despite winterization efforts; a professional may be needed for cleaning.
- Test operation: Run the mower for 5–10 minutes at half throttle, then full throttle, to ensure it’s operating smoothly before mowing.
Frequently Asked Questions
Q: Can I leave my gas mower in the garage all winter without winterizing it?
A: You can, but you risk fuel degradation, carburetor clogs, rust, and a mower that won’t start in spring. Even in a heated garage, untreated gasoline left in the tank for 3+ months forms gum and varnish. Winterization takes a few hours and prevents weeks of frustration and potential repair costs.
Q: Do I need to use fuel stabilizer if I’ve completely drained the fuel tank?
A: No. If the tank and carburetor are completely empty, stabilizer is unnecessary. However, completely draining requires access to a carburetor drain valve, which not all mowers have. For most homeowners, stabilizer is simpler and more practical.
Q: Is it okay to store my mower outside if I cover it?
A: Outdoor storage is not ideal, even with a cover. Breathable covers help, but outdoor mowers still experience freeze-thaw cycles, condensation, and UV exposure. If indoor storage is unavailable, use a ventilated shed or overhang rather than exposed outdoor storage. Elevate the mower on blocks and use desiccant packs inside the air filter to reduce moisture.
Q: How often should I change the oil before winterization if I’m a casual mower?
A: If you’ve been mowing all season (10+ uses), perform an oil change before storage. If you mow only a few times per season, a single oil change in spring before winterization is sufficient—though winterization is a good time to do it if you haven’t already. Most small engines benefit from an annual oil change, ideally at season’s end.
Winterization Checklist
| Task | Timeframe | Notes |
| Inspect mower and engine | Day 1, before starting | Check oil, spark plug, air filter, fuel system for leaks |
| Clean and prepare blade | Day 1 | Remove grass, inspect for damage, apply rust preventative |
| Change or service oil | Day 1–2 | Warm engine first; use correct oil weight per manual |
| Service spark plug | Day 1–2 | Clean or replace; gap new plug per spec |
| Clean air filter | Day 1–2 | Replace if heavily soiled; improves spring startup |
| Treat fuel with stabilizer or drain tank | Day 1–2 | Stabilizer: fill tank, add per ratio, run engine 10 min. Drainage: drain tank and carburetor bowl |
| Clean the mower deck | Day 1–2 | Remove grass and debris; dry thoroughly |
| Store in dry location | Day 2–3 | Use breathable cover; elevate on blocks; stable temperature 32–60°F preferred |
| Disconnect battery (if riding mower) | Day 2–3 | Store battery indoors at room temperature |
Key Takeaways
- Winterization prevents fuel gumming, rust, and engine corrosion during storage. The process takes 30 minutes to 2+ hours depending on thoroughness.
- Fuel treatment is the most critical step: use stabilizer or drain the tank completely to prevent carburetor clogs.
- Change the oil and service the spark plug and air filter before storage for reliable spring startup.
- Clean the blade and deck, apply rust preventative oil, and store the mower in a dry, climate-controlled location.
- Electric mowers require minimal winterization beyond battery removal and indoor storage; robotic mowers should be stored indoors entirely.
- Riding mowers benefit from more thorough maintenance: oil and filter changes, spark plug service, complete fuel treatment, and battery storage.
- Prepare for spring by checking all fluids, reconnecting batteries, and attempting startup in a safe location before regular mowing.