

Quick Answer: How to Winterize a Riding Lawn Mower
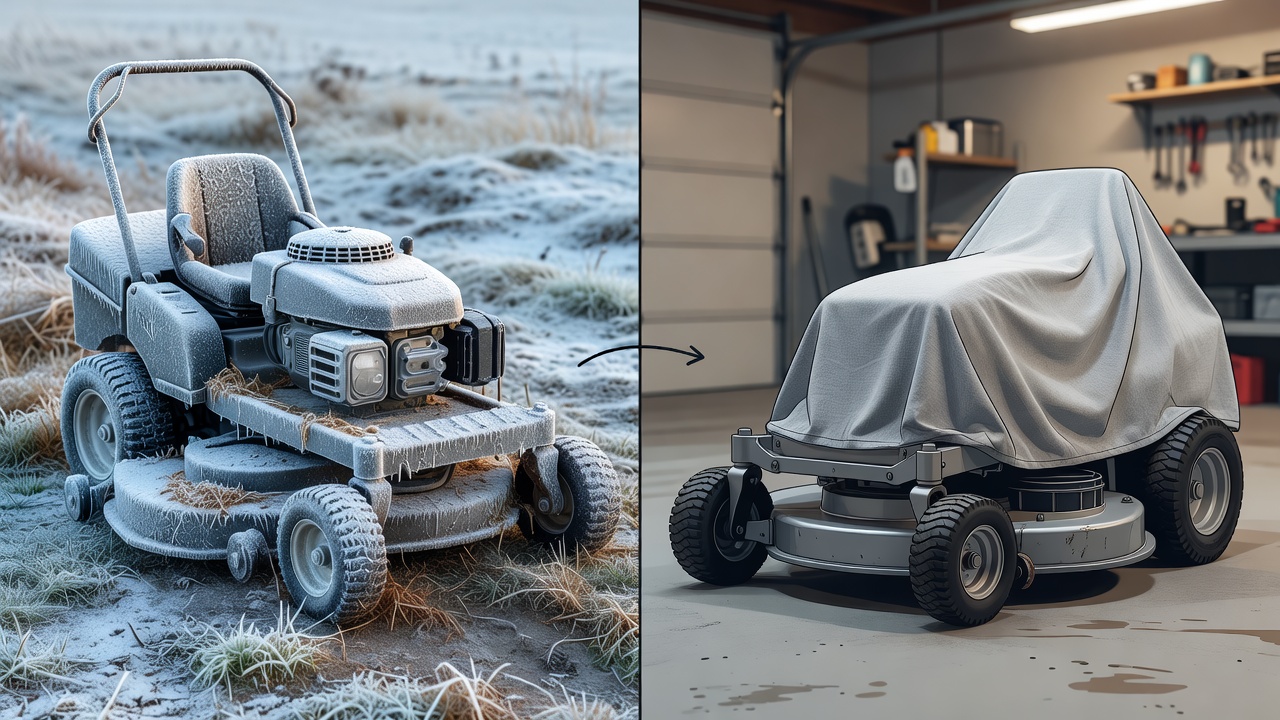
To winterize a riding lawn mower: add fuel stabilizer to a full tank or drain the fuel system completely; change engine oil while warm; remove and inspect the blades; replace the air filter and spark plug(s); disconnect the battery and store it indoors with a trickle charger if lead-acid; clean the mower deck; check tire pressure; then cover and store in a dry, protected space. The entire process takes 1.5–3 hours depending on mower size and condition.
Why Winterizing a Riding Lawn Mower Differs from a Push Mower
Riding lawn mowers require winterization steps that push mowers do not because they contain larger engines, lead-acid or lithium-ion batteries, fuel tanks with higher vapor pressure, and hydraulic or belt-driven transmission systems. A riding mower‘s engine sits idle for months, accumulating moisture in the oil and corrosion on internal surfaces. The fuel tank—often holding 2–4 gallons—develops phase separation when ethanol-blended gasoline (E10 or E15) degrades, leaving gum and varnish that clog the carburetor. The battery, if left connected, self-discharges over winter and may suffer sulfation damage, permanently reducing capacity. Push mowers, by contrast, have smaller engines, no battery, and simpler fuel systems that recover more easily from neglect. Winterizing a riding mower protects a significantly larger investment—typically $2,000–$8,000—and ensures it restarts reliably every spring without costly repairs.
What You’ll Need: Tools and Supplies Checklist
Gather these items before you start to avoid mid-task stops:
- Fuel stabilizer (e.g., Sta-Bil, Marvel Mystery Oil) or a plan to drain the fuel tank
- Engine oil in the correct viscosity per your owner’s manual (typically SAE 30 or 10W-30)
- Oil drain pan and oil filter wrench (if your mower has a cartridge filter)
- Fresh spark plug(s) and gap tool (correct gap specified in owner’s manual)
- New air filter (paper or foam, model-specific)
- Socket set and wrenches for blade removal
- Wire brush or deck scraper for cleaning
- Grease gun and multi-purpose grease for lubrication
- Battery tender or trickle charger (for lead-acid or AGM batteries)
- Tire pressure gauge and air pump
- Breathable mower cover (optional but recommended for outdoor storage)
- Baking soda and water for battery terminal cleaning
Step 1: Make the Fuel Decision—Stabilize or Drain
This is the highest-stakes winterization choice. You have two valid strategies: To compare alternative configurations, check our hands-on review of jbl partybox club 120 vs sony srs xv500.
Strategy A: Add Fuel Stabilizer (Recommended for Standard Winter Storage) To compare alternative configurations, check our hands-on review of jbl partybox club 120 vs sony srs xv500.
Fill the fuel tank completely, then add fuel stabilizer per product instructions (typically 1 ounce per 5 gallons). Run the engine for 10–15 minutes at moderate throttle to circulate stabilized fuel through the carburetor, fuel lines, and injectors. This protects the fuel system from oxidation and prevents gum formation. Stabilizer is ideal if you plan to store the mower for 30–90 days or use ethanol-blended fuel (E10 or E15), which can phase-separate and leave deposits within 30 days. Users looking for related component recommendations can explore our z890 vs x870e motherboard breakdown.
Strategy B: Drain the Fuel Tank (Best for Extended Storage or Non-Ethanol Fuel)
Run the mower until the fuel tank is nearly empty, then allow the engine to consume the remaining fuel naturally until it stalls. This prevents stale gasoline from sitting in the carburetor and fuel lines. If you prefer to drain completely, locate the fuel shutoff valve (if equipped) or use a fuel siphon to empty the tank and lines. This method is safest for mowers stored 90+ days and eliminates the need for stabilizer, but leaves some residual fuel in the carburetor that may still gum slightly. Users looking for related component recommendations can explore our z890 vs x870e motherboard breakdown.
Why This Matters: Ethanol-blended gasoline absorbs water over time and can separate into layers, leaving varnish deposits that block fuel passages. According to the EPA and fuel industry data, E10 gasoline can degrade in as little as 30 days under storage conditions. Older carburetors are especially vulnerable. Check your owner’s manual—some manufacturers (e.g., John Deere, Briggs & Stratton) specify one method over the other for your particular model.
Step 2: Change the Engine Oil
Used engine oil contains combustion byproducts and moisture that accelerate internal engine corrosion during months of dormancy. Changing the oil before storage removes these contaminants and leaves fresh, clean oil to protect bearing surfaces. Before finalizing equipment decisions, refer to our comprehensive marshall stanmore iii vs harman kardon onyx studio 8 comparison.
How to Change Riding Mower Oil:
- Warm the engine by running it for 2–3 minutes so oil flows freely.
- Turn off the engine and allow it to cool for 5 minutes.
- Locate the oil drain plug underneath the mower deck (consult your owner’s manual for exact location).
- Place an oil drain pan beneath the plug and remove it using a socket wrench.
- Allow all oil to drain for at least 10 minutes.
- Wipe the drain plug clean and reinstall it, torqued snugly (typically 20–30 ft-lbs; check your manual).
- Locate the oil filter (if equipped) and unscrew it by hand, turning counterclockwise. Dispose of the old filter properly.
- Install the new filter hand-tight, then rotate it an additional three-quarter turn.
- Refill the engine with the correct oil type and quantity (typically 1.5–2 quarts; verify in your owner’s manual).
- Start the engine briefly to circulate fresh oil, then turn off and wait 2 minutes.
- Check the dipstick or sight glass to confirm oil level is full.
Oil Viscosity: Use SAE 30 for warm climates or 10W-30 (multigrade) for regions with cold winters, unless your owner’s manual specifies otherwise. Never overfill; excess oil foams, loses cooling efficiency, and can leak from seals. For broader ecosystem context, read through our operational guide on dyson v8 cyclone vs bissell featherweight stick.
Step 3: Remove, Inspect, and Service the Mower Blades
Winter is the ideal time to service blades while the mower is idle, ensuring it is ready for spring.
Safe Blade Removal: For troubleshooting and reliability insights, consult our in-depth bissell crosswave hydrosteam vs shark stainforce report.
- Disconnect the spark plug wires to prevent accidental engine start.
- Tip the mower deck on its side (check your owner’s manual for the recommended direction—typically the air filter side faces up to prevent oil leakage).
- Mark the top of each blade with a dab of paint or tape to ensure correct reinstallation direction.
- Use a socket wrench to remove the blade bolts (typically ½-inch), turning counterclockwise.
- Remove the blades carefully and inspect for cracks, deep nicks, or bends.
Blade Maintenance: If blades are dull but undamaged, sharpen them on a bench grinder or take them to a small-engine repair shop. Remove equal amounts of metal from both ends to maintain balance. If blades are cracked or bent beyond safe repair, replace them with OEM equivalents. Reinstall blades with the marked side facing outward, torquing bolts to 25–35 ft-lbs per your manual. Unbalanced blades cause dangerous vibration and reduce cutting quality.
Step 4: Replace the Spark Plug and Air Filter
These are low-cost items that ensure reliable spring startup and prevent misfiring.
Spark Plug Replacement:
- Disconnect the spark plug wire(s) by twisting gently and pulling.
- Use a spark plug socket and wrench to remove the old plug(s), turning counterclockwise.
- Check the gap on the new spark plug using a gap tool (gap specification is printed on the cap or in your owner’s manual—typically 0.030–0.040 inches for lawn mower engines).
- Adjust the gap if necessary by carefully bending the ground electrode.
- Install the new spark plug and torque hand-tight, then turn an additional one-quarter turn with your socket wrench.
- Reconnect the spark plug wire(s), pressing until you hear a click.
Air Filter Replacement:
- Locate the air filter housing (typically a cylindrical or rectangular plastic box on top of the engine).
- Unscrew or unclip the housing cover.
- Remove the old filter (paper element or foam cartridge).
- Wipe the housing clean with a dry cloth.
- If the new filter is foam, optionally coat it lightly with foam filter oil (improves filtration; follow product instructions).
- Insert the new filter and secure the housing cover.
Step 5: Disconnect and Store the Battery Correctly
Battery storage protocol depends on battery type. A disconnected, properly stored battery will maintain charge through winter; a battery left connected may self-discharge and suffer sulfation, permanently reducing capacity.
Lead-Acid Battery (Flooded or AGM):
- Disconnect the negative (black) terminal first, then the positive (red) terminal.
- Clean terminal corrosion using a solution of baking soda and water applied with a wire brush.
- Wipe terminals dry and store the battery in a frost-free location (garage, basement, or shed where temperature stays above freezing).
- Optionally, connect a battery tender or trickle charger to maintain charge over winter (charges at 0.5–2 amps, continuously monitoring voltage). Connect the tender’s positive lead to the positive terminal and negative to negative; plug the tender into a 120V outlet.
Lithium-Ion Battery (EGO, Ryobi, Greenworks, etc.):
- Remove the battery from the mower.
- Store it at approximately 50% state of charge (most batteries display charge level via LED indicators).
- Keep the battery in a room-temperature, dry space (50–80°F ideal).
- Do not connect a trickle charger; lithium batteries manage charge internally and do not benefit from continuous charging.
- Check the battery quarterly and recharge to 50% if it drops below 20%.
Why This Matters: Lead-acid batteries self-discharge at roughly 5–10% per month in cold storage. After months without charging, voltage drops below the threshold needed to start the engine. Additionally, deep discharge causes lead sulfate crystals to form on plates, permanently reducing capacity—a condition called sulfation. Lithium batteries degrade differently; they should never be stored fully charged or fully discharged, as both states stress the chemistry and reduce lifespan.
Step 6: Clean the Mower Deck and Lubricate Moving Parts
Caked grass and moisture on the mower deck promote rust, especially in humid climates. Lubrication prevents freeze damage and ensures smooth operation.
Deck Cleaning:
- Tilt the mower on its side (air filter up) to access the underside.
- Use a putty knife or deck scraper to remove packed grass and mud.
- Rinse with a hose and allow to dry completely.
- Optional: spray the cleaned deck with a light coat of multi-purpose lubricant (e.g., WD-40) to inhibit rust.
- Wipe excess spray to avoid attracting dirt.
Lubrication Points (per Owner’s Manual):
- Spindle grease fittings (typically two per cutting spindle)
- Wheel bearing grease fittings
- Deck-lift pivot points
- Steering mechanism joints
- Transmission shift linkage (if applicable)
Use a grease gun loaded with NLGI Grade 2 multipurpose grease. Pump grease until a small amount extrudes from the fitting (overgreasing can damage seals). If your mower lacks grease fittings, apply a few drops of light machine oil to pivot points instead.
Step 7: Check Tire Pressure and Inspect Belts and Cables
Cold weather reduces tire pressure; properly inflated tires prevent flat spotting during storage.
Tire Pressure Adjustment:
Tire pressure decreases approximately 1 PSI for every 10°F drop in ambient temperature (per automotive engineering standards). Before winter storage, inflate tires to the upper end of the recommended pressure range specified on the sidewall or in your owner’s manual (typically 14–16 PSI for rear tires, 12–14 PSI for front tires on riding mowers). This prevents the tires from flattening during months of dormancy.
Belt and Cable Inspection:
- Drive Belt: Visually inspect for cracks, fraying, or glazing (shiny spots). Replace if damaged; belts are cheaper to replace now than after failure mid-season.
- Deck Belt: Check for signs of wear or slipping. A slipping belt produces a burning smell and reduces cutting height consistency.
- Control Cables: Pull each cable gently to check for kinks, corrosion, or binding. Correct any issues now to avoid starting problems in spring.
Step 8: Store the Mower Correctly
Proper storage minimizes rust, fuel degradation, and moisture damage.
Storage Location:
- Best: Dry, ventilated garage or shed where temperature remains above freezing.
- Acceptable: Outdoor storage under a breathable tarp or cover (allows air circulation, preventing moisture trapping).
- Avoid: Damp basements, outdoor exposure without cover, or storage near heat sources (furnace, heater) where fuel vapors can ignite.
Covering and Positioning:
- Use a breathable cover (not plastic, which traps condensation) specifically designed for mowers or lawn equipment.
- Position the mower away from direct sunlight to minimize UV degradation of plastic trim and seat.
- Leave adequate airflow around the cover to prevent mold growth.
- If your mower has a fuel shutoff valve, turn it to the OFF position (if equipped) to prevent fuel weeping from the carburetor.
Brand-Specific Winterization Notes
Major manufacturers sometimes recommend procedures that override generic guidance. Always consult your owner’s manual for model-specific instructions:
- John Deere: Check the seasonal maintenance section of your operator’s manual; some models recommend fuel stabilizer over draining, while others specify oil viscosity by operating region.
- Husqvarna: Review the winterization checklist in your manual; some hydrostatic transmission models require specific fluid service intervals tied to seasonal storage.
- Cub Cadet: Consult your dealer or official Cub Cadet resource for battery disconnect sequences and fuel recommendations specific to your model year.
- MTD / Yard Machines: Check your manual for transmission fluid specifications if equipped with a hydrostatic drive; some models require fluid changes before extended storage.
When in doubt, contact your manufacturer’s support line or local dealer with your model number and serial number.
Printable Riding Mower Winterization Checklist
| Task | Completed |
| Add fuel stabilizer OR drain fuel tank | ☐ |
| Change engine oil and filter | ☐ |
| Remove, inspect, and service blades | ☐ |
| Replace spark plug(s) | ☐ |
| Replace air filter | ☐ |
| Disconnect and store battery | ☐ |
| Connect battery tender (if lead-acid) | ☐ |
| Clean mower deck | ☐ |
| Lubricate grease fittings and pivots | ☐ |
| Check and adjust tire pressure | ☐ |
| Inspect drive belt and cables | ☐ |
| Cover and store in dry location | ☐ |
Frequently Asked Questions About Winterize Riding Lawn Mower
Can I Leave Gasoline in My Riding Mower Over Winter?
Yes, but only if you add fuel stabilizer or use non-ethanol fuel. Ethanol-blended gasoline (E10 or E15) can phase-separate and form gum deposits within 30 days of storage, clogging the carburetor and preventing spring startup. Adding stabilizer per product instructions protects the fuel system. Alternatively, drain the fuel tank completely by running the engine until it stalls naturally. Leaving untreated ethanol fuel in the tank risks expensive carburetor cleaning or replacement in spring.
Do I Really Need to Change the Oil Before Winter Storage?
Yes. Used engine oil contains combustion acids and moisture that corrode bearing surfaces and cylinder walls during months of dormancy. Changing to fresh oil before storage removes these corrosive compounds and leaves a protective film over internal metal surfaces. This is especially important if the mower will sit unused for 90+ days. Fresh oil costs $10–$20 and takes 20 minutes; carburetor damage or bearing wear from neglect costs $500+.
What Should I Do With My Riding Mower Battery Before Winter?
Disconnect both terminals (negative first) and store the battery in a frost-free location above freezing. If you have a lead-acid or AGM battery, optionally connect a battery tender (trickle charger) to maintain charge over winter—this prevents sulfation and ensures the battery starts reliably in spring. Lithium-ion batteries should be stored at approximately 50% charge with no charger connected. A battery left connected to the mower will self-discharge over winter and may suffer permanent damage, leaving you with a no-start condition when spring arrives.
How Do I Start My Riding Mower After Winter Storage?
Before cranking the engine: reconnect the battery (positive terminal first); check oil and tire pressure; visually inspect belts and spark plug wires for damage. Start with the choke in the full position; after 30–60 seconds of running, gradually move the choke to half, then full throttle. If the engine does not start after three attempts, wait 5 minutes before trying again to avoid flooding. If the mower still will not start, the carburetor may be clogged despite fuel stabilizer; consult a small-engine repair shop or remove and clean the carburetor yourself using a carburetor cleaning kit.

Pros
- Large-size design named in product title
- Sharpening and balancing functions listed
- Listed as a new upgraded version

Pros
- Adjustable 15-to-45-degree range in title
- Sharpening and balancing functions listed

Pros
- Sharpener and balancer functions in title
- 15-to-45-degree adjustable setting listed
- Built for lawn mower blade maintenance
Pros
- Includes replacement gaskets and a 98079-55846 spark plug
- Matches Honda HRR216 and HRS216 lawn mower models
- Designed around the 16100-Z8B-901 carburetor specification
Cons
- Restricted to select Honda GCV160 mower applications
- Installation requires basic mechanical tools and skills
For more hands-on benchmarks and buying recommendations, consult our guides on high-CFM commercial leaf blower guide.
Mechanical safety standards, operational tolerances, and protective gear guidelines align with benchmark specifications established by the American National Standards Institute (ANSI).









