

Quick Answer: Choosing the Best Lawn Mower Starts Then Stops Troubleshooting
A lawn mower that starts but then immediately dies or stalls under load is almost always caused by one of a few common issues: stale or contaminated fuel, a blocked fuel tank vent, a clogged fuel filter or line, a dirty air filter, a fouled spark plug, or a carburetor that needs cleaning. Less often, the problem is mechanical—a stuck…

Pros
- Large-size design named in product title
- Sharpening and balancing functions listed
- Listed as a new upgraded version

Pros
- Adjustable 15-to-45-degree range in title
- Sharpening and balancing functions listed

Pros
- Sharpener and balancer functions in title
- 15-to-45-degree adjustable setting listed
- Built for lawn mower blade maintenance
Pros
- Includes replacement gaskets and a 98079-55846 spark plug
- Matches Honda HRR216 and HRS216 lawn mower models
- Designed around the 16100-Z8B-901 carburetor specification
Cons
- Restricted to select Honda GCV160 mower applications
- Installation requires basic mechanical tools and skills
Quick Diagnostic Checklist: Top Causes in Order
Start here. These are the most common culprits, ranked by how easy and inexpensive they are to check:
- Stale or contaminated fuel. Gasoline older than 30 days (or 90 days if stored with fuel stabilizer) can break down and form gum and varnish that clogs fuel passages and the carburetor.
- Blocked fuel tank vent. The vent (usually in the fuel cap) allows air to enter the tank as fuel exits. When it clogs, a vacuum forms inside the tank, starving the engine of fuel.
- Clogged fuel filter or kinked fuel line. Debris in the tank or a fuel line can restrict flow; ethanol in gasoline can also degrade rubber hose over time.
- Dirty air filter. A saturated or oil-soaked paper filter chokes off airflow, making the mixture too rich and causing the engine to stall.
- Fouled or worn spark plug. Carbon buildup, oil fouling, or worn electrodes prevent reliable ignition.
- Dirty carburetor (main jet, bowl, passages). Gum and varnish restrict fuel flow through the main jet and idle circuit.
- Stuck choke or governor linkage issue. A choke that doesn’t open after warm-up over-richens the mixture; a loose or missing governor spring causes hunting or stalling.
Safety First: Before You Begin
Always work outdoors or in a well-ventilated space. Disconnect the spark plug wire and tuck it away from the plug to prevent accidental ignition. Wait for the engine to cool before touching metal parts. Keep a fire extinguisher rated for Class B fires (flammable liquids) nearby when working with fuel. Never run the mower with the blade engaged while testing. If your mower is under warranty, opening the carburetor or fuel system may void coverage—check your owner’s manual first. Always refer to your specific engine manual for torque specs, gap settings, and fuel recommendations. Users looking for related component recommendations can explore our jbl partybox club 120 vs sony srs xv500 breakdown.
Step 1: Fuel System—Fresh Fuel, Tank Vent, Filter, and Lines
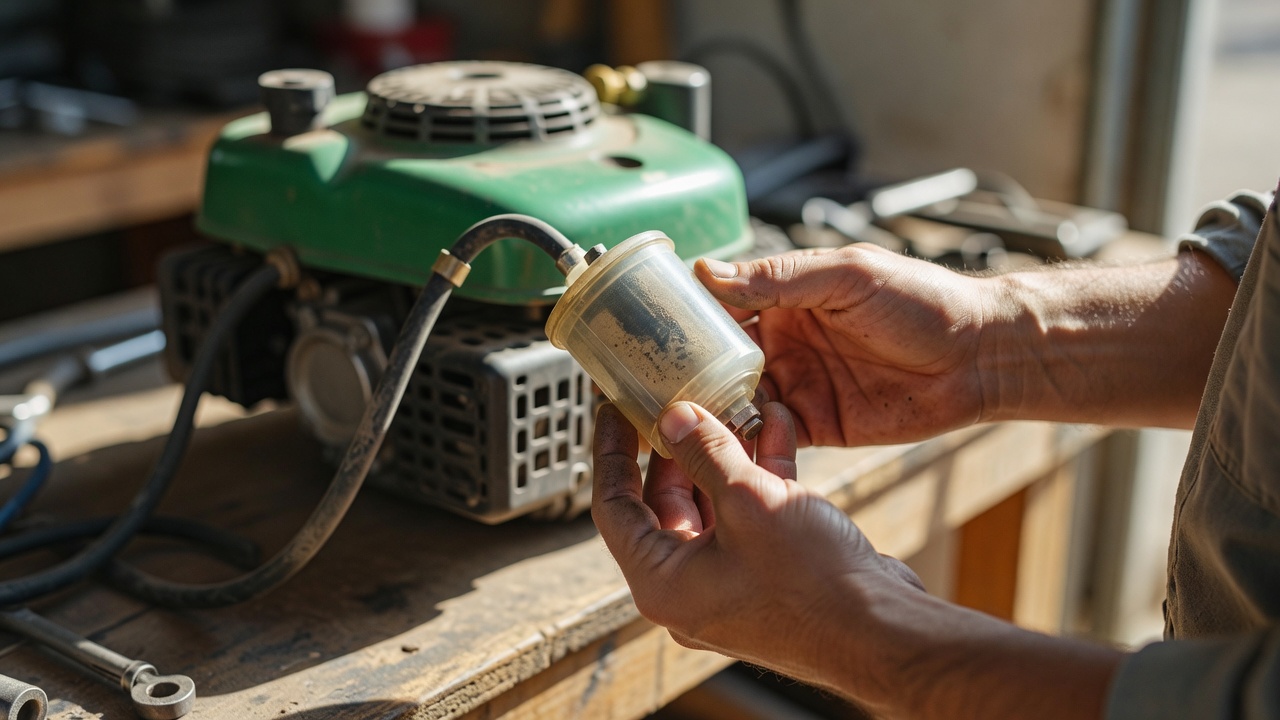
Fuel problems cause most start-then-stall symptoms. Begin here. Users looking for related component recommendations can explore our jbl partybox club 120 vs sony srs xv500 breakdown.
Check and replace the fuel. Drain the old fuel completely and refill with fresh, clean gasoline. Use ethanol-free fuel if available in your area, or fuel with no more than 10% ethanol. If you cannot use the mower for more than a month, add fuel stabilizer before storage to extend shelf life. Old fuel turns to gum and varnish, clogging the carburetor jets and fuel lines. Before finalizing equipment decisions, refer to our comprehensive z890 vs x870e motherboard comparison.
Clear the fuel tank vent. Locate the vent hole in the fuel cap or tank. Loosen the cap slightly while the mower is running; if performance improves or the mower runs better with the cap slightly open, the vent is blocked. Clean the cap vent with a thin wire or blow through it to clear any debris. A blocked vent creates a vacuum that stops fuel from flowing out of the tank.
Inspect the fuel filter and lines. If your mower has an inline fuel filter, remove it and hold it up to light. If it appears dark, dirty, or clogged, replace it—they are inexpensive. Check fuel lines for cracks, kinks, softening, or discoloration from ethanol breakdown. Replace damaged hose with fuel-rated tubing only; regular hose will degrade and leak. Before finalizing equipment decisions, refer to our comprehensive z890 vs x870e motherboard comparison.
Step 2: Air Intake—Filter and Housing
A dirty air filter is the second easiest fix.
Remove the air filter cover and inspect the filter element. A paper filter that is visibly dark, oily, or saturated should be replaced. Tap out loose debris first; if only lightly dusty, it may be reusable, but paper filters are cheap and often worth replacing just to be sure. If your mower has a foam pre-filter, wash it gently in warm soapy water, rinse thoroughly, and allow it to dry completely. Some manuals recommend lightly coating foam filters with a thin layer of motor oil after drying—follow your manual’s guidance. Reassemble the filter housing and ensure it seals tightly; any unfiltered air that bypasses the element will cause a lean mixture and poor running. For broader ecosystem context, read through our operational guide on marshall stanmore iii vs harman kardon onyx studio 8.
Step 3: Ignition—Spark Plug Inspection and Testing
A bad spark plug or weak ignition prevents reliable combustion.
Remove and inspect the spark plug. Unscrew the plug and examine its condition. A spark plug covered in black, sooty carbon (fouling) indicates the engine is running too rich; one that is wet and shiny suggests oil fouling; a plug with severely worn or eroded electrodes is simply worn out. Clean a lightly fouled plug with a wire brush and reinstall, or replace it. New plugs are inexpensive insurance. For troubleshooting and reliability insights, consult our in-depth dyson v8 cyclone vs bissell featherweight stick report.
Check the gap. Use a spark plug gap gauge (a simple wire feeler tool) to measure the distance between the center and side electrodes. Consult your engine manual for the correct gap—typical values range from 0.020 to 0.030 inches, but always verify. If the gap is too wide, the spark may not jump; if too close, the spark is weak.
Test for spark. With the plug removed, reinstall it loosely or rest the threaded end against the engine block to ground it. Pull the recoil starter quickly several times while watching the gap in dim light. You should see a crisp blue spark jumping across the gap. If there is no spark or only a weak orange glow, the ignition coil (or magneto) may be failing—this is a deeper repair best handled by a professional or engine specialist. Readers comparing setup options can review our technical analysis on bissell crosswave hydrosteam vs shark stainforce.
Step 4: Carburetor—Cleaning and Basic Adjustment
A dirty carburetor is the most common culprit if earlier steps haven’t solved the problem.
Diagnose a carburetor issue. If the mower starts easily when you hold the choke partially closed but stalls when you open it to the run position, the carburetor’s main fuel circuit is likely restricted. If the engine runs only at full throttle and dies at idle, the idle circuit is clogged.
Clean the carburetor bowl and jets. Locate the fuel bowl at the bottom of the carburetor and carefully unscrew the drain plug or remove the bowl. Empty old fuel into a safe container. Use carburetor cleaner spray to flush the main jet, emulsion tube, and idle passages. If you have compressed air, blow through these passages to dislodge stubborn varnish. Rinse the bowl with cleaner, allow it to dry, and reassemble with a new gasket if the old one is dry or cracked.
Idle mixture adjustment (if applicable). Most modern lawn mower carburetors use fixed jets and have no user-adjustable idle mixture screws. If your carburetor does have an idle mixture or needle screw, turn it gently clockwise until it seats lightly—do not force it—then back it out 1 to 1.5 turns as a baseline starting point. Start the engine and listen for smoothness. Make very small adjustments (quarter-turn increments) to find the sweet spot. If the engine continues to stall or run poorly after cleaning and adjustment, the carburetor may need professional ultrasonic cleaning or replacement.
Step 5: Choke, Throttle Cable, and Governor Linkage
Mechanical issues sometimes mimic fuel or air problems.
Check the choke mechanism. When you move the choke lever to run, the choke plate inside the carburetor inlet should open fully. A stuck or partially closed choke over-richens the mixture and causes stalling. If the choke plate feels stiff, apply light penetrating oil around the pivot and work it gently back and forth until it moves freely.
Inspect the throttle cable. Follow the throttle cable from the handle to the carburetor. Look for fraying, kinks, or loose anchor bolts. The cable should move smoothly from idle to full throttle without binding. If binding is present, the cable may need lubrication or replacement.
Verify the governor spring. The governor spring is a small spring that connects the governor arm (inside the engine crankcase) to a fixed point on the carburetor or bracket. A missing or stretched spring causes the engine to hunt (rapid RPM fluctuations) or stall. Check that the spring is attached correctly to the correct hole; misalignment or loss of tension prevents proper speed regulation. Lubricate the governor pivot point lightly with oil if it appears dry.
Electric and Battery Mowers: A Brief Note
If your mower is electric or battery-powered, the causes differ. Most commonly, the battery is depleted or failing, or thermal protection has kicked in due to heavy load or blocked ventilation. Charge the battery fully and allow it to cool. Check that all safety switches engage properly—the handle bail, deck-height lever, and grass-bag sensor must be in their correct positions. Clear any grass or debris from motor vents. If the problem persists, test with a known-good battery if possible. For corded electric mowers, verify that the outlet works, the extension cord is the correct gauge for its length, and the cord itself shows no damage.
When to Call a Professional
If you’ve worked through the steps above and the mower still stalls, it’s time to consult a small-engine repair specialist. Seek professional help if:
- The engine is hard to pull (suggests low compression, indicating worn rings or valves).
- The ignition coil or magneto tests bad (no spark even after plug replacement).
- The carburetor continues to fail after cleaning and bowl replacement (internal passages may need ultrasonic cleaning).
- The mower produces excessive smoke or knocking sounds (signs of internal engine damage).
- Your mower is under warranty and the repair involves sealed components (opening them may void coverage).
Professional technicians have specialized tools, diagnostic equipment, and access to replacement parts that make complex repairs faster and more reliable than DIY attempts.
Preventive Maintenance: Avoid the Problem Next Time
Once you’ve fixed the issue, simple habits will prevent it from recurring:
- Use fresh fuel with stabilizer if the mower will sit idle for more than 30 days.
- Run the fuel system dry or drain the tank before long off-season storage.
- Replace the air filter annually, or more often if you mow in dusty conditions.
- Change the spark plug once per season or after every 100 hours of use.
- Clean or replace the carburetor bowl annually, especially if fuel has been sitting.
- Inspect fuel lines and the filter at each oil change.
- Keep the cooling fins and flywheel screen clear of grass buildup to prevent overheating.
- Check your owner’s manual for the recommended oil type and change schedule.
A well-maintained mower rarely develops the start-then-stall problem. Spending a few minutes on seasonal maintenance pays dividends in reliable performance and fewer repairs.
For more hands-on benchmarks and buying recommendations, consult our guides on heavy-duty chainsaw buyer guide, as well as high-CFM commercial leaf blower guide, as well as durable ride-on lawn tractor guide.
Mechanical safety standards, operational tolerances, and protective gear guidelines align with benchmark specifications established by the American National Standards Institute (ANSI).









