

Quick Answer: Choosing the Best Replace Spark Plug Lawn Mower
To replace a spark plug in a lawn mower, first let the engine cool completely and disconnect the spark plug wire. Remove the old plug with a spark plug socket, check and set the gap on the new plug to the manufacturer’s specification, hand-thread it in to avoid cross-threading, then torque it to spec and reattach the wire. This straightforward…

Pros
- Large-size design named in product title
- Sharpening and balancing functions listed
- Listed as a new upgraded version

Pros
- Adjustable 15-to-45-degree range in title
- Sharpening and balancing functions listed
Pros
- Includes replacement gaskets and a 98079-55846 spark plug
- Matches Honda HRR216 and HRS216 lawn mower models
- Designed around the 16100-Z8B-901 carburetor specification
Cons
- Restricted to select Honda GCV160 mower applications
- Installation requires basic mechanical tools and skills
Preparing the Mower and Gathering Tools
Before you touch the spark plug, you need to prepare the mower and gather the right tools. Safety comes first, and a few minutes of preparation prevents injuries and damage to the engine.
Tools You Need to Replace a Spark Plug
You will need a spark plug socket, which is a deep socket with a rubber insert that grips the plug’s ceramic insulator. The socket size is typically 13/16 inch or 5/8 inch, depending on the plug. A ratchet wrench with an extension bar gives you the leverage to loosen a tight plug. You also need a feeler gauge to measure the gap, a torque wrench if you want to tighten the plug to the exact specification, and a clean rag to wipe away debris. A wire brush helps clean the area around the plug before removal.
How to Safely Disconnect the Spark Plug Wire
Start by moving the mower to a flat, dry surface and turning off the engine. If the mower has been running, wait at least 30 minutes for the engine and muffler to cool completely to avoid burns. Locate the spark plug wire, which is a thick rubber cable leading to the top of the engine. Grasp the boot, the rubber cap at the end of the wire, not the wire itself. Pull firmly and steadily straight off the plug. Pulling on the wire can damage the internal conductor. Some mowers have a small retaining clip or a threaded stud; release these before pulling. Once disconnected, tuck the boot away from the plug so it cannot accidentally touch the metal terminal while you work.
Removing the Old Spark Plug
With the wire disconnected, you can remove the old plug. This step requires care to avoid stripping threads or cracking the ceramic insulator.
How to Clean the Area Around the Plug Before Removal
Before removing the plug, clean the area around its base. Dirt, grass clippings, and debris can fall into the cylinder when the plug is removed, causing internal damage. Use a wire brush or compressed air to blow away loose material from the recess around the plug. Wipe the surrounding surface with a clean rag. This simple step protects the engine and makes the job cleaner.
How to Remove a Stuck or Seized Spark Plug
Place the spark plug socket over the plug and attach the ratchet. Turn counterclockwise to loosen. If the plug resists, apply steady, even pressure rather than jerking. A plug that has been in place for years may be stuck due to carbon buildup or corrosion. Spray a penetrating oil around the base of the plug and let it sit for 10 minutes to loosen the threads. Avoid using excessive force, as this can strip the threads in the aluminum cylinder head, a costly repair. Once the plug breaks free, continue turning it out by hand to avoid dropping it. Inspect the old plug before discarding it. A light tan or gray electrode indicates normal combustion, while black soot suggests a rich fuel mixture, and oil fouling points to worn rings or valve seals. These observations help you diagnose engine health, but the replacement procedure remains the same.
Checking and Setting the Spark Plug Gap
The spark plug gap is the distance between the center electrode and the ground electrode at the tip. Correct gapping ensures a strong spark for reliable ignition. Many new plugs come pre-gapped, but the gap can shift during shipping, so always verify it.
What Is the Correct Spark Plug Gap for My Mower?
The correct gap varies by engine model. Common lawn mower engines use a gap between 0.020 and 0.030 inches, but you must confirm the exact specification for your machine. Check the owner’s manual or the sticker on the engine cowling, which often lists the recommended plug type and gap. If you cannot find the manual, look up the engine model number online. Using the wrong gap causes hard starting, misfiring, or poor performance. When in doubt, use the gap specified by the engine manufacturer rather than guessing. When planning workspace deployment, consider the engineering criteria outlined in our marshall stanmore iii vs harman kardon onyx studio 8 guide.
How to Use a Feeler Gauge to Set the Gap
Select the feeler gauge blade that matches the recommended gap, for example 0.025 inches. Insert the blade between the center and ground electrodes. The blade should slide in with slight resistance, a light drag. If it fits too loosely, the gap is too wide; if it will not fit, the gap is too narrow. To widen the gap, gently bend the ground electrode upward using the tool on the gauge or a small screwdriver. To narrow it, tap the ground electrode lightly on a hard surface or press it down with pliers. Work in small increments and recheck with the gauge after each adjustment. Avoid bending the center electrode, as this can crack the ceramic insulator and ruin the plug.
Installing the New Spark Plug
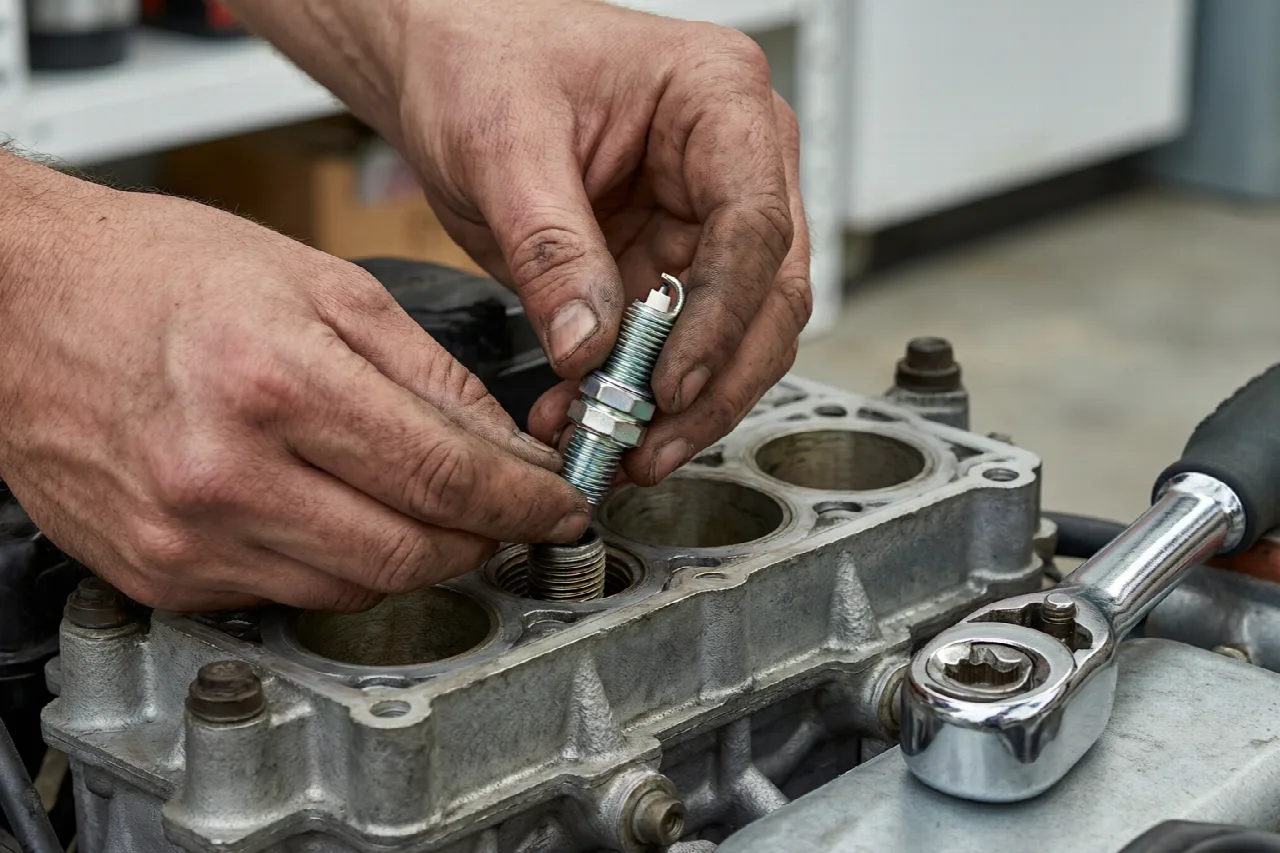
Installation is the most critical step. Proper threading and torque prevent cross-threading, which damages the cylinder head, and ensure a tight seal for compression. For additional operational safety benchmarks, see our published testing notes on dyson v8 cyclone vs bissell featherweight stick.
How to Hand-Thread the Plug to Avoid Cross-Threading
Before installing, apply a small amount of anti-seize compound to the threads if the manufacturer recommends it, though many modern plugs come with a coating that makes this unnecessary. Start the plug by hand. Insert it into the socket or hold it with your fingers and turn it clockwise. Hand-thread the plug until it seats snugly against the cylinder head. If you feel resistance early, stop and back the plug out, then try again. The plug should thread in smoothly by hand for most of its length. Never use a ratchet to start the plug, as this easily cross-threads the soft aluminum threads. Once hand-tight, the plug is correctly seated and ready for final tightening.
What Is the Correct Torque Specification for the Spark Plug?
Torque matters because an over-tightened plug can strip threads or crack the insulator, while an under-tightened plug can vibrate loose and leak compression. Most lawn mower spark plugs require a torque between 15 and 20 foot-pounds, but check the engine manual for the exact value. If you have a torque wrench, set it to the specification and tighten the plug until it clicks. If you do not have a torque wrench, use the rule of thumb: tighten a new plug about a quarter turn past hand-tight, or an eighth turn for a reused plug. This approximation is safe for most small engines, but a torque wrench gives the most reliable result. To compare alternative configurations, check our hands-on review of bissell crosswave hydrosteam vs shark stainforce.
How to Reattach the Spark Plug Wire Securely
After tightening the plug, reattach the wire. Push the boot firmly onto the plug terminal until you feel or hear a click, indicating it has seated over the metal tip. Give the boot a gentle tug to confirm it is secure. If the boot has a retaining clip or screw, fasten it. Ensure the wire is routed away from the hot exhaust and sharp edges, and that it does not sag onto the engine block, which can cause arcing. Start the mower to verify the repair. The engine should start promptly and run smoothly. If it still misfires or fails to start, recheck the gap and the wire connection, and confirm you used the correct plug type for your engine.
Everything You Need to Know: Replace Spark Plug In Lawn Mower FAQ
How Often Should I Replace the Spark Plug in My Lawn Mower?
Most manufacturers recommend replacing the spark plug once per season or every 100 hours of operation, whichever comes first. Frequent use, dirty air filters, or poor fuel quality can shorten plug life. Inspect the plug annually and replace it if the electrode is worn, the insulator is cracked, or the gap is out of specification.
What Are the Signs That a Spark Plug Needs Replacement?
Common signs include difficulty starting, rough idling, misfiring under load, reduced power, and increased fuel consumption. A visual inspection can confirm the diagnosis. Heavy carbon deposits, oil fouling, or a worn electrode all indicate the plug should be replaced. If the engine runs poorly, replacing the plug is a low-cost first step in troubleshooting.
Can I Use Any Spark Plug in My Lawn Mower?
No. Use the plug type specified by the engine manufacturer. The correct plug matches the heat range and thread size for your engine. Using the wrong plug can cause overheating, pre-ignition, or poor performance. The engine manual or a parts lookup by engine model number identifies the correct plug.
Related Maintenance and Operating Guides
To keep your equipment running at peak operating efficiency, explore our related technical walkthroughs and maintenance tutorials:
- Consult our detailed breakdown on heavy-duty chainsaw buyer guide.
- Consult our detailed breakdown on durable ride-on lawn tractor guide.
Technical Standards and Compliance
Mechanical safety standards, operational tolerances, and protective gear guidelines align with benchmark specifications established by the American National Standards Institute (ANSI).









