Quick Answer: How to Remove a Weed Eater Head
To remove a weed eater head, first disconnect the spark plug wire for safety. Then locate how your head attaches—most heads use one of three methods: threaded (turn counterclockwise), bolt-on (remove fasteners with a wrench), or quick-release (unclip or release). For threaded heads, grip the shaft firmly with one hand while turning the head counterclockwise until it detaches. If the head is stuck, apply penetrating oil and wait 15 minutes before trying again.
Safety Precautions Before Removing Your Weed Eater Head
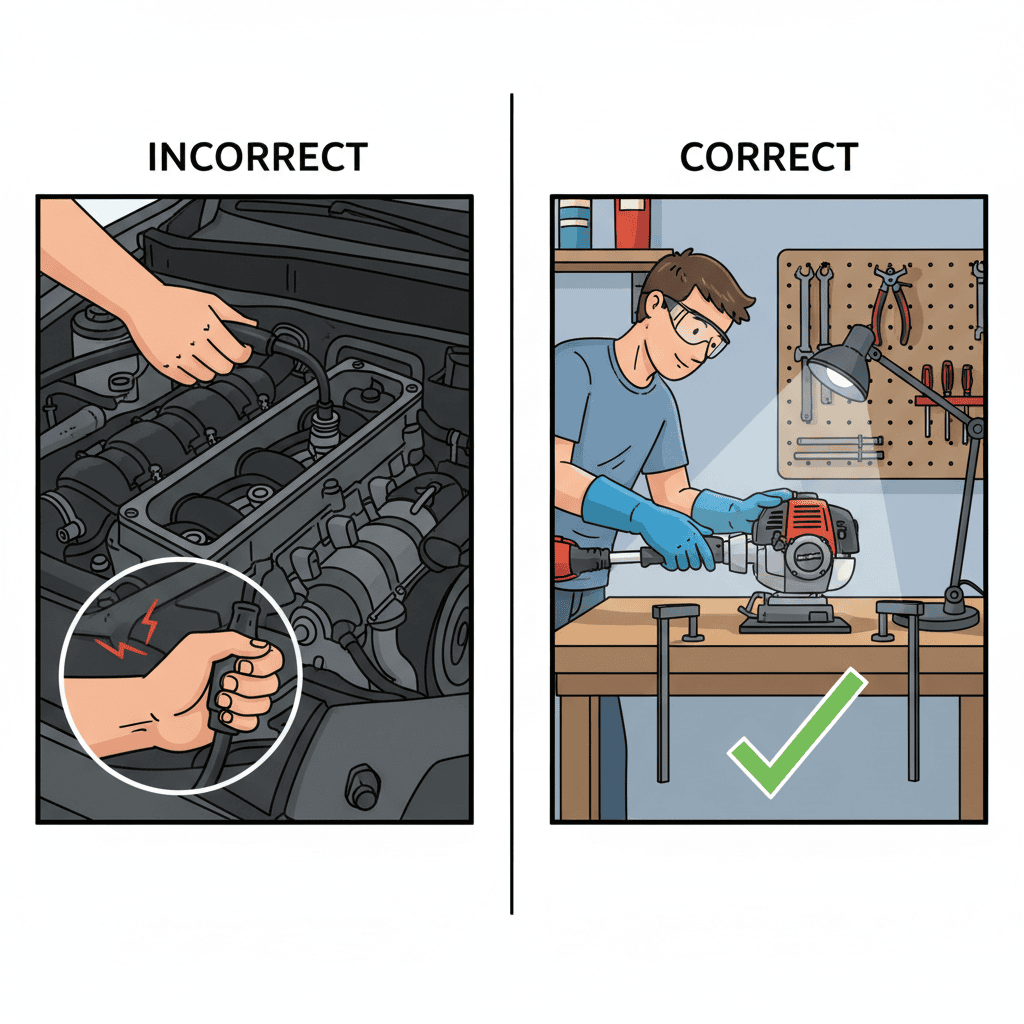
Before you start any removal process, safety must come first. Working on powered equipment can be dangerous if proper precautions aren’t taken.
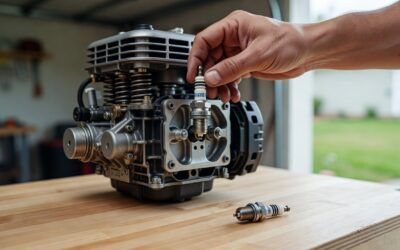
- Disconnect the spark plug wire: This is the most critical step. Removing the spark plug wire ensures the engine cannot accidentally start while you’re working on the head. Even with the engine off, a spark plug wire connection allows potential ignition—disconnecting it completely eliminates this risk.
- Allow the equipment to cool: If you’ve been using your weed eater, wait at least 10-15 minutes before beginning removal work. The engine, head, and metal components will be extremely hot and can cause severe burns.
- Wear protective equipment: Use work gloves to protect your hands from sharp edges, old string, and hot metal. Safety glasses are recommended in case debris falls during removal.
- Work on a stable surface: Place your weed eater on a flat, secure work surface. Never hold it in your lap or between your legs during head removal.
- Ensure adequate lighting: Work in a well-lit area so you can clearly see attachment points and fasteners.
Tools and Materials You’ll Need
Having the right tools on hand before you start will make the removal process much smoother and faster.
| Tool/Material | Purpose | When Needed |
|---|---|---|
| Adjustable wrench or socket set | Remove bolts securing the head | For bolt-on head designs |
| Screwdriver (Phillips or flathead) | Remove screws or release clips | Some quick-release models |
| Penetrating oil (WD-40 or similar) | Loosen stuck or corroded connections | When head won’t turn or budge |
| Strap wrench or rubber grip pad | Provide grip on round shaft | For threaded heads if wrench slips |
| Work gloves | Protect hands | All removal procedures |
| Shop rag or cloth | Clean and wipe components | Before and after removal |
Understanding Your Weed Eater Head Type
Different weed eater models use different attachment methods. Identifying which type you have is essential for successful removal.
Threaded Heads
The most common attachment method is a threaded connection where the head screws directly onto the shaft. You’ll recognize this type by the visible threads where the head meets the shaft. These heads typically rotate counterclockwise to loosen—the same direction as most standard left-hand threading on equipment shafts.
Bolt-On Heads
Some models, particularly commercial-grade or professional trimmers, use a bolt-on design. These heads are secured with one or more bolts (usually 1-3) that run through the head into the shaft. You’ll see bolt heads or nuts on the side or top of the trimmer head. This design is more common on higher-end models and brands like Stihl.
Quick-Release Heads
Modern trimmer models increasingly use quick-release mechanisms with clips or pins. These heads can be removed with a simple clip release or pin removal—no tools required. This is the fastest removal method and is becoming standard on many newer trimmers from all manufacturers.
Step-by-Step Removal: Threaded Heads
Threaded heads are the most common type found on consumer and mid-range weed eaters. Follow these steps for safe removal:
Step 1: Prepare the Equipment
- Disconnect the spark plug wire
- Allow the engine to cool for 10-15 minutes
- Place the trimmer on a stable work surface
- Put on your work gloves
Step 2: Stabilize the Shaft
With one hand, grip the shaft firmly below the head. Use a strap wrench or rubber grip pad around the shaft if your hand keeps slipping. Do not try to turn the shaft—your grip is purely to hold it stationary while the head rotates.
Step 3: Turn the Head Counterclockwise
With your other hand, grasp the head near its base and turn it counterclockwise (to the left). Turn slowly and steadily. You should feel resistance initially, then the head will begin to loosen.
Step 4: Continue Turning Until Detached
Keep turning counterclockwise until the head spins freely and separates completely from the shaft. Once loose enough, you can unscrew it by hand.
Step 5: Inspect the Connection
Once removed, examine the threads on both the shaft and the head for damage, debris, or corrosion. Clean the threads with a cloth before reattaching a new or cleaned head.
Step-by-Step Removal: Bolt-On Heads
Bolt-on heads are less common but found on professional and commercial models:
Step 1: Identify All Fasteners
Look around the trimmer head base to locate all bolts or screws. Most designs have 1-3 fasteners. Take a photo with your phone to remember the layout if helpful.
Step 2: Determine Correct Wrench or Socket Size
Use your adjustable wrench or socket set to find the correct size. The fasteners are typically 6mm, 8mm, 10mm, or similar metric sizes. If using a socket set, start with common sizes like 8mm or 10mm.
Step 3: Remove Bolts Gradually
Do not remove one bolt completely first. Instead, loosen all bolts slightly in a crisscross pattern (like removing wheel lugs from a car). This prevents the head from tilting unevenly. Once all are loose, then remove them completely.
Step 4: Separate the Head from the Shaft
Once all bolts are removed, carefully lift the head straight up and away from the shaft. Be aware that small springs or washers may fall out—keep them organized so you can reinstall them correctly.
Step 5: Store Fasteners Safely
Place all bolts and small parts in a labeled container or plastic bag so you don’t lose them during maintenance or cleaning.
Step-by-Step Removal: Quick-Release Heads
Quick-release heads are the simplest to remove and require minimal tools:
Step 1: Locate the Release Mechanism
Look for a clip, pin, or button on the side of the trimmer head or where it connects to the shaft. The design varies by manufacturer, but there will be a clear release point.
Step 2: Release or Remove the Pin
Depending on the design, you may need to push a button, slide a clip, or pull out a retaining pin. Consult your manual if you cannot easily identify the release mechanism.
Step 3: Separate the Head
Once released, the head should pull straight off the shaft with minimal resistance. Some designs may have a slight twist-off element, but it should be very easy compared to threaded or bolt-on designs.
Step 4: Reinstall Correctly
To reinstall, align the head with the shaft, push firmly until it seats fully, then re-engage the clip or pin until you hear or feel a click confirming it’s locked.
Troubleshooting Stuck or Difficult Heads
Sometimes weed eater heads become stuck due to corrosion, dirt accumulation, or manufacturing defects. Here’s how to handle a stubborn head:
Apply Penetrating Oil
If your threaded or bolt-on head won’t budge, penetrating oil is your first solution. Spray the connection point generously with a product like WD-40 or similar penetrating oil. Allow it to soak for 10-15 minutes, giving it time to work into the threads or connection.
Try Again with Increased Leverage
After the oil has soaked, attempt removal again. Use a strap wrench for better grip if your hand or regular wrench keeps slipping. Turn slowly and steadily—forcing a stuck head can break the shaft or head.
Tap Gently with a Rubber Mallet
If still stuck, gently tap around the base of the head with a rubber mallet. This can help break the corrosion bond without damaging components. Alternate tapping with another application of penetrating oil.
Heat Application (Advanced Method)
For severely stuck threaded heads, carefully applying heat with a heat gun or hair dryer can expand the metal slightly and break corrosion bonds. Do this carefully to avoid burns or damaging plastic components. Allow everything to cool before attempting removal.
When to Seek Professional Help
If after multiple attempts with penetrating oil and careful force the head still won’t budge, you risk damaging your equipment. Consider taking your trimmer to an authorized dealer or repair shop. Professional technicians have specialized tools and experience with stubborn connections.
Brand-Specific Removal Notes
While removal procedures are generally similar, some major manufacturers have unique designs or quirks worth knowing:
Ryobi Weed Eaters
Ryobi trimmers typically use threaded heads with standard counterclockwise removal. Most Ryobi models are straightforward for DIY removal. If your Ryobi model has a bump-feed head (automatic string feeding), the removal process is identical—just be aware you may need to refill the string spool after reattaching.
DeWalt Trimmer Heads
DeWalt offers both threaded and quick-release designs depending on the model. Check your specific model number in your manual to determine which type you have. DeWalt’s newer cordless models increasingly feature quick-release designs for easier head swaps.
Echo Weed Eaters
Echo, a professional-grade brand, often uses bolt-on head designs even on some consumer models. Echo heads may have 2-3 bolts securing the assembly. Echo trimmers frequently feature dual-line head designs that are more complex—pay careful attention to spring placement during removal to ensure proper reinstallation.
Stihl Trimmer Heads
Stihl, known for professional equipment, predominantly uses bolt-on designs. Stihl heads typically have robust construction and may feel stuck even when not corroded—this is normal. Use steady, firm pressure rather than jerky motions. Some Stihl models require a special tool; consult your manual for your specific model.
Common Reasons to Remove Your Weed Eater Head
Understanding why you might need to remove the head helps you decide if removal is truly necessary:
String Replacement
While many heads allow string replacement without full removal (by accessing the spool area), some designs or severe wear situations require full head removal for easier string loading. This is common with manual-wind heads where the string winds around internal spools.
Head Maintenance and Cleaning
Grass buildup, dirt, and debris can accumulate inside the head, affecting performance. Removing the head allows thorough cleaning of the internal mechanism and string paths.
Head Replacement
If your head is cracked, severely worn, or malfunctioning, removal is necessary to install a replacement head. This is common after extended use or damage from hitting hard objects.
Shaft Inspection and Maintenance
Periodically inspecting the shaft threads or mounting points for damage, corrosion, or wear requires head removal. This helps you catch issues before they become serious problems.
Seasonal Storage
Some owners prefer removing the head during off-season storage to prevent corrosion and reduce overall stored equipment size.
Frequently Asked Questions
Can I remove a weed eater head without any tools?
It depends on your head type. Quick-release heads require no tools at all. Threaded heads can sometimes be removed by hand if loose enough, though a strap wrench or rubber grip pad helps significantly. Bolt-on heads almost always require a wrench or socket. If you only have one specific tool, a multi-tool wrench set covers most situations across different models and brands.
Why won’t my weed eater head turn counterclockwise?
The most common reasons are corrosion buildup, dirt accumulation, or the head being tightened too firmly during previous installation. Apply penetrating oil and wait 15 minutes, then try again. If still stuck, try tapping gently around the base with a rubber mallet to break the corrosion bond. Ensure you’re turning the correct direction (counterclockwise for standard threaded heads); turning the wrong direction tightens it further.
Do all weed eater heads remove the same way?
No—removal methods vary significantly. The three main types (threaded, bolt-on, and quick-release) require different approaches. Additionally, different brands and models within the same brand may vary. Always consult your specific trimmer’s manual if you’re unsure. Your model number, usually printed on the body or handle, helps you find manufacturer-specific instructions online if your manual is lost.
Should I remove the head for winter storage?
While not absolutely necessary, removing the head during winter storage can provide benefits: it reduces stored size, prevents corrosion at the connection point, and allows you to clean both the head and shaft thoroughly. If you live in a humid climate, removing the head is particularly helpful. Store the head indoors and apply a light coat of oil to the shaft threads before storage to prevent rust.
Key Takeaways
- Always disconnect the spark plug wire first and allow equipment to cool before removing the head
- Identify your specific head type (threaded, bolt-on, or quick-release) to use the correct removal method
- For threaded heads, grip the shaft while turning the head counterclockwise
- For bolt-on heads, loosen bolts gradually in a crisscross pattern before removing completely
- Quick-release heads are the easiest, requiring only a clip or pin release
- If stuck, apply penetrating oil, wait 15 minutes, and try again gently
- Brand-specific designs exist—consult your manual for your exact model’s requirements
- Common reasons for removal include string replacement, maintenance, head damage, and shaft inspection