Quick Answer: How to Put String in a Weed Wacker
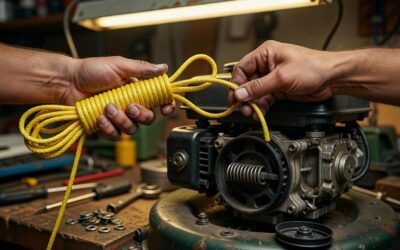
To put string in a weed wacker, disconnect the power, locate and remove the spool (usually by unscrewing the trimmer head or pressing release tabs), measure the correct line length for your model (typically 15–20 feet), thread it through the eyelets on the spool following the marked direction, wind it tightly in the designated grooves, and secure both ends in the anchor slots before reassembling. Most trimmers use a dual-line system, though some models feature single-line or automatic-feed mechanisms.
Understanding Your Weed Wacker’s String System
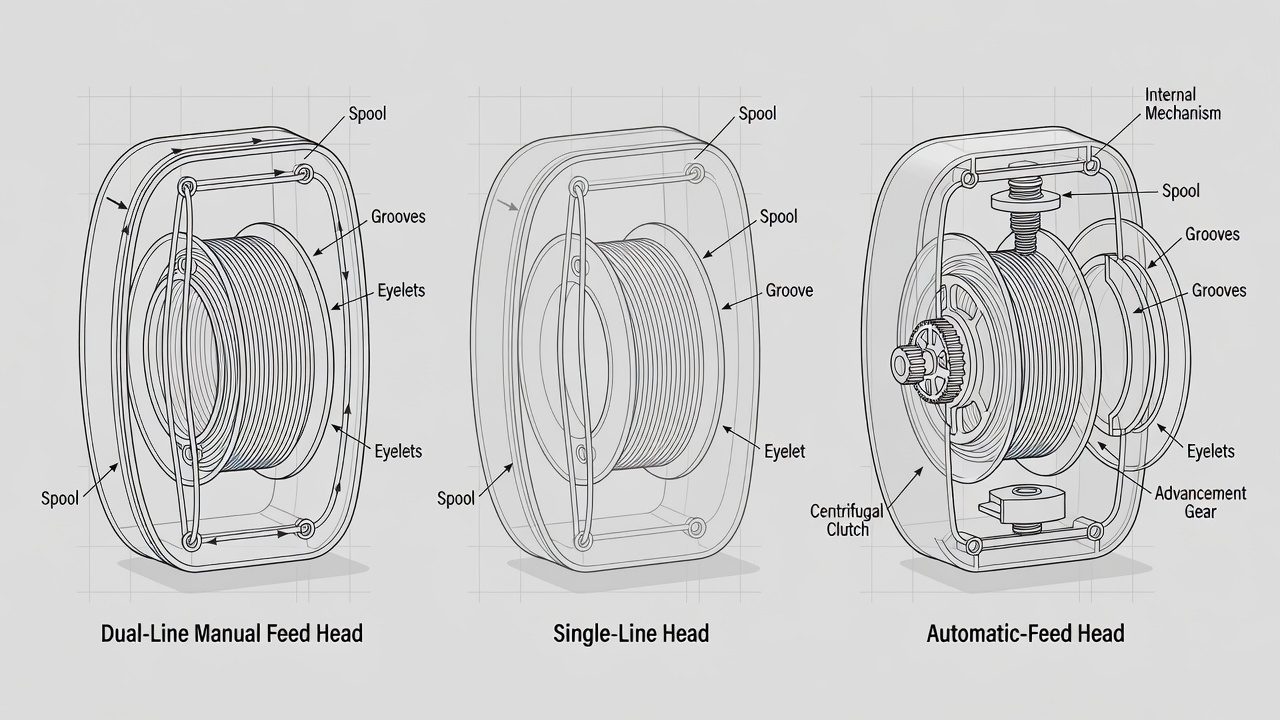
Before you begin reloading string, identify your trimmer’s specific design. Weed wackers come in three primary configurations: dual-line manual feed (the most common type), single-line systems, and automatic or bump-feed models. Each requires a slightly different loading approach.
Most residential trimmers use the dual-line system, which holds two separate strands of trimmer line that rotate together. This design provides better cutting coverage and allows the trimmer to continue working when one line breaks. Single-line models are simpler but less efficient for larger yards. Automatic-feed systems advance new line as the old line wears or breaks, reducing the need for manual reloading.
The trimmer head—the rotating part at the end of the shaft—houses the spool where the string winds. On most models, you’ll access this by either unscrewing the spool cap (typically a plastic dome with grooves for grip) or pressing release tabs on the sides of the head. Check your trimmer’s manual to confirm your model’s design.
Before You Start: Safety and Preparation
Always disconnect the power source before reloading string. For electric trimmers, unplug the unit from the outlet. For battery-powered models, remove the battery pack completely. For gas-powered trimmers, ensure the engine is cool and disconnect the spark plug wire. This prevents accidental starts that could cause serious injury.
Next, gather the correct replacement string for your model. Trimmer line comes in various diameters, typically ranging from 0.065 to 0.110 inches. Using the wrong gauge can damage your trimmer’s feed mechanism or reduce cutting efficiency. Check your trimmer’s manual or the spool housing for the correct size—this information is often printed on a label on the trimmer head itself.
You’ll also need to determine the correct line length. Most dual-line trimmers require 15–20 feet of total string, split evenly between the two channels (7.5–10 feet per line). Some models use longer lengths; refer to your manual for the exact specification. Having a tape measure nearby helps ensure you cut the correct length.
How to Load String: The Dual-Line Method (Most Common)
The dual-line method is standard for most residential string trimmers. Follow these steps for successful loading:
Step 1: Remove the Trimmer Head
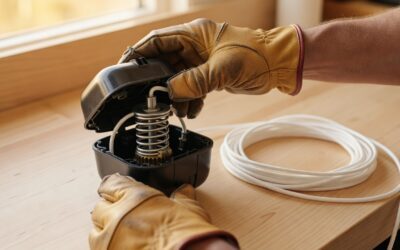
Grasp the spool cap (the top of the trimmer head) with both hands. Turn it counterclockwise firmly but steadily until it loosens. Once loose enough, unscrew it by hand completely. Set aside the cap and any springs or washers that come loose—you’ll need to reinstall these in the correct order.
If your trimmer uses release tabs instead of a screw cap, press the tabs inward simultaneously while pulling upward on the spool. The entire spool assembly should detach from the housing.
Step 2: Remove Old String and Clean the Spool
Pull out any remaining old string from the spool. If the string is wound tightly, you may need to gently pry it loose with a flat screwdriver. Once removed, wipe away any dirt, grass clippings, or debris from the spool grooves using a dry cloth or brush. A clean spool ensures the new string seats properly and feeds smoothly.
Step 3: Measure and Cut New String
Measure the correct length of replacement line for your trimmer. For a typical 15-foot total requirement, cut approximately 7.5–8 feet of line per strand. Cut the line using scissors or a utility knife to ensure clean, straight edges.
Step 4: Identify the Winding Direction
Look for an arrow or directional marking printed or molded into the spool. This arrow indicates the correct winding direction—winding in the wrong direction is one of the most common mistakes and will prevent proper string feeding. The arrow typically points either clockwise or counterclockwise. If you cannot find a marking, check your trimmer’s manual for guidance.
Step 5: Insert and Wind the First Strand
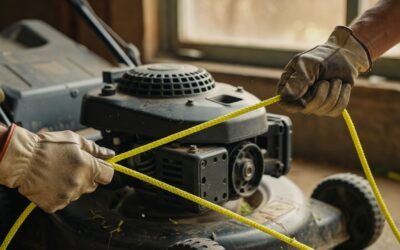
Locate the eyelet (small hole) or guide on the spool where you’ll begin threading the first line. Insert approximately 6 inches of the line into this eyelet to anchor it temporarily. Now begin winding the line around the spool grooves, following the marked direction precisely. Wind tightly and evenly, keeping the line taut as you go—loose winding causes tangling and feeding problems. Fill the groove completely, then move to the second groove if your spool has multiple channels.
Step 6: Secure the First Line
Once you’ve wound the first strand, you’ll reach the anchor slot (a small notch or depression at the edge of the spool designed to hold the line end). Fit the end of the string into this slot firmly. Some spools have small hooks or clips instead of slots—ensure the line is securely seated.
Step 7: Wind the Second Strand
Repeat steps 5 and 6 with your second measured piece of string. Thread it into the second eyelet or guide, wind it in the correct direction in its designated groove, and secure the end in its anchor slot. Both strands should be equally tight and fully wound.
Step 8: Thread the Lines Through the Exit Eyelets
Modern trimmer heads have exit eyelets (small holes) in the head housing where the string extends outward during operation. Pull both secured line ends through these eyelets carefully, ensuring they pass completely through and extend beyond the trimmer head. These exposed ends are what actually cut the grass.
Step 9: Reassemble the Trimmer Head
Align the spool with the trimmer housing and carefully insert it back into position. If your trimmer uses a screw cap, reinstall any washers or springs in their original order, then thread the cap clockwise by hand until hand-tight. Do not over-tighten, as this can crack the plastic housing. If your trimmer uses release tabs, press the spool assembly upward into the housing until you hear or feel it click into place.
Single-Line and Automatic-Feed Variants
Single-Line Systems: Some trimmer models use only one line instead of two. The loading process is nearly identical, but you’ll have only one groove and one anchor slot. Measure the required length (often 20–25 feet for single-line trimmers to compensate for using only one strand), wind it fully in the marked direction, and secure it in the anchor slot. The process is actually simpler than dual-line loading due to fewer components.
Automatic and Bump-Feed Systems: These trimmers advance new line automatically as the old line wears. Loading is different: you’ll typically wind a long length of line (30–50 feet, depending on the model) onto the spool, leaving a tail extending through the exit eyelet. The trimmer’s mechanism automatically feeds this tail as needed, so you rarely need to reload. Consult your specific trimmer’s manual for exact winding instructions, as automatic systems vary significantly between manufacturers.
Reassembling and Testing Your Trimmer
Once the trimmer head is reassembled, reconnect the power source (plug in the electrical cord, reinstall the battery, or reattach the spark plug wire for gas models). Before operating the trimmer on your lawn, perform a quick operational test.
Power on the trimmer and let it run for 10–15 seconds in a safe, open area away from people, pets, and property. The string should extend outward smoothly and rotate without tangling or bunching. Listen for unusual sounds—grinding or rattling may indicate improper assembly. Turn off the trimmer and inspect the string. Both lines should be equally extended and free of kinks or knots.
If the string doesn’t feed smoothly, turn off the trimmer and allow it to cool before reopening the head. Check that both lines are fully wound, properly seated in their anchor slots, and correctly threaded through the exit eyelets. Rewinding may be necessary.
Common Mistakes to Avoid
Winding in the Wrong Direction: This is the leading cause of poor string feeding. String wound backward resists feeding and may cause the line to bunch or tangle inside the head. Always verify the directional arrow before winding, and double-check your work before reassembling.
Over- or Under-Tightening the Spool Cap: A cap that’s too tight can crack the housing or damage internal components. A cap that’s too loose can pop off during operation, scattering the string assembly. Hand-tighten firmly but gently—think of the firmness needed to secure a jar lid.
Using Incorrect String Diameter: Line that’s too thin may break constantly; line that’s too thick may jam the feed mechanism. Always verify your trimmer’s specification and purchase matching replacement string.
Leaving Debris in the Spool: Grass clippings, dirt, or old string fragments prevent new string from seating properly and can cause tangling. Always clean the spool thoroughly before reloading.
Cutting String to the Wrong Length: Measuring inaccurately wastes string or results in insufficient length to fill the spool grooves. Use a tape measure for precision.
Not Anchoring the Lines Securely: If the string ends slip out of their anchor slots during winding or operation, the string unravels and the trimmer fails to function. Verify that both ends are firmly seated before reassembling.
Frequently Asked Questions
How often should I reload string in my weed wacker?
Frequency depends on how often you use your trimmer and the size of your lawn. Light residential use may require reloading once or twice per season, while regular use might necessitate monthly reloading. You’ll know it’s time when the string becomes noticeably shorter, thinner, or the trimmer stops cutting effectively. Most trimmers can use the same spool multiple times before replacement is needed.
What if my trimmer has an automatic-feed system?
Automatic-feed trimmers load differently—you wind one long continuous line onto the spool rather than two separate strands. The trimmer’s internal mechanism advances this line automatically as it wears. Consult your specific trimmer’s manual for exact winding length and technique, as automatic systems vary significantly between brands and models.
Can I use any brand of replacement string in my trimmer?
You should use string that matches your trimmer’s specified diameter and material type. While universal replacement line exists and will fit most trimmers, using the manufacturer-recommended string ensures optimal performance and prevents potential damage to the feed mechanism. Universal string is acceptable if the exact brand is unavailable, but verify the gauge matches your trimmer’s specification.
Why does my string keep breaking or tangling?
String problems typically result from incorrect winding direction, using the wrong diameter, over-tightening the lines, or debris inside the spool. Check the directional arrow on your spool, verify the string gauge matches your trimmer’s spec, wind evenly without excessive tension, and clean the spool before reloading. If problems persist, consult your trimmer’s manual or contact the manufacturer.