Direct Answer: How to Start Your Lawnmower
To start a gas-powered lawnmower, ensure the fuel tank is filled with fresh unleaded gasoline, check the oil level, engage the safety lock (blade brake), move the choke to the cold position, and pull the starter cord firmly with a quick upward motion. The engine should catch within a few pulls. For electric corded mowers, plug into a grounded outlet and press the power button. For battery-powered mowers, charge the battery fully, insert it into the mower, and press the ignition button. Always consult your specific model’s manual for exact procedures, as startup steps vary by manufacturer and engine type.
Understanding Your Lawnmower Type
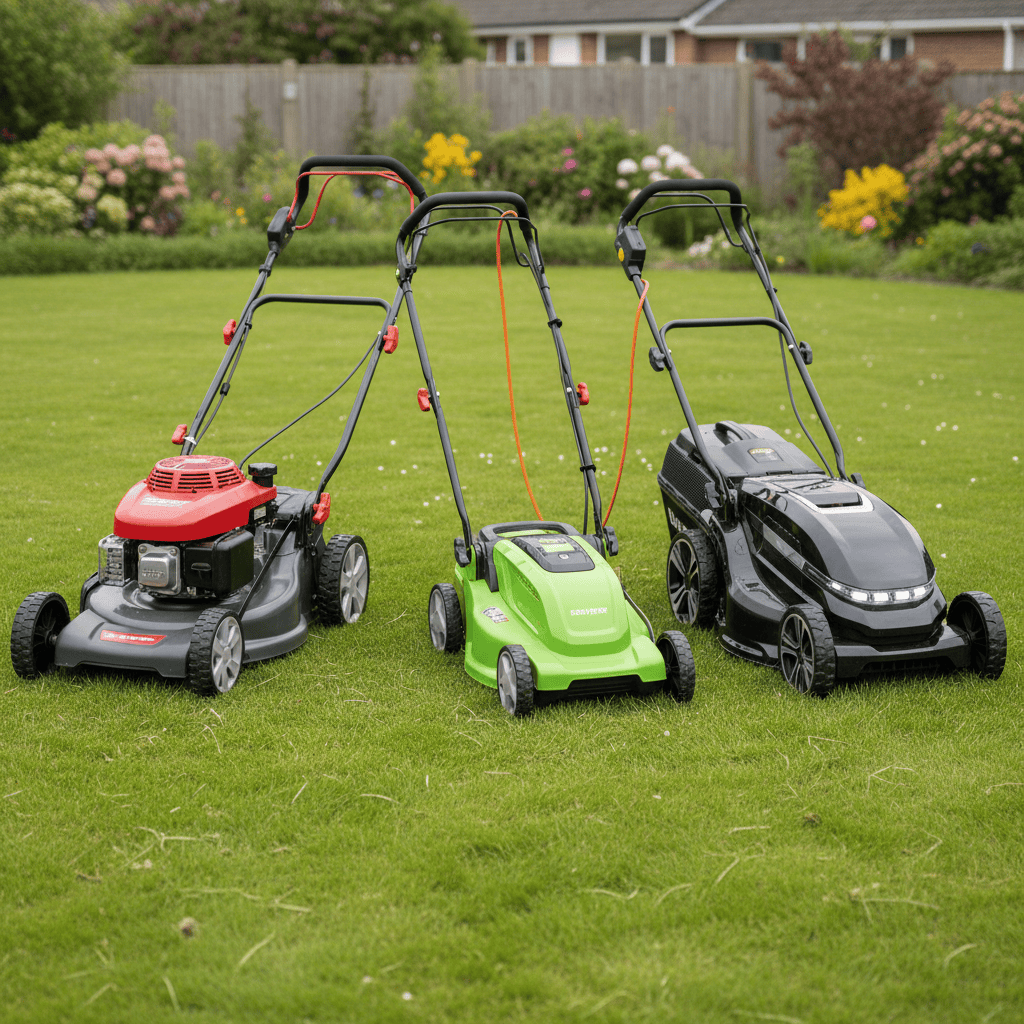
Before attempting to start your mower, identify which type you own. This matters because each has fundamentally different startup procedures and safety requirements.
Gas-Powered Mowers
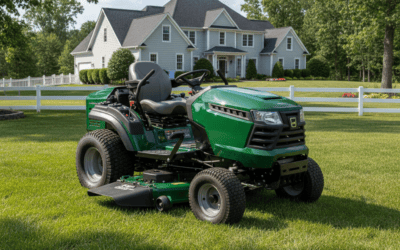
Gas mowers are the most common residential type. They use small internal combustion engines (typically 4-7 horsepower) powered by unleaded gasoline. These engines require manual priming, choke adjustment, and pull-cord ignition. Gas mowers are independent of electrical infrastructure and offer consistent performance across seasons, but they require more maintenance and skill to start reliably.
Electric Corded Mowers
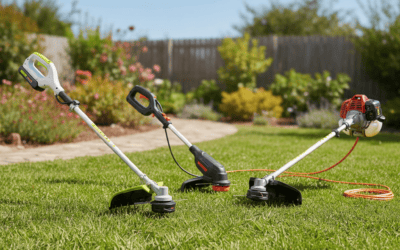
Corded electric mowers plug directly into a standard 110V or 220V household outlet via an extension cord. They have no fuel tank, oil changes, or spark plugs to maintain. Starting is as simple as pressing a button. The main limitation is cord length—typically 25-100 feet—which restricts mowing range.
Battery-Powered (Cordless) Mowers
These use rechargeable lithium-ion batteries, offering the convenience of cordless operation with minimal maintenance. They’re quieter than gas mowers and don’t require fuel storage. Battery life typically provides 30-90 minutes of runtime depending on the model and battery capacity.
Robotic Mowers
Autonomous mowers operate on a timer or app control and don’t require traditional “starting.” Setup involves defining the mowing boundary and scheduling operation times. They’re outside the scope of this guide.
Pre-Startup Checks for Gas Mowers
Proper preparation is essential for reliable starting and engine longevity.
Fuel Requirements
- Fuel type: Use fresh, unleaded gasoline with an octane rating of 87 or higher. Avoid premium fuel unless your mower manual specifies it.
- Ethanol content: Gasoline with up to 10% ethanol (E10) is acceptable for most mowers. Higher ethanol blends (E15, E85) can damage fuel systems—check your manual.
- Fuel freshness: Gasoline degrades within 30 days if left sitting. Use fuel that’s less than two weeks old, or add a fuel stabilizer if storing long-term.
- Tank level: Fill the tank before each use. A full tank prevents water condensation inside the tank.
Oil Level Check
Most lawnmower engines use SAE 30 weight oil or synthetic 10W-30 in cooler climates. Check the oil dipstick (usually located on the side of the engine) before each use:
- Locate the dipstick or oil cap on the engine side.
- If there’s a dipstick, remove it, wipe it clean with a rag, reinsert fully, and pull out again to read the level.
- Oil should reach the “full” mark on the dipstick.
- If low, add oil gradually until full. Overfilling can damage the engine.
- Change oil every 50-100 hours of operation or annually, whichever comes first.
Safety Lock Engagement
The safety lock (also called the blade brake or operator presence control) is a crucial feature that prevents blade rotation when the mower is unattended. This lever, usually located on the mower handle, must be:
- Engaged (squeezed or held toward the handle) before attempting to start the engine.
- Held in place during startup and operation.
- Released to stop the blade immediately if you need to pause.
Many modern mowers won’t start if the safety lock isn’t engaged—this is a critical safety feature that protects you from accidental blade contact.
Visual Inspection
Before starting, check for:
- Debris wrapped around the blade or under the deck (shut off and ensure the blade is stopped before inspecting).
- Loose bolts or visible damage to the deck or handle.
- A clean air filter (replace if clogged with dirt or grass).
- Proper spark plug condition (should have a small gap and not be fouled with debris).
Step-by-Step: Starting a Gas Lawnmower
Cold Start (First Use of the Day)
A cold start requires more fuel-air mixture preparation than a warm start.
- Position the mower: Place the mower on a flat, open area away from obstacles or people. Ensure the blade area is clear of debris.
- Engage the safety lock: Hold or squeeze the blade brake lever firmly toward the handle.
- Set the choke: Move the choke lever to the “closed” or “cold” position. This restricts airflow and enriches the fuel mixture for easier cold starting. On some mowers, this lever is marked with a snowflake symbol (❄️) for cold or a sun symbol (☀️) for warm.
- Optional: Prime the engine: Some mowers have a primer button (a small rubber bulb). Press it 3-5 times to push fuel into the carburetor. This step accelerates cold starting.
- Grip the pull cord: Firmly grip the starter cord handle with your dominant hand.
- Pull with quick, smooth motion: Pull the cord downward and forward in one swift motion, using your arm (not just your wrist). The cord should extend fully but not to its maximum length. Release and let it rewind.
- Repeat if needed: If the engine doesn’t catch on the first pull, pull again. Most mowers start within 3-6 pulls when cold.
- Gradually open the choke: As the engine runs, slowly move the choke toward the “open” or “warm” position. If you open it too quickly, the engine may stall. Listen for the engine to smooth out as you adjust the choke.
- Let it warm up: Allow the engine to idle for 30-60 seconds before engaging the blade (when you release the safety lock to mow).
Warm Start (Subsequent Uses Within a Few Hours)
A warm start is faster and requires less fuel enrichment:
- Engage the safety lock.
- Set the choke to “warm” or “open” position. This is the opposite of cold-start position.
- Skip priming (fuel is already in the carburetor from the previous run).
- Pull the starter cord once or twice. The engine should start immediately.
- Begin mowing. No extended idle period is necessary.
Restarting After a Brief Stop
If you stop the mower for only a few minutes (to move furniture or adjust direction):
- Keep the safety lock engaged.
- Keep the choke in the warm position.
- Pull the starter cord once. The warm engine will catch instantly.
Starting Electric and Battery-Powered Mowers
Corded Electric Mowers
Starting a corded electric mower is straightforward:
- Unwind the extension cord fully to prevent voltage drop and heat buildup. Use a 12-gauge cord rated for outdoor use, typically 50-100 feet in length.
- Plug into a grounded outlet with ground fault circuit interrupter (GFCI) protection. GFCI outlets are standard in modern homes and prevent electrical shock.
- Engage the safety switch: Hold the safety button or lever in the “on” position (requirements vary by model).
- Press the power button to start the blade and motor. The mower will operate immediately without warm-up time.
- Begin mowing. Unlike gas mowers, there’s no idle period.
Safety note: Do not operate a corded mower in rain or wet grass. Water contact creates electrocution risk, even with GFCI protection.
Battery-Powered Mowers
Battery mowers require minimal startup effort:
- Charge the battery fully before first use or after each mowing session. Most batteries take 30-60 minutes to charge fully. Partial charging may reduce runtime.
- Insert the battery into the battery slot on the mower until it clicks into place. The connection should feel secure.
- Engage the safety lock or hold the safety button (varies by model).
- Press the power button to start. The mower will run immediately with minimal noise.
- Monitor battery level during operation. Most mowers display a battery indicator light (green, yellow, red). Stop mowing before the battery is fully depleted to avoid damage to the battery cells.
Battery maintenance tips:
- Store the battery in a cool, dry place (50-80°F is ideal).
- Recharge after every use rather than storing a discharged battery for weeks.
- Most lithium-ion batteries last 3-5 years with proper care.
- Cold temperatures (below 32°F) significantly reduce battery runtime; store indoors in winter.
Troubleshooting: Why Your Mower Won’t Start
Engine Won’t Turn Over (No Sound)
Possible cause: Safety lock disengaged or not held firmly.
- Solution: Verify the blade brake lever is fully engaged and being held toward the handle. Try again.
Possible cause: Spark plug fouled or disconnected.
- Solution: Locate the spark plug (usually on the side of the engine). Disconnect it by removing the wire cap. If the plug is black and sooty, it’s fouled. Replace with a new plug or clean it with a wire brush and restore the gap to manufacturer specifications (typically 0.025-0.040 inches). Reconnect the wire.
Engine Turns Over But Won’t Catch
Possible cause: Choke in wrong position.
- Solution: For a cold start, ensure the choke is fully closed (cold position). For a warm start, move it to open (warm position). Try again.
Possible cause: Stale or contaminated fuel.
- Solution: Drain the old fuel from the tank using a fuel siphon. Refill with fresh gasoline less than two weeks old. If the mower still won’t start, the carburetor may be clogged. Use a carburetor cleaner or contact a technician.
Possible cause: No fuel or very low fuel level.
- Solution: Check the fuel gauge (if present) or open the fuel cap and visually inspect the tank. Refill immediately. Some mowers won’t start if the fuel level is critically low.
Flooded Engine
A flooded engine occurs when too much fuel enters the combustion chamber and prevents ignition.
Signs: Strong fuel smell, engine turns over but won’t start despite multiple pulls, and spark plug is wet with fuel.
Solution:
- Stop pulling the starter cord.
- Set the choke to the open (warm) position.
- Remove the spark plug wire.
- Pull the starter cord 5-10 times to clear excess fuel from the combustion chamber. No ignition will occur without the spark plug wire connected, so the excess fuel will be expelled.
- Reinstall the spark plug wire.
- Set the choke to cold and try starting again.
Weak Spark or Misfire
Possible cause: Dirty air filter.
- Solution: Locate the air filter (usually a plastic container on the engine side). Unscrew or unclip the cover and remove the filter. If it’s heavily clogged with grass or dirt, replace it with a new one. A partially clogged filter can be gently tapped or brushed clean, but replacement is recommended.
Possible cause: Low oil level.
- Solution: Check the oil level using the dipstick. Add oil to the full mark. Some mowers have an automatic shutoff that prevents starting if oil is critically low—this is a safety feature to prevent engine damage.
When to Call a Professional
If the mower won’t start after checking fuel, oil, spark plug, air filter, and choke position, or if the engine starts briefly but immediately stalls, the carburetor or ignition system may require professional service. Contact a certified small-engine technician or take the mower to an authorized service center.
Starting Your Mower After Storage or Winter
Pre-Season Preparation
If your mower has been in storage for more than 30 days, follow these steps before attempting to start:
- Drain old fuel and replace with fresh gas. Fuel left in the tank and carburetor for months can gum up and prevent starting. If available, use a fuel siphon to remove old fuel completely. Refill with fresh unleaded gasoline.
- Replace or clean the spark plug. After storage, spark plugs often become fouled. Replace with a new plug or clean the old one if it’s in acceptable condition.
- Check and replace the air filter. Filters clogged with dust or grass will impede starting. Replace if heavily soiled.
- Check the oil level. Over winter, oil may have drained from engine surfaces or condensation may have diluted it. Verify the level and replace if needed.
- Inspect the blade. Ensure it’s clean, sharp, and not bent. Dull or damaged blades require professional sharpening or replacement.
- Try a gentle pull first. After storage, pull the starter cord slowly once or twice to ensure the engine isn’t seized. Then attempt normal starting procedure.
Long-Term Storage
To prepare a mower for months of storage (winter or off-season):
- Option 1 (Fuel Stabilizer Method): Add a fuel stabilizer to the tank according to product instructions. Run the mower for 5-10 minutes to distribute the stabilizer through the fuel system. This prevents fuel degradation.
- Option 2 (Fuel Drain Method): Run the mower until the fuel tank is nearly empty. Then pull the starter cord several times to purge remaining fuel from the carburetor. This prevents gum buildup.
- Change the oil before storage if it’s near the recommended change interval. Fresh oil provides better engine protection during dormancy.
- Clean the deck to remove grass clippings and moisture that can cause corrosion.
- Store in a dry location such as a garage or shed, away from direct sunlight and moisture.
Frequently Asked Questions
Q: What’s the difference between the choke being “on” and “off”?
A: The choke controls airflow to the engine. Choke “on” (closed position) enriches the fuel mixture with more gas and less air, making cold starts easier. Choke “off” (open position) allows more air into the mixture, which is correct for running a warm engine. Using the wrong choke position prevents starting or causes stalling.
Q: Why does my mower have a safety lock, and what happens if I disable it?
A: The safety lock (blade brake) prevents the blade from spinning when you release the handle, protecting you from accidental contact with a moving blade. Disabling or bypassing this safety feature is dangerous and may also prevent the mower from starting—many modern mowers have an interlock system that won’t allow engine ignition without the safety lock engaged. Never disable this feature.
Q: Can I use premium gasoline in my mower to make it start easier?
A: No. Premium gasoline offers no starting advantage for a typical mower and wastes money. Use regular unleaded gasoline (87 octane) unless your manual specifies premium. Higher octane fuel is only beneficial for high-compression engines, which residential mowers don’t have.
Q: How long does it take to charge a cordless mower battery before first use?
A: Most lithium-ion batteries require 60-90 minutes for a full charge from empty. However, many models allow partial charging (20-30 minutes) for shorter mowing sessions. Check your specific battery charger’s instructions. Allowing the battery to charge fully before first use ensures maximum runtime and proper battery calibration.
Q: Is it normal for a gas mower to be hard to start when cold?
A: Yes, but it shouldn’t require excessive effort. A properly maintained cold-start gas mower typically starts within 3-6 pulls of the starter cord. If you’re pulling more than 10 times, check the fuel freshness, choke position, spark plug condition, and oil level. Persistent hard starting indicates a maintenance issue requiring attention.
Key Takeaways
Starting a lawnmower is straightforward once you understand your mower type and follow the correct procedure. Gas mowers demand more attention—check fuel and oil, engage the safety lock, set the choke appropriately, and use smooth starter cord technique. Electric and battery mowers are simpler: ensure power availability or battery charge, engage the safety lock, and press the button. Troubleshooting involves checking fuel freshness, spark plug condition, air filter cleanliness, oil level, and proper choke positioning. With seasonal preparation and regular maintenance, your mower will start reliably year after year.