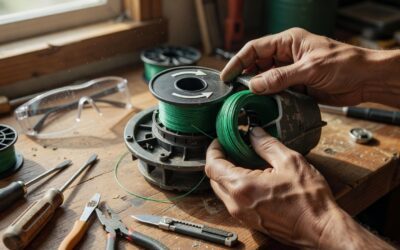
Quick Answer: Stop the engine and disconnect the spark plug wire or battery. Locate your trimmer head (usually a bump-feed plastic cover), unscrew or unclip it, and remove the old string. Wind new string onto the spool following the directional arrows, leaving 4–6 inches hanging from each eyelet. Reassemble the head, thread the string ends through the eyelets, and reconnect power. The exact process varies by trimmer model—bump-feed, fixed-spool, and automatic-feed heads work differently.
Safety First: Before You Start
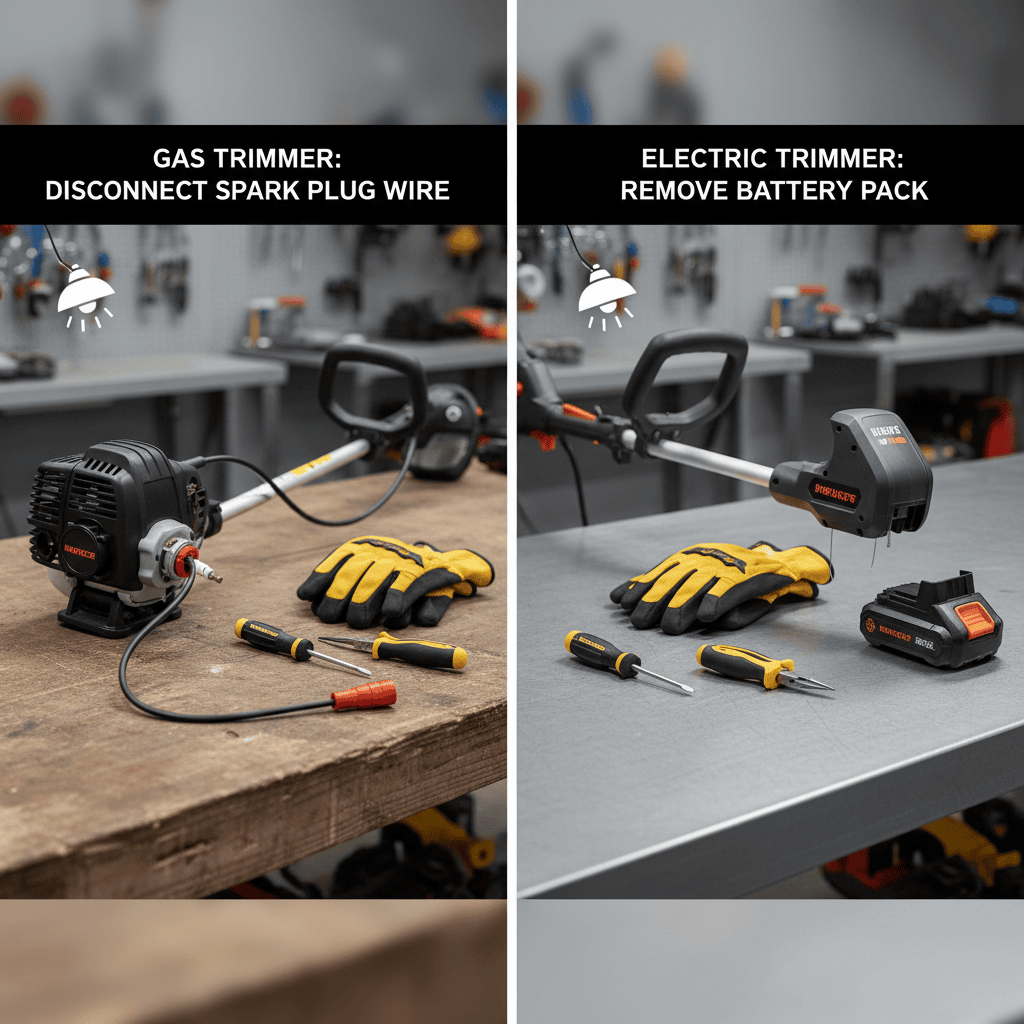
Restringing a weed wacker is straightforward, but safety must come first. A trimmer head spinning at high speed is dangerous, so always:
- Stop the engine completely and let it cool for a few minutes.
- Disconnect the spark plug wire (gas trimmers) by twisting it off the plug, or remove the battery (electric trimmers). This prevents accidental starting while you work.
- Place the trimmer on a flat, stable surface so the head is easily accessible.
- Wear work gloves to protect your hands from sharp string ends and rough plastic edges on the spool.
- Work in good lighting so you can see the directional arrows and eyelet positions clearly.
Never attempt to restring a trimmer while the engine is running or warm. Even a slight bump can cause the head to spin and cause serious injury.
Understanding Your Trimmer Head Type
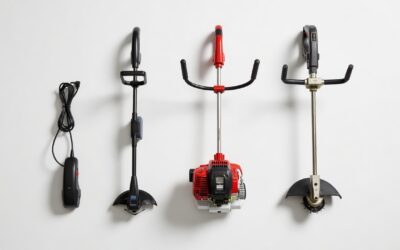
Not all trimmer heads work the same way. Identifying yours is the first step to restringing correctly.
Bump-Feed Head (Most Common)
This is the standard design on most residential trimmers. The spool sits inside a plastic cover (the head) with a small bump or knob at the bottom. When you tap the bump on the ground while the trimmer is running, it advances a bit of string. The cover typically unscrews or unclips, making restringing straightforward.
Fixed-Spool Head
Some trimmers have a fixed spool that doesn’t advance automatically. Instead, you manually pull string from the spool as needed, or the string is pre-cut to a set length. These are less common on residential trimmers but more durable for heavy use.
Automatic-Feed Head
Premium trimmers may have automatic-feed heads that advance string continuously as it wears. These are more complex and usually require professional restringing or replacement rather than DIY rewinding.
How to identify your head: Look at the top of the trimmer head. Bump-feed heads have a visible plastic cover with a center knob. Fixed-spool heads show the spool directly. Check your trimmer’s manual or look up your model number on the manufacturer’s website if you’re unsure.
Tools and Materials You’ll Need
Restringing requires minimal tools and supplies:
- Replacement trimmer string (line) in the correct diameter for your trimmer (typically 0.080″, 0.085″, or 0.095″). Check your manual or the head cover for the recommended size.
- Needle-nose pliers (optional but helpful for removing stubborn spools or cleaning debris).
- Small flathead screwdriver to unscrew the head cover if needed.
- Work gloves for protection.
- A clean, dry workspace to lay out parts.
About string thickness: Using the wrong diameter can cause feeding problems or reduce cutting efficiency. String that’s too thin may break frequently; string that’s too thick may jam in the head. Most residential trimmers use 0.080″ or 0.085″ string—default to your manual’s specification.
Step-by-Step: Changing String on a Bump-Feed Head
This is the most common trimmer design and the easiest to restring. Follow these steps:
Step 1: Access the Trimmer Head
Turn off and unplug the trimmer (or remove the battery). Place it on a stable surface with the head facing up. Look at the plastic cover on the head—you’ll see either a central screw, a clip, or tabs that hold it in place.
Step 2: Remove the Head Cover
If the cover has a center screw, use a screwdriver to unscrew it clockwise (or counterclockwise, depending on the design—check which way it turns before forcing it). If it’s held by tabs or a clip, gently pry the cover off with a flathead screwdriver. Set the cover aside in a safe place.
Step 3: Remove the Spool
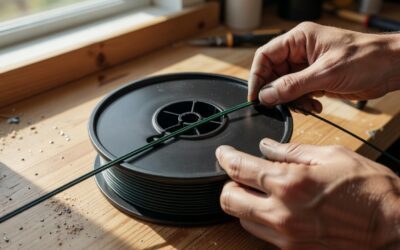
Once the cover is off, you’ll see the spool—a plastic reel that holds the string. In most designs, the spool simply lifts out. In some models, it’s held by a center arbor (pin) that you may need to unscrew. If the spool feels stuck, a light tap with a rubber mallet or the handle of a screwdriver usually loosens it. Once free, lift the spool out and empty any remaining old string or debris.
Step 4: Prepare the New String
Cut a length of new string—typically 15–20 feet for a standard residential trimmer, though your manual may specify a different length. If you’re unsure, start with 15 feet; you can always add more if needed.
Step 5: Wind the String Onto the Spool
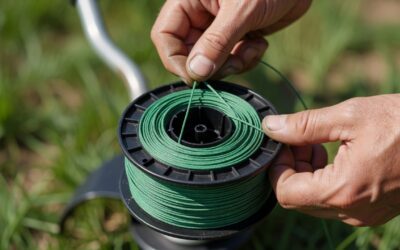
This is the critical step. Look at the spool closely—you’ll see two small eyelets (holes) near the edge and directional arrows molded into the plastic indicating which way to wind. The arrows are essential: winding in the wrong direction will cause the string to tangle or feed improperly.
- Hold the spool in one hand with the eyelets facing toward you.
- Insert one end of the string into the first eyelet (the one on the left, typically).
- Wind the string around the spool in the direction indicated by the arrows, keeping tension so it wraps neatly without overlapping.
- Leave 4–6 inches of string hanging out as you wind.
- When you’ve wound most of the string, locate the second eyelet and insert the other end of the string into it, also leaving 4–6 inches hanging.
The two hanging ends will later be pulled through the eyelets to feed out of the head.
Step 6: Reinstall the Spool
Place the spool back into the head, aligning it with the center arbor. Make sure it seats fully and doesn’t wobble. If your trimmer’s design requires screwing the spool down, do so gently—don’t overtighten.
Step 7: Thread the String Through the Eyelets
Pull the two hanging string ends so they feed through the eyelets and extend 4–6 inches beyond the head. This is the cutting length. The string should slide smoothly; if it resists, make sure the spool is seated correctly and the eyelets aren’t blocked by debris.
Step 8: Reassemble the Head Cover
Place the head cover back on top of the spool, aligning any tabs or guides. If the cover has a center screw, tighten it firmly but gently—don’t strip the threads. If it uses tabs, press down until you hear or feel a click indicating it’s seated.
Step 9: Reconnect Power and Test
Reconnect the spark plug wire or install the battery. Start the trimmer in an outdoor area away from people, pets, and property. Run it for a few seconds at low throttle. The string should extend from the head smoothly. If it doesn’t feed or tangles, turn off immediately, disconnect power, and recheck your spool winding and eyelet threading.
Restringing Fixed-Spool and Automatic-Feed Heads
Fixed-Spool Heads
Fixed-spool designs often have a single wound length of string that you pull from the spool as it wears. Some allow you to wind string manually; others are pre-wound and non-replaceable. Check your manual—if your head is pre-wound, you’ll need to replace the entire spool assembly rather than rewinding. If it’s manual-wind, follow the same directional-arrow method as the bump-feed but keep the spool in place rather than removing it.
Automatic-Feed Heads
These heads are designed to feed string automatically and are more complex internally. Most manufacturers recommend replacing the entire head rather than rewinding it yourself. If your trimmer has an automatic-feed head and you need to restring, contact the manufacturer for a replacement head assembly or take it to a professional service center.
Common Mistakes to Avoid
Winding in the Wrong Direction: This is the #1 reason restringing fails. If your string tangles immediately or won’t feed, you likely wound it backward. Remove the spool and rewind following the arrows exactly.
Overlapping String on the Spool: If string winds over itself, it creates a bulky, uneven spool that tangles. Keep tension steady and wind neatly in a spiral pattern. If you make a mistake partway through, unwind and start over rather than trying to fix overlaps.
String Too Long or Too Short: If the hanging ends are longer than 6 inches, the excess will flap and reduce cutting efficiency. If they’re shorter than 4 inches, the string may retract into the head too easily. Aim for 5 inches as a standard.
Forgetting to Disconnect the Spark Plug or Battery: Always do this before restringing. An accidental start while you’re working near the head is a serious hazard.
Not Cleaning the Spool Before Rewinding: Old string debris can interfere with new string feeding. Wipe out the spool with a dry cloth before installing new string.
Forcing the Spool Out: If it’s stuck, gently tap it rather than yanking. Forcing it can damage the threads or the center arbor.
Troubleshooting: When Your Trimmer Still Won’t Work
String won’t feed from the head: Check that the hanging ends are actually extending through the eyelets. If they’re retracted inside the head, open it up and pull them out again. Also verify the spool is seated fully—a misaligned spool can pinch the string.
String tangles immediately: You likely wound it in the wrong direction. Reopen the head, reverse the spool, and rewind following the directional arrows carefully.
String is too thick or too thin to feed smoothly: You may have installed the wrong diameter. Check your manual and install the correct size.
The spool won’t stay in place: Make sure the center arbor isn’t bent or damaged. If it looks deformed, the entire head assembly may need replacement.
The head cover won’t close properly: Check for wound string hanging outside where it shouldn’t be, or debris blocking the cover. Also ensure the spool is fully seated before closing the cover.
When to Replace vs. Restring
Restringing typically works 2–3 times before wear on the spool and eyelets makes feeding unreliable. Signs your trimmer head needs replacement include:
- Eyelets are cracked or worn smooth.
- The spool is warped or has deep gouges from repeated winding.
- String still won’t feed properly after restringing twice.
- The head cover is cracked and won’t seal.
Replacement heads are available from the trimmer’s manufacturer or universal heads that fit most standard designs. Installation typically involves unscrewing the old head from the trimmer shaft and threading on the new one.
Frequently Asked Questions
How often should I change my trimmer string?
String life depends on use frequency and cutting conditions. Light residential users may restring every 2–3 months; heavy users weekly or more often. You’ll know it’s time when the string becomes noticeably shorter, frays at the tips, or doesn’t cut cleanly. Many people restring before each mowing season or after every 10–15 hours of use.
Can I use any brand of replacement string?
Yes, as long as the diameter matches your trimmer’s requirement (typically 0.080″, 0.085″, or 0.095″). Generic string from hardware stores works just as well as brand-name alternatives. The most important factor is the correct diameter—using the wrong size causes feeding problems and poor cutting performance. Some users prefer twist-resistant or round-profile string for durability, but these are quality upgrades rather than necessities.
What if I don’t know what diameter string my trimmer needs?
Check the inside of the head cover or the trimmer’s manual—the size is usually printed there. You can also contact the manufacturer with your trimmer model number, or visit a local hardware or garden supply store with your trimmer and ask for assistance. Most staff can identify the correct size by looking at the head.
Is it normal for new string to come out tangled?
A little tangling when you first start the trimmer is normal as the string settles into the eyelets. Run it for 5–10 seconds and it should smooth out. However, if the string severely tangles or bunches immediately, the spool was likely wound in the wrong direction. Stop, disconnect power, and reopen the head to check your winding direction against the arrows.
Can I restring a trimmer head without removing it from the trimmer?
Yes, for bump-feed heads. You don’t need to remove the head from the trimmer shaft—just unscrew or unclip the cover and access the spool. This saves time and is perfectly safe as long as you’ve disconnected the spark plug wire or battery first. For fixed-spool or automatic-feed heads, check your manual, as some designs require head removal.