Direct Answer: How to Wind a Weed Wacker
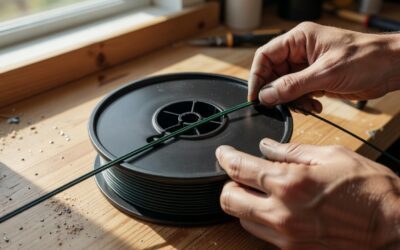
To wind a weed wacker: Remove the spool from the trimmer head and discard old line. Cut new trimmer line to your model’s specified length (typically 10–25 feet). Insert one end into the anchor point on the spool, then wind it tightly in the direction indicated by arrows on the spool, keeping tension even and lines from overlapping. Once wound, thread the line through the eyelets, reassemble the spool into the head, and leave 5–6 inches of line extending for cutting.
Understanding How to Wind a Weed Wacker
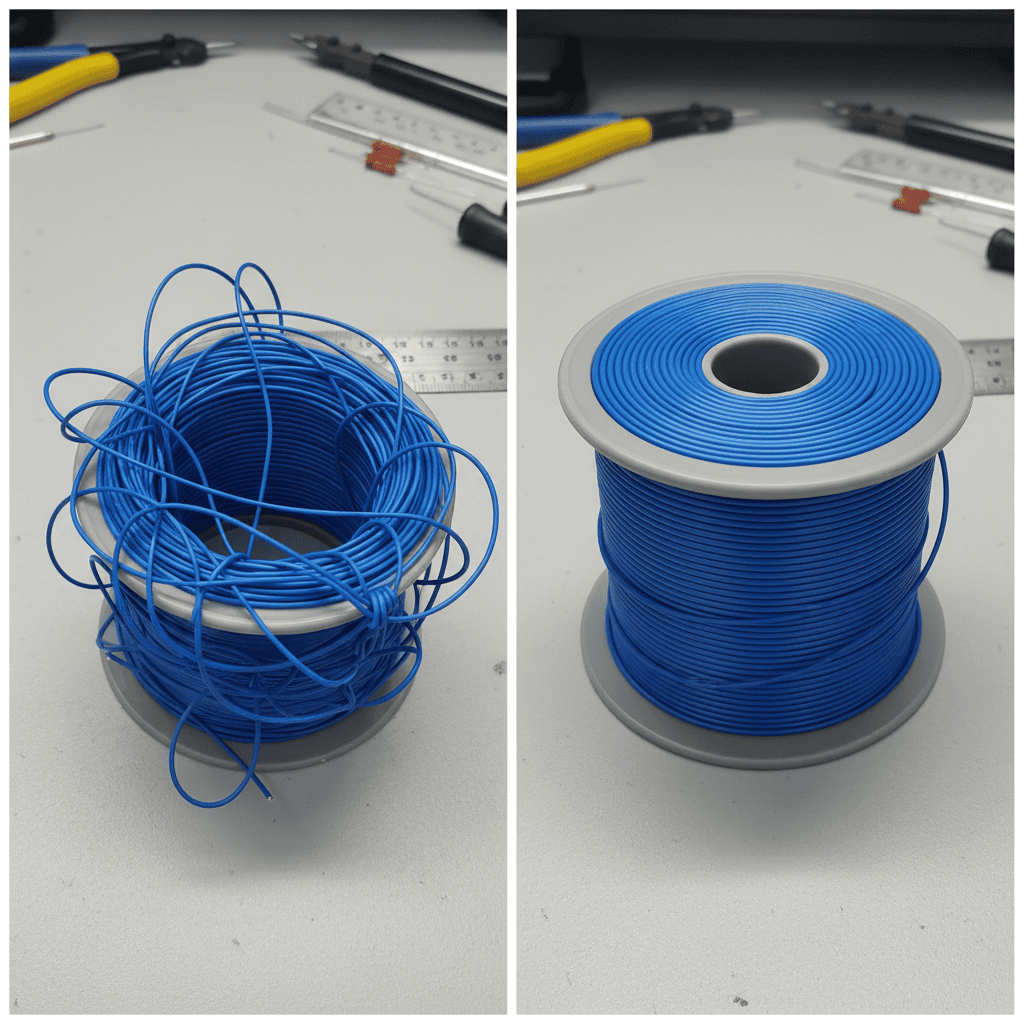
Winding a weed wacker refers to the process of loading new trimmer line onto the spool inside your string trimmer’s cutting head. Over time, trimmer line breaks, wears down, or gets consumed as you use the tool. Knowing how to properly restring your weed wacker saves money, extends equipment life, and ensures your trimmer operates efficiently.
Proper winding technique matters because:
- Line feeding reliability: Incorrectly wound line jams, bunches, or fails to advance when you bump the head.
- Even cutting performance: Properly tensioned line cuts uniformly and doesn’t break prematurely.
- Safety: Loose or tangled line can cause the spool to jam, creating kickback or unexpected stopping.
- Equipment longevity: Correct winding reduces wear on the spool mechanism and trimmer head.
Most weed wackers use one of two trimmer head designs: bump-feed heads (where you tap the ground to advance line) or fixed-line heads (where line is manually advanced or doesn’t advance). Each requires slightly different winding approaches, though the core principle remains the same.
Key Factors to Consider Before Winding
Determine the Correct Trimmer Line Specifications
Before you begin, identify your trimmer’s required line diameter and length:
- Line diameter: Typically ranges from 0.065″ to 0.155″. Check your owner’s manual or the label on the trimmer head. Using the wrong diameter can cause feeding problems or excessive vibration.
- Line length: Most residential trimmers use 10–25 feet of line per spool. Your manual specifies the exact length. Too little line won’t fill the spool properly; too much causes tangling.
- Line material: Most trimmer line is nylon. Some specialty lines (quieter, twisted, or reinforced) are available, but standard nylon is most common and affordable.
Gather Supplies and Tools
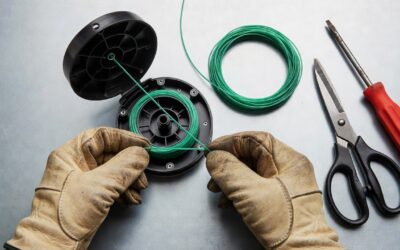
You’ll need minimal equipment:
- Replacement trimmer line (correct diameter for your model)
- Your trimmer’s owner’s manual or a reference photo of the spool
- Scissors or a utility knife to cut the line
- A measuring tape or ruler (optional, but helpful for measuring line length)
- A small Phillips or flathead screwdriver (to remove the spool cover if necessary)
Identify Your Trimmer Head Type
Different trimmer heads wind differently:
| Head Type | How It Works | Winding Consideration |
|---|---|---|
| Bump-Feed | Tapping the ground bumps a mechanism that advances line automatically. | Ensure line is wound tightly and seated in eyelets so the bump mechanism engages smoothly. |
| Fixed-Line | Line doesn’t advance; you manually replace it when it wears. | Line must be wound tightly to prevent unraveling during use. |
| Automatic-Feed | A spring mechanism advances line continuously as it wears. | Wind line under tension and ensure it’s fully seated to activate the feed mechanism. |
Safety Precautions
- Disconnect power: For electric trimmers, unplug the cord. For gas trimmers, disconnect the spark plug wire.
- Wear gloves: Trimmer line edges can be sharp, and handling a disassembled spool prevents cuts.
- Work in a clean area: Use a table or workbench to prevent losing small parts.
- Refer to your manual: Manufacturer instructions override general guidance. Different brands have unique design variations.
Step-by-Step Guide to Winding a Weed Wacker
Step 1: Remove the Spool
Most trimmer heads have a spool cover held by one or two screws or a snap-lock mechanism:
- Place your trimmer on a flat surface with the head facing up.
- Locate the spool cover (usually a plastic cap or disc on the trimmer head).
- If screwed: Use a screwdriver to remove the screws. Keep them in a small container so you don’t lose them.
- If snap-lock: Gently pry or twist the cover counterclockwise until it releases.
- Carefully lift the spool out of the trimmer head. Some spools have a spring underneath—note its position before removing it.
Step 2: Remove Old Line and Clean the Spool
- Unwind any remaining old line from the spool. Discard it.
- If line is tightly wound or stuck, gently pry it free with a screwdriver or your fingernail.
- Inspect the spool for cracks, damage, or debris. If the spool is cracked or the anchor point is broken, the spool must be replaced.
- Wipe the spool clean with a dry cloth to remove grass clippings, dirt, or old line fragments.
Step 3: Measure and Cut New Trimmer Line
- Consult your manual for the exact line length needed. This is typically printed on the spool itself or in the user manual.
- Unroll your new trimmer line and measure the required length using a measuring tape or by marking the line and cutting with scissors.
- Cut the line cleanly with scissors or a utility knife. A clean cut makes it easier to thread through the anchor point.
- Pro tip: Some users cut an extra foot and store it for emergency repairs, but only wind the manufacturer-recommended length onto the spool.
Step 4: Locate the Anchor Point and Thread the Line
- Examine the spool carefully. There will be a small notch, slot, or hole—this is the anchor point where the line begins.
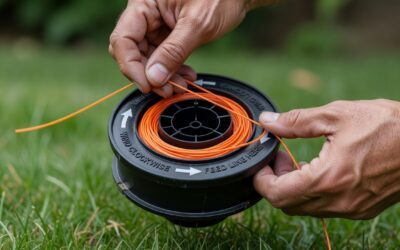
- Most spools have arrows or indicators showing the winding direction (clockwise or counterclockwise). Note this direction before proceeding.
- Insert one end of the trimmer line firmly into the anchor point. It should grip securely. If it doesn’t, the spool may be damaged or you’re using the wrong line diameter.
- Leave approximately 2–3 inches of line extending from the anchor point. This “tail” helps you hold tension while winding.
Step 5: Wind the Line Onto the Spool
This is the critical step:
- Maintain tension: Hold the extended tail of line with your fingers, keeping steady, moderate tension. Don’t pull so hard you strain, but ensure the line stays taut.
- Wind in the correct direction: Rotate the spool in the direction indicated by arrows on the spool. For most bump-feed spools, this is clockwise, but always verify with your manual or the spool markings.
- Wind evenly: Guide the line with your free hand so each wrap sits neatly next to the previous wrap. Avoid overlapping or crossing wraps, as this causes tangling when the line feeds.
- Keep wraps tight: Don’t allow slack between wraps. The line should be coiled snugly around the spool.
- Wind until full: Continue winding until approximately 2–3 inches of line remain unwound (the “tail”). The spool should feel full but not overstuffed.
Step 6: Secure the Line in the Eyelets
After winding:
- Locate the small eyelets or guides where the line exits the spool cover. These guide the line as it feeds out during use.
- Thread the extended tail of line through one of the eyelets, leaving 5–6 inches extending beyond the eyelet.
- If your spool has slots instead of eyelets, carefully seat the line in the designated slots. Some spools have two separate line sections, each feeding through its own eyelet.
- Ensure the line is fully seated. Partially seated line will jam or fail to feed properly.
Step 7: Reassemble the Spool Into the Trimmer Head
- If your trimmer has a spring under the spool, carefully position it back in place.
- Align the spool with the trimmer head cavity and gently lower it into position. The spool should sit flush without forcing.
- Reattach the spool cover by reversing your removal process: insert screws and tighten (don’t overtighten, which can crack the cover), or snap the cover clockwise until it locks.
- Verify the line extends evenly from both eyelets (for dual-line spools) or from the single eyelet.
Step 8: Trim the Line to Cutting Length
- Most trimmer heads are designed with a cutting edge or guard that marks the correct line length.
- Manually pull the line taut and use the cutting edge to trim the line to the proper length (usually 5–6 inches on each side for dual-line spools, or 6–8 inches for single-line designs).
- Alternatively, consult your manual for the exact cutting length.
Step 9: Test the Trimmer
- Reconnect the spark plug wire (gas) or plug in the trimmer (electric).
- Start the trimmer and let it run briefly at idle to ensure the line feeds smoothly.
- For bump-feed trimmers, gently tap the head on the ground to test the feed mechanism. The line should advance slightly.
- Check that the line doesn’t tangle, jam, or feed excessively. If it does, see the troubleshooting section below.
Troubleshooting Common Winding Issues
The Line Tangles or Jams Immediately After Winding
Cause: Line was wound too loosely, wrapped unevenly, or overlapped on itself.
Solution:
- Remove the spool and unwind the line completely.
- Rewind the line, maintaining steady tension and ensuring each wrap sits neatly without overlapping.
- Ensure the line is wound in the correct direction per your manual.
The Line Doesn’t Feed When You Bump the Head
Cause: Line is not properly seated in the eyelets, wound too loosely, or the spool is installed incorrectly.
Solution:
- Remove the spool cover and verify the line is fully seated in the eyelets. It should be firmly in place, not resting loosely.
- Check that the line was wound in the correct direction.
- Rewind if necessary, ensuring the line is wound tightly.
- Verify the spool is fully installed and the cover is tightened securely.
Uneven Line Wear or the Line Breaks Frequently
Cause: Using the wrong line diameter, winding under insufficient tension, or the line being cut by debris or the trimmer guard.
Solution:
- Verify you’re using the correct line diameter for your model. Using undersized line causes premature breakage.
- Ensure you’re winding under consistent tension. Loose wraps lead to uneven wear.
- Inspect the trimmer head and guard for sharp edges or damage that could be cutting the line. File down any burrs.
- Inspect the eyelets for cracks or sharp edges. If damaged, the spool or cover may need replacement.
The Line Unwinds Rapidly or the Spool Feels Loose
Cause: Line wasn’t anchored securely or wound under insufficient tension. The spool may be damaged or installed incorrectly.
Solution:
- Remove the spool and verify the anchor point is intact and not cracked.
- Rewind, ensuring the line is firmly inserted into the anchor point and wound under consistent tension.
- If the problem persists, the spool may be damaged and require replacement.
- Verify the spool cover is tightened securely. A loose cover causes the spool to wobble, which can cause line to unwind.
Frequently Asked Questions
How often should I rewind my weed wacker?
This depends on usage. Casual homeowners might rewind every 2–4 weeks during mowing season. Frequent users may need to rewind weekly or even multiple times per week. You’ll know it’s time when the line becomes noticeably short or breaks repeatedly. Some trimmers with automatic feed mechanisms advance line continuously, requiring rewinding less often.
Can I use any trimmer line, or does it have to be from my trimmer’s manufacturer?
You don’t need the manufacturer’s branded line. Any aftermarket line matching your trimmer’s specified diameter works fine. However, always verify the diameter is correct—using the wrong size causes poor feeding or excessive vibration. Buying from major retailers (hardware stores, online marketplaces) ensures quality and compatibility. Avoid extremely cheap or unknown brands, which may have inconsistent diameter or durability.
What if my spool has two separate line sections?
Some bump-feed spools have two separate chambers, each with its own anchor point and eyelet. Wind each chamber independently using the same technique: thread the line into the anchor point, wind tightly in the correct direction, and seat the line in its eyelet. This design provides two cutting lines simultaneously and ensures more balanced cutting. Follow your manual’s specific layout to identify the two chambers and their winding directions.
Is it normal for the line to feel tight or stiff after winding?
Newly wound line often feels slightly stiff due to tension and the coiling. Once you run the trimmer and the line heats up slightly, it will loosen and feed more naturally. However, if the line is extremely tight and difficult to pull, you may have wound it under too much tension. Rewind using slightly less tension—the line should be taut but not straining. Very tight winding can cause line to break prematurely during use.
Final Tips for Success
- Keep your manual handy: Every trimmer has unique design variations. Your manual is the authoritative guide for your specific model.
- Take photos: Before disassembling your spool, snap a photo showing the winding direction and line routing. This serves as a quick reference.
- Buy line in bulk: Trimmer line is inexpensive in bulk and always useful to have on hand for quick rewinds.
- Practice makes perfect: Your first rewind may feel awkward. By the second or third time, the process becomes intuitive.
- Store spares: Keep a pre-wound spool as a backup, so you can swap spools instantly if one fails during use.