Quick Answer: How to Replace Trimmer Line
To replace trimmer line, first identify your trimmer type (bump feed, automatic, or manual feed), then stop the engine and let it cool. Remove the spool by unbolting or twisting the head cap, extract the old line, measure and cut new line to the correct length (typically 10–15 feet), wind it evenly onto the spool following directional arrows, and reassemble the head. Test the feed mechanism before resuming work.
Identifying Your Trimmer Type
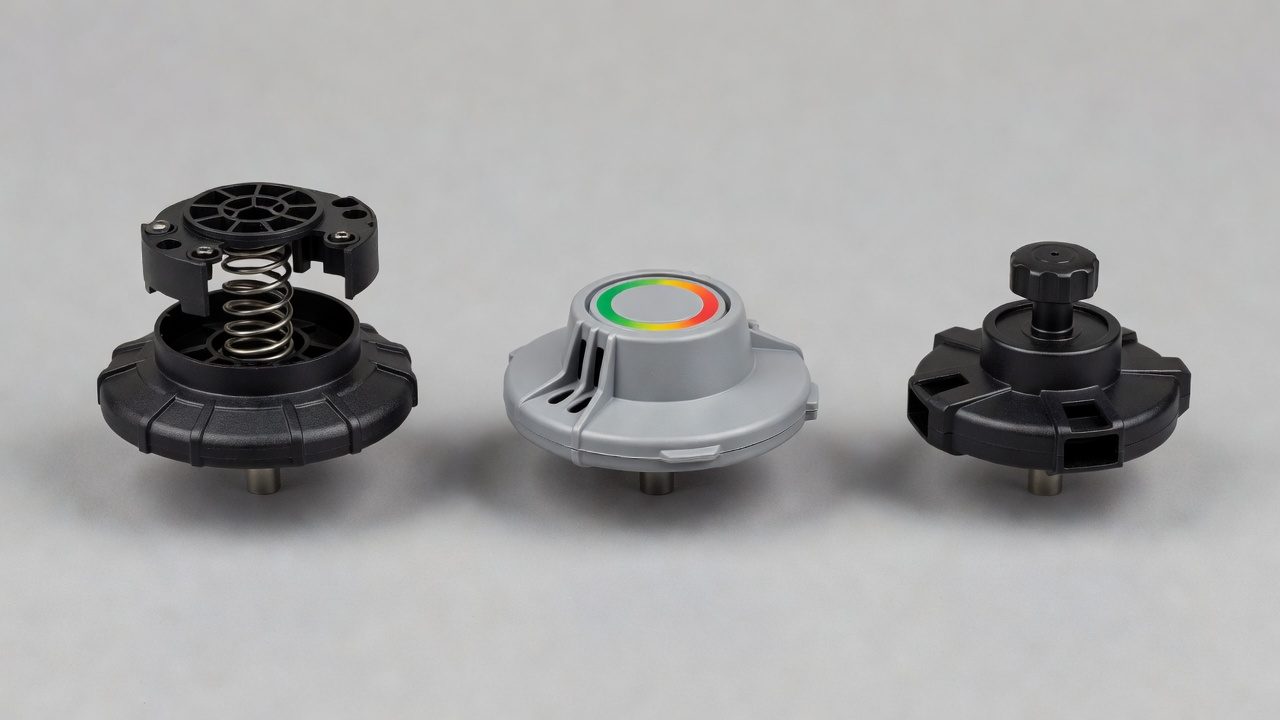
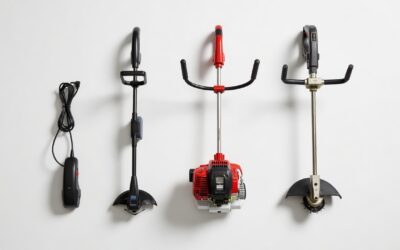
Not all trimmer heads work the same way. Understanding your trimmer type is essential before you begin replacement, as the process varies significantly between models.
Bump Feed Head (Most Common)
Bump feed heads are the most popular residential trimmer design. They feature a spring-loaded spool that advances new line each time you tap (bump) the head against the ground. This mechanism is simple, durable, and requires manual feeding when the line is depleted. When you bump the head, a small amount of line automatically extends from the spool.
Automatic Feed Head
Automatic feed heads advance line continuously as the trimmer runs, without requiring you to bump the ground. These heads use a wear indicator or centrifugal mechanism to release line when needed. They’re convenient but less common on budget models and can consume line faster than bump feed systems.
Manual Feed Head
Manual feed heads require you to stop the trimmer and manually extend line by hand. These are less common on modern residential trimmers but may appear on older or commercial-grade equipment. They offer precise control over line length but require more user intervention.
Tools and Materials You’ll Need
Before starting, gather these items to ensure a smooth replacement process:
- Replacement trimmer line: Purchase the correct gauge for your trimmer (see gauge guide below). Most residential trimmers use 0.065″ to 0.085″ line.
- Socket wrench or screwdriver: For removing the spool head cap (check your trimmer manual for the exact tool).
- Scissors or line cutter: For cutting new line to length.
- Measuring tape: To ensure you cut the correct amount of line.
- Safety glasses: Protect your eyes while working.
- Work gloves: Optional but helpful for handling spools and line.
Choosing the Right Trimmer Line Gauge
Trimmer line comes in various thicknesses, measured in inches. Common residential gauges include:
| Line Gauge | Thickness | Best For |
|---|---|---|
| 0.065″ | Thin | Light grass, electric trimmers |
| 0.080″ | Medium | General-purpose residential use (most common) |
| 0.095″–0.105″ | Thick | Heavy weeds, brush, gas-powered trimmers |
Check your trimmer’s manual or the spool head to determine the correct gauge. Using the wrong gauge can damage your trimmer or result in poor cutting performance.
Step-by-Step: Removing the Old Line
Step 1: Prepare Your Trimmer
Disconnect the spark plug wire (if gas-powered) or unplug the trimmer (if electric) to prevent accidental startup. Allow a gas-powered trimmer to cool for at least 5–10 minutes after use. Working on a hot engine risks burns and ensures your safety.
Step 2: Locate and Remove the Spool Head
The spool head is the rotating part at the end of the trimmer shaft. Depending on your model, you’ll either:
- Unscrew the head cap: Some heads have a bolt or nut holding the cap in place. Use the appropriate wrench or socket to remove it by turning counterclockwise.
- Twist the head cap: Other models feature a twist-on cap. Grip the spool and turn the cap counterclockwise by hand or with a wrench if it’s stuck.
- Press tabs or clips: Some modern heads have release tabs on the side. Press these while gently pulling the spool free.
Consult your trimmer manual if you’re unsure which method applies to your model.
Step 3: Remove the Old Line
Once the spool is exposed, locate and remove any remaining line. Most spools have slots or notches where the line is tucked. Gently pull out the old line. If it’s wound tightly, you may need to unwind it carefully. Discard the old line.
Loading and Winding New Trimmer Line
Step 1: Cut the New Line to Length
Most residential trimmer spools hold 10–15 feet of line, though larger spools may accommodate more. Check your spool or manual for the exact capacity. Common lengths are:
- Small spools: 10 feet
- Standard spools: 12–15 feet
- Large spools: 20+ feet
Measure and cut your new line to the appropriate length using scissors or a line cutter. Cut a clean, straight edge to make threading easier.
Step 2: Identify the Wind Direction
Look for arrows molded or printed on the spool indicating the correct winding direction. This is critical—winding in the wrong direction will prevent the line from feeding properly. The arrow typically shows clockwise or counterclockwise. Some spools have separate slots for two lines; ensure you wind into the correct slot.
Step 3: Wind the Line onto the Spool
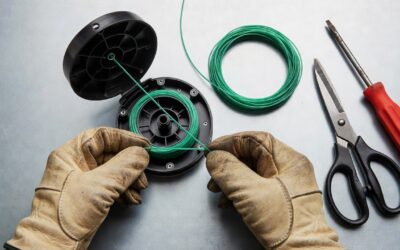
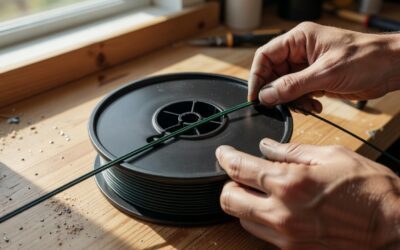
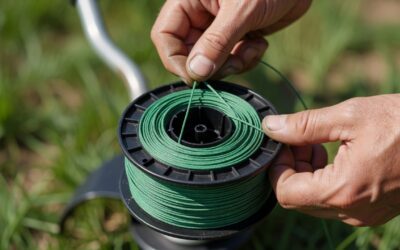
Insert one end of the new line into the small hook or notch at the beginning of the winding path on the spool. Hold the line taut and wind it evenly and tightly in the direction indicated by the arrow. Maintain consistent tension as you wind to prevent slack or overlapping. Continue winding until approximately 4–6 inches of line remain unwound—this extra length will be used to feed through the exit ports.
Pro tip: If your spool has two separate slots (for dual-line heads), repeat this process for the second slot with a second piece of cut line, leaving 4–6 inches on each end.
Step 4: Secure the Line Ends
Once wound, tuck the remaining line ends into the slots or notches provided on the spool to hold them in place. These notches prevent the line from unwinding before you reassemble the head. Some spools have small grooves or clips designed specifically for this purpose.
Reassembling and Testing
Step 1: Reinstall the Spool
Carefully place the loaded spool back into the trimmer head housing, ensuring it sits flat and aligns with the shaft. The line ends should be positioned near or in the exit ports (the small holes where line emerges).
Step 2: Reattach the Head Cap
Replace the head cap by reversing the removal process:
- If you unscrewed it, thread the cap back on and tighten with your wrench or by hand.
- If it twists on, align the cap and turn clockwise until snug. Don’t overtighten—this can strip threads.
- If it uses tabs or clips, press them and slide the cap back into place.
Ensure the cap is secure but not over-tightened, which can damage the spool mechanism.
Step 3: Feed the Line Through Exit Ports
Pull gently on the line ends that are protruding near the exit ports. For bump feed heads, this action seats the line properly for feeding. For automatic or manual feed heads, ensure the line passes completely through the exit ports and extends slightly beyond them (typically ½ to ¾ inch).
Step 4: Test the Feed Mechanism
Before using the trimmer, perform a quick test:
- For bump feed: Reconnect the spark plug wire or plug in the trimmer (do not start it yet). Gently tap the head against the ground or a hard surface. You should see the line advance slightly.
- For automatic feed: Start the trimmer at low speed and listen for line advancement. You should hear a slight clicking or feel the head vibrating differently as line feeds.
- For manual feed: If applicable, manually extend the line by the appropriate method for your model.
If the line doesn’t feed, stop and recheck your winding direction and line seating in the exit ports.
Troubleshooting Common Issues
Line Won’t Feed or Advance
Possible causes:
- Line wound in the wrong direction. Check the directional arrow and rewind if necessary.
- Line not properly seated in the exit ports. Pull the line ends slightly to reseat them.
- Spool cap overtightened or misaligned. Loosen the cap slightly and ensure it’s centered.
- Debris blocking the exit ports. Inspect and clean the ports with a small tool if needed.
Line Breaks Frequently During Use
Possible causes:
- Wrong line gauge—too thin for your trimmer or cutting conditions. Switch to a heavier gauge.
- Line wound too loosely or unevenly. Rewind with consistent, firm tension.
- Debris or damage at the exit ports creating sharp edges. Smooth any rough spots with sandpaper.
- Trimmer speed too high for the line weight. Reduce speed or use thicker line.
Spool Cap Won’t Tighten or Keep Coming Loose
Possible causes:
- Threads stripped. If the cap won’t tighten, you may need to replace the spool head.
- Cap overtightened previously, damaging threads. Try a new cap if available.
- Spool misaligned. Ensure the spool sits flat before tightening the cap.
Line Keeps Getting Tangled or Bunched
Possible causes:
- Line wound too loosely or overlapping itself. Unwind and rewind with firm, even tension.
- Wrong winding direction. Double-check the directional arrow and correct if needed.
- Line not seated properly in the slot. Ensure the starting end is firmly tucked in the initial notch.
Maintenance Tips to Extend Trimmer Line Life
Proper use and storage can reduce how often you need to replace trimmer line:
- Avoid hitting hard objects: Striking rocks, concrete, or metal will break or dull line faster. Keep your cutting height consistent and stay in grassy areas.
- Store line properly: Keep replacement line spools in a cool, dry place away from direct sunlight, which can degrade the material.
- Use the correct line weight: Heavier line lasts longer for thick weeds; lighter line is for delicate grass. Match the line to your trimmer and cutting conditions.
- Keep the spool clean: Dirt and grass clippings can jam the feed mechanism. Wipe the spool and head regularly.
- Check for damage: Inspect the spool head for cracks or wear. Damaged heads should be replaced to prevent feeding issues.
When to Replace the Entire Spool Head
If you experience persistent feeding problems, cracks in the spool, or stripped threads on the cap, the entire head may need replacement. Replacement heads are available for most trimmer brands and are typically affordable. Installing a new head follows the same basic process as replacing line but requires disconnecting the old head from the shaft and attaching the new one.
Frequently Asked Questions
How often should I replace my trimmer line?
This depends on how frequently you trim and the conditions. Light weekly trimming of soft grass may require line replacement once per season. Heavy use in thick weeds or frequent contact with hard surfaces may require line changes every few weeks. Most users replace their line 2–4 times per season.
Can I use any brand of trimmer line in my trimmer?
Yes, as long as the line gauge matches your trimmer’s specifications. Trimmer line is largely universal—any 0.080″ line will work in any trimmer designed for 0.080″ line, regardless of brand. However, always verify the correct gauge for your specific trimmer model.
What’s the difference between round and twisted trimmer line?
Round line is the most common type and works well for general cutting. Twisted or square-shaped line cuts more aggressively and lasts longer but may be louder and harder on the trimmer. Check your manual to see if your trimmer accommodates specialty line shapes.
Should I wind the line myself, or can I buy pre-wound spools?
Both options are available. Pre-wound spools are convenient and ensure correct winding, but they’re typically more expensive. Winding line yourself saves money and is straightforward once you understand the process. Choose based on your budget and preference.