

Quick Answer: How to Change Push Mower Blades
Quick Answer: Disconnect the spark plug wires first to prevent accidental starting. Tip the mower on its side with the carburetor side up, secure the blade with a wood block, unbolt the old blade, install the new blade with the marked side facing down, torque to manufacturer specifications, and reconnect the spark plug before testing. Always wear heavy gloves and eye protection.
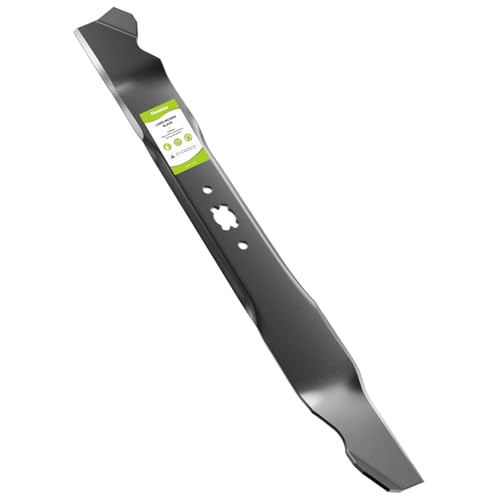
Pros
- Higher 32mm lift produces stronger suction that reduces clogging and speeds up mowing
- Durable high-carbon steel withstands rugged use and holds a sharp edge longer than basic blades
- Broad compatibility with Troy-Bilt Cub Cadet MTD and Craftsman 21-inch walk-behind push mowers
- Supports natural lawn fertilization through fine mulching of clippings
- Exact OEM replacement dimensions ensure straightforward swap for listed part numbers
Cons
- Only fits bow-tie center hole spindles so users must verify their mower pattern before buying
- Factory rust-resistant coating wears away during normal use and requires occasional reapplication of protection
- Limited real-world feedback available since the listing shows zero customer reviews
The Fismiuta 21 Inch Lawn Mower Blade is a purpose-built mulching replacement designed for popular 21-inch walk-behind push mowers from Troy-Bilt Cub Cadet MTD and Craftsman. Forged from durable high-carbon steel and finished with a temporary rust-resistant coating it presents a solid professional-grade impression right out of the package. Measuring 21 inches long by 2-1/4 inches wide and 9/64 inch thick with a distinctive bow-tie center hole it matches the exact OEM footprint of parts such as 942-0741A 742-0741A and CMXGZAM100067.
In real-world performance the upgraded 32mm air lift (versus the common 28mm) generates noticeably stronger suction that lifts grass more efficiently for cleaner cuts and better bag filling. The 3-in-1 geometry shreds clippings finely for mulching returns nutrients to the lawn or directs them cleanly into the bag or side chute. High-carbon steel construction resists bending on thick weeds and uneven ground while remaining easy to resharpen so owners can maintain a sharp even edge throughout the season.
Potential drawbacks include the strict bow-tie spindle requirement. Installation will fail on star or other hole patterns so measuring the existing spindle is essential. The protective coating is only temporary and will wear off during normal operation leaving the steel exposed to moisture. With no customer reviews yet long-term durability data is limited to the stated materials and specifications.
Overall the Fismiuta blade delivers excellent value for owners of compatible Troy-Bilt TB105 through TB370 Craftsman M100 through M320 and similar MTD Cub Cadet models who need a stronger-lift mulching upgrade. It is the right choice for gardeners seeking faster collection fewer bag dumps and natural lawn feeding without changing mower brands.

Pros
- Genuine Oregon brand ensures consistent replacement quality
- Universal compatibility covers riding and push mower types
- Ready-to-use design with zero assembly required
- Directly supports longevity, safety, and performance goals
- Simple tool focused on essential deck leveling needs
Cons
- Limited product details provide no measurement ranges or calibration scales
- Functions solely as a leveling gauge with no extra accessories included
- Effectiveness depends on user skill for accurate deck adjustments
The Oregon 42-095 Small Engine Deck Leveling Gauge stands out as a practical genuine replacement part for lawn mower maintenance. Built under the trusted Oregon brand, this universal tool focuses on correcting unlevel mower blades and decks. Its straightforward design requires no assembly and suits both riding and push lawn mowers, making it an accessible option for homeowners handling basic small engine care.
In real-world use, the gauge helps restore proper blade and deck alignment to support better cutting performance, reduced wear, and safer operation. Key features center on its universal fit and ready-to-use format as an Oregon genuine part. Users can apply it quickly to address common unlevel issues that impact mower longevity and overall efficiency without needing complex setup.
Potential drawbacks include the lack of detailed specifications such as exact measurement ranges or scales, which may leave some users wanting more guidance. It also contains no additional tools or accessories beyond the core gauge function, so results depend heavily on the operator's ability to interpret and adjust the deck accurately.
Overall, the Oregon 42-095 delivers solid value for anyone maintaining riding or push lawn mowers who needs a simple, genuine leveling solution. It is best suited for DIY users seeking to improve safety, performance, and equipment life through regular deck corrections without investing in more advanced tools.
When to Replace Push Mower Blades
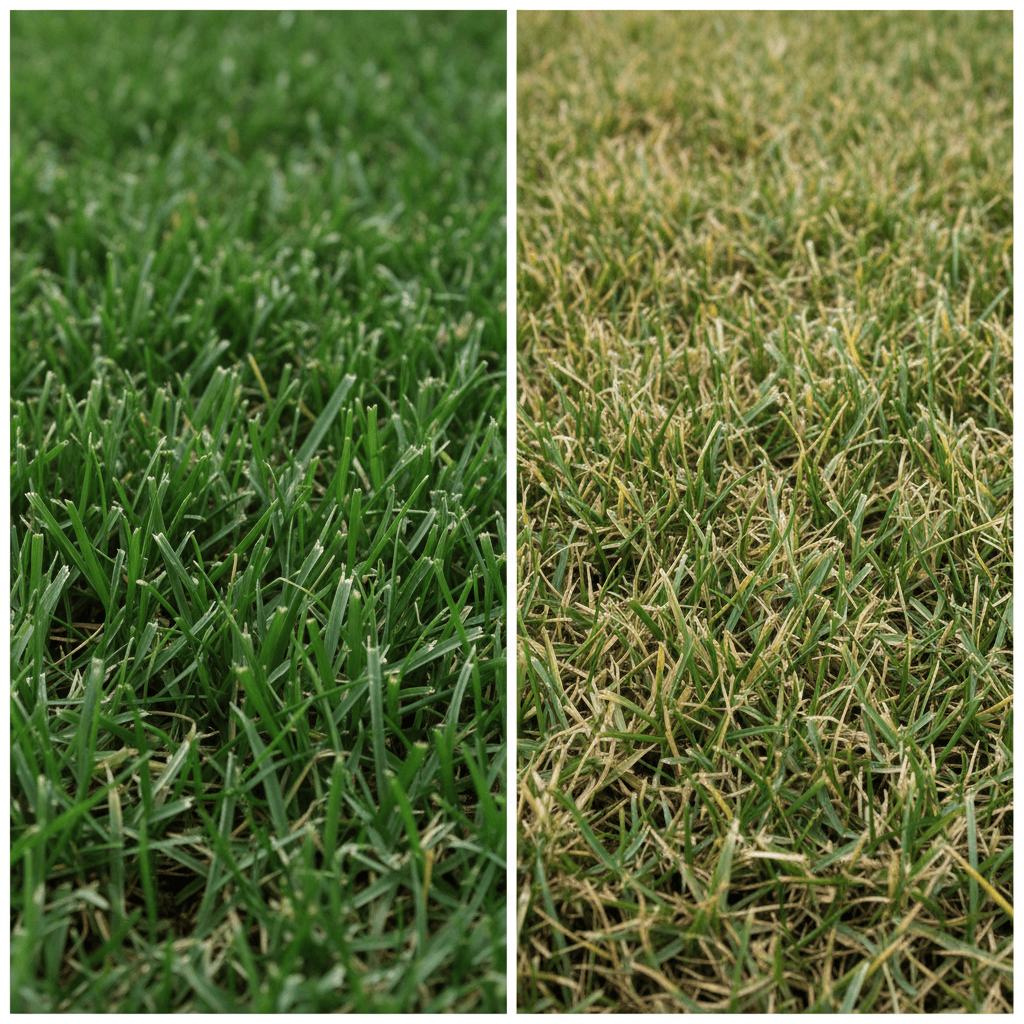
Knowing when to replace your push mower blades is just as important as knowing how. Mower blades wear down with regular use, and dull or damaged blades affect both cutting quality and engine efficiency.
Most manufacturers recommend blade replacement annually or every 20 to 50 hours of operation, depending on your lawn size and mowing frequency. Signs that replacement is needed include uneven or torn grass edges (which indicate dull blades), visible chips or cracks in the blade, severe rust or corrosion, and excessive vibration during operation. While some homeowners attempt to sharpen blades, replacement is safer and more effective for most situations.
Dull blades tear grass rather than cut cleanly, which damages grass tips and leaves them vulnerable to disease. If you notice your lawn looking ragged or browning at the edges after mowing, blade replacement should be your first troubleshooting step.
Safety Precautions Before Starting
Safety is non-negotiable when working on any mower. Always take these precautions before touching the blades:
- Disconnect the spark plug wires: This is the single most important step. Disconnecting the spark plug wires prevents the engine from accidentally starting while you’re working on the blades, which could cause severe injury. Pull the wire cap off the spark plug terminal, don’t just remove the spark plug itself.
- Allow the engine to cool: Wait at least 15 to 20 minutes after the last use before working on the mower to avoid burns from hot engine components.
- Wear protective equipment: Heavy-duty work gloves protect against sharp blade edges, and safety glasses protect your eyes from debris and small metal shavings.
- Position the mower correctly: For gas-powered push mowers, tip the mower on its side with the air filter and carburetor side facing up. This prevents oil from entering the air filter. For electric mowers, ensure the battery is removed or the mower is powered off completely.
- Work on a flat surface: Use a sturdy workbench or flat ground to prevent the mower from rolling or tipping unexpectedly.
Tools and Materials You’ll Need
Gather these items before you begin the blade replacement process:
- Socket wrench or adjustable wrench (size depends on your mower model, typically 3/8″ or 1/2″)
- Heavy-duty work gloves
- Safety glasses
- Replacement blade(s) rated for your specific mower model
- Wooden block or blade holder to prevent the blade from spinning while loosening the bolt
- Torque wrench (optional but highly recommended)
- Cardboard or marker to note blade orientation before removal
- Clean rag or brush to remove grass buildup
Removing the Old Blade
With safety measures in place, you’re ready to remove the old blade: Users looking for related component recommendations can explore our z890 vs x870e motherboard breakdown.
Step 1: Clean the Blade Area
Use a brush or compressed air to remove grass, dirt, and debris from around the blade and bolt. This gives you clear access and prevents debris from falling into the mower deck.
Step 2: Mark the Blade Orientation
Before removing the blade, use a marker or piece of tape to mark which side faces downward. Blade orientation matters, installing it upside down will prevent proper cutting and may damage the mower. Most blades have the manufacturer’s stamp or logo on the top side (facing up when installed). Before finalizing equipment decisions, refer to our comprehensive marshall stanmore iii vs harman kardon onyx studio 8 comparison.
Step 3: Secure the Blade
Place a wooden block against the blade to prevent it from spinning while you loosen the bolt. This is critical, attempting to loosen the bolt while the blade can move risks injury and stripped bolts. The blade bolt typically turns counterclockwise to loosen.
Step 4: Remove the Bolt and Blade
Using your socket wrench, carefully loosen and remove the bolt. Once the bolt is free, gently pull the old blade away from the mower deck. Set it aside safely, the blade edges are sharp. For broader ecosystem context, read through our operational guide on dyson v8 cyclone vs bissell featherweight stick.
Installing the New Blade
Proper installation is just as critical as removal. Follow these steps precisely:
Step 1: Position the New Blade
Hold the new blade so that the marked side (or manufacturer’s logo) faces upward. This ensures the blade’s cutting edges face down toward the grass. Align the center hole of the blade with the spindle bolt on the mower deck. For troubleshooting and reliability insights, consult our in-depth bissell crosswave hydrosteam vs shark stainforce report.
Step 2: Hand-Thread the Bolt
Insert the bolt through the blade’s center hole and into the mower deck. Thread it by hand first to avoid cross-threading, which can strip the bolt hole and require professional repair.
Step 3: Tighten Using a Torque Wrench
Torque specifications vary by manufacturer but typically range from 35 to 90 foot-pounds for push mower blades. Consult your mower’s manual for the exact specification. Using a torque wrench ensures the bolt is tight enough to stay secure but not so tight that it damages the blade or spindle. If you don’t have a torque wrench, tighten until the blade is snug but still allows a slight rock when pushed by hand.
Step 4: Verify Balance
After tightening, manually spin the blade slowly by hand (keeping fingers clear of edges). It should rotate smoothly without wobbling or catching. Any imbalance suggests improper installation or a defective blade.
Testing and Post-Installation Checks
Before returning the mower to regular use, perform these verification steps:
- Visual inspection: Ensure the blade is secure and faces the correct direction. Check that the bolt isn’t protruding dangerously.
- Reconnect the spark plug: Firmly push the spark plug wire cap back onto the spark plug terminal.
- Start the mower: Begin with a small test run in an open area away from obstacles and people.
- Listen and observe: The mower should start smoothly without unusual sounds or vibration. Excessive vibration, rattling, or grinding indicates a problem, stop immediately and recheck blade installation.
- Test on grass: Mow a small section of grass and inspect the cutting quality. Edges should be clean and even, not torn or ragged.
Brand-Specific Considerations
While the general procedure is similar across brands, some manufacturers have specific requirements:
Toro Push Mowers
Toro typically uses standard bolt sizes and torque specifications found in the owner’s manual. Many Toro models specify 35 to 40 foot-pounds of torque. Always check your specific model number in the manual for exact requirements.
Honda Push Mowers
Honda push mowers often feature reinforced spindles and proprietary bolt designs. Honda generally recommends 40 to 45 foot-pounds of torque. Honda blades are available through authorized dealers and are usually well-marked for orientation.
Craftsman Push Mowers
Craftsman mowers vary widely depending on the model year and engine type. Torque specifications typically range from 35 to 60 foot-pounds. Consult the specific manual or contact Craftsman customer service if you’re uncertain about your model.
Rotary vs. Reel Mowers
This guide focuses on rotary push mowers (the most common type). Reel mowers have multiple cutting blades arranged in a cylinder and require different maintenance. If you own a reel mower, consult the manufacturer’s specific instructions, as the blade removal process differs significantly.
Common Mistakes to Avoid
- Skipping the spark plug disconnect: This is dangerous and increases injury risk dramatically.
- Tipping the mower with the carburetor side down: This can damage the air filter and engine components.
- Installing the blade upside down: Double-check blade orientation before tightening.
- Over-tightening the bolt: This can strip threads or crack the blade. Use a torque wrench when possible.
- Ignoring vibration after installation: Excessive vibration means something is wrong, don’t ignore it.
- Mixing up bolts: Some mowers have different bolt sizes for different components. Use the correct bolt specified in your manual.
Maintenance Tips to Extend Blade Life
Proper maintenance between blade replacements helps your mower run more efficiently:
- Clean the mower deck after each use to prevent grass buildup and rust.
- Inspect blades monthly for damage or excessive wear.
- Keep the deck level to ensure even cutting.
- Store the mower in a dry location during the off-season.
- Use the correct fuel and oil types as specified in your manual.
Frequently Asked Questions About How To Change Blades On Push Mower
How often should I replace push mower blades?
Most manufacturers recommend blade replacement annually or every 20 to 50 hours of operation. This varies based on mowing frequency and lawn conditions. If you mow weekly during growing season, annual replacement is reasonable. Heavy use or sandy soil requires more frequent replacement. Inspect blades regularly and replace when you notice signs of wear, dullness, or damage.
Can I sharpen my mower blades instead of replacing them?
Sharpening is possible but replacement is often safer and more effective. Sharpened blades can become unbalanced, causing dangerous vibration. Additionally, severely damaged or heavily rusted blades shouldn’t be sharpened. Replacement is the recommended approach for most homeowners, as new blades are inexpensive and ensure optimal performance.
What happens if I install the blade upside down?
An upside-down blade won’t cut properly and can damage the mower. The cutting angle is reversed, resulting in torn grass and increased stress on the engine. The mower will typically vibrate excessively. If you notice poor cutting quality or excessive vibration after blade replacement, stop immediately and check blade orientation.
Do I need a torque wrench to install mower blades?
A torque wrench is highly recommended but not absolutely required. It ensures the bolt is tightened to the manufacturer’s specification, preventing both under-tightening (blade slipping) and over-tightening (stripped threads or cracked blade). If you don’t have one, tighten the bolt until it’s snug and the blade doesn’t move, but don’t force it. A torque wrench costs $20 to 50 and is a worthwhile investment for regular mower maintenance.
What should I do if the mower vibrates excessively after blade replacement?
Stop using the mower immediately. Excessive vibration indicates an installation problem. Likely causes include: incorrect blade orientation, improper bolt tightening, blade imbalance, or using the wrong blade type for your mower. Recheck the blade orientation and bolt torque. If vibration persists, the blade may be defective, replace it with a new blade from the manufacturer.
Technical Standards and Compliance
Mechanical safety standards, operational tolerances, and protective gear guidelines align with benchmark specifications established by the American National Standards Institute (ANSI).









