Direct Answer: How to Remove a Trimmer Head
Trimmer head removal requires first powering off the device and allowing it to cool completely. For threaded heads, secure the trimmer shaft with one wrench while turning the head counterclockwise with an adjustable wrench until it releases. For quick-release heads, locate the release button or collar, press or slide it while twisting the head counterclockwise, and it will detach without tools. Always consult your device manual for model-specific instructions and required torque specifications.
Safety Considerations Before Removing a Trimmer Head
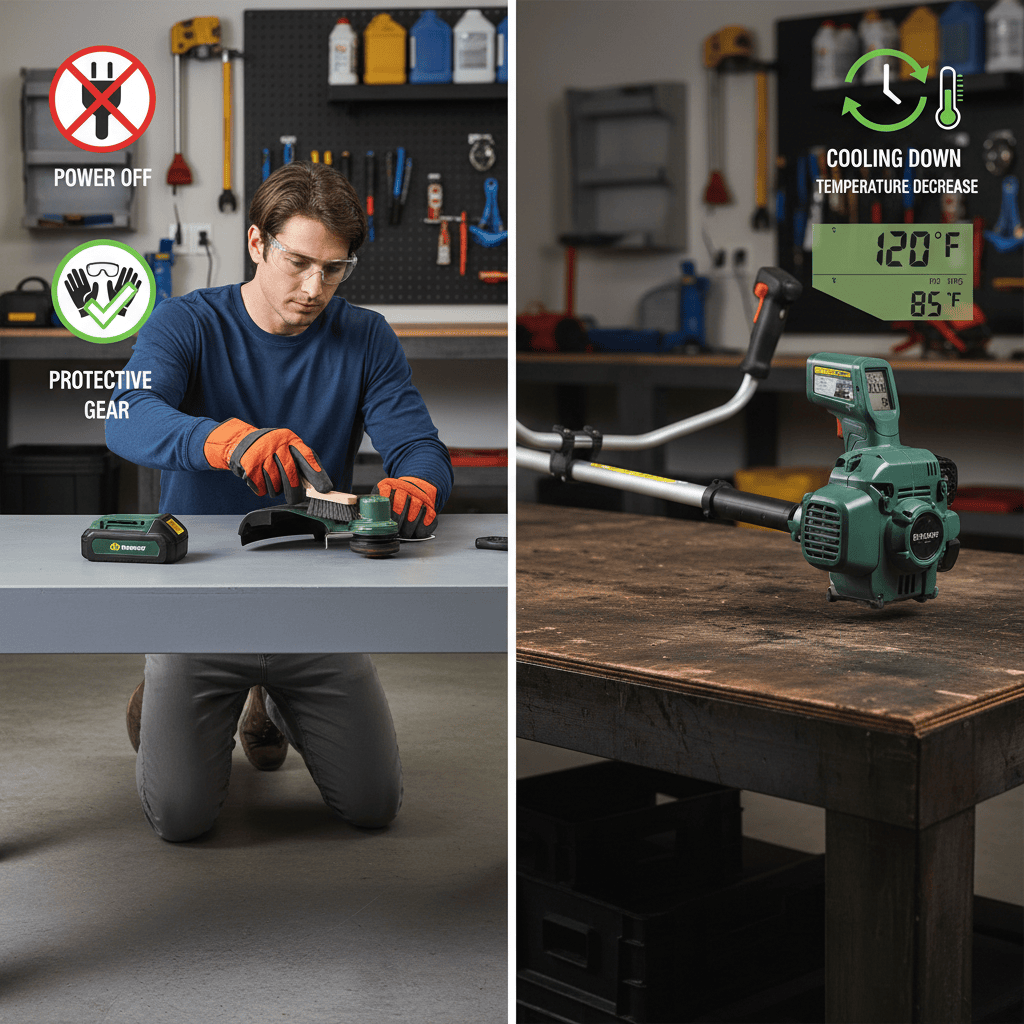
Safety is the foundation of any trimmer maintenance. Never attempt head removal while the device is powered on or still running.
- Power Off Completely: Disconnect the battery (cordless models) or ensure the fuel valve is closed (gas models). For electric corded trimmers, unplug from the outlet.
- Allow Cooling Time: Wait at least 5-10 minutes after operation. Trimmer heads and shafts reach high temperatures during use and can cause burns.
- Wear Protective Gear: Use work gloves to protect against sharp edges on the head or shaft, and safety glasses to shield your eyes from debris.
- Secure Stable Work Surface: Place the trimmer on a flat, stable surface or clamp it securely in a vice to prevent it from moving during removal.
- Check for Residual Fuel: If using a gas-powered trimmer, drain any remaining fuel before extended storage or maintenance.
Understanding Trimmer Head Attachment Types
Trimmer heads attach using one of two primary mechanisms. Identifying yours determines which removal procedure to follow.
Threaded Attachment Systems
The most common design, threaded heads screw onto the trimmer shaft. They feature a socket or collar with internal threads that grip the shaft’s external threads. This system is durable and provides a secure connection for high-powered trimmers.
- Requires two wrenches to remove (one holds the shaft, one turns the head)
- Turns counterclockwise for removal, clockwise for installation
- Common on gas-powered and professional-grade string trimmers
- May require significant force if threads are corroded or tight
Quick-Release Attachment Systems
Newer cordless and entry-level trimmers often use quick-release mechanisms for tool-free head swaps. A release button, collar, or pin holds the head in place and allows rapid removal and installation.
- Requires no wrenches or specialized tools
- Typically involves pressing a button while twisting counterclockwise
- Designed for frequent head changes and maintenance
- Less likely to have stuck or corroded connections
Tools and Materials Needed for Trimmer Head Removal
Gathering the right tools before starting prevents frustration and ensures you can complete the job safely.
| Tool | Threaded Heads | Quick-Release Heads | Purpose |
|---|---|---|---|
| Adjustable Wrench (8-12 inch) | ✓ Required | ✗ Not needed | Turns the head counterclockwise |
| Second Adjustable Wrench or Shaft Wrench | ✓ Required | ✗ Not needed | Holds the shaft steady to prevent spinning |
| Socket Wrench Set | ✓ Optional | ✗ Not needed | Alternative to adjustable wrench for better grip |
| Penetrating Oil (WD-40 or similar) | ✓ Recommended | ✓ Optional | Loosens corroded or stuck threads |
| Work Gloves | ✓ Recommended | ✓ Recommended | Protects hands from sharp edges |
| Safety Glasses | ✓ Recommended | ✓ Recommended | Protects eyes from debris |
| Cloth or Rag | ✓ Optional | ✓ Optional | Wipes away dirt and provides grip |
Step-by-Step: Removing a Threaded Trimmer Head
This procedure works for most gas-powered trimmers and many cordless models with threaded connections.
Step 1: Prepare Your Work Area
- Place the trimmer on a flat, sturdy surface
- If available, secure it in a bench vise using a protective cloth to prevent damage
- Ensure adequate lighting so you can see the attachment clearly
Step 2: Apply Penetrating Oil (If Needed)
- If the head appears corroded or hasn’t been removed recently, spray penetrating oil around the base where the head meets the shaft
- Let the oil soak for 5-15 minutes to break down corrosion
- Wipe away excess oil with a cloth
Step 3: Position Your Wrenches
- Place one wrench on the shaft collar or hex nut just below the trimmer head to hold it steady
- Position your second wrench on the head’s collar or socket
- Ensure both wrenches are fully seated for maximum grip and to prevent slipping
Step 4: Turn the Head Counterclockwise
- Hold the shaft wrench firmly with one hand to prevent the shaft from rotating
- Apply steady, even pressure to the head wrench, turning it counterclockwise
- Do not jerk or apply sudden force, which can strip threads or cause the wrench to slip
- If resistance is strong, stop, apply more penetrating oil, and wait another 10 minutes
Step 5: Complete the Removal
- Once the head begins turning freely, continue counterclockwise until it separates completely from the shaft
- Set the head on a clean surface to prevent dirt accumulation
- Inspect the shaft threads for damage or corrosion before reinstalling or replacing the head
Step-by-Step: Removing a Quick-Release Trimmer Head
Quick-release systems are simpler and faster. Most can be removed in under a minute without tools.
Step 1: Locate the Release Mechanism
- Look for a small button, lever, or collar on the side or top of the trimmer head
- Refer to your device manual if the mechanism isn’t immediately obvious
- Common designs include a push-button collar or a sliding ring mechanism
Step 2: Press or Slide the Release
- Push the release button or slide the collar outward, depending on your model
- Maintain pressure on the release mechanism while proceeding to the next step
Step 3: Twist Counterclockwise
- While holding the release button or collar, twist the head counterclockwise by hand
- You should feel minimal resistance; if you encounter significant resistance, release and recheck the mechanism
- Continue twisting until the head separates from the shaft
Step 4: Release and Separate
- Once the head is loose, release the button or collar
- Gently pull the head away from the shaft
- Set it down carefully on a clean surface
Removing Trimmer Heads from Specific Device Types
Cordless (Battery-Powered) Trimmers
Most cordless models use quick-release systems for user convenience. After removing the battery, follow the quick-release removal procedure above. Some professional cordless trimmers may use threaded heads; check your manual to confirm. The process is identical to gas trimmers but typically requires less force due to lower torque specifications.
Gas-Powered Trimmers
Gas trimmers nearly always use threaded heads. Close the fuel valve before removal, and ensure the engine has cooled completely. These heads are typically tighter than cordless models due to higher operational torque, so use the two-wrench technique and penetrating oil liberally. Never use excessive force, as you may strip the threads.
Professional-Grade Trimmers
Commercial trimmers often feature robust threaded connections rated for heavy daily use. They may require larger wrenches and significant force to remove. Some professional models include a shaft lock button that you press while turning the head, combining features of both attachment types. Always consult the operator manual for specific instructions.
Electric Corded Trimmers
Electric models typically use quick-release or light-duty threaded heads. Unplug the device before removal. These heads generally require minimal force to remove and are designed for ease of maintenance.
Common Issues and Troubleshooting
The Head Won’t Turn
Cause: Corrosion, dirt accumulation, or over-tightening during previous installation.
- Apply penetrating oil around the base of the head and wait 15-30 minutes
- Try again with steady, even pressure rather than sudden force
- If still stuck, apply heat using a heat gun for 2-3 minutes to expand the metal slightly, then try again
- As a last resort, tap gently around the head collar with a rubber mallet to break the corrosion bond
Slipping Wrenches
Cause: Insufficient grip on the wrenches or worn wrench jaws.
- Use wrenches that fit snugly on the shaft and head
- Wrap a cloth around the head collar to increase grip
- Consider switching to socket wrenches for better contact
- Ensure both wrenches are fully seated before applying force
Stripped Threads
Cause: Excessive force, using the wrong wrench size, or cross-threading during installation.
- Stop immediately if you suspect thread damage
- If the head is already off, inspect both the shaft and head threads under good lighting
- Minor damage may be repairable with thread-locking compound or by carefully reinstalling with anti-seize compound
- Severe damage requires shaft or head replacement
Bent or Damaged Head Collar
Cause: Using oversized wrenches or applying force at an angle.
- If the collar is bent but the threads appear intact, you may still be able to reinstall the head
- If the collar is severely deformed, replace the head
Reassembling and Reinstalling the Trimmer Head
Preparing the Shaft
- Clean the shaft threads thoroughly with a dry cloth to remove dirt and old oil
- Inspect for damage; minor corrosion can be cleaned with a wire brush
- Apply a light coat of anti-seize compound to the threads if you plan to reinstall the same head (this prevents future corrosion and stuck heads)
Reinstalling Threaded Heads
- Align the head’s internal threads with the shaft threads
- Hand-turn clockwise until you feel resistance, indicating the threads are engaged
- Use your two wrenches to tighten fully: hold the shaft with one wrench, turn the head clockwise with the other
- Tighten firmly but do not over-tighten, which can strip threads or make future removal difficult
- Consult your manual for specific torque specifications (typically 15-25 foot-pounds for most consumer trimmers)
Reinstalling Quick-Release Heads
- Align the head with the shaft’s quick-release connector
- Press the release button or collar outward
- Push the head onto the shaft while keeping pressure on the release mechanism
- Once fully seated, release the button or collar, which should lock the head in place with an audible click
- Gently tug to verify the head is secure before operating the trimmer
Frequently Asked Questions
Can I remove a trimmer head without wrenches?
Only if your trimmer has a quick-release mechanism. Threaded heads require wrenches to hold the shaft steady and turn the head. Attempting removal by hand alone risks injury and damage to the threads. Always use the proper tools for threaded systems.
How often should I remove and clean my trimmer head?
For gas-powered trimmers, remove and inspect the head every 25-50 hours of operation or at the start and end of each season. For cordless trimmers, inspect monthly during heavy use. Quick-release heads make this maintenance easier and should be removed and cleaned after each use if operating in particularly dusty or wet conditions.
What should I do if the trimmer head is damaged?
If the head is cracked, bent beyond repair, or the cutting surface is severely worn, replacement is the safest option. Damaged heads reduce cutting efficiency and can become unsafe during operation. Purchase a replacement head matching your trimmer’s model and attachment type (threaded or quick-release).
Is it normal for the head to be tight when removing it?
Yes, especially on gas-powered trimmers that have been in use for months. The threads tighten over time due to vibration and thermal cycling. If removal requires significant force even with two wrenches, apply penetrating oil and wait before trying again. Excessive force can damage threads.
Can I use pliers instead of wrenches?
Pliers will slip and may damage the head collar or shaft. Always use appropriately-sized adjustable wrenches or socket wrenches for proper grip and control. Pliers are unsuitable for this task and increase the risk of injury and damage.