Safety Precautions Before Starting

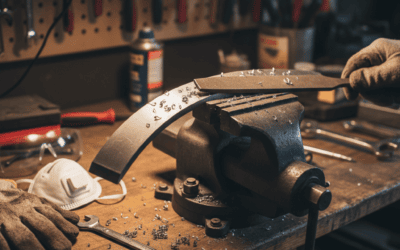
Sharpening lawn mower blades involves working with sharp metal and power tools, making safety the absolute foundation of this task. Before touching anything near your mower, you must disconnect the power source entirely. For gas mowers, remove the spark plug wires to prevent accidental engine startup. For electric mowers, unplug the cord and remove the battery if applicable. Never rely on the ignition switch alone.
Gather the following safety equipment before beginning:
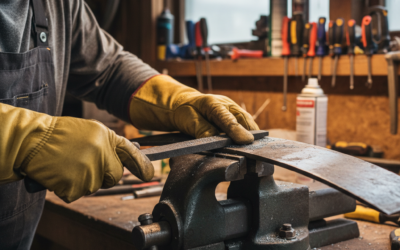
- Heavy-duty work gloves to protect hands from sharp blade edges
- Safety glasses or face shield to protect eyes from metal filings and sparks
- Sturdy work boots with good grip and toe protection
- Dust mask if using an angle grinder to avoid inhaling metal particles
- Hearing protection if operating an angle grinder
Set up your work area on a clean, flat, well-lit surface. A workbench with a vise is ideal. Ensure adequate lighting so you can see blade angles and condition clearly. Keep the work area free from clutter and trip hazards. Never work in poor light or rush through the process, as mistakes can result in injury or blade damage that makes the mower unsafe to operate.
Understanding Your Lawn Mower Blade Type
Not all lawn mower blades are identical, and knowing your blade type affects your sharpening approach. The two most common types are rotary and reel blades.
Rotary blades are the standard on most residential push and riding mowers. These blades spin horizontally beneath the deck and have a single cutting edge on each end. They are relatively straightforward to sharpen and are the focus of this guide.
Reel blades appear on commercial reel mowers and some premium residential models. These comprise five or six cylindrical blades that cut grass against a stationary bar, similar to scissors. Reel blade sharpening is more complex and often requires professional equipment and expertise.
Check your mower’s manual to confirm your blade type. If you own a reel blade mower, professional sharpening is recommended, as improper reel blade work can result in poor cut quality and expensive damage.
Tools You’ll Need for Blade Sharpening
Successful blade sharpening depends on choosing the right sharpening tool for your skill level and available equipment. You have several options:
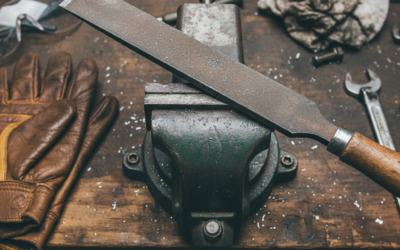
Metal file (10-12 inch mill or bastard cut): This is the most accessible option for beginners and requires only elbow grease. Files are affordable, typically costing $15-30, and give you excellent control over the sharpening angle. However, they require more effort and time than power tools. A file works well for lightly dull blades but may be insufficient for severely dulled edges.
Angle grinder (4-5 inch): An angle grinder equipped with a metal grinding wheel is faster than filing and works well for moderately to severely dull blades. If you already own a grinder, this is an economical choice. The learning curve is steeper, and there is higher risk of overheating the blade if you’re not careful. Grinders cost $30-80 for a basic model.
Bench grinder: A stationary bench grinder offers stability and consistency but requires a dedicated workspace. This option suits those planning regular blade maintenance. Models range from $50-200.
Professional blade sharpener: Portable manual blade sharpeners ($40-100) are designed specifically for lawn mower blades and remove the guesswork on angle. They are ideal for those who want consistency without learning curve but work best on moderately dull blades.
In addition to your primary sharpening tool, gather these items:
- C-clamp or bench vise to secure the blade
- Socket wrench set matching your mower’s blade bolt
- Screwdriver set
- Blade balancer (magnetic or weighted, $10-30)
- Marking pen to mark blade orientation and balance point
- Metal ruler or angle gauge
- Shop towels and degreaser
How to Remove the Lawn Mower Blade
Blade removal requires care and attention to detail. Follow these steps:
Step 1: Disconnect power. Unplug the mower if electric, or disconnect spark plug wires if gas-powered. Wait several minutes to ensure the engine is cool.
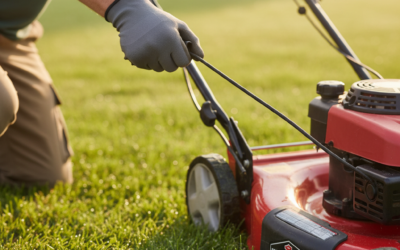
Step 2: Locate the blade access point. For push mowers, tilt the deck or remove access panels. For riding mowers, you may need to raise the mower deck to its highest position for access. Consult your mower’s manual for specific instructions.
Step 3: Mark blade orientation. Before removing the blade, use a marker to draw a line or arrow on the blade indicating which side faces downward. This prevents reinstalling the blade upside down, which would prevent cutting and damage the mower.
Step 4: Loosen the blade bolt. Hold the blade firmly with one hand (while wearing gloves) to prevent it from spinning. Use the appropriate wrench to loosen the center bolt. Some mower bolts have reverse threads; check your manual. Turn the wrench counterclockwise to loosen.
Step 5: Remove the blade. Once loose, carefully lift the blade away from the mower. Note the position of any washers or spacers beneath the bolt and keep them in a safe place.
The Blade Sharpening Process
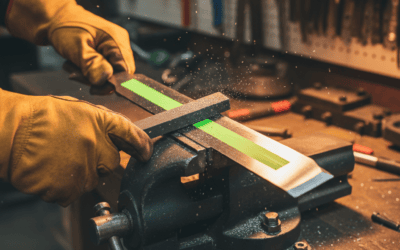
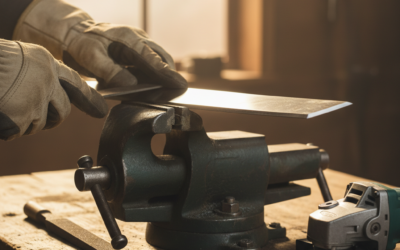
Once the blade is safely removed and secured in your vise, begin sharpening. The cutting edge on each end of a rotary blade should taper to a sharp point, and maintaining the correct angle is crucial for effective cutting and blade longevity.
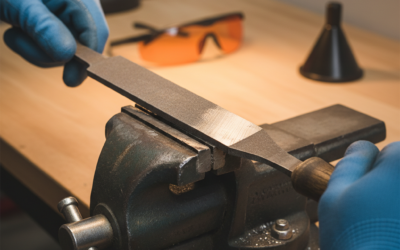
Proper sharpening angle: Maintain a 30-35 degree angle between the file and the blade’s top surface. This angle preserves the blade’s structural integrity while creating an efficient cutting edge. Too steep an angle creates a fragile edge that chips easily; too shallow an angle produces a dull edge that won’t cut effectively.
Sharpening technique with a metal file:
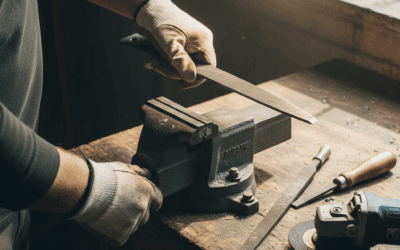
- Place the blade in a vise with the cutting edge facing you and slightly higher than the back edge
- Position your file at the 30-35 degree angle against the blade’s cutting surface
- Push the file forward with moderate pressure for 8-10 strokes, always in one direction (typically away from you)
- Count your strokes on the first end, then sharpen the opposite cutting edge using the same number of strokes
- This equal sharpening on both ends maintains blade balance
- Test the edge by carefully running your thumb (lightly) along the back of the blade; you should feel a slight burr forming
- Remove the burr by making 1-2 lighter passes on the underside of each blade end
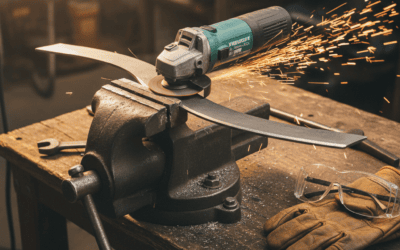
Sharpening technique with an angle grinder:
- Secure the blade firmly in a vise
- Wear safety glasses and a dust mask
- Position the grinding wheel at a 30-35 degree angle
- Use short, controlled passes across the cutting edge
- Sharpen one end with 3-4 passes, then switch to the opposite end with the same number of passes
- Allow the blade to cool between sides; it should be cool enough to touch
- Overheating weakens the blade’s temper and reduces its lifespan
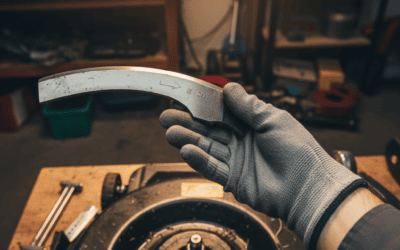
Signs of proper sharpening: The cutting edge should catch light and reflect it as a thin line along the edge, not a dull flat surface. The blade should feel sharp to the touch (carefully, while wearing gloves). Both cutting ends should appear symmetrical when viewed from the side.
Checking and Correcting Blade Balance
An unbalanced blade causes the mower to vibrate excessively, leading to poor cut quality, accelerated wear on the mower’s bearings and blade spindle, and an uncomfortable mowing experience. After sharpening, blade balance becomes even more critical because you’ve removed material unevenly.
How to test blade balance: A magnetic blade balancer is the standard tool. Hang the blade on the balancer’s shaft and observe whether it tilts to one side. If one end drops significantly lower than the other, the blade is unbalanced.
Correcting minor imbalance: If imbalance is minimal, make light filing passes on the heavier end until the blade hangs level. Remove small amounts of metal gradually; it’s easier to remove more material than to add it back.
Correcting severe imbalance: If one end is significantly heavier despite equal sharpening strokes, you may have removed unequal amounts of metal during sharpening. Return to the heavier end and make additional sharpening passes until balance is achieved.
Do not reinstall an unbalanced blade. Operating the mower with an unbalanced blade shortens the mower’s life and creates an unpleasant vibration and potential safety hazard.
Reinstalling Your Sharpened Blade
Proper reinstallation ensures your sharpened blade performs safely and effectively:
Step 1: Clean the mower deck. Before reinstalling, wipe away grass clippings, debris, and rust from the blade area and spindle using a shop towel and degreaser.
Step 2: Position the blade correctly. Align the blade with the spindle shaft, ensuring your marked orientation line points downward toward the ground. This is the cutting side that should face down when the mower operates.
Step 3: Install washers and bolt. Replace any washers or spacers you removed earlier in their original positions. Hand-tighten the blade bolt first.
Step 4: Tighten to specifications. Use your wrench to tighten the bolt firmly. Most lawn mower blades require 35-90 foot-pounds of torque depending on the model. Check your mower’s manual for the exact specification. Over-tightening can strip the bolt or spindle threads; under-tightening risks the blade loosening during operation.
Step 5: Verify installation. Manually rotate the blade (spark plugs still disconnected) to ensure it spins freely without binding or hitting the deck.
Common Mistakes to Avoid
Sharpening only one side of the blade: Rotary blades have cutting edges on both ends. Sharpening only one end creates severe imbalance and makes the problem worse than starting with a dull blade.
Sharpening at an incorrect angle: Angles steeper than 35 degrees create a fragile edge that chips quickly. Angles shallower than 30 degrees leave the blade dull. When in doubt, aim for 32 degrees as a middle ground.
Overheating the blade during grinding: Metal that turns blue or black has been overheated and weakened. Allow adequate cooling time between grinding passes, and use light pressure rather than aggressive grinding.
Reinstalling the blade upside down: This prevents cutting and forces the mower to work inefficiently. Always verify your orientation marking before installation.
Ignoring vibration after sharpening: Excessive vibration indicates an unbalanced blade. Do not operate the mower until this is corrected.
Failing to disconnect power: Even a momentary slip while working near the blade area could result in serious injury if power is not completely disconnected and verifiable.
When to Stop and Get Professional Help
Blade replacement is needed if: The blade is bent or cracked, a significant chunk is missing from the cutting edge, the blade has been welded previously (indicates past damage), or rust penetrates deep into the blade material. These conditions make the blade unsafe to operate and unable to cut effectively.
Professional sharpening is recommended if: You own a reel blade mower, your blade is severely dulled or damaged, you lack the tools or confidence to sharpen safely, or you want consistent results without learning the technique. Professional blade sharpening typically costs $10-25 per blade and includes balance checking and inspection.
Blade sharpening frequency: Most residential lawn mowers benefit from blade sharpening every 20-50 hours of use, or roughly 2-4 times per mowing season depending on lawn size, grass type, and mowing frequency. Sharpen more often if you frequently mow over stones, sand, or debris that dulls blades quickly.
Frequently Asked Questions
How do I know if my lawn mower blade is dull?
A dull blade tears grass rather than cutting cleanly, leaving a brown, shredded appearance on the grass tips within a day or two of mowing. You may also notice the mower requires more power to operate, consumes more fuel, vibrates more than usual, or leaves uncut strips. Visually, a dull blade has a rounded, flat cutting edge rather than a sharp line. By contrast, a sharp blade catches and reflects light along a thin edge.
Can I sharpen a bent lawn mower blade?
Minor bends in the blade may be carefully straightened using a mallet and wooden block (not a hammer, which can damage the blade), but severely bent blades should be replaced. Straightening may damage the blade’s temper or create weak points. A bent blade also indicates the mower may have hit an object; inspect the mower deck and spindle for damage before resuming use.
What is the best tool for sharpening lawn mower blades?
The best tool depends on your experience, budget, and frequency of maintenance. For occasional home sharpening, a metal file offers simplicity and control. For regular sharpening, an angle grinder is faster. A dedicated blade sharpener removes guesswork but costs more. If you sharpen frequently, a bench grinder provides consistency. For one-time sharpening on a severe blade, professional sharpening eliminates risk.
How long do lawn mower blades last after sharpening?
A properly sharpened blade typically remains sharp for 20-50 hours of mowing before requiring resharpening. Lifespan depends on grass type, lawn conditions, mowing frequency, and whether the blade encounters stones or hard objects. A blade’s total lifespan is usually 2-5 years with regular maintenance before replacement is necessary due to wear or damage.