

Quick Answer: How to Replace the Deck Belt on a Riding Lawn Mower
Disconnect the spark plug wire, engage the parking brake, lower the mower deck to its lowest position, slide the deck out from under the frame, photograph the old belt routing path, walk the worn belt off each pulley starting at the idler pulley, route the new OEM-spec belt along the same path around the blade spindle pulleys and idler pulley, reassemble the deck, reconnect the spark plug wire, and run a test cycle with the blade engagement lever engaged to confirm the belt tracks without slipping or squealing.
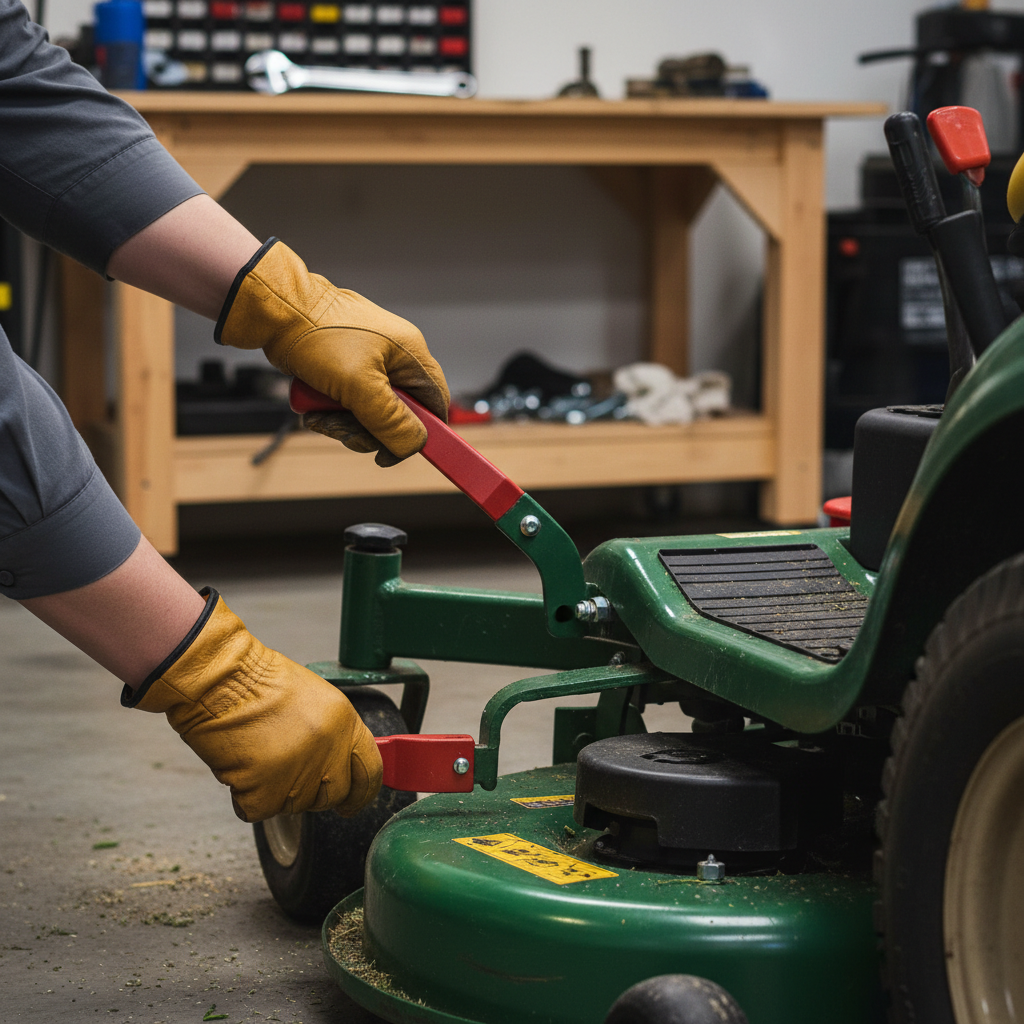
Deck Belt vs. Drive Belt: Which One Do You Need to Replace?
Riding mowers use two separate belts, and confusing them leads to diagnosing the wrong component. Identify the correct belt before purchasing a replacement part.

Pros
- Clear OEM part identification for easier matching.
- Specific compatibility listed for RZT-L42 and RZT-SX 42 mowers.
- Designed for 42 inch deck applications on compatible Cub Cadet zero-turns.
- Lightweight replacement part that is simple to manage during service.
Cons
- Compatibility is limited to the specific Cub Cadet models listed.
- No material, durability, or lifespan details are provided in the manufacturer listing.
- No customer review details are available to help assess long-term real-world performance.
Overview: CUB CADET 490-501-C025 is an OEM deck drive belt made for 42 inch decks on compatible Cub Cadet zero-turn mowers. The part is intended for RZT-L42 and RZT-SX 42 models, so it is aimed at owners who want a direct replacement rather than a universal belt.
Performance: As a deck drive belt, its job is to transfer power within the mower deck system. The main advantage here is fit specificity, since the listed OEM part number and model compatibility help reduce the risk of ordering the wrong belt.
Considerations: The available data does not include lifespan, material construction, or installation accessories. Compatibility is also narrow, so buyers should verify their mower model and deck setup before purchasing.
Verdict: This belt is a practical choice for Cub Cadet owners who need a replacement for a supported 42 inch zero-turn mower. It makes the most sense when you want an OEM part with clearly stated compatibility.

Pros
- Premium Aramid and Neoprene materials offer excellent heat and abrasion resistance
- Broad compatibility across listed Troy Bilt Bronco and Pony 42-inch models
- Heavy-duty build with higher tensile strength for reliable long-term use
- Easy DIY installation with standard dimensions that need no special tools
- Helps maintain peak performance and extend overall mower lifespan
Cons
- Limited to specific Troy Bilt Bronco and Pony 42-inch deck models only
- Requires careful verification of part numbers and measurements for correct fit
- No installation tools or accessories included with the belt
The Tecreddy 954-04060C is a replacement mower deck belt built specifically for Troy Bilt Bronco and Pony 42-inch riding lawn mowers. It features a robust Aramid cord core combined with Neoprene for a durable, heat-resistant design that feels solid and ready for heavy yard work right out of the package. Immediate impressions highlight its precise 1/2" width by 96-1/2" length sizing that matches OEM specs for a confident fit.
In real-world use this belt delivers reliable power transfer across the listed models such as 13A878BS066 and 13A277BS066. The premium materials provide higher tensile strength and non-conductive properties that resist wear from heat and abrasion, helping the mower maintain consistent cutting performance while reducing the risk of unexpected belt failure during extended sessions.
Potential drawbacks include the need to double-check exact model numbers and measurements before purchase since it only supports the specified Troy Bilt 42-inch decks. As a pure replacement part it arrives without extra tools or guides, so first-time installers should take care during the DIY process to ensure proper tension and alignment.
Overall the Tecreddy 954-04060C offers excellent value for Troy Bilt owners seeking a durable, long-lasting deck belt. Homeowners who maintain Bronco or Pony 42-inch riding mowers and prefer a straightforward, high-strength OEM-style replacement will get the most benefit from this reliable part.

Pros
- Uses aramid cord reinforcement for added strength and durability.
- Compatible with specific Husqvarna zero-turn mower models and OEM part numbers.
- Offers heat, oil, and abrasion resistance for outdoor equipment use.
- Clear size listing helps buyers verify fit before purchase.
Cons
- Compatibility is limited, so buyers must confirm the exact part number and belt size first.
- It is a replacement belt only and does not include installation tools or accessories.
- As with any drive belt, fit and performance depend on correct mower model matching and proper installation.
Overview: The Nubelety 592951801 is a replacement lawn mower deck drive belt made for select Husqvarna zero-turn mowers, including Z254F and MZ54 applications. It is a straightforward aftermarket option for users who need a belt replacement with OEM-style sizing and material focus.
Performance: This belt uses synthetic rubber with aramid cord reinforcement, which is intended to improve tensile strength, toughness, and resistance to heat, oil, and abrasion. In practical use, those materials can help support smoother power transfer, better durability under repeated bending, and less slippage when the mower deck is under load.
Drawbacks: The main limitation is fitment. Buyers must confirm both the part number and the 1/2 inch by 152 inch size before purchasing, since this belt is not universal. It is also sold as a single replacement belt, so there are no included extras.
Verdict: This is a solid choice for Husqvarna owners who need a compatible deck drive belt and want a durable replacement with reinforced construction. It is best suited for users who prioritize correct fit, material durability, and a simple direct replacement.

Pros
- Matches multiple OEM numbers across Craftsman Husqvarna Ariens AYP brands for versatile use.
- Precise 1/2 inch by 95 inch dimensions with 93 inch inside circumference guarantee proper tension.
- Supports popular 42-inch deck applications on LT and LTH series riding mowers.
- Covered belt type enhances durability against typical lawn debris and weather exposure.
Cons
- Aftermarket design requires users to confirm exact mower model and original belt specs for compatibility.
- Package contains only the single belt with no mounting hardware or installation instructions included.
- Limited strictly to deck drive use on listed 38-46 inch tractor models.
The Funhoon HOONKA 144959 deck belt is a covered replacement component engineered for riding lawn mower decks. It presents a straightforward durable build with a 1/2 inch width and 95 inch outside circumference that aligns with standard OEM requirements for immediate installation confidence.
This belt performs effectively by transferring power smoothly to the cutting deck on compatible models such as Craftsman LT1000 LT2000 LT3000 and various Husqvarna LTH GTH series. The covered type construction and exact dimensions including a 93 inch inside circumference help maintain proper tension and reduce slippage during regular mowing sessions across 38 to 46 inch decks.
As an aftermarket part users must carefully verify their specific mower model and original belt measurements to avoid fitment issues. The package provides only the single belt without any tools accessories or detailed guides which means installation may need separate resources or experience.
Owners of Craftsman LT series Husqvarna 42-inch riding mowers and related Sears AYP Poulan tractors will gain the most value from this product when seeking a reliable cost-effective way to restore deck drive function and keep their equipment operational.

Pros
- High-quality aramid cords and wrapped cover deliver outstanding durability and heat resistance
- Broad compatibility across Craftsman, Husqvarna, Poulan, AYP and Ariens 42-inch riding mowers
- Precise OEM-matching dimensions and covered design promote reliable power transmission
- Includes 30-day free replacement warranty for defective belts
- Affordable aftermarket option that maintains original equipment performance standards
Cons
- Parts may differ across configurations of the same model, requiring careful confirmation of the complete model number for proper fit
- Limited real-world feedback available due to sparse customer reviews
- Intended only for specific 42-inch deck applications and will not suit other deck sizes
The UDC Parts 144959 Deck Belt is a purpose-built replacement designed for 42-inch riding mower decks on popular Craftsman, Husqvarna, Poulan, AYP and Ariens models. Constructed with aramid tensile cords, a durable natural rubber body and a two-layer wrapped cover, it creates an immediate impression of rugged, OEM-level quality ready for seasonal use.
In real-world performance the belt transmits power efficiently thanks to its precise 0.50 in width by 95.40 in length and low-friction lab-tested design. The aramid cords resist stretching while the covered construction stands up to heat and wear, making it well suited for regular lawn maintenance on models such as the DLT3000, LT3000, YT42LS, YTH20B42T and YTH1842. Installation is straightforward when the exact model number is verified against the extensive compatibility list.
Key considerations include the need to double-check the complete mower model and configuration, because parts can vary even within the same series. Buyers should also note that long-term user feedback is currently limited, so careful measurement and correct tensioning remain essential for optimal results.
Overall the UDC Parts 144959 Deck Belt is an excellent value choice for homeowners and landscapers who need a strong, heat-resistant replacement for compatible 42-inch Craftsman, Husqvarna and similar riding mowers. Those who confirm fitment will appreciate the reliable power delivery and 30-day warranty support.
What Is the Deck Belt?
The deck belt (also called the blade belt or cutter belt) runs underneath the mower deck and connects the engine pulley, also called the crankshaft pulley, to the blade spindle pulleys. When the PTO (power take-off) is engaged via the blade engagement lever, this belt transfers rotational energy from the engine to spin the cutting blades. It lives entirely beneath the deck housing.
What Is the Drive Belt?
The drive belt (ground-drive belt or transmission belt) connects the engine to the transmission or transaxle and propels the mower forward and backward. It operates independently of the deck belt. A failed drive belt means the mower won’t move under its own power, the blades may still spin normally.
How to Tell Which Belt Has Failed
- Deck belt failure symptoms: Blades stop spinning or spin slowly, loud squealing when the blade engagement lever is pulled, visible belt cracking or fraying under the deck, belt lying loose on the ground after a mow.
- Drive belt failure symptoms: Mower won’t self-propel forward or reverse, wheels spin freely when pushed, engine runs normally but the machine has no ground drive.
This guide covers deck belt replacement only, the higher-frequency DIY procedure. If the mower moves but blades won’t engage, continue below. If the mower won’t propel at all, the drive belt is the target component and requires a separate procedure.
Tools and Parts You Need Before You Start
Gathering every item before starting prevents a mid-job stop that leaves the mower disassembled in the garage. Readers comparing setup options can review our technical analysis on z890 vs x870e motherboard.
Tools
- Socket set and wrenches (typically 3/8 in. drive; check your model’s deck bolt sizes)
- Flathead screwdriver or small pry bar (to walk the belt off pulley grooves)
- Needle-nose pliers (to disconnect idler pulley spring clips on some models)
- Work gloves and safety glasses
- Smartphone or camera (to photograph belt routing before removal)
- Jack stands or deck blocks if full deck removal is required
Replacement Belt
Belt width, length, and cross-section profile must match the OEM specification exactly. An incorrect size causes slipping, premature wear, or immediate failure. Locate the correct part number using one of three methods:
- Owner’s manual: The parts diagram section lists the deck belt part number by model.
- Deck housing label: Many manufacturers stamp the belt routing diagram and part number directly on the underside of the deck or on a sticker affixed to the deck housing.
- Manufacturer website: Enter the mower’s model number (found on a plate under the seat or on the frame) into the OEM parts lookup tool, available on Husqvarna, John Deere, Craftsman, Cub Cadet, and Toro websites.
Always purchase an OEM belt or a cross-referenced aftermarket belt confirmed to match the OEM part number. Belt dimensions are not interchangeable across models even within the same brand. For complementary field maintenance guidelines, examine our breakdown of marshall stanmore iii vs harman kardon onyx studio 8.
Safety Steps to Complete Before Touching the Belt
These steps are non-negotiable regardless of experience level. Skipping any one of them creates risk of blade engagement or engine startup while hands are near moving components.
- Park on a flat, level surface. Prevents the mower from rolling during deck removal.
- Engage the parking brake. Locks the rear wheels in place.
- Turn the ignition off and remove the key. Eliminates the possibility of accidental startup.
- Disconnect the spark plug wire. Pull the rubber boot off the spark plug tip and tuck the wire away from the plug. This is the single most critical safety action before any under-deck work, even with the key removed, vibration or an accidental engine rotation can engage the blade if the spark plug wire remains connected. Consult your mower’s operator manual and local small-equipment safety guidelines for model-specific lockout requirements.
- Set the blade engagement lever to the disengaged (off) position. Releases tension on the deck belt system.
- Lower the deck to its lowest cutting height position. Provides maximum clearance for deck removal and makes the belt slack easier to manage.
- Allow the engine to cool completely if the mower was recently running. Hot engine components near the crankshaft pulley area can cause burns.
Do not tip the mower on its side to access the deck belt. The deck slides out laterally on riding mowers , tipping risks fuel and oil spills into the air filter and combustion chamber. To evaluate matched hardware tolerances, consult our detailed overview of dyson v8 cyclone vs bissell featherweight stick.
How to Remove the Mower Deck
Deck removal is the most brand-variable step in this procedure. The generic sequence below applies to most residential riding mowers, but Husqvarna, John Deere, Craftsman, Cub Cadet, and Toro each position their deck hanger pins, lift linkage brackets, and deck belt engagement arms differently. Confirm your specific removal sequence in your owner’s manual before proceeding.
Generic Deck Removal Procedure
- Disconnect the deck belt from the engine pulley first. Before unbolting anything, reach under the frame near the engine pulley and slip the belt off the crankshaft pulley. This separates the deck belt from the engine and creates slack for the rest of the removal.
- Disconnect the PTO or blade engagement cable/rod. This is typically a spring-loaded rod or cable running from the blade engagement lever on the dash down to the deck idler arm. Unhook the spring or disconnect the clevis pin to free the cable from the deck.
- Remove the deck hanger brackets and lift pins. Most decks hang from two or four deck hanger brackets (also called deck lift pins or hanger rods) that connect the deck to the mower frame’s lift mechanism. Slide or unclip these pins from their brackets. On Craftsman and Cub Cadet models, these are often cotter pins through a hanger rod. On Husqvarna and John Deere models, they may be lynch pins or hairpin clips.
- Disconnect any anti-scalp wheel or gauge wheel brackets attached to the frame rather than the deck, if present.
- Slide the deck out laterally from under the mower. On most models, the deck slides out from the right or left side once all attachments are disconnected. Have a second person assist with larger decks (48 in. and above), deck assemblies can weigh 50 to 80 lb.
Brand-specific note: Some John Deere models allow belt replacement without full deck removal by accessing the belt through the deck’s rear opening with the deck lowered. Some Toro TimeCutter zero-turn models require removing the seat and accessing the belt from above. Check your model’s service documentation before committing to full deck removal. When planning workspace deployment, consider the engineering criteria outlined in our bissell crosswave hydrosteam vs shark stainforce guide.
Step-by-Step: How to Remove the Old Deck Belt
With the deck on the ground or on a flat work surface, the belt is fully accessible. Follow this sequence to remove it without damaging pulleys or the idler arm.
- Photograph the belt routing path before touching anything. Take photos from multiple angles showing exactly how the belt wraps around every pulley, the blade spindle pulleys, the idler pulley, and (if still attached) the engine pulley. This photo is the reference for installing the new belt correctly. Do not skip this step.
- Locate the idler pulley. The idler pulley is a spring-tensioned pulley on a movable arm. It maintains belt tension when the PTO is engaged and is the lowest-tension point in the belt path when the system is disengaged.
- Release the idler pulley spring tension. Use needle-nose pliers or a flathead screwdriver to unhook the idler pulley spring from its bracket, or push the idler arm toward the slack side to create enough room to slip the belt off. On some models, the idler arm is held by a bolt you loosen, do not fully remove the bolt unless your service manual directs it.
- Walk the belt off the idler pulley first. With tension released, slip the belt out of the idler pulley groove. A flathead screwdriver can lever the belt edge over the pulley flange without damaging the pulley.
- Remove the belt from each blade spindle pulley. With the idler pulley slack, the belt has enough play to walk it off each spindle pulley. Rotate the pulley by hand while guiding the belt off the groove.
- Inspect the pulleys and spindle bearings before installing the new belt. Spin each pulley by hand. It should rotate smoothly and quietly with no wobble. A rough, grinding, or wobbling pulley indicates a worn bearing, a worn idler pulley bearing is a primary cause of new belt failure. Replace any damaged pulley before installing the new belt, otherwise the new belt will wear prematurely or come off under load.
Step-by-Step: How to Install the New Deck Belt
Belt installation is the reversal of removal, but the routing path must be exact. A misrouted belt will either slip immediately or damage the pulleys within minutes of operation.
- Lay the new belt alongside the old belt to confirm they match. Length, width, and cross-section profile (typically a V-belt or flat belt depending on the model) must be identical. If they differ, stop and verify the part number before installing.
- Reference the routing photograph taken in the removal step. Identify which side of each pulley the belt passes on, and where the belt crosses over itself if the routing includes a crossover point (common on three-spindle decks).
- Start routing at the blade spindle pulleys. Seat the belt into the pulley groove on each blade spindle pulley first, working from the outermost spindle toward the center. Press the belt fully into the groove, a belt sitting on the pulley flange rather than inside the groove will slip and squeal immediately on first engagement.
- Route the belt around any fixed guide brackets or belt keepers. Most decks have stamped-steel belt keepers (small tabs or loops) positioned around pulleys to prevent the belt from jumping off under shock loads. Thread the belt under these keepers, not over them.
- Seat the belt on the idler pulley last. Push the idler arm toward the slack side, seat the belt in the idler pulley groove, then allow the idler arm to return to its spring-tensioned position. Re-hook the idler spring if it was disconnected.
- Verify belt tension by hand. With the blade engagement lever still disengaged, the belt should have moderate slack. It should not be so loose it sags off the pulleys, and not so tight it cannot be deflected slightly by hand pressure at the midpoint between two pulleys. Specific deflection tolerances (typically measured in fractions of an inch) vary by model, refer to the OEM service manual for the specification for your deck. Do not apply a generic tension figure from a non-OEM source.
- Rotate each blade spindle pulley by hand one full revolution and watch the belt track in the pulley grooves. If the belt walks to one side or tries to climb out of a groove, a pulley may be misaligned or the belt is misrouted, identify the problem before reassembling the deck.
Reassembly, Test Run, and Post-Installation Checks
- Slide the deck back under the mower frame and reconnect the deck hanger brackets and lift pins in the reverse of the removal sequence. Ensure all cotter pins, lynch pins, or hairpin clips are fully seated.
- Reconnect the PTO cable or blade engagement rod and its spring to the idler arm bracket.
- Loop the belt back onto the engine crankshaft pulley and confirm it sits in the pulley groove and under any belt keepers at the engine end.
- Reconnect the spark plug wire. Push the rubber boot firmly onto the spark plug tip until it seats.
- Start the mower and let it idle for 30 seconds with the blade engagement lever disengaged. Listen for unusual noise from the deck area before engaging the blades.
- Engage the PTO/blade engagement lever and observe the deck from a safe standing position to the rear. The belt should run smoothly without squealing, wobbling, or vibrating excessively. No belt movement should be visible outside the normal pulley path.
- Make one pass across a small section of lawn at normal operating speed and deck height. Stop, disengage, and re-inspect the belt visually after the first pass to confirm no tracking issues developed under actual load.
A correctly installed deck belt on a residential riding mower typically lasts 1 to 3 seasons depending on hours of operation, cutting conditions, and maintenance. Refer to your mower manufacturer’s recommended maintenance schedule for the service interval applicable to your model.
Common Mistakes That Cause a New Belt to Fail Early
If a newly installed belt slips, squeals, or comes off the pulleys within the first few uses, one of the following is almost always the cause.
- Wrong belt size. Even a belt that appears close in length will slip if it is too long or bind and crack if it is too short. Always match the OEM part number, not just a visual approximation of length.
- Belt misrouted around pulleys. A belt routed on the wrong side of a guide bracket, or skipping a pulley entirely, will track incorrectly and eject from the pulley under load. The routing photograph taken at disassembly is the most important tool for preventing this.
- Belt twisted during installation. A belt with a 180-degree twist seated in the pulley grooves will vibrate, wear unevenly, and fail quickly. Lay the belt flat and inspect it for twists before finalizing installation.
- Worn idler pulley not replaced. A worn idler pulley bearing that wobbles or binds will chew through a new belt within hours of operation. Inspect and replace the idler pulley at the same time as the belt if there is any bearing roughness.
- Belt not seated in pulley grooves. A belt resting on the top edge of a pulley flange instead of inside the V-groove will slip immediately on engagement and generate a loud squeal.
- Belt keepers not re-engaged. Leaving a belt keeper tab bent out of position during reassembly allows the belt to eject from the pulley when a blade strikes an obstacle.
- Deck alignment off after reinstallation. If the deck hanger brackets are not reconnected at the correct lift position, the deck can hang at an angle that puts uneven load across the belt and causes one edge to wear faster than the other.
Everything You Need to Know: How To Replace A Belt On A Riding Lawn Mower FAQ
Can I replace the deck belt without removing the deck?
On some models, particularly certain John Deere and Toro designs, the belt can be accessed and replaced with the deck lowered but still attached to the mower, by working through the rear opening of the deck housing. On most standard residential riding mowers, full or partial deck removal is required to route the new belt correctly around all pulleys. Check the service documentation for your specific model before attempting an on-mower replacement.
How do I find the belt routing diagram for my mower?
Three locations: (1) the belt routing sticker affixed to the top or underside of the deck housing, most manufacturers include this from the factory; (2) the parts diagram section of the printed owner’s manual; (3) the OEM parts lookup tool on the manufacturer’s website, accessed using the model and serial number from the frame plate under the seat. If all three are unavailable, the photograph taken of the original belt before removal is the functional substitute.
Why is my new deck belt squealing immediately after installation?
The three most common causes are: the belt is not fully seated in the pulley groove and is riding the pulley flange; a worn idler pulley bearing is creating friction and vibration against the new belt; or the belt is misrouted and making contact with a deck surface or belt keeper bracket. Disengage the blades, disconnect the spark plug wire, and inspect each pulley for full belt seating and any surface contact before running the mower again.
How long does a riding mower deck belt last?
Deck belt service life varies significantly by mowing conditions, deck size, and maintenance habits. Manufacturers’ recommended maintenance schedules vary by model, consult your OEM service manual for the inspection interval specific to your mower. Cutting in wet or heavy grass, frequent obstacle strikes, and leaving the belt engaged while stationary all accelerate wear. Inspect the belt visually at the start of each mowing season for cracking, glazing, or fraying, and replace it at the first sign of visible damage rather than waiting for complete failure.
Technical Standards and Compliance
Mechanical safety standards, operational tolerances, and protective gear guidelines align with benchmark specifications established by the American National Standards Institute (ANSI).









