

The Short Answer: How to Replace a Lawn Mower Carburetor
Disconnect the spark plug wire and drain the fuel tank first — these two steps prevent fire and accidental engine starts. Remove the air filter assembly, disconnect the fuel line and throttle/choke linkage, unbolt the old carburetor, then install the new one with fresh gaskets in reverse order. Reconnect the spark plug, refill with fresh fuel, start the engine, and check for leaks before adjusting idle or mixture screws per your service manual.

Pros
- Large-size design named in product title
- Sharpening and balancing functions listed
- Listed as a new upgraded version

Pros
- Adjustable 15-to-45-degree range in title
- Sharpening and balancing functions listed

Pros
- Sharpener and balancer functions in title
- 15-to-45-degree adjustable setting listed
- Built for lawn mower blade maintenance
Pros
- Includes replacement gaskets and a 98079-55846 spark plug
- Matches Honda HRR216 and HRS216 lawn mower models
- Designed around the 16100-Z8B-901 carburetor specification
Cons
- Restricted to select Honda GCV160 mower applications
- Installation requires basic mechanical tools and skills
Understanding When and Why to Replace a Lawn Mower Carburetor
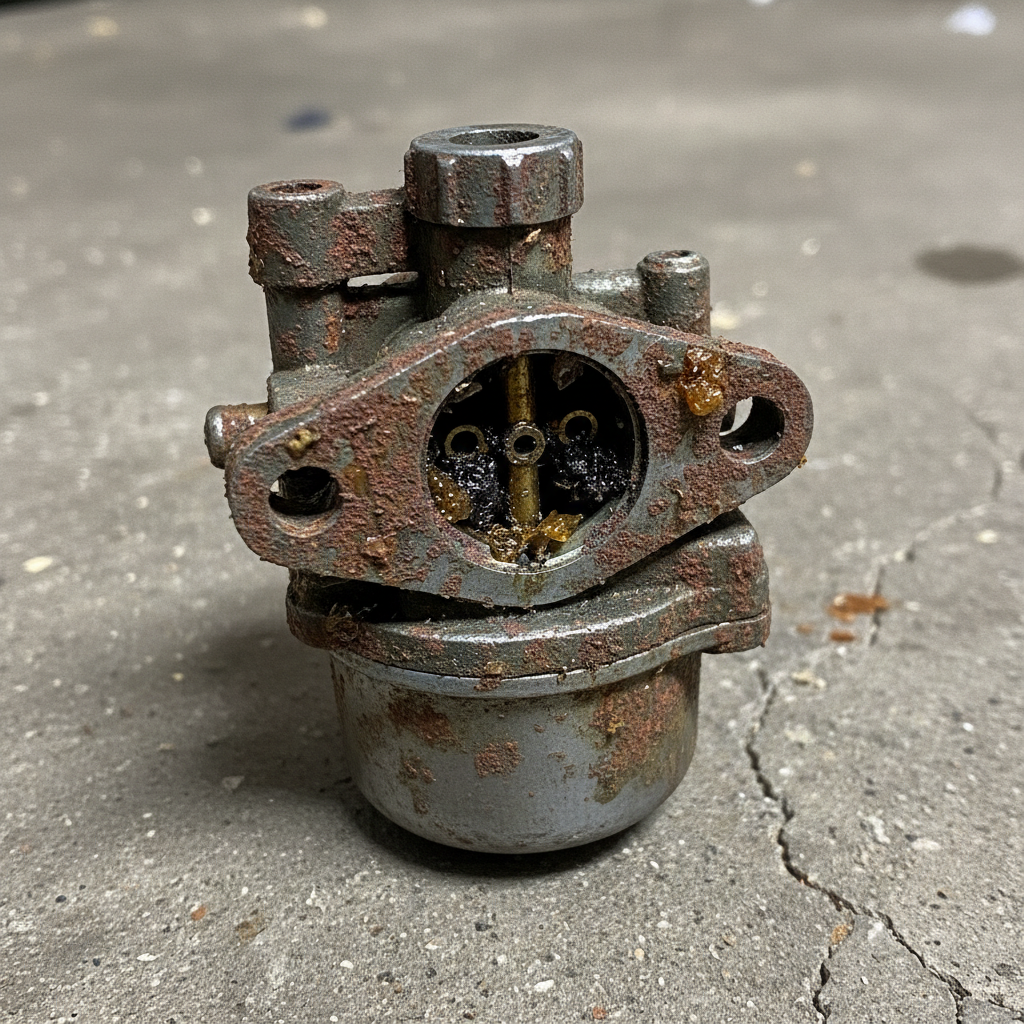
Not every carburetor problem requires full replacement. Recognizing the difference between a carburetor that needs cleaning and one that needs replacing saves time and money.
Common Symptoms of a Failing Carburetor
- Hard starting or no-start condition: The engine cranks but won’t fire, or requires excessive priming.
- Rough idle or stalling: The engine runs unevenly at low RPM or dies shortly after starting.
- Engine surging: RPM cycles up and down repeatedly without throttle input.
- Black smoke from the exhaust: Indicates a rich fuel mixture caused by a stuck float, needle valve, or clogged jet.
- Visible fuel leaks: Fuel drips from the float bowl, primer bulb, or body seams — often caused by a cracked housing or degraded gaskets.
- Fuel in the oil: A stuck needle valve allows fuel to overflow into the crankcase, a serious condition requiring immediate attention.
Cleaning vs. Replacing: How to Decide
Carburetor cleaning is the right first step when the unit is structurally intact and the issue is ethanol-related varnish or debris clogging the jets. Ethanol-blended fuels (E10 and higher) absorb moisture and leave behind gum deposits when fuel sits in the bowl for more than 30 days — this is the leading cause of carburetor failure in small engines used seasonally. To compare alternative configurations, check our hands-on review of jbl partybox club 120 vs sony srs xv500.
Replacement is the better choice when: To compare alternative configurations, check our hands-on review of jbl partybox club 120 vs sony srs xv500.
- The carburetor body is cracked or warped.
- The float is punctured or saturated with fuel.
- The needle valve seat is damaged and leaks even after cleaning.
- A rebuild kit costs nearly as much as a new aftermarket carburetor.
- The unit has been cleaned repeatedly and the problem returns within one season.
Key Factors to Consider Before Replacing a Carburetor
Push Mower vs. Riding Mower
Push mowers use single-cylinder engines (typically 140cc–190cc) with compact, straightforward carburetors that are accessible after removing a single air filter housing. Riding mowers use larger single- or twin-cylinder engines where the carburetor may sit beneath a shroud, fuel tank, or hood panel requiring additional disassembly. The core replacement steps are identical; access and linkage complexity differ.
Finding the Correct Replacement Part
The engine model number — not the mower brand — determines the correct carburetor. Locate the model, type, and code stamped on a metal tag on the engine block (common locations: beneath the fuel tank, on the blower housing, or on the side of the block). Use this number to search on the engine manufacturer’s parts lookup tool (Briggs & Stratton, Kohler, Honda, Kawasaki, Tecumseh/Craftsman) or a parts retailer such as Jack’s Small Engines or Repair Clinic. Users looking for related component recommendations can explore our z890 vs x870e motherboard breakdown.
OEM vs. Aftermarket Carburetors
| Factor | OEM Carburetor | Aftermarket Carburetor |
|---|---|---|
| Cost | $40–$120+ | $8–$40 |
| Fit accuracy | Exact match guaranteed | Usually compatible; verify part number |
| Warranty | Preserves engine warranty (where applicable) | May void engine manufacturer warranty |
| Quality consistency | High, factory-spec materials | Variable; read reviews before purchasing |
| Availability | May require dealer order | Ships quickly from major online retailers |
For mowers still under warranty, use OEM parts. For older machines, a reputable aftermarket carburetor from a known supplier is a practical and cost-effective choice — confirm the part number cross-reference before ordering.
Tools and Safety Preparations for Carburetor Replacement
Tools You Need
- Socket set (3/8-inch drive, metric and SAE)
- Flathead and Phillips screwdrivers
- Needle-nose pliers
- Adjustable wrench or open-end wrenches
- Fuel line clamp pliers or locking pliers
- Small container or drain pan for fuel
- Clean rags and shop towels
- Carburetor cleaner spray (for cleaning gasket surfaces)
- New carburetor gasket set (often included with replacement carb)
- Permanent marker or masking tape (for labeling linkage positions)
- Smartphone or camera (to photograph linkage routing before removal)
Safety Precautions — Complete These Before Touching the Carburetor
- Disconnect the spark plug wire. Pull the rubber boot off the spark plug tip and tuck it away from the plug. This eliminates any possibility of accidental engine start during the procedure.
- Work in a ventilated area. Fuel vapors are heavier than air and accumulate at floor level. Work outdoors or in a garage with the door open. No open flames, pilot lights, or running motors nearby.
- Let the engine cool completely. A hot engine block and exhaust components can ignite spilled fuel. Allow at least 30 minutes after the last run.
- Drain the fuel tank. Use a hand siphon pump or turkey baster to remove as much fuel from the tank as possible into an approved fuel container. Alternatively, run the engine until it stalls from fuel starvation — but only before disconnecting the spark plug.
- Close the fuel shut-off valve. If your mower has an inline fuel shut-off valve (common on riding mowers and some walk-behinds), close it now to stop fuel flowing to the carburetor during removal.
Step-by-Step Guide: Removing the Old Carburetor
Before you begin: Photograph the throttle and choke linkage connections from multiple angles. Small springs and wire clips are easy to misroute on reassembly. Before finalizing equipment decisions, refer to our comprehensive marshall stanmore iii vs harman kardon onyx studio 8 comparison.
Step 1 — Remove the Air Filter and Housing
Unscrew or unclip the air filter cover, remove the foam or paper filter element, and set it aside. Remove the screws holding the air filter base/housing to the carburetor or engine. On some engines, the housing and carburetor share mounting bolts — leave those in place until Step 4.
Step 2 — Disconnect the Fuel Line
Clamp the fuel line with locking pliers or a fuel line clamp just above the carburetor inlet to prevent residual fuel from draining. Slide the spring clamp back along the hose using needle-nose pliers, then twist and pull the hose off the carburetor inlet fitting. Have a rag ready — some fuel will spill regardless of clamping. For broader ecosystem context, read through our operational guide on dyson v8 cyclone vs bissell featherweight stick.
Step 3 — Disconnect the Throttle and Choke Linkage
With your reference photos in hand, unhook the throttle linkage wire from the carburetor throttle lever. On most small engines, this is a Z-shaped wire end that lifts out of a slot. Unhook the choke linkage the same way. Remove any return springs using needle-nose pliers, noting exactly which post each spring connects to.
Step 4 — Remove the Mounting Bolts and Lift Off the Carburetor
The carburetor is secured to the engine intake with two bolts (most push mower engines) or a combination of bolts and studs. Remove these with the appropriate socket or screwdriver. Pull the carburetor straight off the intake manifold. There will be a gasket between the carburetor and the engine — remove it and discard it. A second gasket may sit between the carburetor and the air filter base; discard that one too. For troubleshooting and reliability insights, consult our in-depth bissell crosswave hydrosteam vs shark stainforce report.
How to Handle a Stuck Carburetor
If the carburetor won’t pull free, the intake gasket has bonded to the mating surfaces. Do not pry with a screwdriver — this damages the soft aluminum surfaces. Instead, gently twist the carburetor side to side while pulling outward. If still stuck, spray penetrating oil around the gasket perimeter, wait five minutes, and try again.
Preparing and Installing the New Carburetor
Step 1 — Compare the Old and New Carburetors
Place both carburetors side by side and verify: inlet and outlet positions match, the mounting hole pattern is identical, the throttle and choke shaft orientations align, and the primer bulb port (if equipped) is in the same location. A mismatch on any of these points means the wrong part was ordered.
Step 2 — Transfer Reusable Components (If Required)
Some replacement carburetors ship without a primer bulb, fuel shut-off fitting, or mounting studs. Transfer these from the old unit using the appropriate tool. Do not reuse old gaskets — always install the new ones supplied with the carburetor or purchased separately.
Step 3 — Install New Gaskets
Wipe both the engine intake flange and the carburetor mounting face with a clean rag lightly dampened with carburetor cleaner to remove old gasket material and debris. Place the new intake gasket onto the engine mounting studs or bolts — do not use gasket sealer on small engine carburetors unless specifically directed by the service manual. Most gaskets seal correctly without it.
Step 4 — Mount the Carburetor
Seat the carburetor onto the intake flange, aligning the mounting holes. Thread the mounting bolts in by hand first to confirm alignment, then tighten in an alternating pattern to avoid cocking the gasket. Torque specifications vary by engine model — consult your service manual. For most small single-cylinder engines, 70–95 in-lbs (8–11 Nm) is typical for carburetor mounting bolts, but verify this value for your specific engine rather than relying on this general range.
Step 5 — Reconnect Throttle and Choke Linkage
Using your reference photos, reconnect the choke linkage first (it sits closer to the engine and is harder to access once the throttle linkage is in place), then the throttle linkage. Reinstall all return springs. Manually operate the throttle and choke through their full range of motion — both should move freely with no binding and return to their rest positions when released.
Step 6 — Reconnect the Fuel Line
Remove the fuel line clamp, slide the spring clamp to the end of the hose, push the hose firmly onto the carburetor inlet fitting, and slide the spring clamp back over the fitting to secure it. The hose should seat past the raised bead on the fitting.
Step 7 — Reinstall the Air Filter Base and Element
Install the air filter base gasket (if applicable), mount the air filter base, and reinstall the air filter element. A clogged or dirty filter should be replaced at this time — installing a new carburetor behind a restricted air filter defeats the purpose of the repair.
Step 8 — Adjust Idle and Mixture Screws (If Equipped)
Fixed-jet carburetors (common on many current Briggs & Stratton and Honda engines) have no adjustable mixture screws and require no adjustment. Variable-jet carburetors have an idle speed screw and a mixture (air/fuel) screw. A safe baseline for the mixture screw on most engines is 1.5 turns out from lightly seated (do not overtighten when seating — this damages the needle tip). Final idle adjustment is made with the engine at full operating temperature. Consult your service manual for the specific starting position and acceptable idle RPM range for your engine model.
Post-Installation Checks, Testing, and Troubleshooting
Starting the Engine for the First Time After Replacement
- Reconnect the spark plug wire.
- Open the fuel shut-off valve (if equipped).
- Fill the tank with fresh fuel — ethanol-free fuel (E0) is preferred for small engines; if unavailable, use E10 with a fuel stabilizer.
- Set the choke to the fully closed (CHOKE) position for a cold start.
- Prime the carburetor by pressing the primer bulb 3–5 times (if equipped).
- Start the engine per the normal procedure.
- Allow the engine to warm for 2–3 minutes before moving the choke to the open (RUN) position.
Checking for Fuel Leaks
With the engine running, visually inspect the fuel line connection, the float bowl drain plug, and the carburetor-to-intake gasket joint. Any dripping fuel is a fire hazard — shut the engine off immediately, tighten the connection or replace the component, and retest before continuing.
Troubleshooting Common Post-Installation Issues
| Symptom | Likely Cause | Action |
|---|---|---|
| Engine floods (fuel pours from air filter) | Float stuck open or incorrectly seated needle valve | Remove float bowl, verify float height and needle valve seating; replace if damaged |
| Engine surges at idle | Air leak at intake gasket or mixture screw too lean | Retorque mounting bolts; enrich mixture screw 1/4 turn at a time |
| Engine won’t start after install | Throttle/choke linkage misrouted or fuel not reaching bowl | Recheck linkage against reference photos; confirm fuel shut-off valve is open |
| Black smoke from exhaust | Choke not opening fully or mixture too rich | Verify choke lever moves to fully open position; lean mixture screw 1/4 turn at a time |
| Fuel leak at float bowl | Bowl gasket not seated or overtightened drain bolt | Remove bowl, reseat gasket, retighten bowl bolt to spec |
Frequently Asked Questions About How To Replace A Lawn Mower Carburetor
How much does it cost to replace a lawn mower carburetor?
Aftermarket replacement carburetors for common push mower engines (Briggs & Stratton, Tecumseh) cost $10–$35 online. OEM carburetors range from $40 to over $120 depending on engine model. If a professional small-engine repair shop performs the replacement, expect $50–$150 in labor on top of parts cost, with total repair bills typically falling between $75 and $200 for a push mower. Riding mower carburetor replacement at a shop can run $150–$300+ depending on engine size and access difficulty.
How long does a carburetor replacement take for a beginner?
A first-time DIYer working on a standard push mower should budget 1–2 hours, which accounts for photographing linkage, careful disassembly, and referencing the service manual. An experienced technician completes the same job in 20–40 minutes. Riding mower replacements take longer due to additional disassembly required to access the engine.
Can I replace a lawn mower carburetor without a service manual?
Reference photos taken before disassembly and the general steps in this guide cover most of the job. A service manual becomes critical for torque specifications on mounting bolts, the correct baseline mixture screw setting for your specific engine, and linkage routing on engines with complex governor assemblies. Free PDF service manuals for most Briggs & Stratton, Kohler, and Honda engines are available through the manufacturer’s website or authorized dealer portals.
When should I hire a professional instead of replacing the carburetor myself?
DIY replacement is appropriate when the diagnosis is clear, the carburetor is accessible, and the engine otherwise runs mechanically sound. Hire a professional when: the mower is still under warranty (DIY work may void coverage), the engine has additional issues such as compression loss or valve problems, the carburetor sits inside a complex riding mower engine bay requiring significant additional disassembly, or multiple attempts at carburetor cleaning and replacement have failed to resolve the issue — indicating the problem may be elsewhere in the fuel or ignition system.
For more hands-on benchmarks and buying recommendations, consult our guides on heavy-duty chainsaw buyer guide, as well as high-CFM commercial leaf blower guide, as well as durable ride-on lawn tractor guide, as well as automated robotic lawn mower guide.
Mechanical safety standards, operational tolerances, and protective gear guidelines align with benchmark specifications established by the American National Standards Institute (ANSI).









