

Quick Answer: How To Test Lawn Mower Ignition Coil?
To test the ignition coil on a lawn mower, ensure the engine is off and cool, then disconnect the spark plug wire. Perform a spark test by installing a spark tester or grounded spare spark plug and pulling the starter rope—a strong blue spark indicates a healthy coil. For precise diagnosis, use a digital multimeter set to ohms to measure…

Pros
- Large-size design named in product title
- Sharpening and balancing functions listed
- Listed as a new upgraded version

Pros
- Adjustable 15-to-45-degree range in title
- Sharpening and balancing functions listed

Pros
- Sharpener and balancer functions in title
- 15-to-45-degree adjustable setting listed
- Built for lawn mower blade maintenance
Pros
- Includes replacement gaskets and a 98079-55846 spark plug
- Matches Honda HRR216 and HRS216 lawn mower models
- Designed around the 16100-Z8B-901 carburetor specification
Cons
- Restricted to select Honda GCV160 mower applications
- Installation requires basic mechanical tools and skills
Understanding the Lawn Mower Ignition Coil and When to Test It
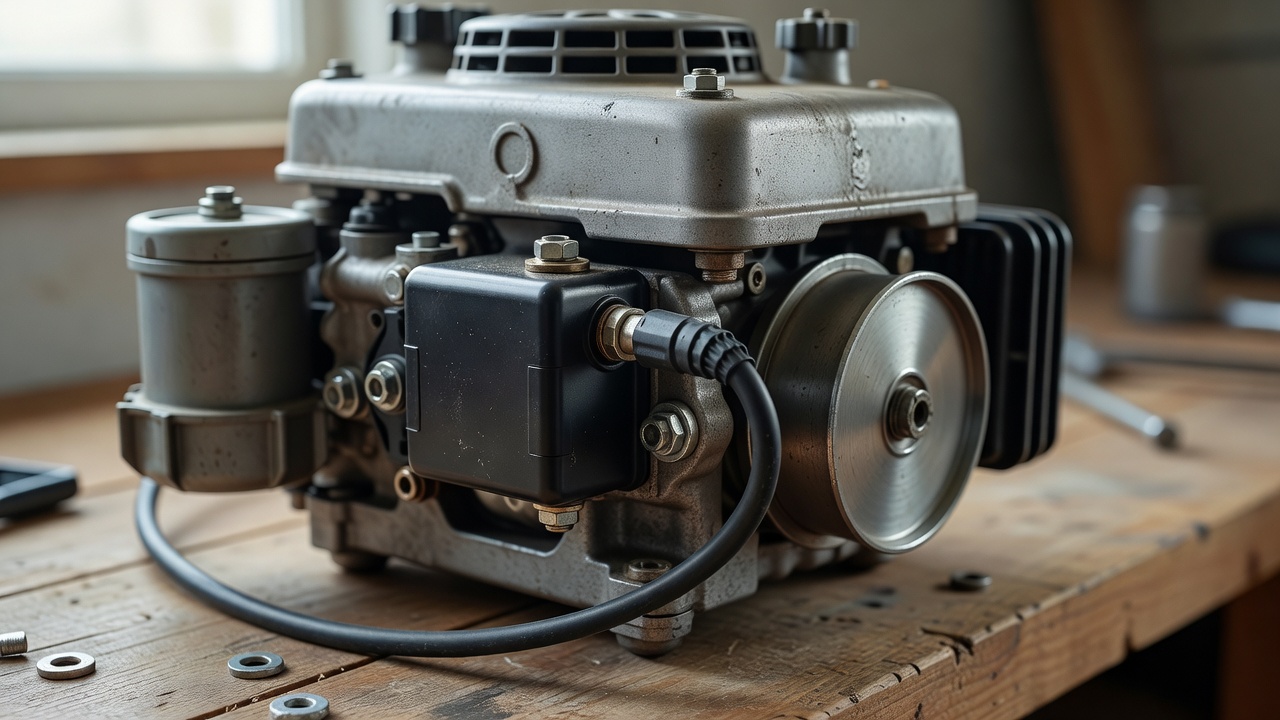
The ignition coil transforms the lawn mower engine’s low-voltage electrical current into the high voltage needed to fire the spark plug. A failing ignition coil typically produces symptoms including no spark at the plug, difficulty starting, engine misfiring, stalling under load, or intermittent running. These symptoms may also stem from a fouled spark plug, damaged wiring, or a faulty kill switch, so systematic testing helps isolate the true cause.
On push mowers and small-engine equipment, “the coil” almost always refers to the ignition coil mounted directly on or near the flywheel. On riding mowers, there are two separate coils: the ignition coil (which fires the spark plug) and the charging or stator coil (which generates AC voltage to charge the battery and power the electrical system). Testing procedures differ between the two; this guide focuses on the ignition coil. If your riding mower has electrical charging issues rather than no-spark symptoms, you may need to test the stator coil instead—a process involving AC voltage measurement rather than spark and resistance testing.
Tools and Safety Preparation Before Testing
Gather a digital multimeter, a spark tester or spare spark plug, your mower’s service manual (or the manual for your specific make and model), safety glasses, and work gloves. You will also need basic hand tools to access and remove the coil if replacement becomes necessary. For broader ecosystem context, read through our operational guide on jbl partybox club 120 vs sony srs xv500. For complementary hardware performance, examine our breakdown on riding lawn mower.
Before beginning any test, follow these safety steps: For broader ecosystem context, read through our operational guide on jbl partybox club 120 vs sony srs xv500.
- Turn off the engine and allow it to cool completely to avoid burns.
- Disconnect the spark plug wire from the spark plug by twisting and pulling gently on the boot (not the wire itself).
- Ground the spark plug wire to the engine block using a jumper wire or by holding it firmly against bare metal on the engine to prevent accidental starting during testing.
- Never pull the starter rope or turn the key while your hands are near the flywheel or rotating parts.
- Keep fuel and flammable materials away from your testing area.
- Refer to your mower’s manual for specific safety procedures and coil location before proceeding.
Step-by-Step: How to Test the Coil on a Lawn Mower
Visual Inspection
Begin by visually examining the ignition coil for physical damage. Look for cracks in the plastic housing, carbon tracking (dark lines or burns on the surface), oil leaks, or melted areas. Even minor cracks or visible burn marks suggest the coil is failing and should be replaced. A coil with severe damage may not pass resistance tests or produce a spark regardless of electrical continuity. For troubleshooting and reliability insights, consult our in-depth z890 vs x870e motherboard report.
The Spark Test
A spark test provides a quick diagnostic check. Install a spark tester onto the spark plug wire, or use a spare spark plug grounded to a bare metal section of the engine block. Have a helper pull the starter rope slowly while you observe the spark tester electrode (or the gap on the spare plug) for a spark. A strong, bright blue spark indicates the coil is likely functioning. A weak orange or yellow spark, a faint intermittent spark, or no spark at all suggests a coil problem—though the spark plug itself, the wiring, or the kill switch could also be at fault.
Multimeter Resistance Test
For a definitive diagnosis, measure the coil’s resistance using a digital multimeter. Set the multimeter to the ohms (Ω) setting, typically the lowest resistance range available. Readers comparing setup options can review our technical analysis on marshall stanmore iii vs harman kardon onyx studio 8.
Testing primary winding resistance: Locate the coil’s primary terminals—usually two small posts or connectors where low-voltage wires attach. Place one multimeter probe on each terminal and record the reading. The primary winding typically shows between 0.5 and 2 ohms, though exact specifications vary by manufacturer and mower model. For troubleshooting and reliability insights, consult our in-depth z890 vs x870e motherboard report.
Testing secondary winding resistance: The secondary winding connects the coil to the spark plug wire. Place one multimeter probe on the high-tension terminal (where the spark plug wire connects) and the other probe on the coil body or a ground terminal. Secondary winding resistance typically ranges from 4,000 to 10,000 ohms, depending on the coil design and manufacturer.
Compare your readings to the specifications in your mower’s service manual. If the manual is unavailable, contact the mower manufacturer or a local dealer with your mower’s model and serial number to obtain exact resistance values. Readings significantly outside the expected range indicate a coil failure. Readers comparing setup options can review our technical analysis on marshall stanmore iii vs harman kardon onyx studio 8.
Interpreting Results: What the Readings Mean
If your spark test shows a strong blue spark and resistance readings match the manual specification, the coil is likely in good condition. The no-start or misfiring problem may stem from a fouled spark plug, damaged spark plug wire, a faulty kill switch, incorrect flywheel-to-coil air gap, or a problem with the fuel or compression system.
If the spark test shows weak or no spark, or if resistance readings are significantly out of specification, the coil is faulty and should be replaced. However, a coil that tests electrically sound but still produces no visible spark warrants a few additional checks before replacement: For complementary field maintenance guidelines, examine our breakdown of dyson v8 cyclone vs bissell featherweight stick.
- Check the spark plug itself. A heavily fouled, damaged, or worn spark plug may prevent a visible spark even if the coil is firing. Try a fresh spark plug rated for your mower model.
- Inspect the spark plug wire. Cracks, burns, or loose connections in the wire prevent spark transmission. Replace a damaged wire or reseat loose connections.
- Verify the flywheel-to-coil air gap. If the coil is mounted too far from or too close to the flywheel magnets, spark may weaken or fail. Most lawn mower coils operate with an air gap between approximately 0.010 and 0.012 inches. Check your service manual for the exact specification and measure the gap with a feeler gauge. Adjust the coil mounting bolts if needed to achieve the correct clearance.
- Test the kill switch. A faulty kill switch may ground the coil circuit even when the engine should be running. Consult your manual for kill switch testing procedures.
When to Replace the Coil and How to Confirm the Fix
Replace the ignition coil if any of the following conditions apply:
- Visible damage such as cracks, carbon tracking, or melting is present.
- Primary winding resistance is significantly below 0.5 ohms or above 2 ohms (or outside your manual’s specification).
- Secondary winding resistance is below 4,000 ohms or above 10,000 ohms (or outside your manual’s specification).
- The spark test shows no spark or only a very weak spark after all other components (spark plug, wire, kill switch, air gap) have been ruled out.
To replace the coil, consult your mower’s service manual for the exact removal and installation procedure, as mounting locations and methods vary widely. After installing the new coil, set the flywheel-to-coil air gap to the manufacturer’s specification using a feeler gauge, then reinstall all fasteners securely. Finally, reconnect the spark plug wire, install a fresh spark plug, and perform a spark test to confirm the repair. The mower should now start and run normally. To evaluate matched hardware tolerances, consult our detailed overview of bissell crosswave hydrosteam vs shark stainforce.
Testing the Charging or Stator Coil on Riding Mowers
Riding mowers often feature a separate charging or stator coil that generates alternating current (AC) voltage to power the battery charging system and accessories. This component is distinct from the ignition coil and requires a different test procedure. Symptoms of a failing stator coil include a battery that will not hold a charge, dim headlights, or a dead battery despite a working ignition system.
To test a stator coil, set your multimeter to the AC voltage setting (usually labeled “V~” or “ACV”). Start the engine and allow it to reach operating RPM, then measure the AC voltage output from the stator leads. Typical stator coils output between 15 and 30 volts AC at full throttle, though specifications vary by mower manufacturer. If the reading is significantly lower or zero, the stator coil is likely failing and requires replacement. Do not confuse the stator test with the ignition coil test, as the procedures and interpretations are fundamentally different.
Our Final Editorial Take on How To Test Lawn Mower Coil
Testing a lawn mower ignition coil is a straightforward diagnostic task that most equipment owners can perform with basic tools and a service manual. Systematic testing using a spark test and multimeter resistance measurement will reliably identify whether the coil is the source of your starting or running problems. If you are uncomfortable performing electrical testing, lack the necessary tools, or if your mower’s manual does not provide clear coil specifications, consult a qualified small-engine repair technician. Proper diagnosis prevents unnecessary part replacement and ensures your mower returns to reliable operation.
For more hands-on benchmarks and buying recommendations, consult our guides on heavy-duty chainsaw buyer guide, as well as high-CFM commercial leaf blower guide.
Mechanical safety standards, operational tolerances, and protective gear guidelines align with benchmark specifications established by the American National Standards Institute (ANSI).









