

Quick Answer: How To Sharpen Mower Blades With Grinder?
Disconnect the spark plug, remove the blade, clamp it in a vise, and grind along the existing bevel at 20–30° using smooth, even strokes with an angle grinder or bench grinder. Deburr the edge, check blade balance on a balancer or nail, then reinstall at the manufacturer-specified torque. Sharpening your mower blades with a grinder restores a clean cut, prevents…

Pros
- Large-size design named in product title
- Sharpening and balancing functions listed
- Listed as a new upgraded version

Pros
- Adjustable 15-to-45-degree range in title
- Sharpening and balancing functions listed

Pros
- Sharpener and balancer functions in title
- 15-to-45-degree adjustable setting listed
- Built for lawn mower blade maintenance
Pros
- Includes replacement gaskets and a 98079-55846 spark plug
- Matches Honda HRR216 and HRS216 lawn mower models
- Designed around the 16100-Z8B-901 carburetor specification
Cons
- Restricted to select Honda GCV160 mower applications
- Installation requires basic mechanical tools and skills
A sharp blade makes a noticeable difference in lawn health. Dull blades tear grass rather than cutting it cleanly, which leads to brown tips, increased disease susceptibility, and a ragged-looking lawn. Most homeowners can sharpen mower blades at home with a grinder in under 30 minutes per blade, saving the cost of a professional sharpening service.
What You Need Before You Start (Tools & Safety Gear)
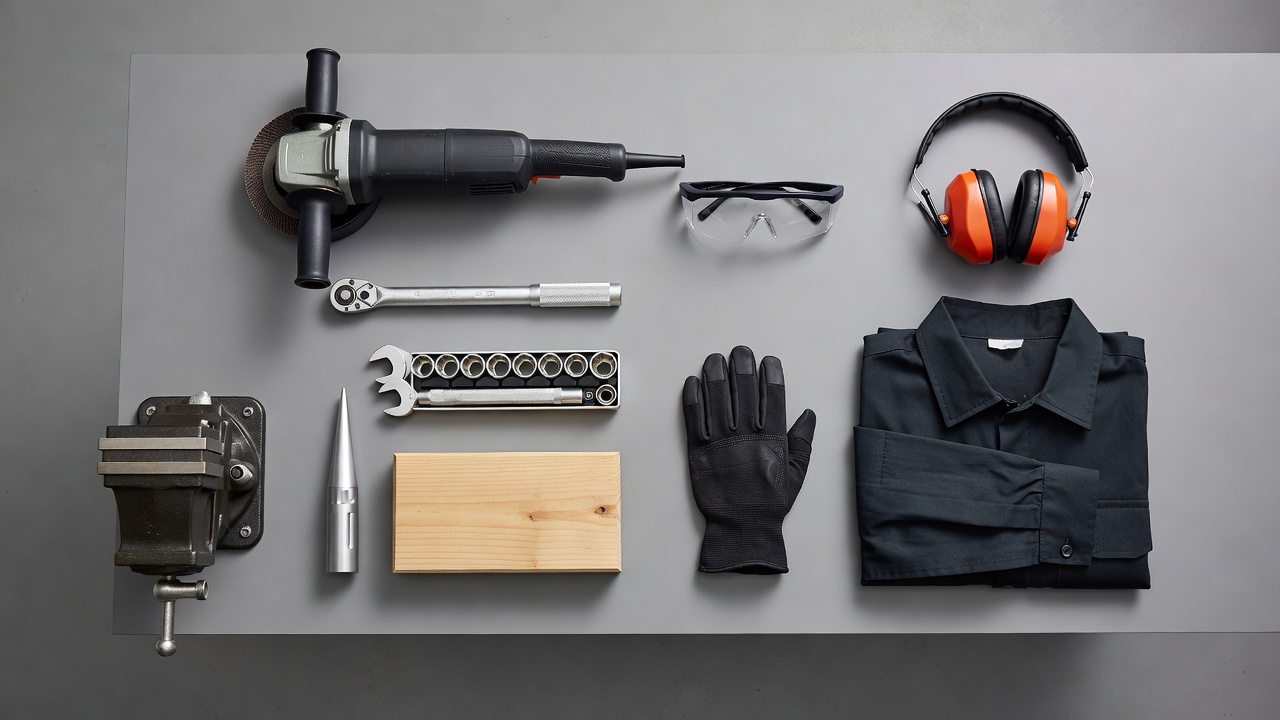
Before you begin sharpening, gather the right tools and personal protective equipment (PPE). Having everything on hand prevents interruptions and keeps you focused on the task.
Essential Tools
- Angle grinder or bench grinder — An angle grinder is the most common and accessible option for home use. A bench grinder works well if you have a dedicated workshop setup.
- Grinding disc or flap disc — For angle grinders, a flap disc (60–80 grit) provides good material removal with a smoother finish than a hard grinding wheel. Bench grinders typically use a standard grinding wheel.
- Vise or heavy-duty clamps — Secures the blade firmly during grinding. A bench vise is ideal; C-clamps on a sturdy workbench can work in a pinch.
- Torque wrench — Ensures you tighten the blade bolt to the correct specification during reinstallation.
- Blade balancer — A simple cone-type blade balancer or a wall-mounted magnetic balancer helps verify even weight distribution after sharpening.
- Socket wrench or breaker bar — For removing and reinstalling the blade bolt.
- Block of wood or blade holder tool — Prevents the blade from spinning while you loosen the bolt.
Safety Gear (PPE)
- Safety glasses or goggles — Grinding throws sparks and metal particles; eye protection is non-negotiable.
- Work gloves — Protects hands from sharp blade edges and hot metal. Use cut-resistant gloves when handling the blade.
- Hearing protection — Angle grinders and bench grinders produce noise levels that can damage hearing over time.
- Long sleeves and closed-toe shoes — Protects skin from sparks and debris.
What Grinder Is Best for Sharpening Lawn Mower Blades?
An angle grinder is the most versatile and widely available option for sharpening mower blades at home. It offers good control, works on blades of any size, and costs significantly less than a dedicated blade sharpener. A bench grinder provides a stable, hands-free alternative if you already have one in your shop. For occasional touch-ups, a hand file can work, though it requires more time and effort. Users looking for related component recommendations can explore our jbl partybox club 120 vs sony srs xv500 breakdown.
When to Sharpen vs. When to Replace a Mower Blade
Not every dull blade needs sharpening — some blades should be replaced entirely. Knowing the difference saves time and prevents you from attempting to recondition a blade that’s no longer safe to use. Users looking for related component recommendations can explore our jbl partybox club 120 vs sony srs xv500 breakdown.
Sharpen Your Blade When:
- The blade has a visible nicks or dull spots but no structural damage
- The blade is straight with no bends or warping
- The cutting edge is worn but the blade still has adequate thickness
- You notice the mower leaving uneven cuts or tearing grass
Replace Your Blade When:
- The blade is visibly bent, cracked, or has deep gouges
- The blade is severely worn down or thinned from repeated sharpening
- The blade has holes, corrosion, or structural weakening
- The blade bolt hole is elongated or damaged
As a general guideline, sharpen mower blades every 20–25 hours of use or at least once per mowing season. Blades used on properties with sandy soil or debris-heavy areas may need more frequent sharpening. If you’ve already sharpened a blade three or four times and it’s becoming noticeably thinner, replacement is the safer choice.
How to Remove a Mower Blade Safely
Blade removal is the first hands-on step, and doing it correctly prevents accidental engine startup and injury. Follow these steps for a standard rotary push mower. Before finalizing equipment decisions, refer to our comprehensive z890 vs x870e motherboard comparison.
Step 1: Disconnect the Spark Plug
Locate the spark plug wire on your mower’s engine and pull the boot off the spark plug. This prevents the engine from accidentally starting while you’re working near the blade. Tuck the wire away from the spark plug so it can’t accidentally make contact.
Step 2: Tip the Mower Safely
For a push mower, tip the mower on its side with the air filter and carburetor facing up. This prevents oil and fuel from leaking into the air filter or onto the ground. If your mower has a drain plug for fuel, consider draining the tank first for added safety. For broader ecosystem context, read through our operational guide on marshall stanmore iii vs harman kardon onyx studio 8.
Step 3: Secure the Blade
Place a block of wood between the blade and the mower deck to prevent the blade from spinning. Alternatively, use a blade holder tool designed for your mower model.
Step 4: Remove the Blade Bolt
Using a socket wrench or breaker bar, turn the blade bolt counterclockwise to loosen it. The bolt may be tight, so apply steady pressure rather than sudden force. Once loose, remove the bolt, any washers or adapters, and the blade itself. Take note of how the components stack together — you’ll need to reassemble them in the same order. For troubleshooting and reliability insights, consult our in-depth dyson v8 cyclone vs bissell featherweight stick report.
Is Blade Removal Different on a Riding Mower vs. a Push Mower?
Yes. Riding mowers and zero-turn mowers typically have a mower deck that can be raised for access. You may need to remove a deck cover or access panel to reach the blade bolts. Some riding mowers have multiple blades, each with its own bolt. Always consult your owner’s manual for model-specific blade removal instructions, as bolt patterns and deck configurations vary between manufacturers.
How to Sharpen Mower Blades with an Angle Grinder (Primary Method)
This is the core sharpening process. An angle grinder gives you the most control and flexibility for restoring a sharp edge to your mower blade. Readers comparing setup options can review our technical analysis on bissell crosswave hydrosteam vs shark stainforce.
Step 1: Inspect the Blade
Before grinding, examine the blade for bends, cracks, or excessive wear. If the blade is bent, it needs to be replaced, not sharpened. Mark the cutting edge side with a marker so you don’t lose track of which edge faces forward during reinstallation.
Step 2: Secure the Blade in a Vise
Clamp the blade in a bench vise with the cutting edge facing up and accessible. Position the vise so you can work along the full length of the blade without repositioning. If you don’t have a vise, clamp the blade securely to a sturdy workbench with C-clamps, ensuring it won’t shift during grinding.
Step 3: Identify the Existing Bevel Angle
Mower blades have a beveled cutting edge, typically ground at a 20–30° angle. Look at the existing bevel on your blade — your goal is to follow this same angle when grinding. The bevel is usually on the trailing edge of the blade (the side that faces the grass during rotation).
Step 4: Grind Along the Existing Bevel
Turn on the angle grinder and let it reach full speed before contacting the blade. Hold the grinder so the disc follows the existing bevel angle. Use smooth, even strokes from the heel of the blade (near the center) toward the tip. Apply light, consistent pressure — let the grinder do the work rather than forcing it into the metal.
Work in overlapping passes along the full length of the cutting edge. You’ll see a bright, clean strip of metal appear as the grinder removes the dull, worn edge. Continue until you’ve established a clean, sharp bevel along the entire cutting edge.
Step 5: Flip and Repeat
Mower blades have two cutting edges on opposite ends. Flip the blade in the vise and repeat the grinding process on the second cutting edge. Grind both edges equally to maintain the blade’s balance.
Step 6: Deburr the Edge
After grinding, a thin burr or rough edge may remain on the back side of the cutting edge. Lightly run the grinder at a shallow angle along the back of the bevel to remove this burr. A clean, burr-free edge cuts more efficiently and holds its sharpness longer.
What Angle Do You Hold a Grinder to Sharpen a Mower Blade?
Match the existing bevel angle on your blade, which is typically between 20° and 30°. Most mower manufacturers design blades with this angle range for optimal cutting performance. Rather than measuring the angle precisely, follow the existing bevel — it’s already set to the correct angle for your blade.
How Do I Keep a Consistent Angle While Grinding?
Rest the body of the grinder against the blade or vise for stability, and use your body position to maintain a steady hand. Some users find it helpful to mark the bevel angle on a piece of cardboard and use it as a visual reference. Practice on a scrap piece of metal first if you’re new to using an angle grinder.
Can You Ruin a Mower Blade by Grinding It Too Much?
Yes. Removing too much material weakens the blade, reduces its remaining service life, and can throw off its balance. Grind only enough to restore a sharp edge — typically just a few passes. If the blade is already thin from previous sharpening, it’s time to replace it.
Angle Grinder vs. Bench Grinder vs. Hand File: Which Should You Use?
Each sharpening method has trade-offs. The right choice depends on your available tools, experience level, and how often you sharpen blades.
| Method | Speed | Control | Cost | Best For |
|---|---|---|---|---|
| Angle Grinder | Fast | Good with practice | Low–moderate | Most homeowners; occasional sharpening |
| Bench Grinder | Moderate | High (hands-free blade movement) | Moderate | Workshop setups; frequent sharpening |
| Hand File | Slow | High | Low | Light touch-ups; no power tools available |
A bench grinder works well for sharpening mower blades if you have a stable setup. The blade is moved against the stationary wheel, which some users find easier to control than holding a moving grinder against a fixed blade. However, bench grinders require more space and are less portable than angle grinders.
A hand file is a viable option for light touch-ups or when power tools aren’t available. It takes significantly more time and effort, but it gives you excellent control over the bevel angle. Use a flat mill file and follow the existing bevel with steady, even strokes.
How to Check and Correct Mower Blade Balance After Sharpening
Blade balancing is a critical step that many people skip. An unbalanced blade causes excessive vibration, which damages spindle bearings, wears out the mower deck, and creates an uneven cut. Always balance your blade after sharpening.
The Nail Method (No Special Tools Needed)
- Find a nail or screwdriver that fits snugly through the center hole of the blade.
- Hold the nail horizontally and slide the blade onto it so the blade hangs freely.
- Watch which end of the blade dips down — that’s the heavier side.
- Remove a small amount of material from the heavy end using the grinder, then recheck the balance.
- Repeat until the blade hangs level or nearly level on the nail.
Using a Blade Balancer Tool
A dedicated blade balancer is a cone-shaped or magnetic tool that mounts to a wall. Hang the blade on the balancer and observe which side is heavier. These tools are inexpensive and provide a more precise balance check than the nail method.
Why Does Blade Balance Matter?
An unbalanced blade spins unevenly, creating vibration that transfers through the mower’s spindle and bearings. Over time, this vibration causes premature wear on spindle bearings, deck components, and even the engine. It also results in an uneven cut, leaving streaks of uncut or poorly cut grass. Taking two minutes to balance your blade after sharpening prevents costly repairs down the road.
How to Reinstall a Mower Blade Correctly
Reinstallation is the reverse of removal, but a few details matter for safety and performance.
Step 1: Check Blade Orientation
The cutting edge (beveled side) should face the direction of rotation — typically downward toward the grass. Most blades have a stamp or marking indicating which side faces down. If you marked the blade before removal, reinstall it in the same orientation.
Step 2: Reassemble the Hardware
Place the blade, washers, and any adapters back onto the mower in the same order you removed them. Refer to your notes or photos from the removal step if you’re unsure about the component order.
Step 3: Tighten to Specification
Hand-tighten the blade bolt first, then use a torque wrench to tighten it to the manufacturer’s specification. Torque values vary by mower model — check your owner’s manual for the correct setting. Over-tightening can strip threads or crack the blade adapter; under-tightening can allow the blade to come loose during operation.
Step 4: Reconnect the Spark Plug
Once the blade is securely installed, reconnect the spark plug wire. Double-check that all tools and debris are clear from the mower deck before starting the engine.
Common Mower Blade Sharpening Mistakes to Avoid
- Overheating the blade — Grinding too aggressively or holding the grinder in one spot too long can overheat the steel, causing it to turn blue or discolor. Overheating removes the blade’s temper, weakening the metal and making it more prone to bending or breaking. Use light pressure and keep the grinder moving.
- Removing too much material — You only need to grind enough to restore a sharp edge. Heavy grinding removes metal that can’t be replaced and shortens the blade’s life.
- Unequal grinding of both edges — Both cutting edges should receive the same amount of grinding to maintain balance. If one edge is more worn than the other, grind them equally or balance the blade afterward.
- Skip the balance check — Even a small imbalance creates vibration that compounds over time. Always balance the blade after sharpening.
- Reconnecting the spark plug too early — Don’t reconnect the spark plug until the blade is fully reinstalled and all tools are clear. This prevents accidental startup during reassembly.
- Ignoring blade orientation — Installing the blade upside down (cutting edge facing up) won’t cut grass and can damage the mower. Verify orientation before tightening the bolt.
Why Does My Mower Still Cut Badly After Sharpening?
If your mower still leaves an uneven cut after sharpening, check for these issues: the blade may be unbalanced, installed upside down, or the blade itself may be bent. Also verify that the mower deck is level and that tire pressures are even, as these factors affect cut quality independently of blade sharpness.
What Does It Mean if a Mower Blade Turns Blue While Grinding?
A blue or dark discoloration indicates the metal has been overheated. This means the blade’s temper has been compromised, weakening the steel. If only a small area is discolored, the blade may still be usable, but monitor it for signs of bending or cracking. Widespread discoloration means the blade should be replaced.
For more detailed testing breakdowns and top recommendations, check our in-depth guide to residential zero-turn lawn mower guide.
For more hands-on benchmarks and buying recommendations, consult our guides on heavy-duty chainsaw buyer guide, as well as high-CFM commercial leaf blower guide, as well as automated robotic lawn mower guide.
Mechanical safety standards, operational tolerances, and protective gear guidelines align with benchmark specifications established by the American National Standards Institute (ANSI).









