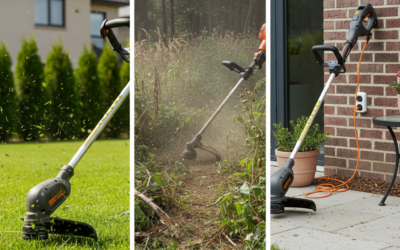
To change a string-trimmer head, shut the tool down, isolate its power source, and wear eye protection. Lock or hold the drive arbor, then unthread or unlatch the old head—many use a reverse thread so they tighten in use. Seat a compatible replacement squarely and tighten or latch it so it cannot spin on its own. Confirm thread direction and head type in the owner’s manual first.
What changing a trimmer head actually involves
A string trimmer cuts with a spinning trimmer head that holds cutting line. Changing that head means taking the worn or damaged assembly off the drive arbor and mounting a matching replacement so it stays locked while the shaft turns. The typical sequence is the same in outline on most consumer gas, corded, and battery models: stop the tool, isolate power, protect your eyes, lock the shaft, release the old head, install a compatible new one, and check that it cannot spin independently of the arbor.
That sequence is not the same job as reloading line. Many heads are still serviceable when the spool is empty, tangled, or the line has broken off at the eyelets. In those cases you open the bump knob or cover, rewind or swap the spool, and put the same housing back on. A full head swap is needed when the housing is cracked, the threads or latch are damaged, the bump mechanism no longer advances line, or you are converting to a different compatible head style.
There is no single universal turning direction, fastener, or adapter. Some heads screw onto a threaded arbor. Others click into a quick-change latch, clamp with a retaining nut, or sit on a brand-specific adapter. Some arbors use a left-hand thread so normal cutting rotation tends to tighten the head instead of loosening it. Because those details are model-specific, the owner’s manual and the model plate on the tool remain the authority even after you understand the general process.
Safety first: isolate the trimmer before you touch the head
The cutting head can still injure you after the trigger is released. Residual inertia can keep the line and housing spinning for a moment. A battery pack left in place, a plugged-in cord, or a gas engine that can restart can also put the head back in motion while your hands are on it. Treat isolation as a required first step, not an optional extra.
Personal protective equipment
Wear eye protection before you handle or test the head. Gloves help with a dirty or sharp housing, and sturdy closed-toe shoes are reasonable when you are working near a cutting tool and a debris shield. Face protection is worth adding if you later run a brief test, because line and packed grass can throw fragments even after a correct install.
How to isolate each power source
Stop the trimmer and wait until the head and any engine motion have fully ended. Keep your hands off the line and bump knob until that happens.
- Battery models: remove the battery pack so the tool cannot start. That battery isolation step is the main electrical control you have at the workbench.
- Corded models: unplug the power cord from the outlet. Do not rely on the trigger switch alone.
- Gas models: switch the engine off and wait until it is still. If the owner’s manual calls for disconnecting the spark-plug lead as extra isolation, do that so a pull-start cannot fire the engine while you work. Avoid touching a hot muffler or exhaust area.
Check the area around the head before you reach in. Look for spilled fuel on a gas unit, a still-warm engine, a switch left in the on position, or a debris shield packed with wet grass that can hide sharp line ends. Do not work on a head that can still start. If the manual describes a specific lockout or spark-plug isolation method for your model, follow that method rather than improvising.
Decide whether you need a new head or only new line
Replacing a damaged head is a different job from rewinding or swapping a spool of cutting line. Starting with the right diagnosis saves parts and prevents you from putting a cracked housing back into service.
Signs you only need line or a spool
An empty, short, or tangled spool is the most common reason a trimmer stops cutting well. Typical clues include line that has broken off at the eyelets, a bump knob that no longer feeds because the remaining line is welded together inside the housing, or a spool that will not turn freely because grass is packed behind the cover. On a bump-feed head you usually open the cap, clear debris, and rewind or insert a pre-wound spool. Automatic-feed heads still rely on an internal spool and spring; if those parts move freely and the housing is intact, a refill is often enough. Fixed-line heads do not use a winding spool in the same way: you insert cut lengths of line into slots or holes, so “changing line” means replacing those segments, not the entire head.
Signs the head itself should be replaced
Replace the head when the plastic is cracked, the housing is bent, the bump knob is seized or broken, the eyelets are torn out, or the threads or latch no longer hold the assembly on the arbor. A head that walks off during use, wobbles on a straight arbor, or will not stay seated after you have confirmed the small hardware is present is not a candidate for another season of cutting. A spool that will not turn because the hub is melted or the cover threads are stripped also points to a new head rather than another rewind.
Do not confuse a string head with another attachment
This process applies to a consumer string-trimmer head: bump-feed, automatic-feed, or fixed-line. A metal blade, brush-cutter attachment, or hedge-trimmer gear is a different assembly with different retention hardware and different hazards. If the tool in front of you has a blade or a gear-case adapter instead of a line head, stop and use the instructions for that attachment. Do not treat those parts as if they were a string head.
Identify the head type and how it attaches
Matching the replacement to the trimmer’s mounting system matters more than matching the brand name molded into the old housing. Two trimmers from the same maker can use different arbors, adapters, or quick-change cassettes.
Common consumer head styles
A bump-feed head is the familiar drum with a bump knob on the bottom. Tapping that knob on the ground while the head spins releases more line from the internal spool. An automatic-feed head also stores line on a spool but advances it without a deliberate bump. A fixed-line head has no winding spool; you push short pieces of line through the housing and they lock in slots or holes. Pre-wound spool heads look similar to bump-feed units from the outside but are sold as a complete spool-and-cap kit you drop in rather than rewind by hand.
The drive arbor and how heads stay on
The drive arbor is the rotating shaft or threaded stud at the bottom of the trimmer, inside the debris shield. Most consumer heads screw onto that threaded arbor. Some designs use a retaining nut and washer on top of the head, a bolt through the center, a spring-loaded latch, or a brand-specific adapter that sits between the shaft and the head. Before you turn anything, look for:
- A shaft lock button or a pin hole in the shaft or gear case, used to keep the arbor from spinning while you loosen the head
- Wrench flats on the arbor or a slot that accepts a holding tool
- A retaining nut, washer stack, or adapter that must come off in order and go back in the same order
- Arrows, “on/off,” or “loosen” markings molded into the head or bump knob
Why some arbors use a reverse thread
Many consumer trimmers use a reverse, or left-hand, thread on the arbor. Cutting rotation then tends to tighten the head instead of unscrewing it. That is useful in use and confusing on the bench, because the loosening direction is the opposite of a typical right-hand nut. Not every model is reverse-threaded, and some heads do not thread on at all. Never assume a direction. Check the owner’s manual, any marking on the head, and the way the old head was installed before you apply force.
A replacement must match the mounting system and clear the debris shield. A head that fits the threads but sits too tall, too wide, or on the wrong adapter can hit the shield, fail to seat, or come off in use. Use the model identification on the trimmer and the compatibility information that comes with the new head. Brand name alone is not enough.
Remove the old trimmer head
Support the trimmer so the shaft cannot spin freely and so the debris shield is not taking the whole load. A work surface that holds the shaft steady, or a second person holding the upper shaft, is often enough. Do not clamp a thin plastic housing in a way that cracks it.
Lock the shaft before you turn the head
If the tool has a shaft lock, press and hold that button and rotate the head slowly until the lock engages. Some models use a hole through the shaft or gear case; the manual may describe inserting the supplied pin or a matching tool to hold the arbor. Other shafts have wrench flats. The goal is the same: keep the drive arbor from turning so your effort goes into the head, not into spinning the whole drivetrain.
Determine the loosening direction without forcing it
Look first at the owner’s manual and any direction arrows on the head. If those are missing, try the direction that would unthread a reverse-thread fastener, then stop immediately if the parts bind. A head that gets tighter instead of looser is telling you that you chose the wrong direction or that debris is locking the threads. Do not keep increasing force through a plastic housing.
Sometimes the bump knob, spool cover, or outer cap comes off before the head itself. That is normal on many designs. Set those parts aside in order, including the spring, spool, and any washers, so you can compare them with the new head or reuse hardware the replacement still needs. The main housing may still be threaded or latched onto the arbor after the cap is off.
If the head is stuck
Packed grass, rust, heat, and overtightening can seize a head on the arbor. Clear debris from the threads and from behind the debris shield first. A proper holding tool on the arbor flats is safer than twisting the plastic drum. If the manual allows a penetrating lubricant on metal threads, use it sparingly and keep it off clutches, plastic, and rubber. Stop if the arbor rounds off, the housing cracks, or the head will not move in either direction. Hammering, heat guns, and locking pliers on a plastic head are more likely to destroy the arbor or shield than to free the part. At that point a qualified service shop is the safer next step.
Keep every washer, adapter, and retaining nut with the old head until the new one is on. Missing a single spacer is a common reason a replacement later loosens or sits crooked.
Install the replacement head so it cannot come off
A loose, cross-threaded, or incomplete head can detach while the trimmer is running. Installation is about square engagement, full seating, and using every piece of hardware the mounting system requires.
Clean and inspect before the new head goes on
With power still isolated, wipe the arbor threads or latch, the inside of the debris shield, and any adapter. Look for damaged threads, a bent shaft, a cracked shield, or a missing washer. Compare the new head with the old one: same mounting style, similar height so it will clear the shield, and the same need for an adapter or retaining nut. If the new head is a different family—fixed-line versus bump-feed, or a quick-change cassette versus a threaded drum—confirm compatibility from the trimmer model and the head instructions, not from appearance alone.
Seat the head squarely
Start a threaded head by hand so you can feel the threads engage evenly. If it binds in the first turn, back it off and restart rather than forcing a cross-thread. A latch-style or cassette head should slide or click onto the arbor in the orientation shown on the head. Do not cock the housing against the shield.
Tighten or latch in the direction specified for that model. On a reverse-thread arbor, that is often the opposite of a standard nut, which is why the manual still matters at this step. Snug the head until it cannot spin independently of the arbor and the housing sits flush against its mating face or washer. Stop short of crushing plastic parts or distorting the bump knob. There is no universal tightness, click count, or torque figure that applies to every consumer head.
If the new head includes its own internals
Some replacements arrive as a complete assembly with spool, eyelets, spring, and bump knob already installed. Others are a housing that you must load. For a generic bump-feed load, line is wound on the spool in the direction marked on the spool, then fed out through the eyelets before the cover and bump knob go back on. For a fixed-line head, equal lengths of the specified line type are pushed through the openings until they lock. Follow the instructions that come with that head for wind direction, line diameter, and cover orientation. Those details are not interchangeable between designs.
Final bench checks, still with power isolated: the head does not spin on the arbor by itself, the bump knob or cover is fully seated, no washer or adapter is left on the bench, and the line or housing clears the debris shield through a full hand turn if the tool allows it.
Check the install and restart the trimmer safely
Inspect the job before you restore power. Confirm that retaining hardware is present, the shield is undamaged and clear of tools, line is not so long that it immediately drags on the shield, and nothing is loose when you try to turn the head by hand on an isolated tool.
Restore power only after that check:
- Battery models: reinstall the battery pack once your hands are clear of the head.
- Corded models: plug in only when the switch is off and the head is in a clear area.
- Gas models: reconnect the spark-plug lead if you removed it, then start according to the trimmer’s normal cold- or warm-start method, away from the workbench clutter.
A safe test is brief and boring. Stand in a clear area away from people, pets, windows, and loose debris. Keep the head below you and away from your feet. Start the tool and listen and look: the head should run true, without a heavy wobble, grinding, or the sound of the housing hitting the debris shield. Any unusual vibration, a ticking contact sound, or a head that looks off-center is a reason to shut down immediately, isolate power again, and recheck seating and hardware. Do not start cutting grass until that short run looks and sounds normal.
Model differences and when the owner’s manual is required
Consumer gas, corded, and battery string trimmers share the same basic idea: isolate the tool, hold the arbor, remove one head, and lock on another. Isolation is what changes most. Battery isolation is a pack removal. A corded unit needs a physical unplug. A gas unit needs a stopped engine and, when the manual says so, a disconnected spark-plug lead. Head-retention hardware can also differ. A straight-shaft battery trimmer may use a quick-change cassette, while a gas curved-shaft model from the same shelf era uses a threaded arbor and a stack of washers.
Two trimmers from the same brand can still use different arbors or adapters. Shaft diameter, thread direction, male versus female threads, and whether a separate adapter is required are all reasons a head that “looks right” will not seat. Replacements are sold as a complete head, a spool-and-cap kit for a housing you already have, or a brand-specific quick-change cassette. Buy for the mounting system printed in the owner’s manual or on the model plate, not for the color of the old drum.
If the machine is a commercial unit, has a gear-case blade adapter, or otherwise sits outside ordinary consumer string-head designs, do not force this article’s steps onto it. Those tools can use different locks, different torque-critical hardware, and different cutting attachments. Use the manufacturer’s service information or a qualified shop.
Troubleshooting if the head will not come off or will not stay on
When the head will not turn in either direction, recheck the intended loosening direction, engage the shaft lock fully, and clear packed grass from the arbor and shield. A head that is simply dirty often frees after the debris is removed and the arbor is held correctly. If it still will not move, stop applying force. Rounded arbor flats, stripped threads, or a cracked housing are stop-work problems, not invitations to a larger tool.
A new head that wobbles, will not start on the threads, or bottoms out too soon is usually the wrong mounting style, missing an adapter or washer, or cross-threaded. Compare it side by side with the old head. If the old head used a spacer and the new one does not have a place for it, or the new one is clearly a different thread, do not assemble it “anyway.” A missing washer, adapter, or spring can also let a correctly threaded head loosen in use, because the housing never clamps against a solid face.
If threads are damaged, the arbor is bent, or the head will not seat fully after you have confirmed parts and direction, take the trimmer to a qualified service shop. Continuing to force the assembly can ruin the shaft and make a later repair harder. Do not drill, tap, or machine a damaged arbor as a home fix.
Safety caveats after the head is changed
A successful swap does not retire the usual trimmer hazards. A loose, cracked, or mismatched head can become a projectile. Even a correctly installed head throws grass, stones, and broken line. Keep bystanders well away, keep the debris shield in place, and keep eye and face protection on whenever the tool is running.
Fuel, battery, and cord safety continue after the mechanical work is done. Reinstall a gas cap securely, store extra fuel away from the hot engine, seat the battery until it locks, and keep a corded power cord clear of the spinning line. After the first period of use, isolate the tool again and recheck that the head is still tight, the cover or bump knob has not backed off, and no cracks have appeared. Repeat that check if you strike a solid object.
Never put a head into service if it is loose, cross-threaded, cracked, or missing hardware. If someone is seriously hurt by a thrown part or a restarting tool, seek emergency care. For anything beyond a straightforward consumer string-head swap—damaged arbors, commercial gear cases, or blade conversions—use the owner’s manual and qualified service rather than improvising.