

Quick Answer
Enable PBO in BIOS, set limits to platform maximums, leave the scalar at Auto, then apply a Curve Optimizer all-core offset of -5 as a baseline. Stress-test for stability, increment by -5 per pass until crashes occur, then back off by 3 to 5 counts. Per-core tuning extracts the final 2 to 4% headroom.

Pros
- 24 cores (8 P-cores, 16 E-cores) and 32 threads for intense multitasking
- Advertised maximum clock speed reaching up to 6.0 GHz
- Broad compatibility with both DDR4 and DDR5 memory platforms
- Features integrated Intel UHD Graphics 770
Cons
- Requires a potential BIOS update for Intel 600-series motherboards

Pros
- 14-core hybrid architecture with 6 P-cores and 8 E-cores
- Unlocked clock speeds up to a rated 5.2 GHz
- Equipped with 26MB cache for responsive processing
- Supports modern PCIe 5.0 and 4.0 standards
- Compatible with Intel 800 series motherboards
Cons
- Requires a dedicated discrete graphics card
- Does not include a cooling solution

Pros
- High 5.4 GHz max boost is well suited to gaming workloads.
- Unlocked multiplier gives experienced users tuning headroom.
- AM5 and DDR5 support align with current-generation desktop platforms.
- 6-core, 12-thread layout is practical for gaming and general use.
Cons
- Cooler is not included, so buyers must plan for separate cooling.
- Requires an AM5 motherboard and DDR5 memory, which limits drop-in upgrades for older systems.
- 6 cores may be less ideal for heavy content creation or workstation tasks than higher-core CPUs.
Overview: The AMD Ryzen 5 9600X is a 6-core, 12-thread unlocked desktop processor built on the Zen 5 architecture. It is aimed at users who want a fast, modern CPU for an AM5-based gaming PC or a responsive everyday desktop build.
Performance and features: With a 5.4 GHz max boost, 38 MB cache, and DDR5-5600 support, this processor is positioned for strong gaming responsiveness and smooth multitasking. Select AM5 motherboards can also provide PCIe 5.0 support, which adds future-ready flexibility for compatible components.
Drawbacks and considerations: The main limitation is that a cooler is not included, so total build cost can rise once cooling is added. It also depends on the AM5 platform and DDR5 memory, which makes it less convenient for older AMD or Intel system upgrades.
Verdict: This CPU makes the most sense for gamers and PC builders who want a fast, unlocked Ryzen chip for a current-generation AM5 system. If you want a straightforward upgrade path and value high boost clocks over bundled extras, the Ryzen 5 9600X is a strong fit.
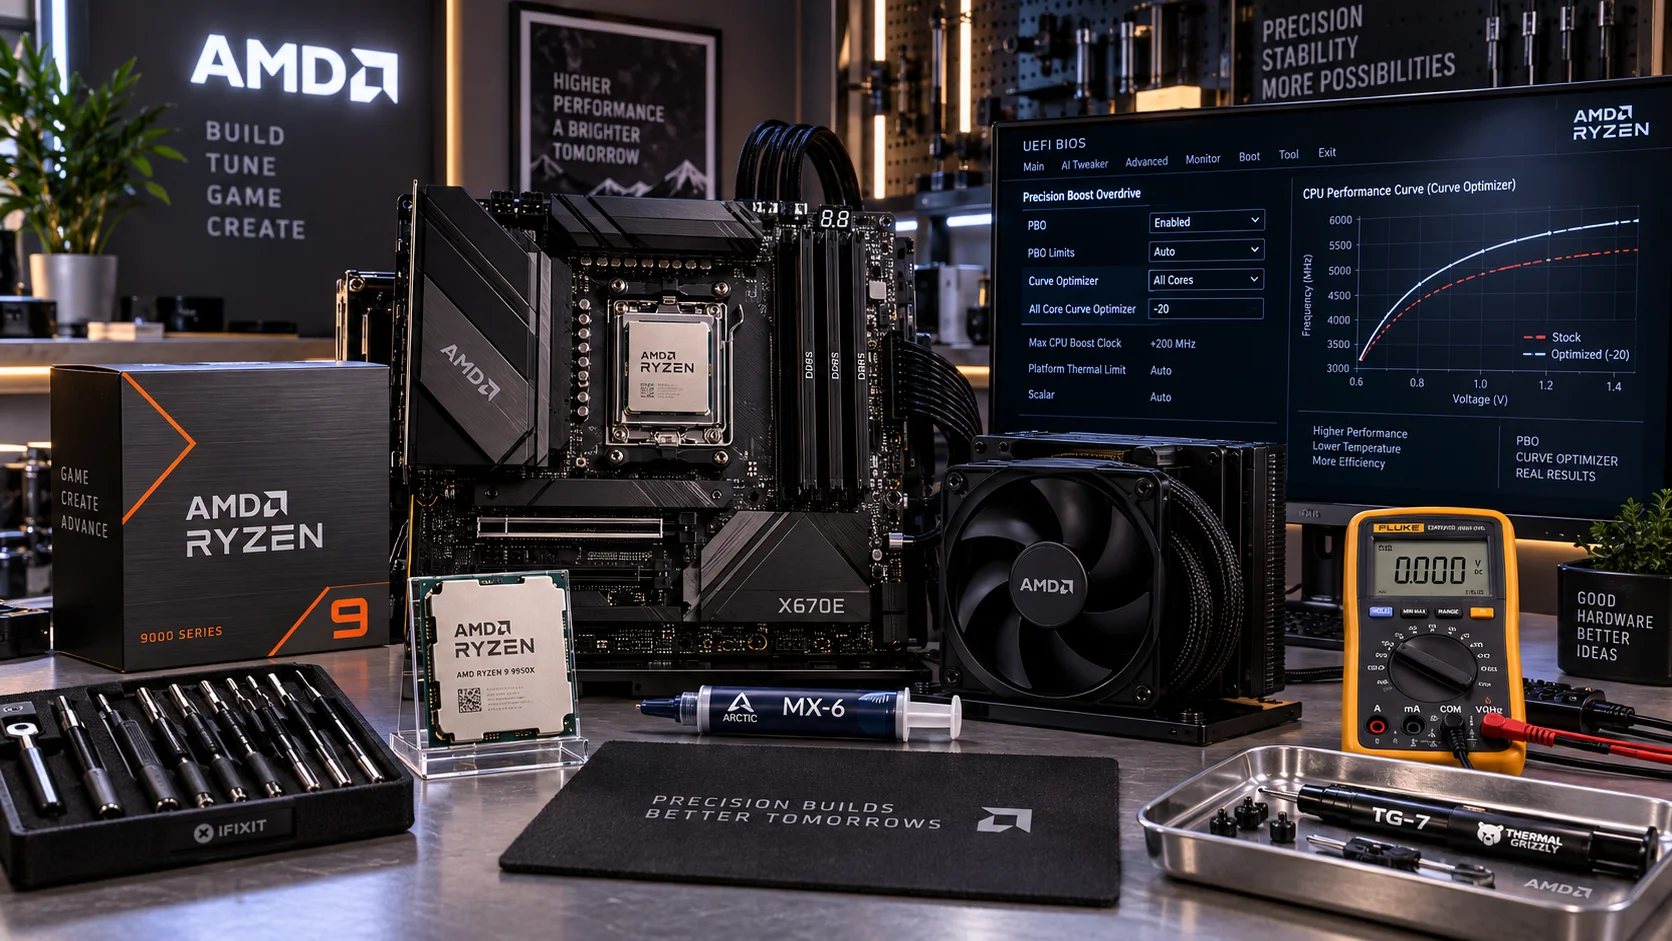
AMD’s Precision Boost Overdrive and Curve Optimizer represent the most consequential per-silicon performance levers available to Ryzen desktop CPU owners in 2026. Unlike a traditional static overclock, PBO works with the processor’s internal Precision Boost algorithm rather than against it, raising power, current, and thermal headroom ceilings so the CPU can sustain higher boost frequencies for longer durations. Curve Optimizer then refines voltage-frequency behavior at the silicon level, allowing negative voltage offsets that reduce heat and let the boost algorithm climb further before hitting thermal throttle. The combination, commonly written as AMD PBO Curve Optimizer, is genuinely free performance on most Ryzen 5000, 7000, and 9000 series desktop processors, provided the implementation is disciplined. For a direct competitive context on what these gains mean at the platform level, see our AMD Ryzen 5 9600X vs Intel Core Ultra 5 245K head-to-head, where PBO-tuned results form the AMD baseline.
How AMD Precision Boost Overdrive Works at the Silicon Level
Stock Ryzen CPUs operate under three hard guardrails enforced by the SMU (System Management Unit): Package Power Tracking (PPT), which caps sustained socket wattage; TDC (Thermal Design Current), which limits sustained current through the VRM; and EDC (Electrical Design Current), which governs peak instantaneous current. These limits are set conservatively by AMD to guarantee stability across every motherboard tier, every ambient condition, and every cooling solution that ships on a boxed CPU. PBO’s core function is raising all three ceilings to whatever the physical platform can sustain.
PPT, TDC, and EDC, What Each Controls
PPT governs sustained multi-threaded workloads, rendering, compilation, scientific compute. Raising PPT from a stock 105 W (Ryzen 9 9950X default) toward 200 to 230 W unlocks longer all-core boosts before the SMU ramps down frequency. TDC and EDC govern current delivery quality. A weak VRM stage will exhibit voltage droop at high TDC, causing the boost algorithm to back off even when thermal headroom exists. This is precisely why board quality matters: see our ASUS ROG Maximus Z890 Hero vs MSI MEG Z890 ACE comparison for a direct analysis of how VRM topology affects sustained boost behavior under PBO.
The Platform Limits Option vs. Manual Values
BIOS implementations typically offer three PBO modes: Disabled, Auto, and Advanced (manual entry). Platform Limits raises all three values to the maximum the motherboard vendor certifies , the safest aggressive setting. Manual entry lets you push beyond that certification boundary. For daily-use configurations, Platform Limits is the correct starting point. Manual values above certification are for ambient-cooled competitive benching only; silicon degradation risk increases non-linearly above 250 W PPT sustained on Zen 5. For broader ecosystem context, read through our operational guide on custom cpu fan curve.
Curve Optimizer: Voltage-Frequency Shaping Per Core
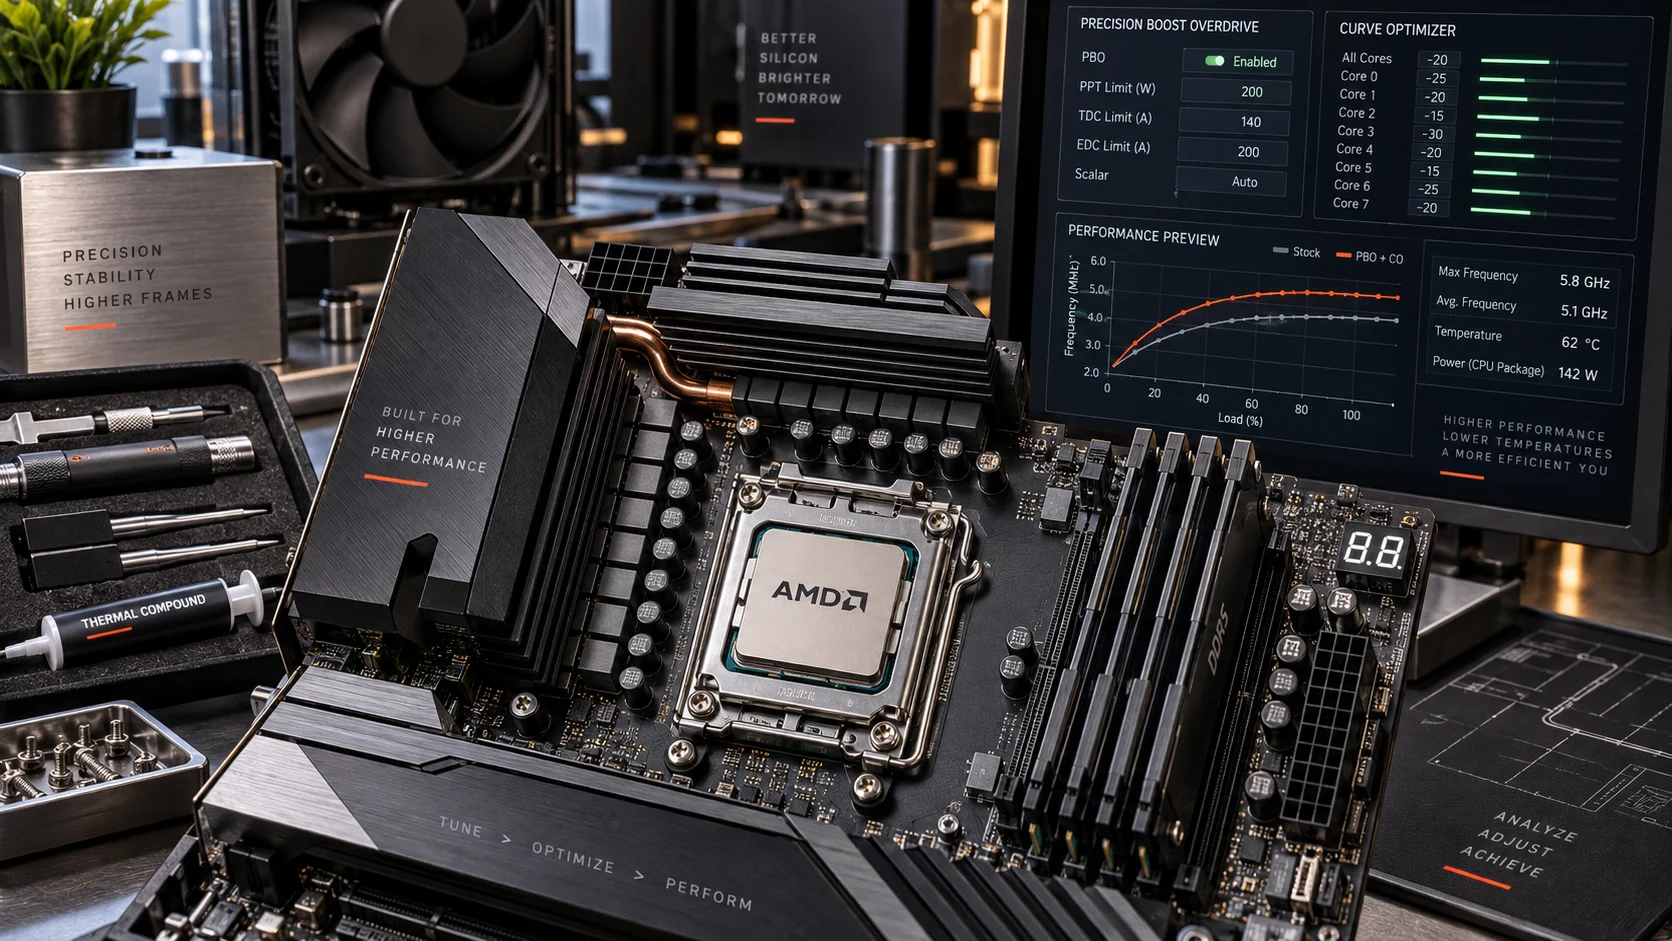
Curve Optimizer, introduced with Precision Boost Overdrive 2.0 on Zen 3 and carried forward through Zen 4 and Zen 5, operates on the internal V/F (voltage-frequency) curve, the lookup table the SMU consults to determine what voltage to supply at each frequency step. A negative CO offset does not reduce the CPU’s maximum frequency target; it reduces the voltage supplied at each frequency step. Lower voltage means lower heat at identical clock speeds, which means the thermal ceiling is hit later, which means the boost algorithm sustains higher clocks longer. The result is simultaneously lower peak temperatures and higher sustained boost, a rare case where undervolting and performance improvement are the same action.
All-Core vs. Per-Core Offsets
CO supports both an all-core global offset (applied identically to every core) and individual per-core offsets (each core tuned independently). The valid range is , 30 to +30, where negative values reduce voltage and positive values increase it. Start with an all-core value of , 5 for the first stability pass. If stable after 30 minutes of Prime95 Small FFTs or y-Cruncher stress, increment by , 5 and repeat. Most mid-grade silicon on Zen 4 and Zen 5 settles between , 15 and , 25 all-core. Stopping 3, 5 counts above the crash threshold provides the stability margin needed for real workloads. Per-core tuning , identifying each core’s individual quality via HWINFO64’s “CPU Core Voltage” per-core readout during Cinebench R24 , can extract an additional 2, 4% on top of a well-tuned all-core offset, particularly on the two highest-quality cores the Precision Boost 3 algorithm preferentially boosts during lightly threaded work. For troubleshooting and reliability insights, consult our in-depth how to choose cpu cooler report.
The PBO Scalar, Leave It at Auto
The PBO scalar (1x to 10x) multiplies the aggressiveness of the Precision Boost algorithm’s upward frequency decisions. Higher scalars push the algorithm to attempt boost states more aggressively, increasing both peak performance ceiling and thermal variance. Empirically, Auto outperforms every fixed scalar setting on modern Zen 4 and Zen 5 silicon because the SMU’s internal heuristics adapt to workload class and thermals in real time. A fixed 10x scalar on a lightly cooled system will cause thermal throttle events that a fixed 3x scalar would avoid, but Auto navigates that boundary dynamically. Set scalar to Auto and spend tuning time on CO offsets instead.
Step-by-Step PBO and Curve Optimizer Configuration
- Enter BIOS. Reboot, press Delete or F2 (board-dependent). Navigate to the CPU overclocking or OC Tweaker section.
- Enable PBO. Set Precision Boost Overdrive to Advanced or Enabled. Select Platform Limits for PPT, TDC, and EDC unless your VRM has been independently validated above certification.
- Set PBO Scalar to Auto. Do not manually assign a scalar value at this stage.
- Enable Curve Optimizer. Set mode to All Core. Enter an offset of -5. Save and reboot.
- Run stability validation. Use Prime95 29.8 Small FFTs (no AVX restriction) for 30 minutes minimum, monitoring CPU package temperature in HWINFO64. If the system completes without BSOD or application crash, proceed.
- Increment offset. Return to BIOS, increase negative offset by 5 counts (e.g., -5 to -10). Reboot, retest.
- Locate crash threshold. When a BSOD (typically WHEA_UNCORRECTABLE_ERROR) or hard reset occurs, note the failing offset value.
- Set final value. Back off 3 to 5 counts from the crash threshold. This is your stable all-core offset.
- Optional per-core tuning. Switch CO mode to Per Core. Set all cores to the stable all-core value. Individually push the two best cores (identified by highest single-core frequency in Cinebench R24 Core Cycling) an additional -3 to -5 counts. Validate each change.
- Set Max CPU Boost Clock Override (optional). PBO exposes a boost clock override field (+0 to +200 MHz). Start at +25 MHz and test; this instructs the algorithm to attempt higher peak boost states, it does not guarantee them, the silicon decides.
- Save profile. Name and save the BIOS profile. Export if your board supports USB profile backup.
Stability Testing, Methodology and Toolchain
Stability validation is the operationally hardest part of the amd-pbo-curve-optimizer workflow. A configuration that passes 10 minutes of Cinebench may fail 20 minutes into a Blender production render. Use a stratified test protocol: Readers comparing setup options can review our technical analysis on thermal paste shelf life.
- Prime95 Small FFTs, no AVX restriction, 30 min: Maximum CPU thermal and power stress. Confirms VRM and cooling adequacy under PBO PPT limits.
- y-Cruncher, 1B digits, 3 passes: Integer-heavy workload that stresses different execution units than Prime95. Catches CO offset instability Prime95 sometimes misses.
- Cinebench R24 nT loop, 10 iterations: Validates sustained all-core boost frequency consistency. Score variance under 0.5% across 10 runs indicates a well-settled configuration.
- Real-world soak test, 60 min: Run your actual production workload, game session, compile job, video encode. Synthetic stress is necessary but insufficient alone.
Monitor with HWINFO64. Critical sensors: CPU Package Power (confirm it hits PPT ceiling under all-core load), CPU Core Voltage (check for droop events below 1.05 V at full load, which signals VRM inadequacy), and CPU Die (CCD) Temperature (watch for sustained periods above 95°C triggering thermally-induced frequency reductions on Zen 5). For GPU-side monitoring during gaming stability tests, our graphics card tests & GPU guides cover GPU sensor interpretation methodology that complements CPU-side analysis. Additionally, while our focus here is AMD architecture, the Intel Architecture Technical Documentation provides useful comparative context on how competing boost algorithms handle thermal headroom, illustrating why AMD’s SMU-driven approach with CO is architecturally distinct.
PBO and Curve Optimizer Reference Table
| Parameter | Conservative Setting | Aggressive Setting | Notes |
|---|---|---|---|
| PBO Mode | Platform Limits | Manual (custom PPT/TDC/EDC) | Platform Limits for daily use; manual for validated high-end VRMs only |
| PPT (Ryzen 9 9950X) | 105 W (stock) | 230 W (platform limit) | Beyond 230 W requires confirmed 16-phase VRM with active cooling |
| TDC (Ryzen 9 9950X) | 80 A (stock) | 160 A (platform limit) | Low TDC causes boost drop even when thermal headroom exists |
| EDC (Ryzen 9 9950X) | 170 A (stock) | 225 A (platform limit) | Governs transient peak current; critical for lightly threaded burst tasks |
| PBO Scalar | Auto | Auto | Auto consistently outperforms fixed values on Zen 4/5 |
| CO All-Core Offset (Zen 5) | -5 to -10 | -15 to -25 | Silicon-dependent; stop 3 to 5 counts above crash threshold |
| CO Per-Core Best Cores (Zen 5) | All-core value -3 | All-core value -5 | Apply to cores ranked 0 to 1 by Cinebench Core Cycling or Ryzen Master |
| Boost Clock Override | +0 MHz | +25 to +75 MHz | Instructs algorithm; actual boost depends on silicon quality and thermals |
| Thermal Throttle Onset (Zen 5) | 95°C (TjMax) | 95°C (non-adjustable) | SMU begins frequency reduction above this threshold automatically |
| AGESA Version Requirement | 1.2.0.0+ (Zen 4 CO stable) | Latest available | Pre-1.2.0.0 AGESA had CO offset persistence bugs on some AM5 boards |
AMD Ryzen Master vs. BIOS, Which Configuration Method to Use
AMD Ryzen Master provides a Windows-based GUI for PBO and Curve Optimizer adjustments. Changes made in Ryzen Master apply immediately without a reboot and are ideal for iterative testing, modify CO offset, run Cinebench, observe score, adjust, repeat. The critical limitation: Ryzen Master settings do not persist across reboots by default. They must be re-applied on each boot via the application’s profile auto-apply function, or replicated in BIOS for permanent effect. BIOS configuration is the correct final destination for any validated PBO and CO profile, it applies before the OS loads and is not subject to Windows process conflicts.
For systems running the desktop CPU benchmarks & reviews workflow, where benchmark reproducibility across reboots is essential, BIOS-resident CO profiles are mandatory. Ryzen Master profiles introduce a timing window between boot and profile application that inflates single-threaded scores measured immediately at desktop. Always validate final performance numbers from a cold-boot BIOS-configured state.
One frequently missed configuration point: the BIOS must be on a current AGESA firmware revision. Pre-1.2.0.0 AGESA builds on AM5 contained CO offset persistence bugs where values partially reverted to a less negative state on S3 resume. Update motherboard firmware before any PBO tuning session. This also applies when cross-referencing GPU-side stability: a system crash during a game is more likely to be a CO-induced WHEA error than a GPU fault, our Radeon RX 9060 XT 8GB vs 16GB comparison test system ran a fully PBO-tuned 9700X, and we confirmed the crash delineation methodology there.
Final Diagnostic Verdict & Maintenance Checklist
A properly configured AMD PBO Curve Optimizer setup delivers 5 to 15% sustained multi-threaded performance improvement over stock and 2 to 6% single-threaded uplift depending on silicon quality, cooling, and platform. The amd pbo curve optimizer guide workflow below is the repeatable, safe sequence for 2026 AM4 and AM5 platforms:
- BIOS firmware: Confirm latest AGESA revision is installed before any PBO configuration. Check manufacturer support pages monthly, AGESA updates regularly adjust boost behavior.
- PBO mode: Platform Limits for the vast majority of users. Manual values only on independently validated VRM stages with active or passive heatsink confirmed below 90°C under 200 W+ sustained draw.
- PBO Scalar: Auto. Do not override unless systematically testing scalar impact in a controlled benchmark loop.
- CO offset, initial: -5 all-core. Stress-test 30 minutes. Increment by -5 per validated pass.
- CO offset, final: 3 to 5 counts above crash threshold confirmed by WHEA error or hard reset in Prime95 or y-Cruncher.
- Per-core tuning: Optional but recommended for productivity workstations. Identify best two cores via Ryzen Master Core Performance Boost ranking or Cinebench R24 Core Cycling. Push those cores an additional -3 to -5 counts from the all-core baseline.
- Boost Clock Override: +25 MHz as a conservative starting point. Validate with Cinebench R24 nT loop, score variance above 1.5% across 10 runs indicates instability at that override value.
- Thermal ceiling: 95°C sustained under Prime95 is expected and safe for Zen 5. Sustained operation above 95°C under gaming loads (not synthetic) indicates cooling inadequacy, reseat cooler or repaste before finalizing PBO limits.
- Post-configuration monitoring: Run HWINFO64 sensor logging for 7 days of normal use. Review minimum core frequency during boost events, a well-tuned system shows higher minimums (fewer drop events) than stock, confirming CO’s thermal headroom benefit is translating into sustained boost.
- Revalidate after BIOS updates: AGESA updates can alter SMU boost behavior. Re-run the full stability protocol after any firmware update, even minor revisions.
The entire amd-pbo-curve-optimizer process rewards patience and systematic methodology. Every percentage point of CO headroom must be earned by a corresponding stability validation pass. The silicon defines the ceiling, the discipline of the tuning process determines how close you get to it.
Caution Notes on Power Tuning
Small voltage offsets can affect stability even when the change looks minor on paper, so caution is worth the effort. A plain overview of electronics safety is at American National Standards Institute (ANSI), which is worth reading before you begin any tuning.









