

Quick Answer: Can You Sharpen Lawn Mower Blades?
Yes, you can sharpen lawn mower blades yourself in most cases. Typical rotary blades on walk-behind and riding mowers can be restored at home with a file, angle grinder, or bench grinder if you disconnect the power source, follow the existing bevel, keep the steel cool, and balance the blade before reinstalling it. Replace a bent, cracked, or badly worn…

Pros
- Large-size design named in product title
- Sharpening and balancing functions listed
- Listed as a new upgraded version

Pros
- Adjustable 15-to-45-degree range in title
- Sharpening and balancing functions listed

Pros
- Sharpener and balancer functions in title
- 15-to-45-degree adjustable setting listed
- Built for lawn mower blade maintenance
Pros
- Includes replacement gaskets and a 98079-55846 spark plug
- Matches Honda HRR216 and HRS216 lawn mower models
- Designed around the 16100-Z8B-901 carburetor specification
Cons
- Restricted to select Honda GCV160 mower applications
- Installation requires basic mechanical tools and skills
Why a Sharp Blade Matters
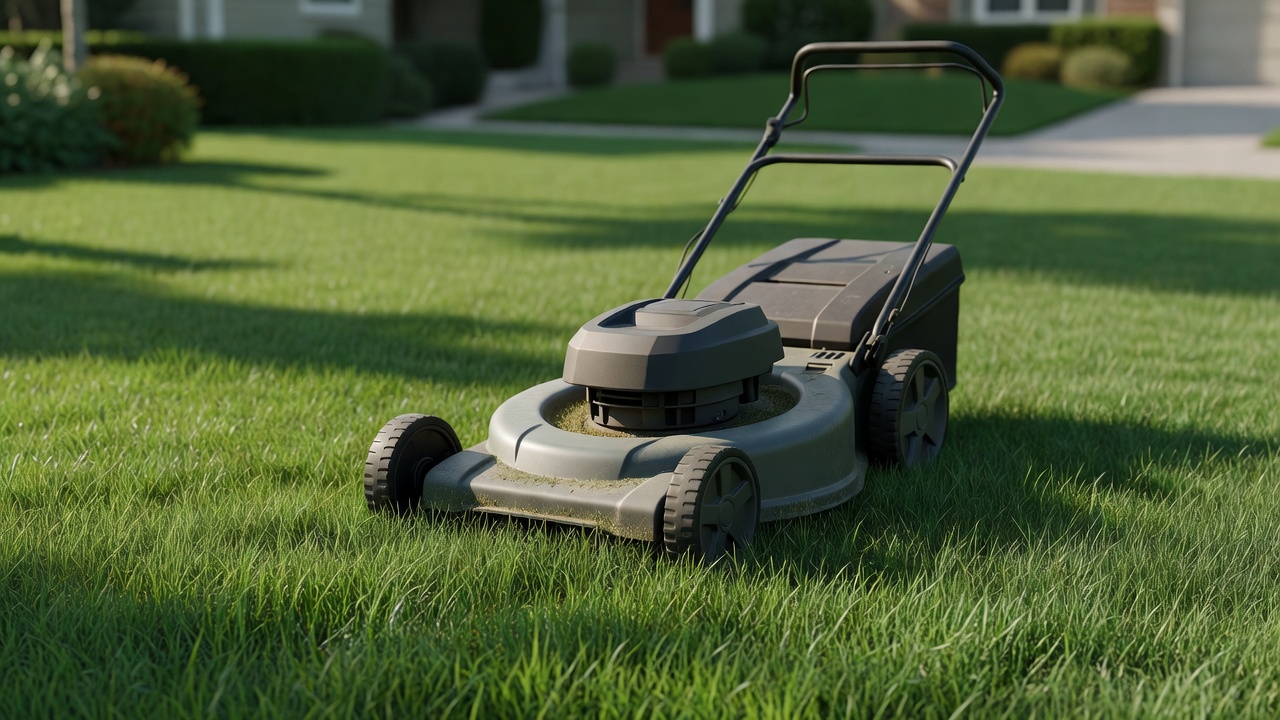
A lawn mower blade is a cutting tool first and a spinning metal bar second. When the cutting edge is keen, it slices grass cleanly. When that edge is rounded, nicked, or rolled over, the blade tears and shreds the leaf instead of cutting it. Torn tips look ragged, dry out faster, and can brown at the ends. The lawn still gets shorter, but the finish is poorer and the plants take more stress from a messy wound.
A dull edge also changes how the machine works. The mower has to push harder through the same turf. You may notice more vibration, a rougher sound, or a deck that seems to bounce instead of glide. Extra strain is not a dramatic failure on its own, but it is wasted effort for the engine or motor and for you. Sharpening does not magically transform a neglected lawn, and it does not guarantee a set improvement in appearance or fuel use. It does restore the job the blade was designed to do: a clean cut with less tearing.
That is why sharpening is worth learning before the season gets busy. You are not chasing a perfect factory finish. You are putting a usable edge back on a part that takes constant abuse from soil, sand, twigs, and the occasional rock. A well-maintained rotary mower blade cuts more cleanly, is easier on the turf, and is less likely to shake the machine because of uneven wear. Those are practical reasons to inspect the edge and restore it when it is only dull, not destroyed. For complementary field maintenance guidelines, examine our breakdown of jbl partybox club 120 vs sony srs xv500.
Mulching and bagging also depend on a decent edge. A mulching blade still needs to chop clippings into smaller pieces. A torn, chewed discharge is a sign the cutting edge is no longer doing that work efficiently. Sharpening will not fix a clogged deck or the wrong cutting height, but it removes one common cause of a messy cut. For complementary field maintenance guidelines, examine our breakdown of jbl partybox club 120 vs sony srs xv500.
Is DIY Sharpening Realistic for Your Mower?
For a standard rotary mower, yes. Most homeowners can sharpen a typical walk-behind or riding-mower blade at home if they work slowly, respect the existing bevel, and follow basic safety steps. You do not need a machine shop. You do need patience, eye and hand protection, and a way to hold the blade still. A beginner can do this safely if the blade is structurally sound and the person is willing to stop when something looks wrong.
The same general process applies to many gas, battery, and corded rotary machines. The blade itself does not care whether the mower is powered by a spark plug or a battery pack. What changes is how you disable the machine before you touch anything. A push mower, a self-propelled walk-behind, and a riding mower all use a spinning rotary blade under a deck. Removal hardware and access differ, but the sharpening idea is the same: restore the factory cutting edge, keep heat down, and put a balanced blade back on in the correct orientation. To evaluate matched hardware tolerances, consult our detailed overview of z890 vs x870e motherboard.
Reel mowers are a different tool. A reel, or cylinder, mower uses a helical reel that shears grass against a bedknife. That geometry is precise. Home files and grinders are a poor match for it. If you have a reel mower, treat sharpening as specialized service unless the manufacturer clearly describes a home method for your model. Do not assume a rotary-blade routine will work.
Specialty blades need the same caution. Some mulching blades have a more complex shape. Some commercial or high-lift blades are thicker or have extra features. The rule is still to follow the existing bevel and the owner’s manual. If the manual warns against home grinding, or if the blade has unusual wings, steps, or coatings you cannot identify, replacement or a shop is the conservative choice. When planning workspace deployment, consider the engineering criteria outlined in our marshall stanmore iii vs harman kardon onyx studio 8 guide.
Skill level matters more than bravado. If you have never used an angle grinder, start with a hand file. If you cannot securely clamp the blade, do not freehand a spinning disc against a loose piece of steel. If you are unsure whether a crack is a scratch or a fracture, replace the blade. DIY sharpening is realistic for common rotary mowers and careful people. It is not a requirement. A new blade or a shop sharpening is a valid alternative whenever the job feels beyond your tools or comfort.
Always check the owner’s manual for model-specific warnings before you start. Decks, blade bolts, washers, and adapters are not identical across brands. The manual is the place for those details. This article stays with the general method that applies to ordinary rotary blades. For additional operational safety benchmarks, see our published testing notes on dyson v8 cyclone vs bissell featherweight stick.
Signs the Blade Needs Sharpening or Replacement
You do not need a gauge to see most problems. Look at the grass first. If the lawn looks shredded, with brown or frayed tips a day after mowing, the cutting edge may be dull. If the mower leaves strips of uncut or poorly cut grass even when the height is even, inspect the blade. Extra vibration that was not there before is another reason to stop and look. Vibration can come from many sources, but an unbalanced or damaged blade is a common one after you hit something or after a long stretch of use.
Then look at the metal. A sharp-enough rotary blade still has a defined cutting edge along the bevel. A dull blade looks rounded, shiny, or flattened where it should be a thin edge. Nicks from stones and debris are normal over time. Small nicks can often be filed out as you restore the bevel. Large bites, missing corners, or a saw-tooth look mean more metal is gone than a light sharpening should remove. To compare alternative configurations, check our hands-on review of bissell crosswave hydrosteam vs shark stainforce.
Replacement is the right call when the blade is no longer a safe piece of steel. Do not sharpen a blade that is bent. A bend changes how it tracks and how it balances. Hammering it straight is not a reliable repair and can hide a crack. Do not sharpen a blade with a crack, including hairline cracks near the center hole or along the cutting edge. Cracks can grow under centrifugal force. Do not save a blade with large chunks missing or an edge worn so thin that the remaining steel looks fragile. Severe rust that has pitted the cutting area or eaten into the body of the blade is another reason to replace rather than grind.
Inspect after you hit a rock, root, or hidden object, even if the mower still runs. A single impact can roll the edge, knock a nick into the steel, or bend the blade. Inspect when the cut looks ragged after a stretch of sandy or debris-filled grass. Sand acts like an abrasive and dulls an edge faster than soft turf. Make inspection a habit at the start of the season and whenever performance changes. You are deciding between three outcomes: a light sharpening, a more careful grind plus balance check, or a new blade. Structural damage ends the debate.
Safety Steps You Must Take First
A lawn mower blade is heavy, sharp even when dull, and attached to a machine that can start if you skip the disable step. Treat the job as blade work plus machine lockout, not as a quick swipe under a live deck.
For a gas mower, disconnect the spark-plug wire and keep it away from the plug so the engine cannot fire. Do not rely on the throttle or a blade-brake lever alone. For a battery mower, remove the battery and keep it aside. For a corded electric mower, unplug the machine and keep the cord in view so nobody reconnects it. Exact shut-off steps vary by model. Confirm them in the owner’s manual, including any parking-brake, key, or operator-presence details on a rider.
Work on a stable surface. A riding mower may need the deck lowered or the machine supported according to the manual. Never put any part of your body under a deck that is held only by a jack you do not trust. Chock wheels if the machine could roll. Give yourself light and room. A cramped garage floor with the mower half on a slope is a poor place to wrestle a blade bolt.
Wear safety goggles. Metal filings, rust scale, and grinding sparks are real hazards, not theoretical ones. Wear sturdy work gloves when you handle the blade, especially when it is off the mower and when you are filing. Gloves help against cuts; they are not a substitute for clamping the blade so it cannot twist into your hand. Close-toed shoes and long pants are sensible. If you use a grinder, think about hearing protection and keep loose clothing and hair away from the wheel or disc.
Handle a removed blade as a tool with two dangerous ends. Carry it with the edges away from your body. Set it down so it cannot fall on a foot. Do not leave it on a mower seat or a step where it can slide. Keep children and pets out of the work area. Filings and a loose blade are both problems.
These steps do not make the job risk-free. They remove the most common ways people get hurt: an accidental start, a spinning grinder against an unsecured blade, and an unprotected eye. If any part of lockout or blade removal is unclear on your machine, stop and use the manual or a qualified technician. Personal injury from a blade or a power tool is the main hazard of this project. Damage from overheating or a wrong bevel is the main hazard to the part.
Tools and Methods: File, Angle Grinder, or Bench Grinder
Three common methods cover almost all home jobs: a hand file, an angle grinder, and a bench grinder. None is universally best. The right choice depends on how much metal you need to remove, how much control you want, and which tools you already know how to use safely.
A hand file is slower and gives a beginner the most control. A mill file or a similar flat file lets you follow the existing bevel with light, even strokes. You can feel the edge form. You generate far less heat than a power grinder, which reduces the chance of overheating the steel. Filing is a good match for a blade that is dull but not deeply nicked. It is also the method to choose if you have never used a grinder or cannot mount the blade securely for power tools. The tradeoff is time and arm work. You will not remove large nicks quickly.
An angle grinder is faster. A grinding disc can restore a battered edge in minutes. The main risks are removing too much metal, changing the bevel, and overheating a thin section of the cutting edge. Sparks, kickback, and a disc that catches the blade are also real. If you use an angle grinder, clamp the blade, use a light touch, keep the disc moving, and pause so the steel stays cool enough to touch after a brief wait. Do not grind one spot until it blues or blackens. Discoloration from heat is a warning that the steel may have been weakened in that area.
A bench grinder is also fast and can feel more stable because the wheel stays put while you bring the blade to it. The same heat and over-grinding risks apply. The blade is long and awkward. You must support it so the edge meets the wheel at the existing bevel, not at a random angle. A rest or a careful two-hand hold helps, but the blade can still catch. Cool the metal often. Do not force the work.
A simple blade balancer is useful after any method. Many balancers are a cone or a nail-like pivot that lets the blade hang from its center hole. The heavy end drops. You then remove a little metal from the heavy side, usually on the back or the cutting area opposite the light end, until the blade hangs level. You can also hang the blade from a nail through the center hole on a wall. Perfect laboratory balance is not the goal. A blade that hangs roughly level is far less likely to cause harsh vibration than one that clearly dives to one side.
You will also want a way to mark orientation before removal, a wrench or socket that fits the blade fastener, a block of wood to keep the blade from turning while you loosen the bolt, and a stiff brush to clean grass and debris off the blade and deck. Optional items include a vise or clamps, a marker to highlight the bevel, and a shop rag. Do not treat any single tool as required beyond a way to disable the mower, protect your eyes and hands, restore the edge, and check balance.
Step-by-Step: Remove, Sharpen, Balance, and Reinstall
Work in a sequence. Skipping lockout or orientation is how people create new problems.
Disable the mower and document the blade
Disconnect the spark-plug wire, remove the battery, or unplug the cord as described earlier. Wait until all motion has stopped. Clear the deck of packed clippings so you can see the blade, the center fastener, and any adapter or washer stack.
Photograph or mark how the blade sits before you remove it. Many blades have a directional stamp, a “grass side” shape, or lift wings that must face a certain way. Some decks use more than one blade. Mark which blade came from which spindle if that applies. A quick photo on a phone is enough. If you put a blade on upside down, it will not cut properly and can be unsafe.
Remove the blade
Wear gloves. Brace the blade so it cannot spin when you turn the fastener. A scrap of wood wedged between the blade and the deck is a common method; use something that will not shatter into your face. Loosen the blade bolt or nut. Keep track of every washer, spacer, and adapter in order. Those parts control alignment and are not interchangeable guesswork. If a fastener is frozen, do not beat on the blade itself in a way that could bend it. Penetrating oil and patience are safer than force that twists the cutting edge.
Lift the blade off and inspect it in good light. Confirm it is not bent, cracked, or worn too thin. Clean off grass and rust scale so you can see the full bevel and the center hole. If the blade fails inspection, stop and replace it.
Secure the blade and restore the edge
Clamp the blade in a vise or to a sturdy bench so the cutting edge is accessible and the blade cannot pivot into you. If you cannot clamp it, a file is safer than a grinder.
Follow the existing factory bevel. Do not invent a new angle. The manufacturer already chose a bevel that matches how that blade is meant to cut. Your job is to refresh that same slope until a clean cutting edge appears. Work along the edge with even strokes. If you are filing, push the file along the bevel in one direction rather than sawing randomly. If you are grinding, use light passes and keep the tool moving. Match both ends of a two-sided rotary blade as evenly as you can so you do not create a heavy side.
Remove nicks by taking the bevel back just far enough to erase them, not by grinding a deep scallop in one spot. Do not raise a fragile razor wire that will fold on the first sandy patch. A practical home edge is sharp enough to slice paper or to feel keen with care, but still supported by enough metal behind it. Keep the steel cool. If the blade is warm, pause. Dip in water only if you are sure you are not creating a false sense of security while you immediately overheat the same spot again. Overheating can weaken the steel even if the edge looks pretty.
Do not grind the flat underside into a new knife geometry unless that is how the blade was made. Most rotary blades are beveled on the cutting face. Changing that relationship can hurt the cut and waste metal.
Check balance
Clean off filings. Place the blade on a balancer or hang it from a nail through the center hole. If one end drops, remove a small amount of metal from the heavy end. Take off a little at a time from the back of the blade or from the cutting area in a way that does not destroy the bevel you just made. Recheck often. If you cannot get the blade close to level without removing a worrying amount of steel, replace it. An unbalanced blade often causes vibration that can stress the spindle, deck, and fasteners.
Reinstall
Put the blade back in the orientation you photographed. Reassemble washers and adapters in the original order. Thread the fastener by hand first so you do not cross-thread it. Tighten securely. Use the owner’s manual for the correct tightness on your machine. Do not invent a torque number. A loose blade is dangerous. An over-tightened cheap bolt can be a problem too. If the hardware is rounded, stretched, or missing, replace the hardware rather than hoping.
Reconnect power only after tools, blocks, and loose parts are clear of the deck. Restore the spark-plug wire, battery, or cord. Stand in a safe position and test. Listen for unusual vibration. If the mower shakes hard, shut it down and recheck balance, orientation, and fastener tightness. A short test cut on a small patch will tell you whether the edge is cutting instead of tearing.
Changing the angle or overheating the edge can weaken the blade or create a hazard. Matching the original bevel and keeping the metal cool are the two habits that separate a useful sharpening from a ruined part.
Mistakes, Limits, and When to Replace Instead
Most ruined blades come from a short list of mistakes. Grinding past the original bevel until the edge is a thin, steep knife is one. That edge folds or chips. Overheating until the steel turns blue or brown is another. The blade may still look sharp and then fail sooner. Removing huge amounts of metal from one end to chase nicks will destroy balance. Ignoring a bend and installing the blade anyway invites vibration. Forgetting orientation and mounting the blade upside down wastes the whole job.
If the blade will not balance after sharpening, stop grinding blindly. Confirm you did not leave a large nick on one end and a long bevel on the other. Remove metal from the heavy side in small amounts. If the center hole is worn oval, or if the blade body is twisted, balance is the wrong problem to solve. Replace the blade. Do not hammer a bent blade straight and put it back in service. Bends and cracks are structural. Sharpening does not fix them.
Do not grind the blade to a fragile razor point. Lawn mower blades work in dirt and silica. They need an edge with some support. Do not use a cutting disc as if you were slicing the blade in half. Do not sharpen while the blade is still on a live mower. Do not skip eye protection because “it is only a file.” Filings still fly.
A new blade or a shop is the better choice when any of these are true: the blade is cracked, bent, or missing large pieces; you cannot disable or support the machine safely; you do not have a way to clamp the work; you are uncomfortable with a grinder and the blade is too far gone for a file; or the mower is a reel type that needs proper reel-to-bedknife work. Shop sharpening can make sense if you want a consistent bevel and you would rather not own a grinder. A replacement blade makes sense when labor and risk exceed the value of saving a worn piece of steel. Those are judgment calls. There is no single calendar interval that fits every yard, and this article will not invent one. Inspect by condition: ragged cut, nicks, vibration, or a known impact.
Limits apply even when you do everything carefully. Sharpening does not straighten a warped deck, fix a failing spindle, or correct the wrong cutting height. It does not turn a mulching blade into a different design. It restores a cutting edge on a sound rotary blade. That is a useful, finite job.
If you stay inside that job, DIY sharpening is straightforward. Disable the mower. Confirm the blade is worth saving. Restore the existing bevel with a file or a carefully used grinder. Keep heat down. Balance the blade. Reinstall it the way it came off, with the original hardware stack, and confirm tightness against the owner’s manual. Replace anything that is structurally damaged. That sequence answers the question in practical terms: yes, you can sharpen lawn mower blades yourself, as long as you treat the blade as both a cutting tool and a high-speed part that must stay sound, cool, and balanced.
For more hands-on benchmarks and buying recommendations, consult our guides on heavy-duty chainsaw buyer guide.
Mechanical safety standards, operational tolerances, and protective gear guidelines align with benchmark specifications established by the American National Standards Institute (ANSI).









