Short Answer: No — But Check These Three Things First
New lawn mower blades are pre-sharpened at the factory to a cutting edge angle of 30 to 45 degrees and are ready to cut straight out of the packaging. Sharpening a brand-new blade before first use is unnecessary and can actually remove the precision factory grind. What is necessary: inspect the edge for shipping nicks, verify the blade is balanced, and install it at the correct torque. Skipping those steps — not skipping a pre-use sharpening — is what causes poor cutting performance and spindle damage on a new blade.
How New Lawn Mower Blades Are Made and Finished
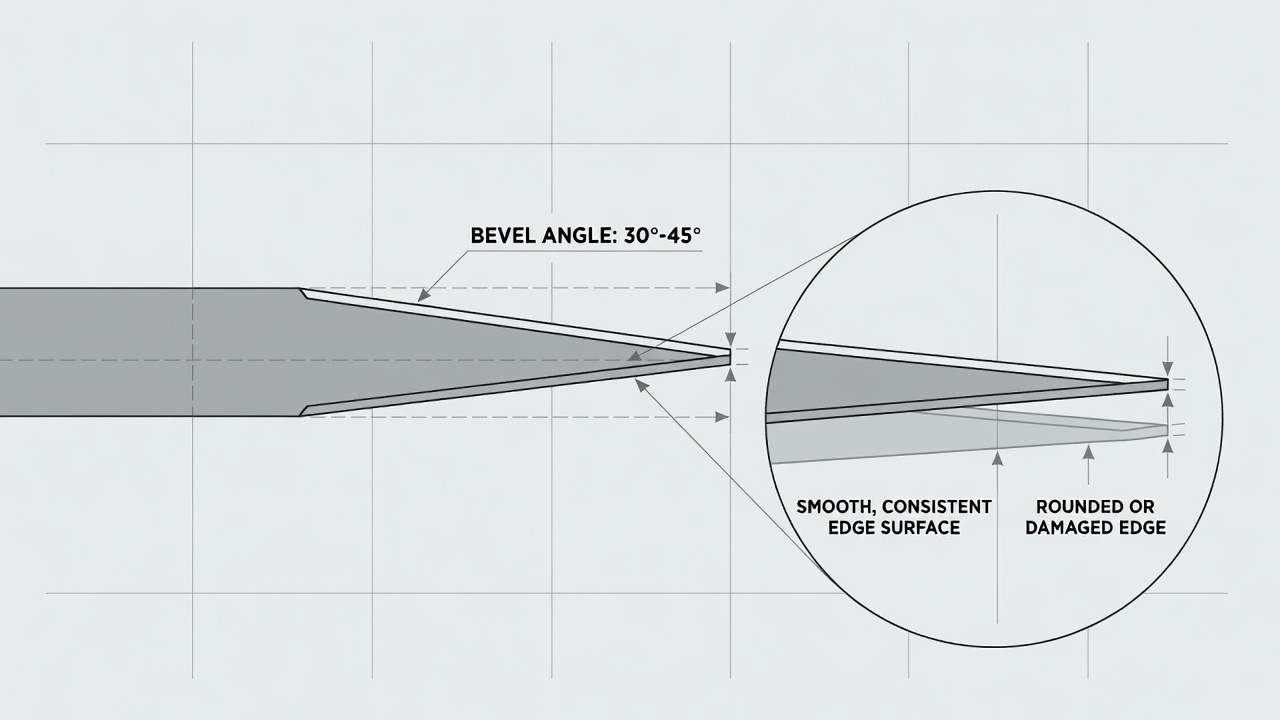
Lawn mower blades are stamped or forged from high-carbon or hardened alloy steel, then ground to a finished cutting edge on automated grinding equipment before leaving the factory. That process produces a consistent bevel — typically in the 30–45 degree range — across the entire cutting edge. OEM (original equipment manufacturer) blades for brands such as Honda, Husqvarna, Toro, and Deere go through quality-control checks that confirm edge geometry before packaging.
The factory edge is intentionally not razor-sharp in the way a kitchen knife is. A mower blade cuts by velocity and impact, not slicing pressure. The correct working edge is sharp enough to cleanly sever grass stems without folding them, but it has a slight thickness that resists chipping when it strikes small stones or debris. Running your thumb carefully across the bevel — not along it — should reveal a consistent, smooth edge with no flat spots or gaps.
Can the Edge Be Damaged Before You Even Install It?
Yes. Two situations create genuine pre-use edge damage on an otherwise new blade:
- Shipping and handling impact: A blade rattling inside loose retail packaging can contact the metal spine of another blade or the packaging hardware, raising a burr or creating a nick along the cutting edge.
- Long shelf storage: Blades stored in humid warehouse or retail conditions can develop surface oxidation along the edge. Light rust does not always sharpen away during the manufacturing process if corrosion occurred post-grinding.
Neither situation is common with reputable brands, but both justify a 60-second visual inspection before installation.
Signs a New Blade May Still Need Edge Adjustment
Before installing any new blade, hold it under good lighting and examine the full length of the cutting edge on both ends. You are looking for three specific problems:
- Nicks or chips: A small V-shaped notch in the bevel indicates impact damage. A nick wider than roughly 1/8 inch warrants a single light sharpening pass to restore a continuous edge.
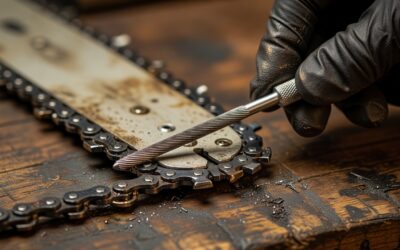
- Flat or rolled edge: If the very tip of the bevel looks rounded rather than angled, the factory grind may have been incomplete, or the blade was edge-down in packaging. A quick pass on a bench grinder or angle grinder restores the correct bevel.
- Uneven edge color or pitting: Dark discoloration or pitting along the edge suggests corrosion from storage. Light surface rust can be cleaned with steel wool; deeper pitting may require grinding past the affected material.
OEM vs. Aftermarket Blade Quality
OEM blades consistently arrive with acceptable factory edges. Low-cost aftermarket or off-brand blades are a different story. Budget blades sourced from unverified manufacturers may use softer steel and inconsistent grinding. The edge angle may be too shallow (over 45 degrees, reducing cutting efficiency) or too steep (under 25 degrees, making the edge brittle and chip-prone). If you purchase an aftermarket blade, edge inspection is not optional — treat it as a required step rather than a precaution.
A properly sharp mower blade edge, whether factory or freshly sharpened, should reflect light consistently across the full bevel, feel uniformly keen when the bevel face is pressed carefully against a fingernail, and show no visible flat spots when viewed at eye level.
Blade Balancing: The Step Most Owners Skip
Sharpening gets all the attention, but blade balance is the pre-installation check that actually protects your mower. An unbalanced blade — one that is heavier on one end than the other — creates vibration at the spindle. That vibration transmits directly into the spindle shaft bearings. Over time, it causes premature bearing wear, spindle seal failure, and in severe cases, spindle housing cracking. Spindle replacement on a mid-range riding mower can cost $150–$400 in parts alone. A blade balancer costs under $10.
Why Even New Blades Can Be Unbalanced
Manufacturing tolerances allow small weight variations across a blade’s length. A difference of as little as a few grams between the two cutting ends creates measurable vibration at 3,000 RPM — the typical operating speed of a residential mower spindle. Quality OEM blades are generally within acceptable balance tolerance, but this is not guaranteed, and it is never verified on the packaging.
How to Check Balance Before Installation
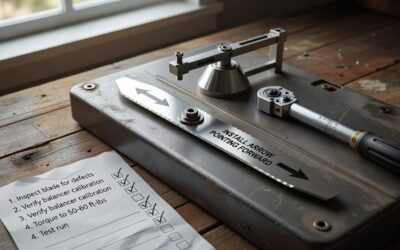
Use a blade balancing cone (also called a blade balancer or magnetic blade balancer). This is a cone-shaped tool that mounts to a wall or sits on a flat surface; you set the blade’s center hole over the cone tip and release it. A balanced blade remains level or rotates slowly and stops at a random position. An unbalanced blade consistently drops one end toward the ground.
If the blade is heavy on one end, remove small amounts of steel from the heavy end’s cutting edge bevel using a file or grinder — never from the flat back of the blade — until the blade rests level on the balancer. Remove the minimum material necessary; over-grinding to achieve balance defeats the purpose of a new blade.
A second method uses a nail or dowel inserted horizontally through a wall or vise, balanced on its point through the blade’s center hole. This works but is less accurate than a dedicated balancer due to nail-tip friction. For the cost, a proper balancing cone is worth keeping in your tool kit permanently.
How to Properly Install a New Lawn Mower Blade
Correct installation affects cutting performance as directly as sharpness does. Follow this sequence:
Safety Steps Before Touching the Blade
- Disconnect the spark plug wire (gas mowers) or disconnect the battery (electric/battery mowers). This prevents accidental engine start while your hands are near the blade.
- Drain fuel or tilt the mower with the air filter and carburetor side facing up to prevent fuel and oil from flooding the air filter.
- Wear cut-resistant gloves throughout blade removal and installation.
Blade Orientation: Which Way Does It Face?
This is the single most common installation error. The blade must be installed so the cutting edges lead into the direction of rotation and the wings (also called fins or lifts) curve upward toward the mower deck. Most blades are stamped with “This Side Down” or “Grass Side Down” on the non-cutting face. If your blade has no marking, position it so the angled fin tips point toward the deck, not toward the ground. Installing a blade upside down results in zero cutting and potential deck damage within seconds of mowing.
Blade type also matters for orientation context:
- High-lift blades have pronounced upward-curved wings that generate strong airflow for bagging. The wing angle is steep and obvious.
- Low-lift blades have flatter wings suited for sandy soils or side-discharge on dry grass. Lower profile but same orientation rule applies.
- Mulching blades have a curved cutting edge along much of the blade length and multiple cutting surfaces. The same upward-wing orientation rule applies.
Torque Specifications
The blade bolt must be tightened to specification — undertightening allows the blade to shift or spin on the hub, overtightening risks stripping the spindle thread or distorting the blade mounting area. General torque ranges by mower type:
| Mower Type | Typical Blade Bolt Torque |
|---|---|
| Walk-behind push mower (small engine) | 35–50 ft-lbs |
| Self-propelled walk-behind | 35–55 ft-lbs |
| Residential riding mower / lawn tractor | 70–90 ft-lbs |
| Zero-turn residential | 70–110 ft-lbs |
Always confirm torque against your specific model’s operator manual. Torque specs vary by spindle diameter and thread pitch; the table above is a general reference only. Use a calibrated torque wrench, not an impact driver set to guesswork.
Block the blade with a piece of wood wedged against the deck interior to prevent rotation while torquing. Do not use the blade itself as a lever brace — it can distort the blade or strip the bolt.
When to Sharpen a Lawn Mower Blade After First Use
A new factory-sharp blade does not stay that way indefinitely. Understanding when dullness sets in lets you plan maintenance rather than react to a deteriorating lawn.
Sharpening Frequency Guidelines
For a typical residential lawn of 1/4 to 1/2 acre with no significant debris or rocks, blades need sharpening approximately every 20–25 hours of mowing time, or roughly once per mowing season. Lawns with gravel borders, sandy soil, hardscape edges, or frequent sticks and debris accelerate wear significantly — some high-debris environments require sharpening every 10–15 hours.
A practical seasonal approach for average homeowners:
- Sharpen at the start of each mowing season before first use.
- Inspect mid-season (around the halfway point of mowing hours) and sharpen if signs of dullness appear.
- Replace blades showing cracking, deep gouging, or thickness loss of more than 1/4 inch from the original cutting edge width.
Signs Your Blade Has Gone Dull
The lawn tells you before the blade does. Watch for:
- Torn or frayed grass tips instead of clean, flat cuts. A dull blade rips grass stems rather than severing them cleanly.
- Brown or white grass tips 1–2 days after mowing. Torn stems desiccate and die back at the cut point, turning the lawn brown at the tips across the whole cut surface.
- Uneven cut height across the lawn despite a level deck.
- Increased engine load or slower mowing speed needed to maintain even cut.
- Visible grass lying flat rather than standing after the pass — the blade is pushing rather than cutting.
Sharpening vs. Replacing: Knowing the Difference
Sharpening extends blade life, but sharpening a blade that is structurally compromised is both ineffective and dangerous. A blade spinning at 3,000 RPM that fractures throws metal fragments at high velocity — this is a serious injury and property damage risk.
Sharpen When:
- The cutting edge is dull but the blade body is straight and flat.
- Minor nicks exist that can be ground out while maintaining the correct edge angle.
- The cutting edge has not been sharpened to the point of thinning the steel excessively (the edge should remain at least 1/4 inch wide from the very tip back to the flat blade body).
Replace When:
- The blade is bent. Even a slight bend — a deviation of more than a few degrees from flat — means the blade struck a solid obstruction hard enough to permanently deform high-carbon steel. That impact also creates internal stress fractures not visible to the eye. A bent blade must be replaced, not straightened and reused.
- A chunk is missing from the cutting edge. A missing segment cannot be sharpened back to a safe, balanced edge.
- Cracks are visible anywhere on the blade body. Run your eye and a cloth along the full blade surface. Any crack, however small, is a disqualifying defect.
- The blade is worn thin. Repeated sharpening removes steel from the cutting edge. When the remaining edge material measures less than approximately 1/4 inch from tip to blade spine, the edge is too thin to survive normal mowing impacts safely.
- The center hole is elongated or damaged. A deformed center hole prevents secure blade mounting and causes the blade to run off-center.
Is It Safe to Sharpen a Blade With a Bent Tip or Missing Chunk?
No. A bent tip indicates a high-impact event that may have compromised the steel’s crystalline structure beyond what is visible. Grinding off the bent portion to restore a straight edge removes significant metal mass, throws off blade balance, and leaves a shorter blade that may not match deck geometry. The correct action is replacement. The cost of a new blade ($15–$60 depending on mower type) is not comparable to the cost of a spindle repair or an injury from blade failure.
Frequently Asked Questions
Do new lawn mower blades come sharp enough to use immediately?
Yes. New lawn mower blades are ground to a finished cutting edge at the factory — typically 30 to 45 degrees — and are ready to install and use without any additional sharpening. The only reason to sharpen a brand-new blade before first use is if a visual inspection reveals shipping damage, nicks, or a poor factory edge on a low-quality aftermarket blade.
How do I know if my new mower blade is balanced?
Use a blade balancing cone: set the blade’s center hole on the cone tip and release it. A balanced blade rests level or rotates slowly without either end falling consistently. If one end drops repeatedly, that end is heavier — remove small amounts of steel from its cutting edge bevel with a file or grinder until balance is achieved, then re-verify on the balancer.
How often should I sharpen my lawn mower blade?
Every 20–25 hours of mowing use, or at minimum once per season for average residential lawns. Lawns with gravel, sandy soil, or frequent debris contact may require sharpening every 10–15 hours. Torn grass tips and brown edges appearing 1–2 days after mowing are the clearest indicators that sharpening is overdue.
When should I replace a mower blade instead of sharpening it?
Replace the blade when it is bent (any deviation from flat), has a visible crack anywhere on the body, has a chunk missing from the cutting edge, or has been sharpened to the point where less than approximately 1/4 inch of edge material remains. Bent blades in particular must never be straightened and reused — the impact that caused the bend creates internal stress fractures that are invisible but structurally compromising.