

Quick Answer: Do New Lawnmower Blades Need To Be Sharpened?
Most new rotary lawnmower blades are factory-sharpened and ready to install. You do not need a full grind before first use. Check the cutting edge for nicks, burrs, rust, bends, or a rough aftermarket grind. A light, even hone is enough if the blade is intact but not as clean as you want. Leave a sharp, undamaged factory edge alone….

Pros
- Large-size design named in product title
- Sharpening and balancing functions listed
- Listed as a new upgraded version

Pros
- Adjustable 15-to-45-degree range in title
- Sharpening and balancing functions listed

Pros
- Sharpener and balancer functions in title
- 15-to-45-degree adjustable setting listed
- Built for lawn mower blade maintenance
Pros
- Includes replacement gaskets and a 98079-55846 spark plug
- Matches Honda HRR216 and HRS216 lawn mower models
- Designed around the 16100-Z8B-901 carburetor specification
Cons
- Restricted to select Honda GCV160 mower applications
- Installation requires basic mechanical tools and skills
Most New Blades Arrive Ready to Cut
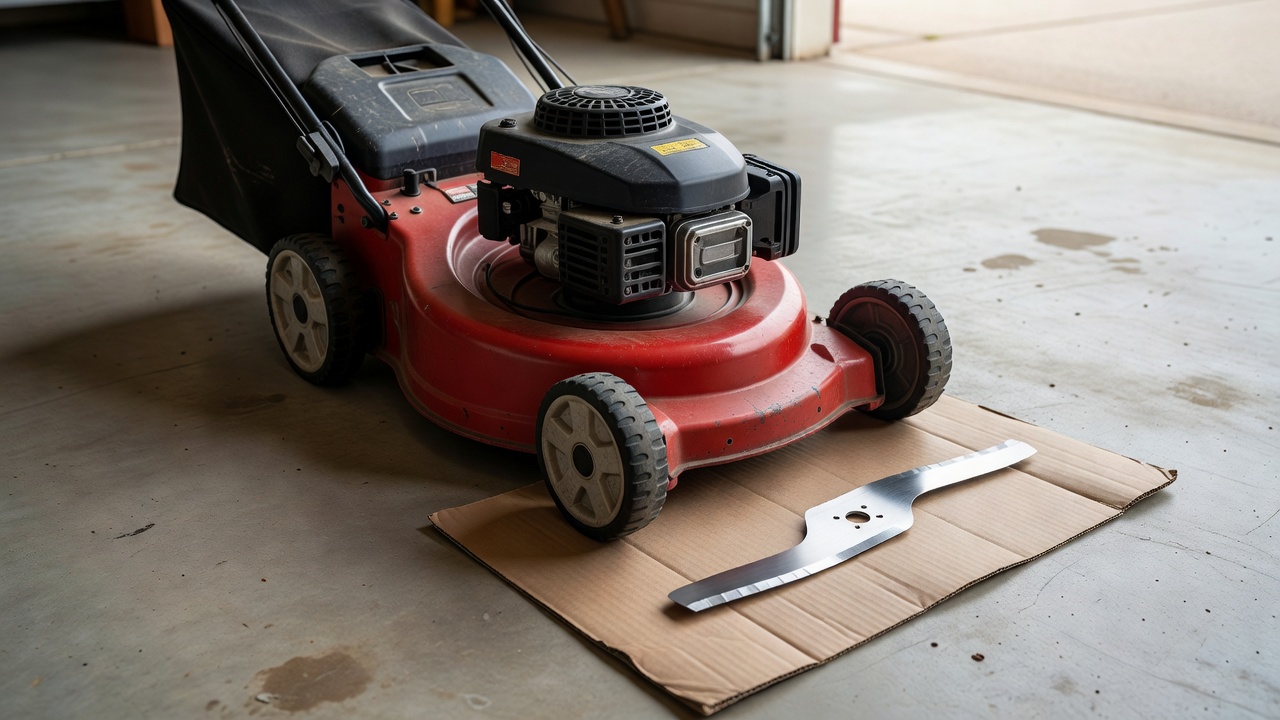
Brand-new consumer rotary lawnmower blades usually leave the factory with a ground cutting edge. That is true of blades that arrive on a new walk-behind or riding mower and of replacement blades sold on their own. The factory edge is there so you can bolt the blade on and mow. A full pre-install grind is not the normal next step.
“Factory-sharpened” does not mean every new blade is finely honed. It means the cutting bevel has already been formed and the part is intended to cut grass. Edge finish still varies. An OEM-style replacement often arrives with a cleaner, more consistent grind than a low-cost aftermarket blade. Either can be usable as installed. The word “new” is not a sharpness rating, and it is not a reason to assume the steel is blank.
A usable factory edge looks like a defined bevel on each cutting end, not a rounded bar. In good light you can see a crisp line where the bevel meets the face of the blade. A used dull blade looks different: the edge is often shiny and rounded, nicked from stones, or rolled over. A new blade should not look worn in that way. Check it with gloves on. Do not drag bare skin along the edge to “test” it. New blades can cut skin straight out of the package. For troubleshooting and reliability insights, consult our in-depth jbl partybox club 120 vs sony srs xv500 report.
Manufacturers grind the edge before shipping because a rotary mower cuts by impact and shear at the tips and leading edges. An unsharpened stamping would tear turf, leave ragged tips, and make the machine work harder than it should. The factory grind is the intended starting geometry. Your job is to confirm the blade arrived intact and matches the mower, not to invent a new bevel on the bench. For troubleshooting and reliability insights, consult our in-depth jbl partybox club 120 vs sony srs xv500 report.
Why Some People Still Hone or Sharpen a New Blade
Some owners still give a new blade a light hone. That habit is understandable, and it is not the same as saying every new blade needs blade sharpening.
Shipping and storage can leave a small manufacturing burr, a flattened spot on a tip, or a film of protective oil or coating. Warehouse handling can nick a corner even when the rest of the blade is fine. A cheap aftermarket grind can look coarse or slightly uneven even when the steel is structurally sound. None of that automatically means the blade is unusable. A slightly coarse factory edge often still cuts grass acceptably, especially if you mow dry turf at a sensible height and keep the deck clean. Readers comparing setup options can review our technical analysis on z890 vs x870e motherboard.
A light hone or a few careful file strokes on the existing bevel can knock off a burr or clean a painted or oily edge so the first cut is cleaner. That is cleanup. It is not a full resharpen. A full grind removes a lot of metal, can wander off the intended cutting bevel, and shortens the life of a blade that was already serviceable. If you only need to remove a wire edge or a mill mark, stop when that ridge is gone.
Do not treat a hone as a way to make a bargain aftermarket blade perform like a premium OEM replacement. Inspection still matters more than the label on the box. Low-cost blades are not “always dull,” and name-brand replacements are not “always perfect.” Look at the steel in front of you. If the edge is already clean and sharp, extra work is optional at best. There is also no reliable way to promise that honing a new blade will save fuel, cut engine load, or improve turf health by a measurable amount. Those claims need data that a home bench session cannot supply. For complementary field maintenance guidelines, examine our breakdown of marshall stanmore iii vs harman kardon onyx studio 8.
How to Inspect a New Blade Before First Use
Inspect the blade before it goes on the deck. Do that only after the mower is safe to work on. Wait for all motion to stop. Disconnect electric power or remove the battery as the machine requires. On a gasoline mower, pull the spark plug lead off the plug and keep it away from the terminal. Stabilize the mower so it cannot roll or drop. Wear cut-resistant gloves and eye protection. The full safety sequence belongs in every blade job, not only when you plan to grind.
Look at both cutting edges, both tips, the body, the lift or sail, and the mounting hole. Turn the blade in good light. A quick glance at one painted face is not enough. To evaluate matched hardware tolerances, consult our detailed overview of dyson v8 cyclone vs bissell featherweight stick.
What the edge and body should tell you
- Nicks, rolled edges, or missing chips along the cutting bevel
- Heavy burrs or sharp mill marks standing up from the edge
- Surface rust versus pitting that eats into the cutting edge
- Cracks near the center hole, bolt shoulders, or anywhere the blade flexes
- Obvious bends, twisted tips, or a blade that will not sit flat
- Shipping damage: crushed packaging that lines up with a dinged tip, or a blade that arrived loose and battered against hardware
A burr or mill mark is a thin ridge of metal left by grinding or stamping. It can often be dressed off with a light hone. A nick is a bite out of the edge. A bend is a change in the plane of the steel. A crack is a split in the metal, and it is especially dangerous near the hub. Do not install a cracked blade. Do not try to grind a crack out.
You do not need shop gauges to spot a warp. Set the blade on a known-flat surface such as a sturdy workbench or a true table edge. See whether both ends sit the same way and whether a tip is kicked up or down. Rocking, a lifted corner, or a twisted sail is a reason to reject the blade. Do not hammer it straight. Straightening a heat-treated mower blade is not a reliable home repair, and a blade that was bent in shipping may already have hidden stress. When planning workspace deployment, consider the engineering criteria outlined in our bissell crosswave hydrosteam vs shark stainforce guide.
Light surface rust from warehouse storage is often cosmetic if the edge itself is not pitted. Deep rust on the bevel, flaking scale, or rust sitting in a crack is not cosmetic. If packaging oil is the only issue, wipe it off. You do not have to grind oil away. Paint on the bevel can look alarming and still hide a usable edge; it can also hide a rolled edge, so look closely rather than assuming paint means “unsharpened.”
Match the replacement to the mower
Compare the new blade with the old one and with the mower’s documentation. Match overall length class, shape, mounting hole pattern, and style—standard, high-lift, or mulching blade—using the markings on the blade and the owner’s manual. If the old blade was already the wrong type, do not copy it. If the center hole, keyways, or adapters do not match, stop. Never drill the hole to make a blade fit. Never stack random washers to take up a gap the manual does not describe.
On a multi-blade deck, confirm you have the correct blade for each bay if the machine uses sided or offset parts. Mixing styles under one deck can leave a ragged strip even when every edge is sharp. Do not spin the blade on the machine as a sharpness test. A powered deck is not a bench fixture.
When Sharpening a New Blade Is Unnecessary or Unwise
If the factory edge is clean, sharp, and undamaged, extra grinding only removes useful metal. That shortens how long the blade will last before it truly needs sharpening. It can also wander away from the intended cutting bevel. A sound new blade does not become better because it spent time on a grinder.
Do not sharpen a new blade that is cracked, bent, or deeply notched in an attempt to save it. Sharpening does not repair structural damage. Grinding a notched tip “smooth” still leaves weaker, uneven steel. Replace that blade. The same rule applies to a blade with a mushroomed mounting hole, a cracked sail, or a missing chunk at the tip. Those are discard conditions, not sharpening projects.
Aggressive grinding on a good new blade can flatten or steepen the factory bevel, take more metal from one end than the other, and ruin blade balance. A bench grinder used carelessly can also overheat the edge. Blue or straw discoloration at the bevel is a warning that the steel at the very edge may no longer behave as it should. If you see that color, stop. A shop or a new blade is safer than continuing.
Some mulching blades and coated blades have more complex geometry than a simple two-end cutter. A coarse grind can erase those forms or strip a coating the maker intended to stay on the face of the blade. If the blade or mower maker publishes guidance, follow it. If you would have to guess, leave a sound factory edge alone or take the blade to a shop that works on mower blades regularly. There is no universal remaining-thickness number or discard limit that applies to every consumer blade. When damage is obvious, replacement is the conservative choice.
If You Touch Up a New Blade, Keep the Work Light and Even
If inspection shows only a burr, a slightly dull line, or a coarse factory grind—and the blade is otherwise straight and uncracked—keep the work light. The goal is to freshen the existing bevel, not to reshape the part.
- Clamp the blade in a vise with jaw protection so it cannot twist or launch if a tool slips.
- Work the existing bevel only. Do not create a new angle from scratch.
- Use a hand file or a fine stone and take light, even strokes. A coarse bench grinder is a poor first tool for a blade that is almost ready.
- Treat both cutting ends the same way: the same area, the same pressure, and a similar number of strokes.
- Stop as soon as the burr or dull line is gone.
- If a wire edge folded over the back of the bevel, dress that side lightly. Do not turn the blade into a knife-thin wedge.
Follow the manufacturer if it specifies a method. Otherwise keep the original bevel. There is no single correct file grit, wheel speed, or degree setting that applies to every rotary blade. Chasing a number you found in a generic chart is how people ruin a factory edge that only needed a few strokes.
Symmetry matters on a rotary mower. The blade is a spinning bar. Taking more metal from one end than the other throws off blade balance. An unbalanced blade vibrates, stresses the crankshaft or spindle, loosens hardware, and can make the mower unpleasant or unsafe to control. Even a new blade can be thrown out of balance by uneven “improvement.”
A rough home check is to balance the blade at its center hole on a cone balancer, or on a rounded nail or screwdriver shank held firmly in a vise. If one end consistently drops, the heavy end still has more metal. You can remove a little more from that end’s cutting edge, or you can stop and start over with another blade. This is only a coarse check. It does not replace shop equipment, and there is no single gram tolerance or RPM limit that you should treat as universal.
Stop and use a shop or a different blade if you would need a heavy grind to make the edge usable, if the blade will not come close to balancing, if you cannot work both ends evenly, or if you only have a coarse grinder and no way to keep the steel cool. Never weaken the blade by grinding deep notches, cutting a new profile, welding a chip back on, or modifying the mounting hole. Those modifications are not touch-ups. They are how a replacement part becomes scrap.
Safety Before You Handle or Install Any Blade
Treat blade work as machine work, not casual bench tidying. A new edge is still an edge. A deck that looks “off” can still store energy in a springy starter, a capacitor, or a blade that has not quite stopped.
- Wait until the engine or motor and the blade have fully stopped.
- On gasoline mowers, disconnect the spark plug lead and keep it away from the plug so a pull on the starter cannot fire the engine.
- On battery, corded, and robotic mowers, remove the battery or use the manufacturer’s lockout procedure. Unplugging a corded mower is not optional.
- Chock wheels or otherwise stabilize the machine so it cannot roll or drop on your hands.
- Support a tipped mower the way the manual describes. Do not rely on a single unstable prop.
- Wear eye protection and cut-resistant gloves. Keep your head out of the path a blade would take if it slipped from a vise or off a bolt.
A loose or unbalanced blade on a rotary mower can cause severe vibration and loss of control. It can also damage the spindle or crankshaft. After any install, confirm the blade is seated on the correct adapters or flats and facing the direction marked on the blade. Cutting edges usually lead in the direction of rotation. The sail or lift typically faces up toward the deck so it can move air and clippings. An upside-down blade tears grass even when the factory edge is excellent.
Fastener torque, whether the blade bolt is single-use, washer and adapter order, and any threadlocker requirement are manufacturer-specific. Use the owner’s manual. Do not guess numbers, copy a neighbor’s “good and tight” rule, or reuse hardware the manual says to replace. If the manual is missing, get the correct document for that model rather than inventing a procedure.
Rotary Blades Are Not the Same as Reel Mower Blades
The advice in this article applies to typical consumer rotary mowers: walk-behind, self-propelled, riding, and zero-turn decks that spin one or more horizontal blades under a deck. Those lawnmower blades are stamped or formed bars with cutting bevels at the ends. Balance between the two ends is part of how they run smoothly.
A reel mower, sometimes called a cylinder mower, cuts differently. A spinning helical reel closes against a bedknife, more like scissors than like a spinning bar. New reel cylinders and bedknives are set by clearance. When they need refreshing, shops use methods such as backlapping or a controlled grind of the reel. That is not freehand sharpening of a stamped rotary edge, and it is not a two-end balance problem in the same sense.
Do not take rotary touch-up advice to a reel unit. If you own a reel mower, use the reel manufacturer’s setup instructions. Factory-edge questions, a light hone on a bevel, and a nail-balance check do not map cleanly onto a reel-to-bedknife pair. Guessing relief angles or bedknife gaps is a good way to leave washboarding or a shiny, uncut strip.
If the First Cut Looks Poor, Check More Than Sharpness
A ragged first pass is not automatic proof that the new blade was dull. Sharpness is only one part of how a rotary deck finishes turf.
- Grass that is too tall or wet mats and tears instead of slicing.
- A deck packed with clippings recirculates poorly and smears the cut.
- Height set too low scalps; height set too high can let stems fold over ahead of the blade.
- On a multi-blade deck, one new blade next to a remaining dull or damaged blade leaves stripes.
- The wrong style—a mulching blade where the deck needs high-lift discharge, or the reverse—changes how clippings move even when the edge is fine.
- A blade installed upside down or backward meets the grass with the dull back or the wrong face of the sail.
Vibration after a new install is a stop-now problem, not a sharpen-more problem. Shut the machine down, make it safe, and check for loose hardware, missing adapters, a bent blade, debris stuck to the blade or deck, or a blade that is the wrong length for the bay. More grinding will not fix a backward blade, a clogged deck, or a missing cup washer.
If the cut is poor, recheck the install and the mowing conditions before you remove more metal from a new edge. Mow a small, dry test strip after you have confirmed direction, hardware, and height. If the turf still looks shredded and the blade passed inspection, a light even hone is reasonable. If the blade never passed inspection, replace it. The useful question is not “Did I sharpen the new blade?” It is “Is this the right, undamaged blade, installed safely, meeting grass it can actually cut?”
Mechanical safety standards, operational tolerances, and protective gear guidelines align with benchmark specifications established by the American National Standards Institute (ANSI).
When a New Blade Is Ready—and When It Is Not
Most new consumer rotary blades are sold with a factory-ground cutting edge and can be used without a full pre-install sharpening. That is the usual answer for walk-behind and riding decks. Edge quality still varies, so inspection beats assumptions. A light, even hone can remove a burr or freshen a slightly coarse grind. That is not the same as putting a brand-new part on a grinder “just because.”
Skip the extra metal removal when the factory edge is already clean, sharp, and undamaged. Replace cracked, bent, or severely notched blades instead of trying to sharpen them back into service. If you do touch up an otherwise good blade, keep both ends the same and check that it still balances in a rough, sensible way. Disconnect the spark plug lead or electric power before you reach under the deck, and handle the new edge as if it can cut—because it can.
Reel-mower owners should ignore rotary bench habits and follow reel setup instructions. Everyone else can treat “new” as a starting point, not a verdict. Look at the bevel, the body, and the mount. Then decide whether the blade is ready, needs a light hone, or should never go on the machine at all.
For more hands-on benchmarks and buying recommendations, consult our guides on heavy-duty chainsaw buyer guide, as well as high-CFM commercial leaf blower guide, as well as automated robotic lawn mower guide.









