

Quick Answer: Do You Need To Sharpen A New Lawn Mower Blade?
Usually no. Most new rotary blades for walk-behind and riding mowers come with a factory-ground cutting edge and are meant to be used after you inspect them, not after a full sharpening job. Extra honing is optional if the bevel looks rough, slightly blunt, or poorly finished. Do not install a blade that is nicked, bent, cracked, or obviously unbalanced,…

Pros
- Large-size design named in product title
- Sharpening and balancing functions listed
- Listed as a new upgraded version

Pros
- Adjustable 15-to-45-degree range in title
- Sharpening and balancing functions listed

Pros
- Sharpener and balancer functions in title
- 15-to-45-degree adjustable setting listed
- Built for lawn mower blade maintenance
Pros
- Includes replacement gaskets and a 98079-55846 spark plug
- Matches Honda HRR216 and HRS216 lawn mower models
- Designed around the 16100-Z8B-901 carburetor specification
Cons
- Restricted to select Honda GCV160 mower applications
- Installation requires basic mechanical tools and skills
Most New Blades Are Ready After Inspection
A typical consumer rotary blade—whether it shipped on a new walk-behind or riding mower or arrived in a box as an OEM or aftermarket replacement—is sold with a factory-ground bevel. That factory edge is intended to cut grass. For most owners, the first job is not to reshape the metal. It is to confirm that the blade in your hands is the right part, that both cutting ends look even, and that nothing happened in shipping or warehouse handling that would make the blade unsafe to spin.
That is a qualified answer, not a universal rule. “Factory-edged” is not the same as “razor-sharp,” and it is not a promise that every new blade will leave a show-quality cut on the first pass. Finish quality varies by maker and price tier. Some new blades feel keen along the leading edge. Others look blunt, slightly burred, or coated so the bevel is harder to judge. None of those appearances automatically means you must grind the blade before install, and none of them means you should bolt it on without looking. For additional operational safety benchmarks, see our published testing notes on jbl partybox club 120 vs sony srs xv500.
Extra sharpening is optional on a sound new rotary blade. A light hone can refine a rough factory burr or a slightly dull bevel. A full grind is rarely required on a true new blade and can do more harm than good if you remove metal unevenly. If the edge is badly nicked, the body is bent, the center area is cracked, or the two ends do not match, the right move is not a home sharpening session. It is to stop and use the seller or manufacturer return path instead of guessing a repair. For additional operational safety benchmarks, see our published testing notes on jbl partybox club 120 vs sony srs xv500.
New Complete Mower Versus a Replacement Blade
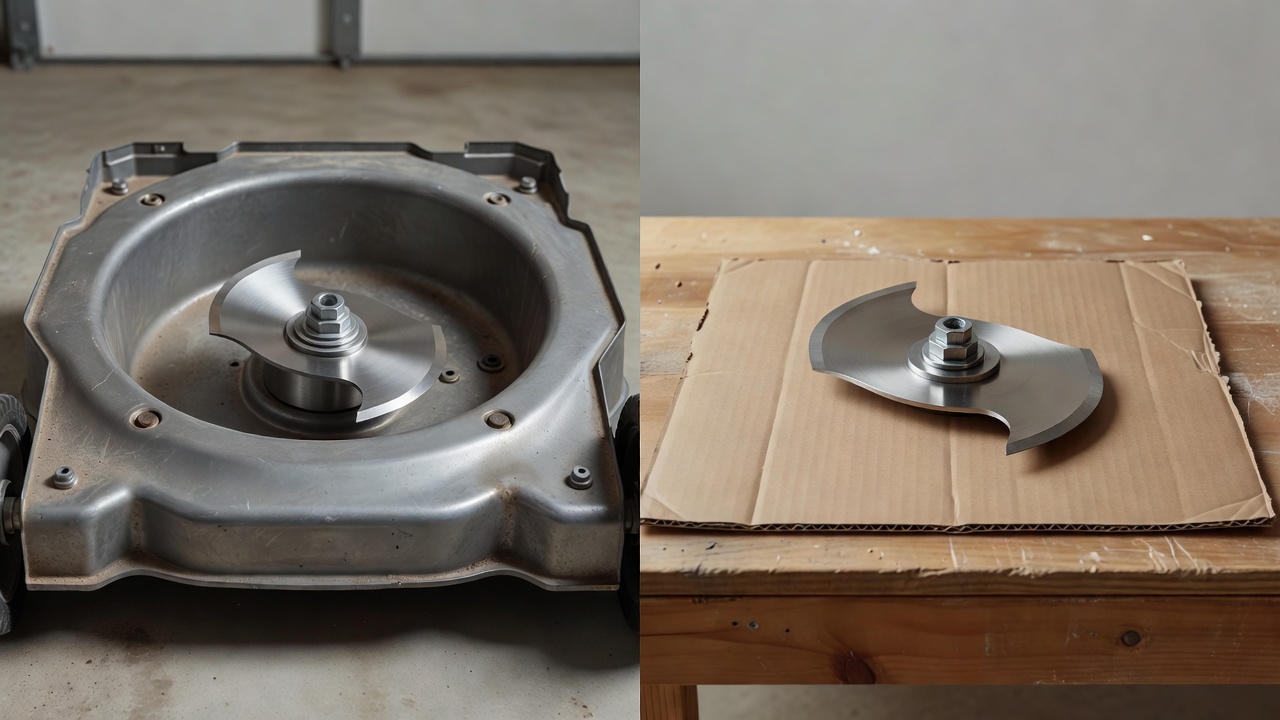
Owners usually meet a “new blade” in one of two ways: the cutter that already sits under a brand-new walk-behind or riding mower, or a boxed replacement bought after the original wore out, bent, or hit something. The inspection logic is the same in both cases. You still want a usable factory edge, the correct style for that deck, and a blade that is straight, matched, and undamaged. You do not treat one as automatically perfect and the other as automatically unfinished.
A blade that left the factory already mounted on a complete mower has usually been handled as part of a finished machine. A boxed replacement may show more warehouse scuffs, a heavier coat of protective oil or paint, or a rougher grind. That difference in appearance does not, by itself, tell you which edge will cut better. It only means you should look more carefully at a loose replacement before you trust it at deck speed. To compare alternative configurations, check our hands-on review of z890 vs x870e motherboard.
If the mower or blade maker printed install or first-use guidance in the owner’s manual or on the blade package, follow that over generic advice. This article cannot replace those instructions, and it does not invent unpacking checklists or break-in periods. In the absence of a specific warning that the edge must be honed first, a typical consumer rotary blade is generally intended for use after inspection. You should still tilt or lift the machine only as the maker allows, disable it as described later, and look at the blade before the first cut. New does not mean you skip that look.
What a Factory Edge Usually Is—and Is Not
A factory-ground mower blade edge is a working cutting edge, not a finely honed kitchen knife. On a typical two-ended rotary blade you will usually see a bevel along the leading side of each wing. That bevel is what shears grass as the blade spins. Behind the edge, the rest of the wing may be formed for lift, mulching, or discharge. Those shapes matter for airflow and clipping movement, but they are not a substitute for a continuous cutting edge on the leading side. Users looking for related component recommendations can explore our marshall stanmore iii vs harman kardon onyx studio 8 breakdown.
Factory grinding is done to get blades out the door with a usable bevel. A careful hand hone or a shop grind after service is often more refined: the burr may be smaller, the edge more even from end to end, and the finish easier to judge. That difference is why a new blade can be “ready” without looking pretty. A usable factory edge is meant to cut grass. It is not meant to match the feel of a blade that just left a sharpening jig.
Some new blades feel sharp if you (carefully) test the edge with a gloved thumb pad, never a bare fingertip drawn along the metal. Others look blunt because the bevel is relatively thick, because a burr folds over, or because paint, oil, or a protective coating covers the grind. Paint over the bevel does not automatically mean the blade is dull, and it does not automatically mean you must strip the coating. Avoid chemical strippers or homemade coating recipes. Judge the metal you can see and feel, not the marketing language on the box. Before finalizing equipment decisions, refer to our comprehensive dyson v8 cyclone vs bissell featherweight stick comparison.
Do not chase a named bevel angle or hardness number. Those figures vary and are not something a homeowner can verify on a bench. What you can verify is simpler: there is a continuous bevel on each cutting end, the two ends of a typical two-sided blade look like a pair, and nothing obvious is missing, folded, or cracked.
Inspect the New Blade Before You Install It
Do the inspection on a bench or other stable surface, not under a half-supported mower. Wear cut-resistant gloves and eye protection. Treat every edge as sharp even if the blade looks painted or oily. A new lawn mower blade can still slice a hand. For broader ecosystem context, read through our operational guide on bissell crosswave hydrosteam vs shark stainforce.
Look first at the cutting edges. You want a continuous factory-ground bevel on the leading side of each wing, without missing chunks or a saw-tooth row of dings. Tiny cosmetic nicks from handling happen. A deep nick, a rolled edge, or a bite taken out of the tip is another matter. Check the tips and any high-lift or mulching surfaces for bends or cracks. Those formed areas can be damaged in a drop even when the bevel still looks intact.
Then look at the body of the blade:
- Center hole and mounting area: cracks, elongation, or deformation around the hole are stop signs.
- Both ends of a typical two-sided rotary blade: length, shape, and bevel should match as a pair.
- Flatness: sight down the blade or set it on a known-flat surface. An obvious banana bend or twisted wing is not something to “true up” at home and then run.
- Rust and pitting: light storage film or oil is common. Heavy scale or pitting on the edge or at the center is a reason to reject the part.
- Burrs and shipping dings: a small burr can be honed. A crushed tip or a gouge into the mounting area cannot be ignored.
Confirm that you have the correct blade style before you fall in love with the edge. Length, center-hole shape, mounting pattern, and intended use (standard, mulching, high-lift, bagging, and similar consumer categories) must match the mower. A sharp blade of the wrong family is still the wrong blade. If the package, stamping, or seller listing does not clearly match the machine, do not install it on a guess.
There is no reliable home go/no-go number for nick depth. If damage is more than a tiny cosmetic mark, do not install the blade and do not invent a repair. Return or replace it. Filing a large chip out of one end and leaving the other end untouched is a fast way to create an unbalanced cutter.
Confirm Fit, Orientation, and Balance
Sharpness is only one safety question. The blade must fit the mower, sit in the correct orientation, and not be badly out of balance. A new blade can fail any of those checks.
Match the blade to the machine using the mower maker’s blade designation when you have it, plus the physical cues you can see: overall length, center hole, and how the blade locates on the spindle, adapter, or blade driver. Many decks use a specific hole shape or a set of shoulders so the blade cannot be clocked randomly. If the new blade rocks, leaves a large unexplained gap, or needs a different adapter than the hardware you removed, stop. Do not stack washers or force a “close enough” hole onto a spindle. Torque values, adapter part numbers, and spindle hardware rules belong in the owner’s manual, not in a generic article.
Orientation matters because the cutting edge has to lead, and formed lift or mulching surfaces have to face the way the designer intended. Many blades are stamped with a cue such as “this side down,” “grass side,” or similar wording. When that stamp is present, follow it. When it is not, compare the new blade with the old one before you remove the old one, or with the diagram in the manual. Installing a blade upside down can give a terrible cut, poor discharge, and extra stress on the deck. On a multi-blade deck, do not mix unmatched blades. Length, style, and wear state should be a set.
A simple home balance check can reveal a clearly heavy end. A nail through the center hole, or a basic blade balancer, will show a blade that consistently droops to one side. That check is not a precision shop measurement and it does not prove the blade is safe. It only flags an obvious problem. A new blade that is badly lopsided may have been ground unevenly, bent, or made with an error. Do not install it. Do not try to “fix” a large imbalance by grinding random metal off the heavy end unless you know how to keep both cutting edges even and the blade structurally sound. If you are not equipped for that, use a different blade or a qualified shop.
A bent, cracked, or obviously lopsided new blade is not a sharpening project. It is a do-not-run part.
When Honing or Sharpening a New Blade Still Makes Sense
There are honest reasons to touch a new edge. A light hone makes sense when the blade is otherwise straight, correctly matched, and undamaged, and the factory bevel is only a little blunt or carries a rough burr. The goal is to refine the existing grind, not to invent a new one. A few careful strokes that follow the factory bevel on both ends, then a check that you did not leave a wire edge or take more metal from one wing than the other, is the usual home approach. There is no universal file-stroke count or grit sequence that applies to every blade.
Full reshaping is a different job. You would only grind a new blade aggressively if the bevel is so poorly formed that it will not cut and the rest of the blade is still sound—an uncommon situation on a true new part. Even then, heavy grinding removes useful metal, can overheat the edge if you use a power tool carelessly, and can ruin balance. If the problem is a large nick, a folded tip, or an uneven factory grind that you cannot even out by hand, return or replace the blade. Do not try to save a damaged new blade by turning it into a thinner, shorter, or lopsided one.
Mulching and high-lift blades do not get a different factory-sharpness rule. They still cut on the leading edge. The extra forming is for clipping handling and airflow. Hone that leading edge the same way you would a standard rotary blade: keep both ends even, stay on the existing bevel, and leave the lift or mulching faces alone unless they are damaged. Do not file decorative chamfers into the formed areas.
If you cannot keep both ends even and the blade reasonably balanced, prefer the decent factory edge you already have, or take the blade to a shop that sharpens mower blades regularly. Aggressive DIY grinding on a new blade is rarely necessary and is one of the easier ways to turn a usable part into a vibrating one.
Why You Should Not Assume Every New Blade Is Perfect
“It is new, so it must be fine” skips the only checks that matter. Blades are stamped, ground, coated, boxed, and shipped. Any of those steps can leave a nick, a bend, a heavy burr, or the wrong part in the right-looking package. Aftermarket and OEM parts both deserve the same look-over. Price tier is not a substitute for inspection.
A poor edge tears grass instead of slicing it. The lawn can look gray or brown at the tips, with frayed ends that dry out in the sun. That is a cut-quality problem, not a proof that the mower is failing. A nicked edge can also leave uncut strips or a ragged, scalloped appearance. A factory blade is not guaranteed to give a clean cut on every turf type, height, or moisture condition. Inspection simply removes the avoidable causes: a dull, damaged, reversed, or mismatched cutter.
A bent or unbalanced blade can shake the deck, the handles, or the whole machine. Vibration is hard on the operator and on spindles, belts, and fasteners. You do not need a lab number to take that seriously. If a new blade looks twisted or fails a simple balance check, the risk is not theoretical. A damaged blade can also throw debris with more unpredictability than a sound one. Keep that language cautionary: do not run a compromised cutter and hope the deck will contain every fragment or stone.
Handling risk is immediate. The same edge that should cut grass will cut skin. Gloves, a clear bench, and a habit of never testing sharpness with a bare sliding finger are ordinary precautions, not drama.
Safe Handling and Installation Basics
Disable the mower before you touch the blade. Wait until the blade has fully stopped. On a typical gasoline walk-behind, remove the spark-plug boot so a pull on the starter or an accidental turn of the blade cannot fire the engine. For riders and zero-turns, remove the key, set the parking brake, and follow that machine’s deck-service steps. For battery-electric and corded machines, use the manufacturer’s disable procedure; do not invent a battery-isolation sequence here. Chock wheels and stabilize the mower only as the maker allows. Do not rely on tipping a mower up on its handles or running board unless the manual describes that method and the orientation that keeps fuel and oil where they belong.
Wear gloves and eye protection. Support the blade when you loosen hardware so it cannot drop onto a hand or the floor. Keep track of the order and orientation of washers, adapters, and the blade bolt or nuts. Reinstall hardware in the original order. If anything is stretched, rounded, or missing, replace it with the correct part rather than reusing damaged fasteners.
Blade-bolt torque, threadlocker, spindle-adapter warnings, and any special washers are machine-specific. Put those details in the “follow the manual” column. If the hardware does not seat the way the old assembly did, or if the blade does not sit flush on its driver, stop and sort the fit before you tighten anything. After install, rotate the blade by hand only with the machine still disabled and confirm it clears the deck and any mulching plug or chute. Then restore the spark-plug boot or other disable devices only when tools and hands are clear.
What Not to Do With a New Blade
Skip the shortcuts that turn a simple replacement into an injury or a poor cut.
- Do not assume box language or a “new” stamp equals a perfect edge. Inspect anyway.
- Do not install a cracked, bent, severely nicked, or obviously unbalanced blade.
- Do not grind so much metal that the two ends no longer match in shape or weight.
- Do not mix unmatched blades on a multi-blade deck.
- Do not reuse damaged, incorrect, or mystery hardware.
- Do not work under a mower that is poorly supported, and do not defeat blade-stop, operator-presence, or other interlocks to make the job faster.
- Do not guess manufacturer claims about self-sharpening coatings, warranty limits, or required first-use honing. If those claims matter to you, read the actual documents that came with the product.
Refusing to run a new blade is the right call whenever the part is the wrong style, the mounting area is damaged, the body is bent or cracked, or you cannot get a trustworthy orientation and balance. A delayed first mow is cheaper than a vibrating deck or a thrown fragment.
If the First Cut Looks Ragged
A mediocre first cut does not automatically mean you should have sharpened the blade for an hour. Stop and separate blade problems from setup problems.
Symptoms that point back to the edge or the install include ragged, shredded leaf tips right after a careful pass, uncut strips that follow the blade path, or new vibration that was not there with the old (even if dull) blade. Those are reasons to resafe the machine and recheck edge condition, orientation marks, hardware stack, and a simple balance check. Also look for a loose blade bolt, a blade sitting on the wrong side of an adapter, or a mulching blade installed where the deck expects a different style.
Other common causes have little to do with factory sharpness. Deck height that is too low for the turf, wet grass, a first pass that hit a hidden stick or sprinkler head and nicked a brand-new edge, mismatched cutting height after a deck-level change, and simply asking one pass to hide a long, tangled lawn can all leave a rough look. Sharpening will not fix a deck that is not level, and it will not fix a blade that is on upside down.
If vibration is new, or if you hear or feel something that was not there before, stop mowing. Recheck the blade and hardware. Continuing to cut in the hope that the machine will “settle in” is not a diagnostic method. If the edge is only a little rough and everything else checks out, a light hone after that first inspection is reasonable. If the cut is poor and the blade is damaged, replace it.
Exceptions: Reel, Robotic, and Other Cutters
This advice is for general consumer rotary blades on walk-behind and riding mowers, including typical OEM and aftermarket replacements. It does not transfer cleanly to other cutter types.
Reel mowers cut with a cylinder and a bedknife. Factory prep, adjustment, and any later backlapping or grinding follow a different logic than filing a rotary bevel. Robotic mowers often use small discs or multiple short blades with their own replacement schedules and handling rules. Commercial fleet blades may be specified, tracked, and sharpened to shop standards that a homeowner article should not invent. If you own one of those machines, use the equipment maker’s guidance rather than adapting rotary-file habits.
For a typical home rotary mower, the decision stays simple. Most new blades are factory-edged and can go to work after a careful inspection. Hone only when the edge needs a little help and the blade is otherwise sound. Do not run a damaged or mismatched cutter, and do not let the word “new” replace a look at the metal.
For more detailed testing breakdowns and top recommendations, check our in-depth guide to residential zero-turn lawn mower guide.
For more hands-on benchmarks and buying recommendations, consult our guides on heavy-duty chainsaw buyer guide, as well as high-CFM commercial leaf blower guide, as well as automated robotic lawn mower guide.
Mechanical safety standards, operational tolerances, and protective gear guidelines align with benchmark specifications established by the American National Standards Institute (ANSI).









