

Quick Answer: How Much Does Lawn Mower Blade Sharpening Cost?
Professional sharpening runs $5–$15 per blade at a small engine repair shop or hardware store. DIY costs $0 if you already own a grinder, or a one-time tool investment of $20–$60 for an entry-level angle grinder and blade balancer. Most rotary blades need sharpening once per season or every 20–25 hours of mowing.

Pros
- Large-size design named in product title
- Sharpening and balancing functions listed
- Listed as a new upgraded version

Pros
- Adjustable 15-to-45-degree range in title
- Sharpening and balancing functions listed

Pros
- Sharpener and balancer functions in title
- 15-to-45-degree adjustable setting listed
- Built for lawn mower blade maintenance
Pros
- Includes replacement gaskets and a 98079-55846 spark plug
- Matches Honda HRR216 and HRS216 lawn mower models
- Designed around the 16100-Z8B-901 carburetor specification
Cons
- Restricted to select Honda GCV160 mower applications
- Installation requires basic mechanical tools and skills
Professional vs. DIY Sharpening Cost at a Glance
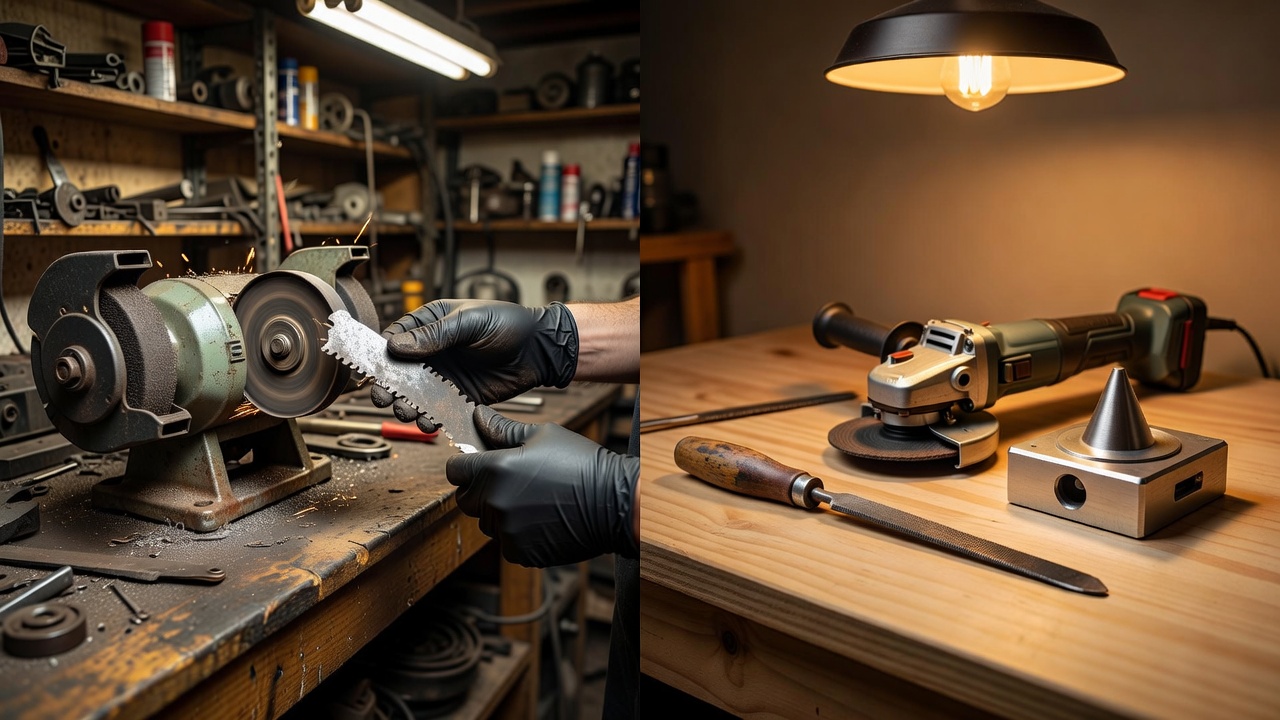
| Method | Cost Per Session | Time | Skill Required |
|---|---|---|---|
| Small engine / hardware shop | $5–$15 per blade | Drop-off; same day or next day | None |
| Angle grinder (DIY) | $0 ongoing (tool: $25–$50) | 15–30 minutes | Low–moderate |
| Bench grinder (DIY) | $0 ongoing (tool: $40–$60) | 10–20 minutes | Low–moderate |
| Hand file (DIY) | $0 ongoing (file: $8–$15) | 30–45 minutes | Low |
| Blade balancer | One-time: $5–$15 | 2–3 minutes | Very low |
What Affects the Price of Professional Blade Sharpening?
The $5–$15 baseline applies to a standard push mower with a single rotary blade in reasonable condition. Several variables shift that number up or down.
Blade Size and Blade Count
A standard 21-inch push mower has one blade. A riding mower or zero-turn may carry two or three blades on a multi-blade deck. Shops typically price per blade, so a three-blade riding mower deck costs $15–$45 total for a full sharpening service. Longer blades — 22 inches and above — may carry a slight surcharge at some shops because they require more passes on the grinder. For additional operational safety benchmarks, see our published testing notes on jbl partybox club 120 vs sony srs xv500.
Blade Condition
A blade with minor dullness but no significant nicks sharpens quickly and sits at the low end of the price range. A blade with deep nicks, rust, or material buildup takes more time and may push the price toward $15 or trigger a recommendation to replace rather than sharpen. For additional operational safety benchmarks, see our published testing notes on jbl partybox club 120 vs sony srs xv500.
Shop Type and Location
Small engine repair shops and local hardware stores (including some Ace Hardware locations) are the most common sharpening sources and tend to offer the lowest rates. Lawn and garden centers attached to larger retailers may charge slightly more. Geographic location matters: urban shops in high-cost markets may charge $10–$20 per blade, while rural small engine shops often hold the $5–$10 range.
Seasonal Timing
Shops are busiest in early spring when homeowners prep mowers for the season. Bringing a blade in mid-summer or fall typically means faster turnaround and occasionally a lower price, since labor demand is lighter. To compare alternative configurations, check our hands-on review of z890 vs x870e motherboard.
DIY Sharpening: Tools, Time, and True Cost
DIY sharpening saves money on every session after the initial tool purchase. The key cost decision is which tool to use — and whether to include a blade balancer, which is not optional if you want to protect the mower’s spindle bearings.
Angle Grinder
An entry-level angle grinder with a grinding disc costs $25–$50 at a hardware store. It removes metal quickly and handles nicks well, making it the fastest DIY method. The tradeoff is control: angle grinders are aggressive, and removing too much metal shortens blade life. Maintain a 20–30 degree sharpening angle — the same bevel angle the blade left the factory with — and work in smooth, even strokes along the cutting edge. Protect eyes with a face shield; metal sparks are unavoidable. Users looking for related component recommendations can explore our marshall stanmore iii vs harman kardon onyx studio 8 breakdown.
Bench Grinder
A bench grinder ($40–$60 for an entry-level 6-inch model) offers more control than an angle grinder because the blade moves against a fixed wheel rather than the other way around. This makes it easier to maintain a consistent 20–30 degree bevel. A bench grinder is also useful for dozens of other sharpening tasks around the garage, making it a better long-term investment for households that maintain multiple tools.
Hand File
A 10-inch mill bastard file costs $8–$15 and is the lowest-cost, slowest, and safest DIY method. It works well for lightly dulled blades with no significant nicks. Clamp the blade in a vise, identify the existing bevel angle, and file in single-direction strokes away from the body. For blades with nicks deeper than 1/16 inch, a file alone is impractical — a grinder is required to remove enough metal efficiently. Before finalizing equipment decisions, refer to our comprehensive dyson v8 cyclone vs bissell featherweight stick comparison.
Blade Balancer: Non-Negotiable Step
After any DIY sharpening session, check blade balance. An unbalanced blade — one that has more metal on one side than the other — vibrates at high RPM. That vibration transfers directly to the spindle, crankshaft, and bearings, causing premature wear and eventual engine damage. A cone-style blade balancer costs $5–$15 and hangs the blade on a center peg; if one side dips, file metal from the heavy side’s non-cutting surface until the blade hangs level. This step adds two to three minutes and eliminates a costly repair risk.
Total DIY Time Per Session
Removing and reinstalling the blade takes 10–15 minutes. Sharpening with a grinder takes 10–20 minutes depending on blade condition. Balancing takes 2–3 minutes. Total realistic time: 25–40 minutes per blade for a confident beginner; experienced DIYers complete the task in under 20 minutes. For broader ecosystem context, read through our operational guide on bissell crosswave hydrosteam vs shark stainforce.
Rotary vs. Reel Mower Blades: Do Costs Differ?
Most homeowners own a rotary mower — the standard push or riding mower where a single horizontal blade spins beneath the deck. All cost and method guidance above applies to rotary blades.
Reel mowers operate differently. A reel mower uses a cylindrical set of helical blades rotating against a fixed bottom blade (the bedknife). Sharpening a reel mower is called backlapping — a lapping compound is applied to the reel blades, and the reel is spun in reverse so blades and bedknife hone each other simultaneously. This requires a backlapping kit and a cordless drill or dedicated backlapping motor.
Reel Mower Sharpening Cost
- Professional backlapping service: $25–$60 depending on reel width and condition — significantly more than rotary sharpening because the process is more involved.
- DIY backlapping kit: $15–$30 one-time purchase for the lapping compound and drive adapter. Time required: 30–60 minutes per session.
- Bedknife replacement (when the fixed blade wears out): $20–$80 depending on mower brand and reel width.
Do not attempt to sharpen a reel mower blade with an angle grinder or bench grinder. The blade geometry requires the backlapping method; individual blade grinding destroys the reel-to-bedknife relationship and makes the mower cut worse, not better.
How Often Should You Sharpen a Lawn Mower Blade?
The standard guidance from small engine authorities and university extension turf programs is to sharpen a rotary mower blade every 20–25 hours of mowing use. For a homeowner mowing a typical suburban lot (roughly one hour per session, once a week during the growing season), that equates to once every four to six weeks during peak season, or at minimum, once at the start of each mowing season.
Season-Based vs. Hours-Based Scheduling
- Once-a-season minimum: Acceptable for small lawns mowed infrequently on clean, debris-free turf. Sharpen at the start of the season so the first cut is clean.
- Every 20–25 hours: Correct for lawns of a quarter-acre or more, lawns with sandy soil (abrasive to blade edges), or any mowing that routinely contacts gravel, roots, or hard debris.
- After any debris strike: If the blade hits a rock, root, or thick stick, inspect and sharpen immediately regardless of elapsed hours. A single hard impact can nick the cutting edge enough to tear grass on the next pass.
Reel Mower Frequency
Reel mower blades need backlapping more frequently than rotary blades — typically every 8–10 hours of use for fine-bladed turf grasses — because the cutting action relies on precise blade-to-bedknife contact. A reel mower that cuts by tearing rather than snipping is overdue for service.
Signs Your Blade Needs Sharpening Now
Rather than tracking hours exactly, watch for these lawn and mechanical signals that the cutting edge has degraded.
Lawn Symptoms
- Torn or ragged grass tips: The clearest sign. A sharp blade severs grass cleanly; a dull blade tears it, leaving a frayed, whitish-brown tip visible within 24–48 hours. University extension turfgrass research confirms that torn grass tips create open wounds that increase susceptibility to fungal disease and moisture stress.
- Uneven cut height: Dull blades deflect rather than cut, causing inconsistent cutting height across a single pass.
- Lawn looks gray or brown shortly after mowing: Shredded tips desiccate quickly and discolor — the lawn looks stressed within a day of mowing even when watered correctly.
- Mower must pass over the same area twice: If sections of grass are missed or standing upright after a full pass, the blade is deflecting stems rather than cutting them.
Blade Symptoms
- Visible nicks or flat spots on the cutting edge: Run a gloved finger along the blade’s non-cutting spine side — if you can see or feel flat spots where the bevel should be, the edge is dull or damaged.
- Increased mower vibration: Can indicate an unbalanced blade (often caused by uneven wear) or a bent blade. Both require immediate inspection.
- Higher fuel consumption: A dull blade makes the engine work harder to power through grass it should be cutting cleanly. Noticeable fuel increase over a season is a sign the blade has been neglected.
When to Replace Rather Than Sharpen
Sharpening has a lifespan. Repeatedly removing metal to restore an edge eventually thins the blade to the point where the cutting section can no longer hold an edge safely. Replacement blades for most push and riding mowers cost $10–$40 depending on brand and blade length — often less than two professional sharpening sessions — making replacement straightforward when a blade reaches end of life.
Replace the Blade When You See These Conditions
- Cracks or fractures anywhere on the blade body: A cracked blade is a projectile hazard at operating RPM. Replace immediately; do not sharpen.
- Bent blade: A blade bent from a hard impact cannot be straightened safely at home. Metal fatigue at the bend point makes re-straightened blades unreliable under load. A bent blade also causes severe vibration that damages crankshaft bearings. Replace it — a new OEM or aftermarket blade costs $10–$40 and restores the mower to safe operation.
- Deep gouges exceeding 1/4 inch: Removing enough metal to eliminate a deep gouge thins the blade disproportionately. If the gouge cannot be filed out in one or two sessions without visibly thinning the blade, replacement is more cost-effective.
- Blade thickness worn thin: Hold the blade against a straight edge and inspect the cutting section in profile. If the blade has been sharpened so many times that the cutting section has lost its original thickness and the bevel angle cannot be maintained, the blade is at end of life.
- Corrosion through the blade body: Surface rust is normal; pitting or corrosion that penetrates the blade’s cross-section compromises structural integrity.
Replacement Cost Context
A replacement rotary blade for a standard push mower runs $10–$20 for aftermarket and $15–$40 for OEM (original equipment manufacturer) blades. Riding mower blades, particularly mulching blades or blades for wide-deck zero-turns, range from $15–$40 per blade. Buying a two- or three-blade set for a riding mower typically costs $30–$80 for a full deck replacement.
Common Questions on How Much To Sharpen A Lawn Mower Blade Answered
How much does it cost to get a lawn mower blade sharpened at a hardware store?
Most hardware stores and small engine shops charge $5–$15 per blade. Some Ace Hardware locations offer sharpening services in this range. Call ahead to confirm availability — not every location provides the service, and seasonal demand affects wait times.
Can I sharpen a lawn mower blade without removing it?
Technically possible with a rotary tool or specialized blade-sharpening drill attachment, but not recommended. Sharpening in place prevents you from checking balance, cleaning debris from the blade hub, or inspecting the blade for cracks. Remove the blade — disconnect the spark plug wire first — and sharpen it on a workbench for a safe, accurate result.
What angle should I sharpen a lawn mower blade at?
The standard sharpening angle for most rotary mower blades is 20–30 degrees, matching the original factory bevel. Most blades leave the factory closer to 25–30 degrees. Match the existing bevel rather than imposing a new angle — changing the angle significantly affects how the blade interacts with grass and how quickly the edge dulls.
Is a dull lawn mower blade bad for the lawn?
Yes. A dull blade tears grass tissue rather than cutting it cleanly, leaving ragged tips that turn brown and create entry points for fungal pathogens. Turfgrass extension research from universities such as Purdue and Penn State documents the link between torn grass tips and increased disease pressure, particularly from dollar spot and brown patch. Clean cuts heal faster, retain moisture better, and produce visually healthier turf.
For more detailed testing breakdowns and top recommendations, check our in-depth guide to residential zero-turn lawn mower guide.
For more hands-on benchmarks and buying recommendations, consult our guides on heavy-duty chainsaw buyer guide, as well as high-CFM commercial leaf blower guide, as well as durable ride-on lawn tractor guide, as well as automated robotic lawn mower guide.
Mechanical safety standards, operational tolerances, and protective gear guidelines align with benchmark specifications established by the American National Standards Institute (ANSI).









