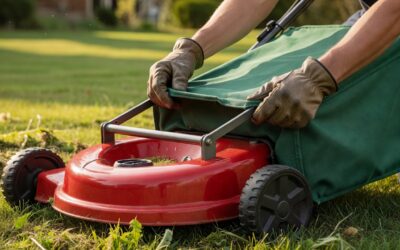
Direct Answer: Locate the height adjustment mechanism on your mower — a wheel-mounted lever on most walk-behind models, a deck-lift pedal or side lever on riding mowers, or a deck crank or electric lift switch on zero-turns — then move it to the notch or setting that matches your target cutting height, typically marked in inches or a numbered scale. Always perform the adjustment with the engine off and the mower parked on a flat, level surface.
Identify Your Mower Type Before Adjusting
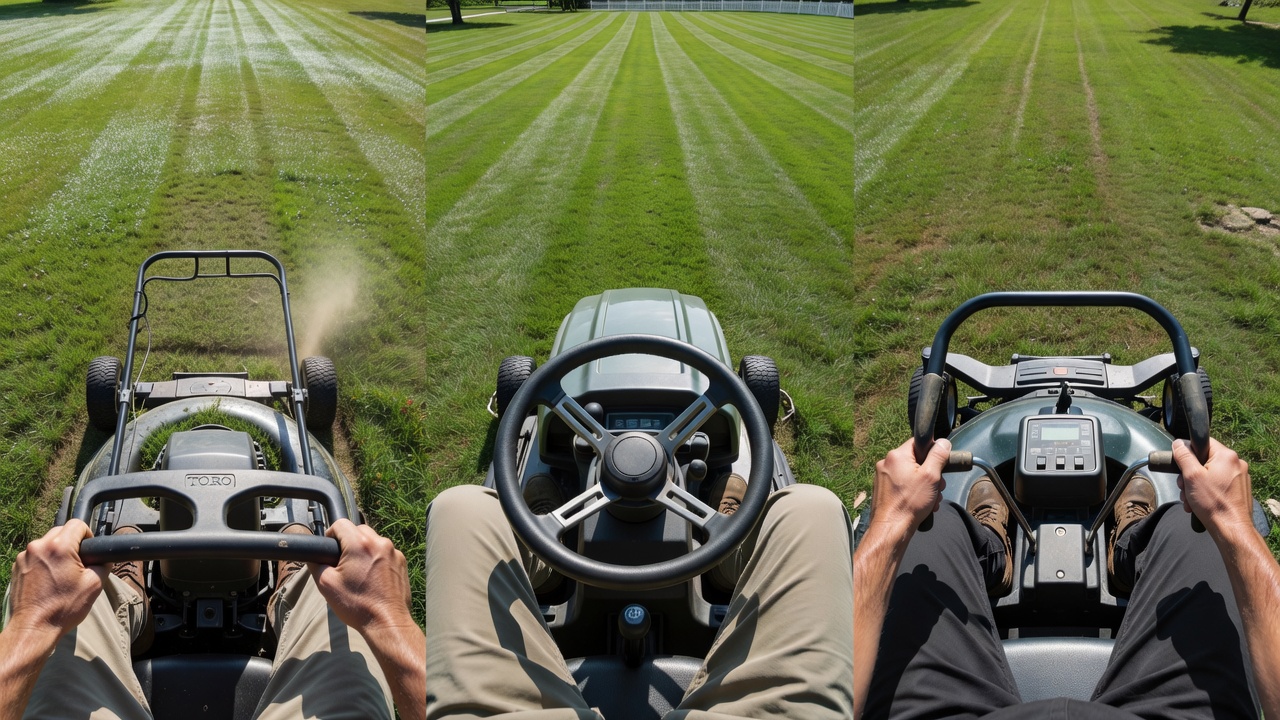
The adjustment mechanism differs significantly by mower category. Using the wrong procedure wastes time and risks an uneven cut. Use this quick decision tree to go directly to the right section:
- You walk behind it and push or self-propel it → Walk-Behind Mower section below.
- You sit on it and it has a steering wheel → Riding Mower section below.
- You sit on it and it has two lap bars (no steering wheel) → Zero-Turn Mower section below.
Gas vs. electric/battery walk-behinds: Battery-powered mowers (EGO, Greenworks, Ryobi) commonly use a single-point adjustment lever or dial at the center of the deck that changes all four wheels simultaneously. Most gas walk-behinds use individual per-wheel levers. Both are covered in the walk-behind section.
How to Adjust Cutting Height on a Walk-Behind Mower
Walk-behind mowers are the most common type, and their wheel height bracket system is the most varied by brand. The principle is identical across manufacturers: a lever on each wheel (or a single central lever) clicks into a notched bracket to set deck height.
Per-Wheel Lever System (Most Gas Walk-Behinds)
- Turn the engine off and wait for all moving parts to stop completely. Never adjust height with the blade spinning.
- Park on a flat, hard surface such as a driveway or garage floor. An uneven surface produces an inaccurate setting.
- Locate the wheel height lever. On most gas walk-behinds, a small lever or tab sits just inside or behind each wheel, clipped into a toothed or notched bracket on the wheel axle housing. Brands mount these levers in slightly different positions — check near the top, rear, or inner face of each wheel assembly.
- Squeeze or press the lever to disengage it from its current notch. Some designs require you to push the lever inward; others require lifting. The lever should release with moderate hand pressure.
- Move the wheel up or down to the desired notch. Higher notch position = higher wheel = higher deck = taller cut. Lower notch = shorter cut. Most mowers mark positions in 0.25-inch increments, ranging from roughly 1 inch to 4 inches.
- Release the lever so it clicks firmly into the new notch. Tug the wheel gently to confirm it is locked. A lever that does not click indicates misalignment — reposition and try again.
- Repeat on all four wheels, setting each to the identical notch. Mismatched wheel heights produce a visibly uneven cut.
- Verify by measuring deck-to-ground clearance with a ruler or tape at the front and rear of the deck. Front should be 1/8 to 1/4 inch lower than the rear for a clean discharge; both sides should match.
Single-Point Adjustment System (Battery/Electric Mowers)
- Power off the mower and remove the battery key or disconnect power if applicable.
- Locate the single adjustment lever or dial. On most battery walk-behinds it sits at the center-rear of the deck, or on the left side of the deck near the handle. Some models use a large rotary dial with numbered positions.
- Pull the lever outward or rotate the dial to the desired height setting. Single-point systems move all four wheel brackets simultaneously via a linkage rod running across the deck.
- Confirm the lever or dial is fully seated in the new position. A half-engaged lever will allow the deck to shift under load.
- No per-wheel verification is required on a true single-point system, but check that the deck sits level side-to-side by eye before mowing.
Why won’t the lever click into place? Bent wheel brackets, grass and debris packed into the notch, or a worn lever tab are the three most common causes. See the troubleshooting section at the end of this article.
How to Adjust Cutting Height on a Riding Mower
On a riding mower, height is adjusted at the cutting deck, not at the wheels. The rear wheels and drive axle are fixed; the deck hangs from the frame on adjustment linkages. A common user error is looking for wheel levers — they do not exist on most riding mowers for height purposes.
Deck-Lift Pedal System
Many riding mowers (particularly entry-level and mid-range models from brands such as Husqvarna, Cub Cadet, and Troy-Bilt) use a foot-operated deck-lift pedal combined with a height-selector dial or notch plate.
- Stop the mower on flat ground and disengage the blade (PTO off). The engine can remain running for this adjustment, but the blade must be disengaged.
- Locate the deck height dial or notch selector. This is typically a large rotary knob or a numbered quadrant on the right side of the operator console or fender deck, labeled in inches (e.g., 1 through 4.5).
- Set the dial to your desired cutting height. Turn clockwise or counterclockwise to the target number.
- Use the deck-lift pedal (left foot, on most models) to raise the deck slightly, then allow it to settle to the new dialed position. Some designs require pressing the pedal down to disengage the current lock before the dial setting takes effect.
- Release the pedal slowly. The deck drops to and locks at the new height.
- Visually confirm the deck is level side-to-side before engaging the blade. Adjust the deck leveling linkage if one side hangs lower (see leveling note below).
Side-Mounted Lift Lever System
Older and some commercial-grade riding mowers use a single lift lever on the right side of the seat that moves through a notched arc.
- Disengage the blade (PTO off) and stop on flat ground.
- Grip the lift lever and press the release button or squeeze the grip to disengage from the current notch.
- Pull lever rearward to raise the deck, or push forward to lower it, moving to the desired notch. Release into the notch.
- Confirm the lever is fully seated — the deck should not rock or shift when you push down on it by hand.
Deck leveling after height adjustment: If the cut is uneven side-to-side after adjustment, the deck may need re-leveling via the left or right deck hanger adjustment nuts. Consult your operator’s manual for the specific linkage location; the process involves measuring deck blade-tip height on each side and turning the hanger nut until both sides are equal.
Can you adjust height while the riding mower is running? You can change the dial or move the lift lever while the engine runs, but the blade must be disengaged. Never reach under the deck while the engine is running under any circumstances.
How to Adjust Cutting Height on a Zero-Turn Mower
Zero-turn mowers use a deck crank (manual) or electric deck lift switch rather than foot pedals. The crank or switch raises and lowers the entire cutting deck on a set of parallel linkage arms.
Manual Deck Crank System
- Disengage the blade (PTO off) and park on flat ground.
- Locate the deck crank. On most zero-turns it is a round hand crank mounted to the right-side frame rail or to the front of the operator platform, connected by a rod to the deck linkage.
- Turn the crank clockwise to raise the deck, counterclockwise to lower it (verify direction on your model — some brands reverse this). Each full turn typically moves the deck approximately 1/4 inch.
- Read the height indicator. A pointer and scale (marked in inches or millimeters) adjacent to the crank shows current deck position. Set to your target height.
- Confirm the deck is locked at the new setting — the crank should not turn freely when you release it. If it spins, the locking pin or detent is not engaged; consult your manual.
Electric Deck Lift System
Higher-end zero-turns (common on commercial and prosumer models from Scag, Ferris, and Gravely) use an electric actuator controlled by a rocker switch or digital panel.
- Disengage the blade and hold the machine stationary on flat ground.
- Press and hold the deck-raise or deck-lower switch until the height indicator on the panel reaches your target setting. Release the switch — the actuator locks the deck in position automatically.
- Cross-check with the physical indicator rod (a metal rod with measurement marks that moves with the deck) if your model has one, to confirm the electronic reading is accurate.
Adjust zero-turn height with the deck disengaged (PTO off) at all times. Raising or lowering the deck under blade load puts abnormal stress on the linkage arms and can bend the adjustment hardware over time.
Recommended Cutting Heights by Grass Type
Setting the right height matters as much as knowing how to set it. Cutting too short stresses the turf, reduces root depth, and promotes weed invasion by opening the canopy. The one-third rule — never remove more than one-third of the grass blade length in a single mowing pass — applies to every grass species and every mower type.
| Grass Species | Recommended Cutting Height (inches) | Notes |
|---|---|---|
| Bermuda grass | 0.5 – 1.5 | Tolerates very low cut; scalp risk below 0.5 in |
| Zoysia grass | 1.0 – 2.0 | Cut lower in warm season; raise in heat stress |
| Kentucky bluegrass | 2.5 – 3.5 | Raise to 3.5 in during summer heat |
| Tall fescue | 3.0 – 4.0 | Higher height improves drought tolerance |
| Fine fescue | 2.5 – 3.5 | Shade-tolerant; do not cut below 2 in |
| St. Augustine grass | 2.5 – 4.0 | Raise in shade; lower end for dense sun lawns |
| Centipede grass | 1.0 – 2.0 | Scalp risk if cut below 1 in |
| Perennial ryegrass | 1.5 – 2.5 | Often mixed with bluegrass; match the blend |
Seasonal adjustment: Raise cutting height by 0.5–1 inch during summer heat stress periods for cool-season grasses. Lower back to the recommended range in fall when temperatures drop and growth resumes.
The one-third rule in practice: If your target height is 3 inches, mow before the grass exceeds 4.5 inches. If grass has grown too tall, step down to the target height over two or three mowing sessions, not in a single pass.
Common Height Adjustment Problems and Fixes
Lever Is Stuck and Won’t Move
- Cause: Dried grass clippings, rust, or debris packed into the notch bracket.
- Fix: Spray penetrating lubricant (such as WD-40) into the bracket and lever pivot, wait 5 minutes, then work the lever back and forth. Clear debris from the notch with a stiff brush or flathead screwdriver. Wipe dry and apply a thin coat of white lithium grease to the bracket teeth to prevent recurrence.
Mower Still Cuts Unevenly After Adjustment
- Cause 1: Walk-behind — one or more wheels set to a different notch than the others.
- Fix 1: Check all four wheel levers individually. Reset any that do not match.
- Cause 2: Riding or zero-turn — deck is out of level (one side hangs lower than the other).
- Fix 2: Measure blade-tip height on each side with a ruler. Adjust the deck hanger or linkage arm on the low side per the operator’s manual until both sides are within 1/8 inch of each other.
- Cause 3: All mower types — a worn, bent, or unbalanced blade produces an uneven cut regardless of deck height setting.
- Fix 3: Remove and inspect the blade. Replace a bent blade; sharpen and rebalance a dull one.
Deck Does Not Lock at the New Setting
- Cause: Worn detent pin, broken notch tab on the bracket, or a stripped crank mechanism (zero-turn).
- Fix: Inspect the bracket for cracked or broken notch teeth. A worn lever tip or detent ball that no longer provides resistance requires part replacement — the specific part number is listed in the mower’s parts diagram under the deck or axle assembly section. Continuing to mow with an unlocked deck allows the height to drift mid-cut.
Can a Worn or Bent Blade Affect Cutting Height?
Yes. A blade bent downward on one end effectively lowers the cut on that side of the deck, producing a stripe or scalp mark even when the deck height is correctly set. A blade with unequal tip length due to uneven wear cuts at two different effective heights simultaneously. Inspect the blade whenever an uneven cut persists after confirming all height settings are correct.
Frequently Asked Questions
Do I need to adjust all four wheels on a walk-behind mower?
Yes, on per-wheel lever systems all four wheels must be set to the same notch. Setting only the rear wheels — a common shortcut — tilts the deck forward and scalps the front strip of each pass. Single-point systems on battery mowers move all four wheels automatically, so no individual adjustment is needed.
What is the safest cutting height for a lawn mower?
For most cool-season grasses, 3 to 3.5 inches is the most widely recommended default. This height keeps the canopy dense enough to shade out weed seeds, supports deeper root growth, and stays within the one-third rule for a weekly mowing schedule. Warm-season grasses such as Bermuda and Zoysia thrive at lower settings — see the height table above for species-specific ranges.
Can I adjust the cutting height on a riding mower while it is running?
The engine can remain running while you change the deck height dial or move the lift lever, but the blade engagement (PTO) must be switched off first. Never reach under the deck to inspect or adjust anything while the engine is running under any circumstances.
Why does my mower cut lower on one side even after I adjusted the height?
The most likely cause is an unlevel cutting deck. On walk-behinds, verify that all wheel levers are in the same notch. On riding and zero-turn mowers, the deck hanger linkage on one side may need adjustment — measure blade-tip height on both sides with the engine off, and turn the hanger adjustment nut on the low side until both measurements match within 1/8 inch. A bent blade is the other common cause; inspect and replace if necessary.