

Quick Answer: How To Change A Lawn Mower Blade?
To change a typical rotary lawn mower blade, first make the machine unable to start: pull the spark-plug boot on a gas mower or disconnect the battery or power cord on an electric model, then wait until the blade is fully stopped. Wear sturdy gloves and eye protection, stabilize the mower only as the owner’s manual allows, lock the blade…

Pros
- Large-size design named in product title
- Sharpening and balancing functions listed
- Listed as a new upgraded version

Pros
- Adjustable 15-to-45-degree range in title
- Sharpening and balancing functions listed

Pros
- Sharpener and balancer functions in title
- 15-to-45-degree adjustable setting listed
- Built for lawn mower blade maintenance
Pros
- Includes replacement gaskets and a 98079-55846 spark plug
- Matches Honda HRR216 and HRS216 lawn mower models
- Designed around the 16100-Z8B-901 carburetor specification
Cons
- Restricted to select Honda GCV160 mower applications
- Installation requires basic mechanical tools and skills
A lawn mower blade is a spinning knife. Changing it is ordinary home maintenance on many walk-behind rotary mowers, but the job is unforgiving if the machine can still start, the deck is unstable, or the new blade is the wrong part facing the wrong way. This guide covers the usual sequence for a common residential walk-behind rotary mower and flags the points where riding mowers, robotic units, battery packs, and multi-blade decks need a different procedure. Exact fasteners, washer stacks, blade orientation marks, and tightening specs belong in the owner’s manual for your model. Use this article to understand the job, then follow that manual whenever the two disagree.
Make the mower safe before you touch the blade
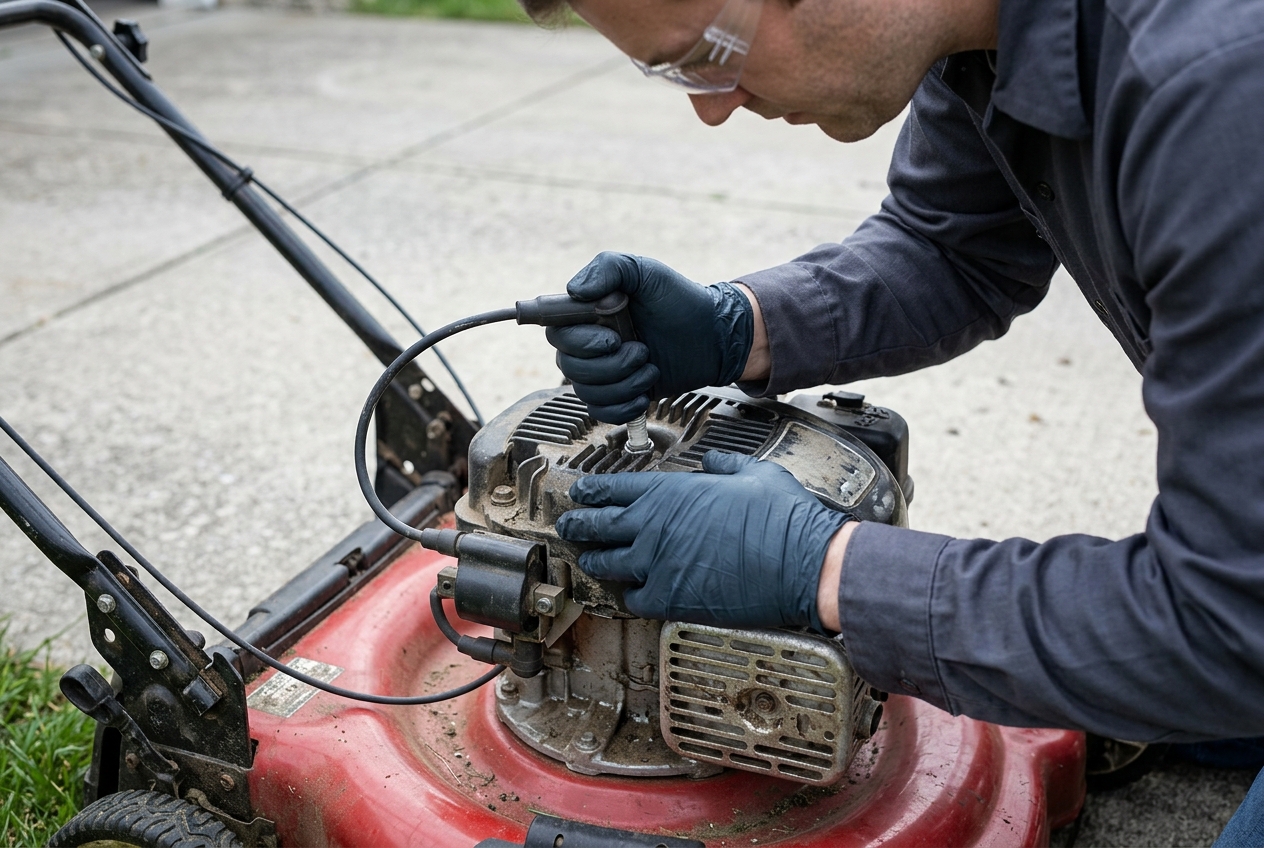
Two hazards dominate this job. The first is accidental start: a gas engine can fire if the blade is turned and the ignition is still live, and an electric motor can spin the moment power is present. The second is the blade itself. A stopped blade is still sharp enough to cause severe cuts. Treat it as a cutting tool the entire time your hands are under the deck.
On a typical gas walk-behind mower, disable ignition by pulling the spark-plug boot off the plug so it cannot snap back into place. Do not rely on the throttle, a stop switch, or the operator-presence bar alone. If the machine has a blade-brake clutch or other interlock, leave those systems intact. Never tape, wedge, or bypass a safety control to make the work easier. Before finalizing equipment decisions, refer to our comprehensive jbl partybox club 120 vs sony srs xv500 comparison.
On a battery or corded electric mower, remove the power source. Unplug a corded model at the machine if you can, not only at the wall. On a battery model, take out the pack or use the disconnect method the maker specifies, and remove the key if the mower has one. Battery packs can remain energized after the handle switch is off, so the pack itself has to be isolated. Follow any extra wait or lock steps in the manual rather than guessing how long residual energy lasts. Before finalizing equipment decisions, refer to our comprehensive jbl partybox club 120 vs sony srs xv500 comparison.
Wait until the blade is fully stopped before you reach under the deck. Wear eye protection and gloves that can stand up to a sharp edge. Long sleeves and closed shoes help, and keep loose clothing and jewelry away from the spindle. If someone else is nearby, make it obvious that the machine is being serviced so no one reconnects the boot or battery while you are working.
Confirm the mower type and when to use the owner’s manual
The sequence below is written for a common residential walk-behind rotary mower: one cutting blade bolted under a stamped deck, driven by a vertical engine or motor. That layout is widespread, but it is not universal. Fastener direction, washer or adapter order, torque, whether you may tip the deck, and how multiple blades line up all vary by model. Those details are almost always model-specific. For broader ecosystem context, read through our operational guide on z890 vs x870e motherboard.
Stop and open the owner’s manual—or take the machine to a shop—when any of the following is true:
- The mower is a riding mower, rear-engine rider, zero-turn, or commercial unit whose deck is large, heavy, or hung on linkages.
- It is a robotic mower with sensors, charging contacts, and proprietary blade fasteners.
- The deck has two or more blades that can collide if they are mismatched or out of time.
- You cannot identify the blade bolt, adapter, or orientation marks.
- The spindle wobbles, the bolt is damaged, or the replacement does not match the mounting pattern.
Do not assume a rule from one brand applies to another. Some mowers use a reverse-thread blade bolt; others do not. Some decks may be tipped a certain way; others must stay level. This article cannot replace the owner’s manual for torque, orientation, or tipping rules, and it is not a promise that a do-it-yourself swap is appropriate on every gas, electric, riding, or robotic machine. For troubleshooting and reliability insights, consult our in-depth marshall stanmore iii vs harman kardon onyx studio 8 report.
Tools and a compatible replacement blade
You do not need a full shop for a typical walk-behind job, but the tools have to fit. Common items include a socket or wrench that matches the blade bolt, a short extension if the bolt sits in a recess, a scrap block of wood stout enough to lock the blade against the deck, gloves, eye protection, and a scraper for packed grass. A flashlight helps you see washers and stamps. A camera or a quick sketch is useful for recording the hardware stack before anything comes apart.
Match the replacement to the machine, not to color or a vague “universal” claim. Measure the old blade’s cutting length, look at the center hole or star pattern, and note whether the blade is a standard, mulching, or high-lift design. The new blade must be intended for that deck size and mounting style. A hole that is close but not the same is not close enough. Do not drill, file, or grind a mounting hole so a mismatched blade will fit. Readers comparing setup options can review our technical analysis on dyson v8 cyclone vs bissell featherweight stick.
Mulching, high-lift, and standard blades are not interchangeable just because they share a length. A mulching blade is shaped to recut clippings. A high-lift blade is meant to move air and discharge more aggressively. Mixing styles on a multi-blade deck, or fitting a blade that was never designed for that housing, can change airflow, increase vibration, or cause contact with the deck or a neighboring blade. If the old blade’s type is unclear, use the parts information for your model rather than guessing from appearance.
Inspect the blade bolt, washers, and any blade adapter before you decide to reuse them. Hardware should go back only if it is undamaged: threads intact, no stretching, no rounded head, no cracked or missing adapter. Some makers specify a new bolt when the blade is changed. If your manual says that, replace the fastener. Do not substitute a random bolt from a hardware drawer; grade, length, shoulder, and thread direction all matter on a spinning cutter. For complementary field maintenance guidelines, examine our breakdown of bissell crosswave hydrosteam vs shark stainforce.
Access the underside of the deck safely
You need a stable view of the spindle, not a precarious crawl space. For many walk-behind gas mowers, the manual allows tipping the machine with the air-filter or carburetor side kept upward so fuel and oil are less likely to run into the filter, carburetor, or cylinder. That is common guidance, not a universal rule. If your manual forbids tipping, or specifies a different side or a service position, follow the manual. Drain or run the tank down only if the maker tells you to; do not invent a fuel level.
Set the mower on a firm, level surface. Engage the parking features the machine actually has, and chock wheels if the deck could roll. If you raise a side, support the machine so it cannot drop onto your hands. Never work under a mower held only by its handle, a single jack, stacked bricks, or loose blocks. Those props can slip, and a falling deck can crush or cut.
A riding-mower deck is a different problem. Many riders need the deck lowered to a service height or removed entirely. Do not crawl under a raised rider supported by an unstable jack. If you are not set up to support that deck the way the manufacturer describes, this is a shop job. Exact jack points, lift ratings, and deck-removal sequences are model-specific and are not covered here.
Scrape packed grass and mud away from the blade bolt and adapter before you put a wrench on anything. Debris hides washers, orientation stamps, and damaged threads. Work so clippings fall away from your face, and keep the spark-plug boot or battery well out of the way so they cannot be knocked back into service by accident.
Remove the old blade and keep the hardware in order
Lock the blade so it cannot spin while you turn the bolt. A widely used method on a walk-behind rotary mower is to brace a wood block between the blade and the deck rim so the cutting edge cannot rotate into your hand. Keep the block on the deck structure, not on a thin baffle you might bend. Specialty blade holders exist; they are optional, not required for every machine.
Before the bolt moves, look for markings on the deck or bolt head that indicate thread direction. Some mowers use reverse-thread blade bolts. The only safe confirmation is the owner’s manual or those on-machine markings. If you force the bolt the wrong way, you can round the head or damage the spindle. When direction is unclear, stop and check the documentation rather than applying more force.
Loosen the center bolt with a socket that fully seats on the head. As the stack comes apart, keep every piece in order: bolt, any lock washer or flat washer, the blade, and the blade adapter or driver if it is removable. Photograph the assembly or lay the parts out in a line so they go back the same way. Note which face of the blade was toward the grass, which way the cutting edges led in rotation, and where any lift wings or “this side down” stamps sat.
If the bolt is rusted or stubborn, penetrating oil and a better-fitting tool are reasonable first steps. Give the oil time to work and keep the blade blocked. Do not heat the spindle, grind the bolt, or use an impact setting that can twist or mushroom the shaft. A rounded or seized fastener is a reason to take the mower to a shop rather than risk the part that drives the blade.
Inspect the blade, spindle, and mounting hardware
Once the blade is off, decide whether a simple swap is still the right job. Replace the blade rather than trying to straighten or keep using it if it is bent, cracked, deeply notched, or worn so thin that the cutting area has lost its shape. Hammering a bent blade “back to flat” does not restore its strength or balance. Sharpening is a separate maintenance task. It can restore an otherwise sound edge; it does not fix structural damage or a blade that already vibrated badly in use.
Look at the spindle, adapter, and bolt with the same skepticism. Stop and get service if you see wobble at the shaft, damaged or stripped threads, a cracked or missing adapter, or a bolt that is stretched, bent, or rounded. Those are not cosmetic issues. A loose or damaged mount can let the blade come off at speed. Do not diagnose bearings from a single glance or invent a go/no-go measurement; if the shaft does not turn smoothly and sit true, treat it as unsafe to ignore.
Clean the mounting faces so the new blade can sit flat. Grass packed under an adapter can tilt the blade and cause vibration even when the part numbers match. Check that any drive lugs, stars, or pins on the adapter are intact. If the adapter is worn so the blade can shift, replace that part rather than hoping the bolt will clamp it still.
Install the replacement blade the right way around
Blade orientation matters. Cutting edges must lead in the direction the spindle turns, and lift faces or wings must point the same way as on the blade you removed. Many blades have stamps such as a grass-side mark, a model number on one face, or formed sails that cup toward the deck. Match the old blade and those markings. An upside-down blade may still bolt on, then cut poorly, scrape the deck, or throw debris in unexpected ways.
Set the new blade flat on the spindle or adapter so the center hole or star pattern fully engages. It should not rock. If it will not sit flush, stop. The part is wrong, something is still packed on the mount, or the adapter is damaged. Reassemble washers and adapters in the order you recorded. Do not leave out a washer that was there, and do not add extras “for tightness.”
Start the bolt by hand to avoid cross-threading. Then tighten it securely while the blade is blocked again so it cannot spin. The fastener must be fully seated. If the owner’s manual gives a torque value, that figure is the one to use, with a torque wrench if you have one. This article does not supply a numeric torque, a “quarter-turn past snug” shortcut, or a required threadlocker. Those choices are model-specific. An under-tight bolt can back out. An over-tight bolt can stretch, seize, or damage the spindle.
Spin the blade by hand only after the bolt is secure and your fingers are clear of the edge, and only with power still disconnected. It should clear the deck, baffles, and any neighboring blade path. If it scrapes or looks off-center, remove it and find the mismatch before you restore power.
Checks before you mow again
Before anything is reconnected, look under the deck one more time. Confirm that the blade is the right way around, every washer and adapter is present, the bolt head is fully seated, and no tools, blocks, or scrapers remain in the housing. Check that the deck is back on its wheels or hangers and is stable. Return any covers or chute parts you removed.
Reconnect power last. On a gas mower, push the spark-plug boot fully onto the plug until it seats. On an electric or battery model, install the pack or cord only after the deck is clear and the controls are off. Restore the key if you removed one. Do not defeat a blade brake or operator-presence control to test the machine.
Do a short first run in a clear area with no bystanders, pets, or loose debris. Listen and feel for vibration, scraping, or an unusual wobble. If anything sounds or feels wrong, shut the mower down, disable it again the same way you did at the start, and recheck the blade and bolt. A fastener recheck after that first use is reasonable common practice, especially if the hardware was dirty or the bolt was difficult to tighten. There is no single required minute count or mowing distance that applies to every machine; the point is to catch a loose or misinstalled blade early.
Special cases: battery, riding, robotic, and multi-blade decks
Battery-pack and corded electric mowers
Electric walk-behind mowers often use a similar center-bolt blade, but the energy source is different. Remove the battery pack or unplug the cord before you tip the deck. Use the maker’s key-removal and disconnect steps. Do not assume the handle switch isolates the motor. Avoid pinching the harness when you tip the housing, and keep metal tools away from exposed battery terminals. If the manual describes a wait after disconnect, follow that instruction; do not invent a timer of your own.
Riding mowers
A riding-mower blade change usually differs in access and in count. The deck may need to be lowered or removed. There is often more than one blade, and those blades may overlap. They typically must stay matched in style and installed so their paths cannot collide. Hardware and spindles are duplicated, so a mistake on one corner can still wreck the deck. If you cannot support the deck securely or the manual calls for timing or specific blade sets, treat this as a job for a technician.
Robotic mowers
Robotic mowers are not the same job. They often use small pivoting blades on a disc, different fasteners, lift sensors, and charging contacts. The safety interlocks are part of how the machine is allowed to run unattended. Do not bypass those systems, improvise a walk-behind-style wood-block lock, or substitute household screws. Use the maker’s blade kit and procedure, or have the unit serviced.
Dual blades, triple blades, and blade-brake clutches
On multi-blade decks, unmatched lengths, mixed cutting styles, or a reversed blade can cause blades to hit each other. Change blades as a set when the maker says they are paired, and keep each blade on the spindle it came from unless the manual says they are identical. Blade-brake clutches and similar systems add extra parts around the spindle. Do not disassemble a clutch to reach a bolt unless the documentation walks you through it. Leave those assemblies alone if you only meant to swap a cutter.
Troubleshooting after a blade change
Vibration after a swap is a warning, not a character trait of a “stiff” new blade. Common causes include a bent blade, a missing washer, a blade that is upside down or not seated on the adapter, packed debris under the mount, or a bolt that is not fully tight. Shut the mower down and disable it before you investigate. Scraping or a sudden change in cut quality points to the same list. None of those symptoms is a complete diagnosis on its own, and none of them should be “run in” in hopes they fade.
If the new blade will not sit flat or the hole does not match, return it. Do not enlarge the hole, stack extra washers to take up slack, or grind the adapter. A blade that almost fits can still come loose. Check that you bought the length and mounting pattern for your deck, not merely a blade sold for a similar cutting width.
If the old bolt will not break free after penetrating oil and a proper-fitting tool, stop. Heat, cutting, or grinding around the spindle can destroy the part that everything else bolts to. A shop can extract a seized fastener with less risk to the shaft. The same advice applies if you round the head: continuing at home often makes the repair larger.
A correct blade change restores a clean, even cut only if the rest of the mower is sound. Dull neighboring blades, a warped deck, low tire pressure on one side, or a bent crankshaft from an earlier impact can still leave a poor finish. Do not expect a new cutter to hide those problems, and do not keep mowing through heavy vibration.
Mechanical safety standards, operational tolerances, and protective gear guidelines align with benchmark specifications established by the American National Standards Institute (ANSI).
For practical maintenance advice and setup requirements, check our guide on does a lawn mower have an alternator.
A short recap of the safe sequence
Changing a lawn mower blade is a safety-first job: isolate power, protect your hands and eyes, support the machine the way the manual allows, lock the blade, and keep every washer and adapter in order. Fit a replacement that matches the mounting pattern and cutting style, face it the same way as the old blade, and tighten the blade bolt securely using any torque the owner’s manual requires. Inspect the spindle and hardware, then test in a clear area and recheck the fastener if anything feels loose or rough. When the mower is a rider, a robot, a multi-blade deck, or a machine with a damaged spindle, stop improvising and use the documentation or a qualified shop.
For more hands-on benchmarks and buying recommendations, consult our guides on heavy-duty chainsaw buyer guide.









