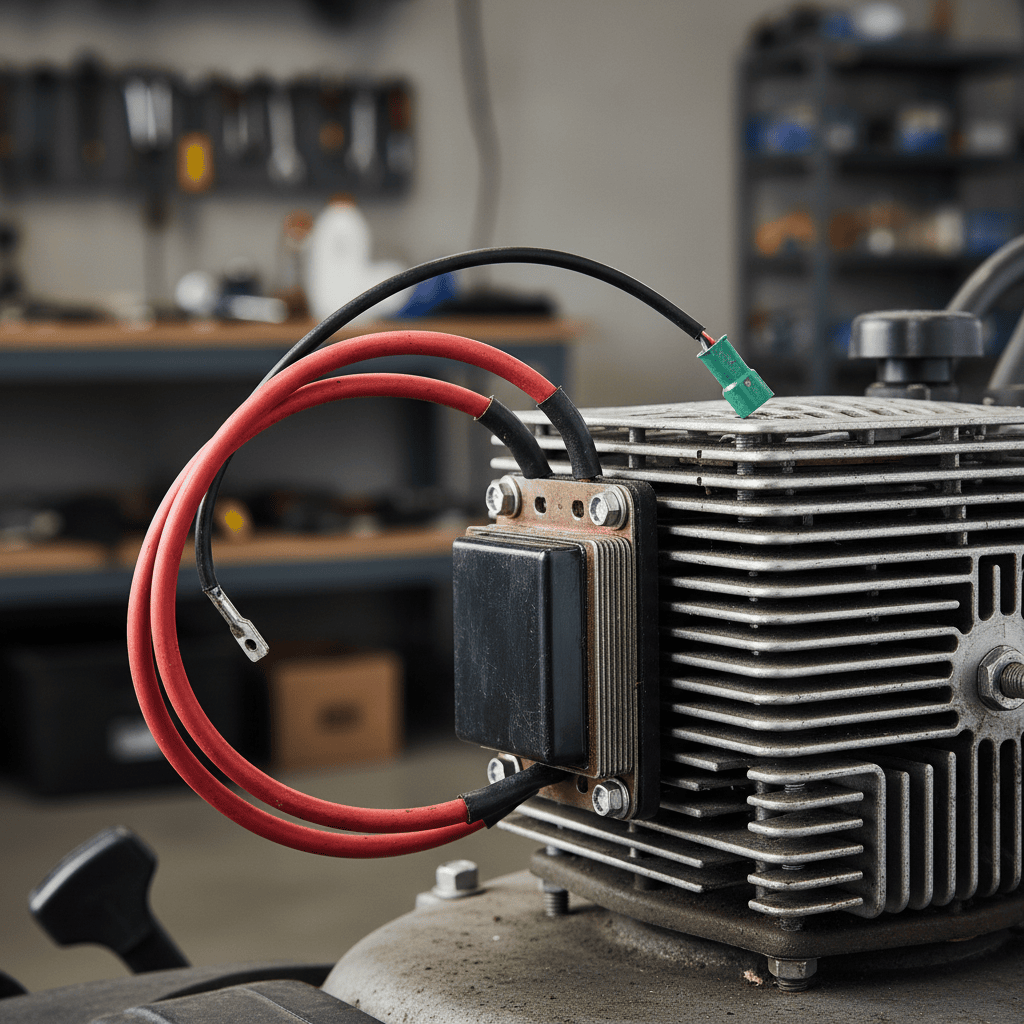
When your lawn mower engine cranks but won’t start, the ignition coil (also called a magneto or armature) is a primary suspect. This component generates the high-voltage spark that ignites the fuel in the engine. Checking it is a straightforward diagnostic process that can save you time and money before deciding on a replacement.
What Is the Direct Answer to Checking a Lawn Mower Coil?
To check the ignition coil on a lawn mower, use a multimeter to measure its primary and secondary resistance. First, disconnect the spark plug wire and kill wire. Set your multimeter to ohms (Ω). Measure primary resistance between the coil’s kill terminal/ground and the ignition lead (typically 0.5–2 ohms). Measure secondary resistance between the ignition lead and the spark plug wire cap (typically 5,000–15,000 ohms). Compare these readings to your mower’s service manual specifications. A good coil will produce a strong blue spark when tested with a spark tester. Out-of-range resistance readings or no spark indicate a faulty coil that needs replacement.
Why Would You Need to Check the Lawn Mower Coil?
The ignition coil is essential for engine operation. If it fails, the engine will not produce a spark, leading to a no-start condition. Common symptoms of a bad ignition coil include:


Pros
- Includes replacement gaskets and a 98079-55846 spark plug
- Matches Honda HRR216 and HRS216 lawn mower models
- Designed around the 16100-Z8B-901 carburetor specification
Cons
- Restricted to select Honda GCV160 mower applications
- Installation requires basic mechanical tools and skills
- Engine cranks but won’t start: The starter turns the engine over, but it never fires.
- No spark at the spark plug: When you remove the spark plug, ground it against the engine block, and crank the engine, there is no visible spark.
- Weak or intermittent spark: The spark is faint, orange/yellow instead of bright blue, or it cuts in and out.
- Engine stalls under load: The mower starts but dies when you engage the blades or go uphill.
It’s important to distinguish the ignition coil from other coils on a mower. The charging coil or stator generates electricity to charge the battery and power electrical accessories on riding mowers. The starter solenoid is a high-current switch for the starter motor. This guide focuses specifically on testing the ignition coil responsible for spark. To compare alternative configurations, check our hands-on review of jbl partybox club 120 vs sony srs xv500.
Tools and Safety Precautions for Testing the Coil
Tools You Will Need
- Multimeter (or ohmmeter): A basic digital multimeter that can measure resistance (ohms) is essential for the most accurate test.
- Spark tester: A dedicated in-line spark tester is the best tool for visually confirming spark output. A spare spark plug can work in a pinch.
- Basic hand tools: Socket set, wrenches, and screwdrivers to access the coil.
- Insulated pliers or gloves: For handling high-voltage components safely.
Critical Safety Steps
- Disconnect the spark plug wire: Always remove the spark plug wire from the spark plug before working on the ignition system to prevent accidental starting.
- Ground the spark plug wire: Secure the disconnected spark plug wire so it cannot contact any metal parts and create a short circuit.
- Disconnect the kill wire: The ignition coil has a small wire (the kill wire) that grounds the coil to stop the engine. Disconnect this wire at the coil or at the engine stop switch to isolate the coil for testing.
- Work on a cool engine: Allow the engine to cool completely before touching any components.
- Refer to your manual: Consult your mower’s service manual for model-specific safety warnings and component locations.
Step-by-Step Guide: How to Test the Ignition Coil with a Multimeter
This procedure assumes a standard magneto ignition system common on most walk-behind and many riding mowers. Always verify with your specific model’s service manual. To compare alternative configurations, check our hands-on review of jbl partybox club 120 vs sony srs xv500.
Step 1: Locate and Access the Ignition Coil
The ignition coil is typically mounted on the engine block near the flywheel. On a walk-behind mower, you may need to remove a plastic engine cover. On a riding mower, you might need to remove the hood or side panels. The coil is a small, blocky component with a thick wire (the ignition lead) that goes to the spark plug and a small wire (the kill wire) that goes to the engine stop switch.
Step 2: Disconnect the Wires
For an accurate resistance test, the coil must be electrically isolated. Users looking for related component recommendations can explore our z890 vs x870e motherboard breakdown.
- Disconnect the spark plug wire from the spark plug.
- Disconnect the kill wire from the ignition coil terminal.
- If possible, remove the coil mounting bolts and lift the coil away from the flywheel to prevent any magnetic interference during the test.
Step 3: Measure Primary Resistance
The primary winding is the low-resistance circuit that receives low voltage from the flywheel magnet.
- Set your multimeter to the lowest ohms (Ω) setting (often the 200Ω range).
- Touch one multimeter probe to the coil’s kill terminal/ground post (where the kill wire was connected).
- Touch the other probe to the metal base of the ignition lead (the thick wire that goes to the spark plug).
- Read the resistance value on the multimeter.
Typical Specification: Primary resistance is very low, usually between 0.5 and 2 ohms. A reading of zero indicates a short circuit, while a reading of infinity (OL) indicates an open circuit. Both are signs of a faulty coil. Before finalizing equipment decisions, refer to our comprehensive marshall stanmore iii vs harman kardon onyx studio 8 comparison.
Step 4: Measure Secondary Resistance
The secondary winding is the high-resistance circuit that steps up voltage to create the spark.
-
li>Keep the multimeter on the ohms setting, but switch to a higher range if necessary (e.g., the 20kΩ range).
- Touch one probe to the metal base of the ignition lead (same point as before).
- Touch the other probe to the metal connector inside the spark plug wire cap (the end that plugs onto the spark plug).
- Read the resistance value.
Typical Specification: Secondary resistance is much higher, typically between 5,000 and 15,000 ohms (5kΩ to 15kΩ). A reading of infinity indicates a break in the winding. For broader ecosystem context, read through our operational guide on dyson v8 cyclone vs bissell featherweight stick.
Step 5: Compare to Manufacturer Specifications
The ranges above are generic guidelines. For a definitive pass/fail diagnosis, compare your readings to the exact specifications in your mower’s service manual. Specifications vary by manufacturer (Briggs & Stratton, Honda, Kohler, etc.) and model.
Alternative Test: Checking for Spark Without a Multimeter
If you don’t have a multimeter, you can perform a simple visual spark test. For troubleshooting and reliability insights, consult our in-depth bissell crosswave hydrosteam vs shark stainforce report.
- Reconnect the kill wire to the ignition coil.
- Remove the spark plug and reconnect it to the spark plug wire.
- Ground the spark plug: Hold the metal body of the spark plug firmly against a clean, unpainted metal part of the engine block using insulated pliers. Do not hold it with your bare hands.
- Crank the engine: Pull the starter rope or turn the key. Watch the spark plug gap.
Interpreting the Spark:
- Good Spark: A bright, strong blue spark that jumps the gap consistently with each crank.
- Weak Spark: A faint, thin, or orange/yellow spark. This indicates a failing coil or other ignition issue.
- No Spark: No visible spark at all. This strongly suggests a faulty ignition coil, but you should also check the kill switch and wiring.
For a more reliable test, use an in-line spark tester. This tool connects between the spark plug wire and the spark plug (or ground) and has a window where you can clearly see the spark intensity.
Interpreting Results and Next Steps
If the Coil Tests Within Specification
If your resistance readings are within the manufacturer’s specified range and you see a strong blue spark, the ignition coil is likely good. The no-start problem may be caused by:
- Fuel system issues: Clogged carburetor, bad fuel, or a faulty fuel pump.
- Compression problems: Worn piston rings or a blown head gasket.
- Flywheel key sheared: If the engine hit a solid object, the small key that aligns the flywheel with the crankshaft may have sheared, throwing off the ignition timing.
- Kill switch or wiring fault: A stuck kill switch or shorted wire can ground the coil and prevent spark even if the coil itself is good.
If the Coil Tests Outside Specification
If primary or secondary resistance is out of range (zero, infinity, or far from spec), or if there is no spark during the visual test, the ignition coil is faulty and should be replaced. Always replace it with the correct part number for your specific mower model.
Everything You Need to Know: How To Check Coil On Lawn Mower FAQ
Can I test a lawn mower ignition coil without removing it?
Yes, you can perform both the multimeter resistance test and the visual spark test with the coil mounted on the engine. For the multimeter test, you only need to disconnect the kill wire and spark plug wire. For the spark test, the coil must be installed and the kill wire connected. Removing the coil is not necessary for diagnosis but can make access easier on some models.
What is the difference between the ignition coil and the charging coil?
The ignition coil (magneto) generates high voltage for the spark plug to ignite the fuel. The charging coil (part of the stator) generates lower voltage to charge the battery and power lights and other electrical accessories on riding mowers. They are separate components with different functions.
Why does my mower have spark but still won’t start?
If you have confirmed a strong blue spark, the problem is likely not the ignition coil. Check the fuel system first: ensure you have fresh fuel, the fuel valve is open, and the carburetor is delivering fuel to the engine. Also, check for a clogged air filter and verify that the engine has adequate compression.
How much does it cost to replace a lawn mower ignition coil?
Ignition coils typically cost between $15 and $40 for the part. If you install it yourself, that is your total cost. If you have a small engine repair shop install it, expect to pay an additional $50 to $100 for labor, depending on your location and the complexity of accessing the coil.
For more hands-on benchmarks and buying recommendations, consult our guides on heavy-duty chainsaw buyer guide, as well as high-CFM commercial leaf blower guide, as well as durable ride-on lawn tractor guide, as well as automated robotic lawn mower guide.
Mechanical safety standards, operational tolerances, and protective gear guidelines align with benchmark specifications established by the American National Standards Institute (ANSI).