

Direct Answer: How to Mount a Lawn Mower Tire
Mounting a lawn mower tire means one of two things: fitting a new tire onto its rim, or attaching the wheel assembly back onto the mower. To mount a tire on the rim: remove the wheel from the mower, deflate the old tire, and break the bead loose from the rim using a bead breaker or a board-and-vehicle technique. Work the old tire off with tire irons or pry bars, then clean and inspect the rim for rust or damage. Lubricate the new tire’s bead with soapy water or tire mounting lubricant, and work the first bead over the rim with tire irons, then the second bead. Inflate the tire slowly, watching for the bead to seat evenly against the rim (you’ll hear a pop), and inflate to the PSI listed on the tire sidewall or in your mower manual. Then reinstall the wheel on the mower, hand-starting the lug nuts or bolts and tightening them in a crisscross pattern, and lower the mower before applying final torque. Always use eye protection, keep your face away from the wheel while inflating, and never exceed the tire’s maximum rated pressure.
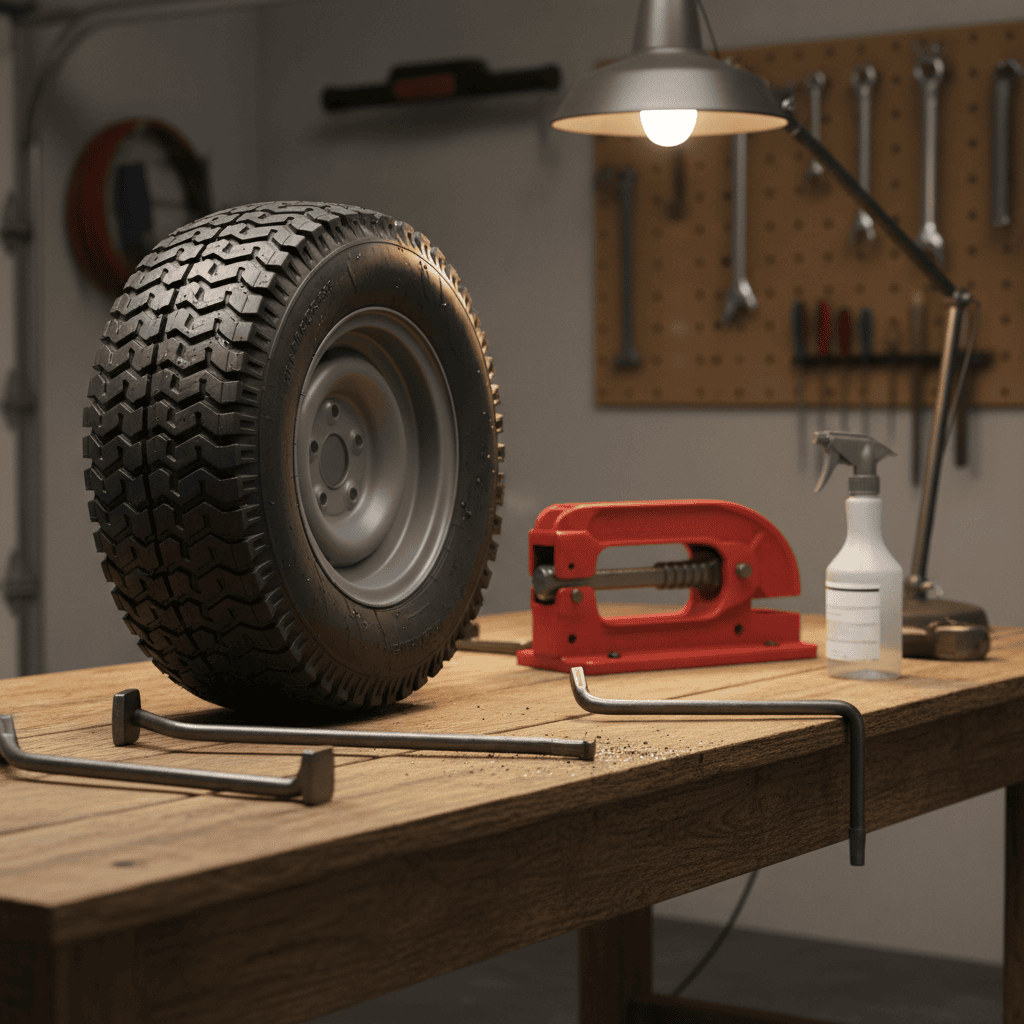
What Does “Mounting a Lawn Mower Tire” Actually Mean?
Before you gather tools, it’s worth clarifying what job you actually have in front of you. The phrase “mounting a lawn mower tire” is used casually to describe two different procedures, and each requires a different set of steps.

Pros
- Broad compatibility covering rim sizes from 4 to 16.5 inches
- Integrated manual bead breaker separates beads without shop air
- Reinforced rectangular steel base enhances operational stability
- Adjustable locking collar secures wheels during service
Cons
- Heavy 66-pound unit is cumbersome to transport or store
- Full manual operation requires significant physical effort

Pros
- Accommodates light-vehicle tire sizes from 8 to 16 inches
- Forged Q235B steel construction with rust-resistant powder coat
- Dual-purpose handle handles both bead separation and mounting
- Pre-drilled X-base allows secure anchoring to workshop floors
Cons
- Not compatible with commercial vehicle tires
- Requires manual effort and floor mounting for stable operation

Pros
- All-season natural rubber and 4-ply construction offer good durability and shock absorption
- Steel rims add structural strength for reliable front axle use
- 3-inch offset hub with 3/4-inch bushings matches common riding mower specifications
- Supports up to 570 lbs load capacity suitable for standard lawn care tasks
Cons
- Not designed for highway use and limited to lawn and garden applications only
- Requires grease to be pumped into bushings for proper lubrication before operation
- Sold as a single pack so matching pairs must be ordered separately
The Cubesprings 15x6.00-6 is a front lawn mower tire and wheel assembly built for riding mowers, lawn tractors, and garden tractors. It uses all-season natural rubber for the tire and high-quality steel for the rim, creating a solid and practical replacement option with a 4-ply tubeless design. Dimensions include a 15-inch tire diameter, 6.1-inch width, 6.7-inch rim diameter, 3-inch offset hub, and 3/4-inch bore, giving an immediate impression of standard-compatible construction.
Performance centers on the 4-ply tubeless pneumatic setup that provides good shock absorption and a more stable driving experience on lawns. The tire carries a maximum load capacity of 570 lbs and fits many 100 and 300 series mowers that use the 15x6.00-6 size, making it a practical front replacement for common garden equipment. Proper greasing of the bushings helps ensure smooth rotation and reliable everyday mowing performance.
Key considerations include the need to verify existing tire size, hub length, and bushing diameter before purchase to guarantee correct fitment. Grease must be added for lubrication, and the product is not intended for highway use or static load-bearing applications beyond its rating. These factors require careful matching and basic maintenance for best results.
This Cubesprings 15x6.00-6 tire delivers solid value for homeowners and lawn care users who need a durable, correctly sized front replacement for their riding mower or garden tractor. It is best suited for those seeking a straightforward 4-ply tubeless option with offset hub compatibility for regular yard work.

Pros
- Complete 3-piece set includes a bead breaker and two tire spoons
- Durable carbon steel build withstands tough mechanical stress
- Rounded spoon tips help safeguard rims against scratching
- Versatile fit for motorcycles, lawn mowers, and utility equipment
Cons
- Manual lever design requires significant user strength for stiff beads
Interpretation 1: Fitting a Tire onto a Rim
This is the classic tire-mounting job. You have a bare rim (or a rim with a damaged tire) and a new tire. The task is to get the tire’s bead, the reinforced edge that seals against the rim, over the rim flange, then inflate the tire so the bead seats properly. This is the more labor-intensive procedure and the one most DIYers find intimidating.
Interpretation 2: Installing the Wheel Assembly onto the Mower
If your tire is already mounted on its rim, “mounting” might simply mean putting the wheel back on the mower after a repair, a flat fix, or a blade change. This is a much simpler job involving axle alignment, fasteners, and torque. Many readers actually need this procedure while searching for the first one, so this guide covers both.
Can You Mount a Lawn Mower Tire at Home?
Yes. Lawn mower tires are small, low-pressure tires, and they are far easier to mount than automotive tires. The bead is flexible, the rims are lightweight, and the inflation pressures are modest. With a few basic hand tools and patience, most DIYers can complete the job in under an hour per wheel. You do not need a special license or certification to mount a tire at home.
When Is It Cheaper to Buy a Pre-Mounted Wheel?
There is a legitimate shortcut: many lawn mower tires are sold already mounted on rims as a complete wheel assembly. If your rim is badly rusted, bent, or damaged, or if the replacement tire is inexpensive, buying a pre-mounted wheel can be cheaper and faster than doing the job yourself. Compare the cost of the bare tire plus your time against the price of a complete wheel. For very low-end tires, shop rates can be cost-effective, but for premium tires or specialty sizes, DIY mounting usually wins. For complementary field maintenance guidelines, examine our breakdown of z890 vs x870e motherboard.
Tools and Materials You’ll Need Before You Start
Preparation prevents mid-task frustration. Here is a complete checklist of what you need to mount a lawn mower tire safely and correctly.
Essential Tools
- Tire irons or tire levers (at least two, ideally three): These are the curved, flat pry bars designed specifically for working tire beads over rims. They are inexpensive and far safer than improvised tools.
- Bead breaker: A tool that presses the tire bead away from the rim flange. You can buy a manual bead breaker, or use the board-and-vehicle technique described below.
- Wire brush or scraper: For cleaning rust, dirt, and old rubber residue off the rim’s bead seat.
- Lubricant: Soapy water in a spray bottle or a dedicated tire mounting lubricant. This is essential for getting the bead over the rim without tearing it.
- Air source: An air compressor is ideal, but a portable 12V inflator or even a sturdy bicycle pump can work for small lawn mower tires. You need enough volume to seat the bead quickly.
- Tire pressure gauge: To check the final PSI accurately.
- Socket wrench and sockets: To remove and reinstall the wheel fasteners.
- Jack or blocks: To lift and safely support the mower while removing and reinstalling wheels.
- Eye protection: Safety glasses are non-negotiable when prying, cleaning, and inflating.
Can You Use Screwdrivers or Pry Bars Instead of Tire Irons?
Technically yes, but it is a bad idea. Screwdrivers have sharp tips that easily gouge the rim and puncture the tire’s inner liner or tube. Standard pry bars are too thick and can pinch or tear the bead. Proper tire irons are designed with rounded, blunt ends that slip between the bead and rim without damaging either. They cost a few dollars and are worth the investment. To evaluate matched hardware tolerances, consult our detailed overview of marshall stanmore iii vs harman kardon onyx studio 8.
What Lubricant Works Best?
Soapy water is the classic DIY choice: mix a few drops of dish soap with water in a spray bottle. It is cheap, effective, and won’t harm the rubber. Dedicated tire mounting lubricants (often sold as bead soap or tire mounting paste) work even better because they stay slippery longer and dry without leaving residue. Avoid oil-based lubricants, which can degrade rubber over time.
Do You Need an Air Compressor?
Not strictly. A compressor makes the job easier because it delivers high air volume quickly, which helps the bead snap into place. A portable 12V inflator works for most lawn mower tires, and a bicycle pump can work in a pinch, though it is slow and tiring. If you have a compressor, set it to a modest pressure and use a chuck with a trigger so you can control the airflow. When planning workspace deployment, consider the engineering criteria outlined in our dyson v8 cyclone vs bissell featherweight stick guide.
Step-by-Step: Removing the Old Tire from the Rim
Before the new tire can go on, the old one must come off. This is often the most physically demanding part of the job.
Step 1: Lift and Support the Mower Safely
Park the mower on a flat, level surface, engage the parking brake, and remove the spark plug wire so the engine cannot accidentally start. Jack up the side of the mower you are working on and support it with jack stands or sturdy wooden blocks. Never rely on the jack alone while you are working under or beside the machine. For additional operational safety benchmarks, see our published testing notes on bissell crosswave hydrosteam vs shark stainforce.
Step 2: Remove the Wheel from the Mower
Remove the hubcap or dust cover if present, then loosen the lug nuts or wheel bolts with a socket wrench. On many lawn mowers, the rear wheels are held by a single large nut or a cotter pin and washer arrangement; front wheels often use a similar setup. Once the fasteners are loose, pull the wheel straight off the axle. If it is stuck, tap the tire sidewall with a rubber mallet rather than prying against the rim.
Step 3: Fully Deflate the Old Tire
Remove the valve core from the valve stem (a small tool available at auto parts stores) or simply press the valve stem center to let all air out. The tire must be completely deflated before you attempt to break the bead. Any remaining pressure makes the bead nearly impossible to break and dangerous to pry against.
Step 4: Break the Bead Loose
The bead is the stiff wire-reinforced edge of the tire that seals against the rim. To break it, you need to push it away from the rim flange. A manual bead breaker clamps onto the rim and presses the bead down with a screw mechanism. If you don’t have one, use the board-and-vehicle technique: lay a sturdy board across the tire sidewall, then carefully drive the mower (or another vehicle) onto the board. The weight pushes the bead off the rim. Work your way around the tire, breaking the bead in several spots on both sides.
Step 5: Work the Old Tire Off the Rim
With the beads broken, press the tire sidewalls down into the center drop well of the rim, the recessed channel in the middle of the rim that gives you slack. Insert a tire iron between the bead and the rim flange, and pry the bead up and over the flange. Hold the first iron in place, then use a second iron a few inches away to work the bead over progressively. Repeat around the entire circumference, then flip the wheel over and repeat on the other side to remove the tire completely.
Step 6: Clean and Inspect the Rim
Once the old tire is off, scrape and wire-brush the bead seat area to remove rust, dirt, and old rubber. Inspect the rim for cracks, bends, or severe rust pitting. A damaged rim will not seal properly and can ruin a new tire quickly. If the rim is badly corroded or bent, replace it or buy a pre-mounted wheel instead. Also check the valve stem: if it is cracked, brittle, or leaking, replace it now while the wheel is apart.
Step-by-Step: Mounting the New Tire on the Rim
Now for the main event. Take your time here, rushing causes pinched tubes and damaged beads.
Step 1: Determine Tube-Type vs. Tubeless
Check whether your lawn mower tire is tube-type or tubeless. Most modern lawn mower tires are tubeless, but many older models and some specialty tires use an inner tube. If your tire is tube-type, install the tube inside the tire before mounting, with the valve stem aligned with the rim’s valve hole. If you are reusing a tube, inspect it for cracks and punctures; if there is any doubt, replace it, a tube is cheap insurance against a pinch flat. If your tire is tubeless, the valve stem is built into the rim, and no tube is needed.
Step 2: Lubricate the Bead and Rim
Spray soapy water or apply tire mounting lubricant generously to the bead of the new tire and the bead seat area of the rim. This lubrication is what allows the bead to slide over the rim flange instead of tearing. Do not skip this step, dry rubber will fight you the entire way.
Step 3: Mount the First Bead
Lay the tire flat and align the bottom bead with the rim. If you are using a tube, tuck the tube inside the tire first, keeping the valve stem centered. Press the first bead over the rim flange by hand where possible, using your thumbs to work it into the drop well. When you reach the last section, use tire irons to pry the remaining bead over the flange, being careful not to pinch the tube between the iron and the rim.
Step 4: Mount the Second Bead
This is the trickier side. Work the second bead over the rim flange using the same technique, starting opposite the valve stem and working toward it. Keep the already-mounted bead pushed down into the drop well on the opposite side, this gives you the slack you need. Use two or three tire irons in sequence, sliding each one along the rim as you go. If you feel resistance, add more lubricant rather than forcing it.
Step 5: Avoid Pinching the Tube
If you are mounting a tube-type tire, the greatest risk is a pinch flat: trapping the tube between the tire iron and the rim, which punctures it. To minimize this risk, keep the tube fully inside the tire, away from the bead, and never insert a tire iron deeper than necessary. After mounting both beads, push the valve stem through the rim hole and pull the tube gently to remove any wrinkles before inflating.
Step 6: Check the Valve Stem Alignment
Before inflation, confirm the valve stem is straight and centered in its hole. A crooked stem will leak or make it difficult to attach an air chuck. If the stem is angled, deflate, reposition the tube or tire, and remount as needed.
Seating the Bead and Inflating Safely
Inflation is the most dangerous step in tire mounting. A tire that fails to seat can burst with explosive force, so take safety seriously.
Step 1: Initial Inflation to Seat the Bead
Attach your air source and inflate slowly. As the tire fills, the beads will move outward toward the rim flanges. You will typically hear one or two loud “pops” as the beads snap into place against the rim. This is normal and is the sound of a successful seat. If the tire has been properly lubricated, the beads should seat evenly all the way around.
Step 2: Watch for Even Seating
Stop and inspect the tire. The bead seat line, a molded line near the edge of the tire, should be equidistant from the rim flange all the way around on both sides. If the line is closer to the rim on one side than the other, the bead has not seated evenly. Deflate, re-lubricate, and try again, sometimes pressing on the high spots to encourage the bead into place.
Step 3: Inflate to the Correct PSI
Once the beads are seated, inflate to the pressure listed on the tire sidewall or in your mower’s owner’s manual. Most lawn mower tires run between 10 and 20 PSI; rear tires often require less pressure than front tires for traction and ride comfort. Never exceed the maximum pressure printed on the sidewall. Overinflating beyond the rated maximum can cause the tire to burst and may result in serious injury.
Step 4: Keep Your Face and Body Away from the Wheel
While inflating, never lean over the tire, and never place your face or hands directly over the tread or sidewall. If a tire is going to fail, it often does so at the moment the bead seats, with a loud pop that can send debris flying. Use eye protection, and consider inflating inside a tire cage or behind a barrier if you have one. If the tire will not seat below the maximum rated pressure, stop, do not keep inflating in hopes it will pop into place.
Step 5: What If Air Leaks Around the Bead?
A slow leak around the bead after seating usually means the rim is dirty, corroded, or damaged, or the bead was not fully seated. Deflate, clean the bead seat again with a wire brush, re-lubricate, and reseat. If the leak persists, inspect the rim for dents or rust pitting and check whether the tire size matches the rim diameter. For tubeless tires, a leaking valve stem should be tightened or replaced.
Installing the Mounted Wheel Back on the Mower
If your goal was simply to put a wheel back on the mower, or if you just finished mounting a fresh tire, here is how to reinstall the assembly correctly.
Step 1: Clean the Axle and Hub
Before sliding the wheel on, clean the axle shaft and the hub bore with a wire brush to remove rust, grass, and old grease. A light coat of anti-seize compound or grease on the axle prevents the wheel from seizing over time, but keep it off the brake surfaces if your mower has wheel brakes. Check the axle key or keyway if present, and make sure it is in place.
Step 2: Align and Slide the Wheel On
Slide the wheel onto the axle, aligning the keyway or lug holes. Push it on as far as it will go by hand. If it resists, rotate the wheel slightly to align the splines or key, and tap the tire sidewall gently with a rubber mallet. Never hammer on the rim itself.
Step 3: Hand-Start the Fasteners
Thread the lug nuts or wheel bolts on by hand first, turning each one until it is snug. This prevents cross-threading, which can strip the studs and ruin the hub. If a fastener does not thread smoothly by hand, stop and check for dirt or damage rather than forcing it with a wrench.
Step 4: Tighten in a Crisscross Pattern
Tighten the fasteners in a crisscross or star pattern, a little at a time, so the wheel seats evenly against the hub. Do not fully tighten one nut before starting the next. If your mower manual specifies a torque value, use a torque wrench to reach it; otherwise, snug them firmly with a socket wrench, lawn mower wheels do not need the extreme torque of automotive wheels. Overtightening can warp the rim or strip the threads.
Step 5: Lower the Mower Before Final Torque
Lower the mower so the tire is on the ground and the wheel is loaded before applying final torque. This prevents the wheel from spinning while you tighten and ensures the hub is fully seated. After lowering, re-check each fastener in the crisscross pattern, then replace any hubcap or dust cover.
Common Mistakes, Troubleshooting, and When to Call a Pro
Even careful DIYers hit snags. Here is how to diagnose and fix the most common problems, and when to hand the job to a shop.
Why Does My Newly Mounted Tire Leak Around the Bead?
A bead leak almost always points to one of three causes: a dirty or corroded rim bead seat, an improperly seated bead, or a damaged rim. Remove the wheel, deflate, clean the bead seat thoroughly, re-lubricate, and remount. If the leak persists, inspect the rim for dents, rust pitting, or an out-of-round condition. A rim that is bent or severely pitted will never seal reliably and should be replaced.
Why Does the Mower Wobble or Pull to One Side?
A wobble after mounting usually means the tire is not seated evenly on the rim, or the wheel is not torqued evenly. Check the bead seat line on both sides, it should be parallel to the rim flange all the way around. If it is uneven, deflate and reseat. Also verify that all lug nuts are tightened evenly in the crisscross pattern. A pull to one side can also be caused by mismatched tire pressures between the two rear tires, so check both.
Does a Lawn Mower Tire Need Balancing?
Generally, no. Lawn mower tires are small, operate at low speeds, and rarely need the dynamic balancing that car tires require. If you notice a persistent vibration at normal mowing speed after mounting, first check for an unevenly seated bead or a bent rim. Only if those are ruled out should you consider having the tire balanced at a shop.
When Should You Stop DIY and Call a Shop?
Call a professional if the rim is bent or cracked, if the tire will not seat even with proper lubrication and technique, if you are uncomfortable with the inflation step, or if the replacement tire is expensive enough that a mounting mistake would be costly. Many shops will mount a tire you bought elsewhere for a modest fee, and for low-end tires this can be the most cost-effective option. There is no shame in letting a pro handle a stubborn bead, it is safer than forcing the job.
Final Safety Reminders
- Always wear eye protection when prying, cleaning, and inflating tires.
- Never exceed the maximum pressure printed on the tire sidewall.
- Keep your face and body away from the wheel during inflation.
- Support the mower with jack stands or blocks, never work under a mower supported only by a jack.
- Disconnect the spark plug wire before working on the mower.
Buyer FAQs: How To Mount A Lawn Mower Tire Solved
What PSI should I inflate a lawn mower tire to?
The correct pressure is printed on the tire sidewall and often repeated in your mower’s owner’s manual. Most lawn mower tires run between 10 and 20 PSI, with rear tires frequently set lower than fronts for traction. Always check the sidewall for the maximum rating and never exceed it, as overinflation can cause the tire to burst.
Do I need special tools to mount a lawn mower tire?
You need tire irons (or tire levers), a bead breaker or a board-and-vehicle substitute, a wire brush, soapy water or tire mounting lubricant, an air source, and a tire pressure gauge. A torque wrench is recommended if your mower manual specifies a torque value for the wheel fasteners. All of these are inexpensive and available at auto parts or hardware stores.
How do I know if my lawn mower tire is tube-type or tubeless?
Check the tire sidewall for the words “tubeless” or “tube type.” If there is no marking, look at the valve stem: a tubeless tire has a valve stem that mounts directly into the rim, while a tube-type tire’s valve stem passes through a hole in the rim and is attached to the tube inside. When in doubt, ask a tire shop or consult your mower’s manual.
Can I mount a lawn mower tire without an air compressor?
Yes. A portable 12V inflator or even a sturdy bicycle pump can seat and inflate most lawn mower tires, though it takes more time and effort. A compressor is faster because it delivers high air volume, which helps the bead snap into place. Whichever you use, inflate slowly and watch for even bead seating.
Related Maintenance and Operating Guides
To keep your equipment running at peak operating efficiency, explore our related technical walkthroughs and maintenance tutorials:
- Consult our detailed breakdown on residential zero-turn lawn mower guide.
Technical Standards and Compliance
Mechanical safety standards, operational tolerances, and protective gear guidelines align with benchmark specifications established by the American National Standards Institute (ANSI).









