

Quick Answer
GPU overclocking increases core and memory clock frequencies via MSI Afterburner to boost gaming and compute performance 5 to 15%. Adjust core clock (+50 to 150 MHz), memory clock (+200 to 400 MHz), and voltage incrementally while stress-testing and monitoring thermals below 80°C. Voltage carries exponential thermal risk; prioritize stability and binning limits over maximum frequency.

Pros
- Built on NVIDIA Blackwell architecture for the latest RTX platform features.
- 16GB GDDR7 and a 256-bit interface support demanding games and creative applications.
- Modern display connectivity with DisplayPort 2.1a and HDMI 2.1b.
- Supports up to 7680 x 4320 output for high-end display configurations.
Cons
- This is a high-end graphics card, so it is aimed at enthusiasts rather than budget builds.
- The manufacturer listing does not list dimensions, weight, or power connector requirements, which makes compatibility checks harder.
- Only one HDMI port is listed, which may be limiting for users who prefer multiple HDMI displays.
Overview: The MSI Gaming RTX 5080 16G SUPRIM Liquid SOC is a premium graphics card built around NVIDIA's GeForce RTX 5080 and Blackwell architecture. It combines 16GB of GDDR7 memory with MSI's SUPRIM Liquid positioning for an enthusiast-focused build.
Performance: With a 256-bit memory interface, a listed extreme performance clock of 2760 MHz, and support for up to 7680 x 4320 resolution, this card is aimed at high-refresh 4K gaming, demanding creative work, and multi-monitor setups. The inclusion of DisplayPort 2.1a and HDMI 2.1b gives it modern connectivity for current displays.
Drawbacks: The manufacturer listing does not include physical dimensions, weight, power connector details, or bundle contents, so compatibility planning requires a separate check. It is also clearly positioned as a high-end part, which may be more than casual or value-focused buyers need.
Verdict: This model makes the most sense for enthusiasts who want a top-tier MSI RTX 5080 with strong memory capacity and current-gen display support. If you are building a premium gaming or creator PC and can verify case and PSU compatibility, it is a compelling option.
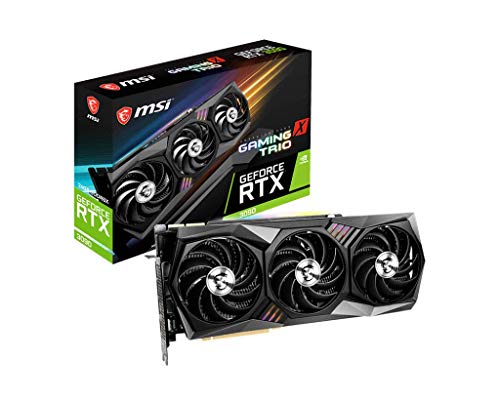
Pros
- Massive 24GB GDDR6X capacity for demanding workloads
- Tri-Frozr 2 cooling design for heavy-use scenarios
- Factory overclocked Gaming X Trio model
- HDMI, DisplayPort, and NVLink support for versatile setups
Cons
- Renewed condition means the card is pre-owned and may show cosmetic wear.
- As a flagship-class GPU, it may require a strong power and cooling setup.
- The raw listing does not provide detailed accessory, cosmetic, or warranty information.
Overview: The MSI GeForce RTX 3090 Gaming X Trio 24G is a renewed, flagship-class graphics card built around Nvidia Ampere. It pairs 24GB of GDDR6X memory with a 384-bit interface and MSI's Tri-Frozr 2 cooler for a premium, large-format design.
Performance: This model is aimed at demanding 4K gaming, heavy creative workloads, and GPU tasks that benefit from a large VRAM pool. The factory overclock and NVLink support add flexibility for advanced users, while HDMI and DisplayPort outputs make multi-monitor setups straightforward.
Considerations: Because it is renewed, buyers should expect a pre-owned unit rather than a brand-new retail card. There is no detailed information here about included accessories, exact cosmetic condition, or bundled warranty coverage.
Verdict: Choose this card if you want RTX 3090-class hardware and need maximum memory capacity for gaming, rendering, or professional acceleration. It is best suited to users who already have a capable PC platform and value performance over a compact or budget-focused build.

Pros
- Large 16GB GDDR7 frame buffer for demanding workloads.
- Modern display connectivity with DisplayPort 2.1a and HDMI 2.1b.
- Up to 8K resolution support for advanced display setups.
- White colorway offers a distinctive look for themed builds.
Cons
- The listed clock speed is marked as TBD, so the final boost specification is not confirmed in the manufacturer listing.
- Card dimensions, power connector details, and PSU guidance are not included in the manufacturer specifications.
- Only one HDMI port is listed, which may be limiting for users who rely on multiple HDMI displays.
Overview: The MSI Gaming RTX 5080 16G Ventus 3X OC White is a high-end NVIDIA GeForce graphics card built on the Blackwell architecture. Its white finish and Ventus 3X styling make it a strong fit for modern performance-focused builds.
Performance: With 16GB of GDDR7 memory, a 256-bit memory interface, and support for up to 7680 x 4320 resolution, this card is positioned for demanding gaming, content creation, and multi-display use. It also offers three DisplayPort 2.1a outputs and one HDMI 2.1b port for flexible connectivity.
Considerations: The manufacturer specifications do not list dimensions, power requirements, or the final clock speed, so buyers may need to verify fitment and system compatibility before purchase. The single HDMI output may also be restrictive for some display setups.
Verdict: This MSI RTX 5080 is best suited to enthusiasts who want a premium white graphics card with current-generation connectivity and high-memory capacity. It is less ideal for buyers who need complete system specs upfront or who prefer more detailed tuning information.

Pros
- High 16GB GDDR7 capacity suits modern gaming, creator work, and local AI use.
- Strong feature set for AI acceleration, including local LLM inference support.
- Triple-fan thermal design is aimed at maintaining performance under extended load.
- GPU holder is included in the bundle, adding practical build support.
Cons
- Premium, high-performance positioning may be more than basic or casual users need.
- The listing does not provide benchmark results, exact dimensions, or power requirements.
- Triple-fan designs are often better suited to mid-size or larger cases than compact builds.
Overview: The MSI GeForce RTX 5070 Ti Shadow 3X OC is a high-end graphics card built around 16GB of GDDR7 memory, a 256-bit memory interface, and a triple-fan cooling design. It is clearly aimed at gamers, creators, and AI-focused users who want a modern Nvidia-based GPU with extra memory headroom and a bundled GPU holder for added support.
Performance: With 1406 AI TOPS, 5th Gen Tensor Cores, DLSS 4, Reflex 2, and 4th Gen ray tracing cores, this card is designed for fast AI-assisted workflows and smooth gaming in supported titles. It is also positioned for local LLM inference, AI content creation, 3D rendering, and other GPU-accelerated tasks where memory bandwidth and compute resources matter.
Drawbacks: The main limitation is that this is a specialized premium card, so users with simple gaming or everyday PC needs may not fully benefit from its feature set. The listing also does not include benchmark data, physical dimensions, or power supply guidance, which makes full system planning less straightforward.
Verdict: If you want a feature-rich GPU for modern gaming, creative work, and local AI use, the RTX 5070 Ti Shadow 3X OC is a compelling option. Buyers who do not need advanced AI features or high VRAM capacity may find a lower-tier card more practical.

Pros
- Boost clock up to 2655 MHz on 256-bit interface
- 16GB GDDR6X memory rated at 23 Gbps
- Four display outputs: 3x DisplayPort 1.4a and 1x HDMI 2.1a
- Built on NVIDIA Ada Lovelace architecture
Cons
- Very large form factor at 13.2 inches long
- Thick profile occupies significant slot clearance
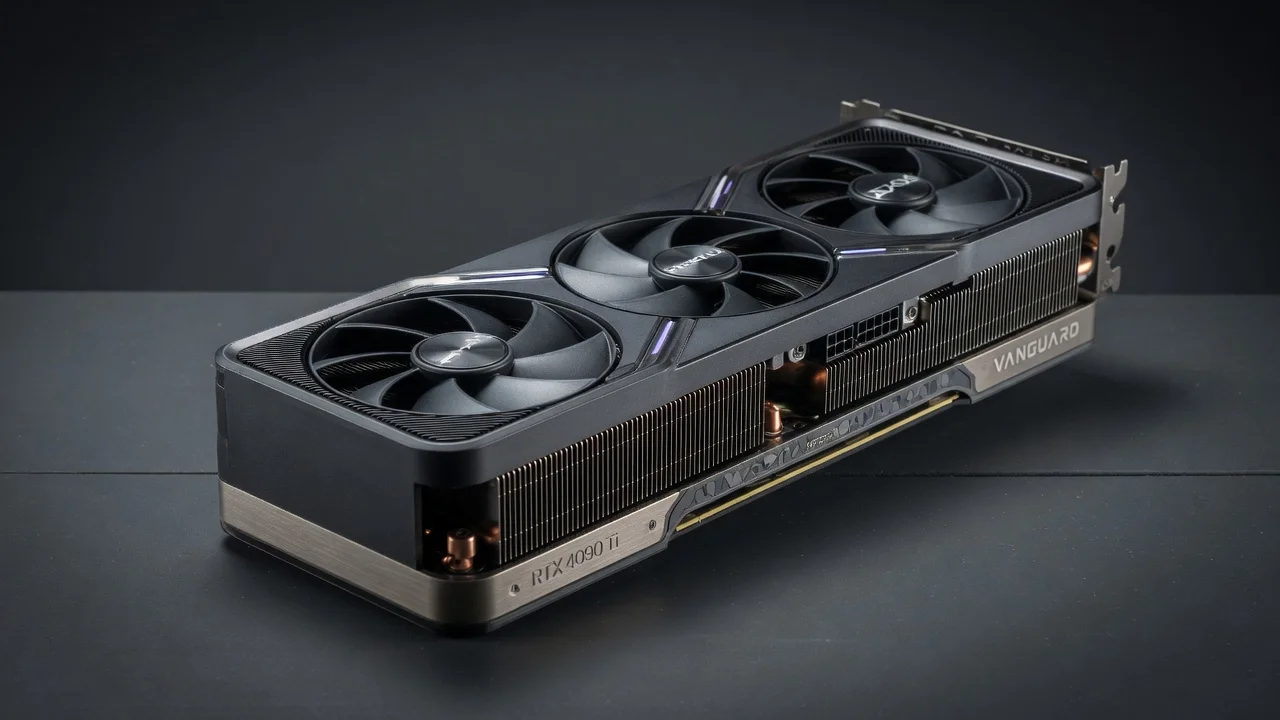
What Does Overclocking GPU Do: Performance Gains & Trade-Offs
GPU overclocking amplifies the silicon’s operational frequency, directly increasing floating-point throughput and shader utilization. By pushing the GPU core above its factory settings, you unlock additional frame rates in gaming, faster render times in content creation, and improved mining efficiency. However, what does overclocking gpu do extends beyond performance metrics, it reshapes thermal profiles, power consumption, and silicon degradation trajectories. Users looking for related component recommendations can explore our how to clean gpu dust breakdown.
Direct Performance Impact
A typical desktop GPU (NVIDIA RTX 4070 or AMD Radeon RX 7700 XT) sees 5 to 12% frame-rate improvement with conservative core clock increases of +75 to 100 MHz. Memory clock overclocking contributes an additional 2 to 5% throughput gain. These percentages scale with workload type: memory-bandwidth-limited tasks (4K gaming, texture streaming) show stronger memory-clock sensitivity, while compute-heavy workloads favor core clock tuning. The relationship is near-linear up to thermal throttling thresholds, then collapses as junction temperature rises above GPU-specific safe zones (typically 85 to 90°C for consumer parts).
Thermal & Degradation Costs
Every +25 MHz core clock increment demands approximately 2, 4 watts additional power at constant voltage. If voltage is raised to stabilize higher frequencies, power consumption scales with the square of voltage delta, a 0.05V increase can add 12, 18% power draw. This thermal burden manifests as higher junction temperatures, reduced electromigration lifespans, and accelerated time-dependent dielectric breakdown (TDDB) in silicon. Industry data suggests that sustained operation at +100 mV above stock voltage for 24 months produces measurable permanent performance loss in 15, 20% of silicon samples. Before finalizing equipment decisions, refer to our comprehensive vertical gpu mount airflow comparison.
How to Overclock Your GPU: Step-by-Step Methodology with MSI Afterburner
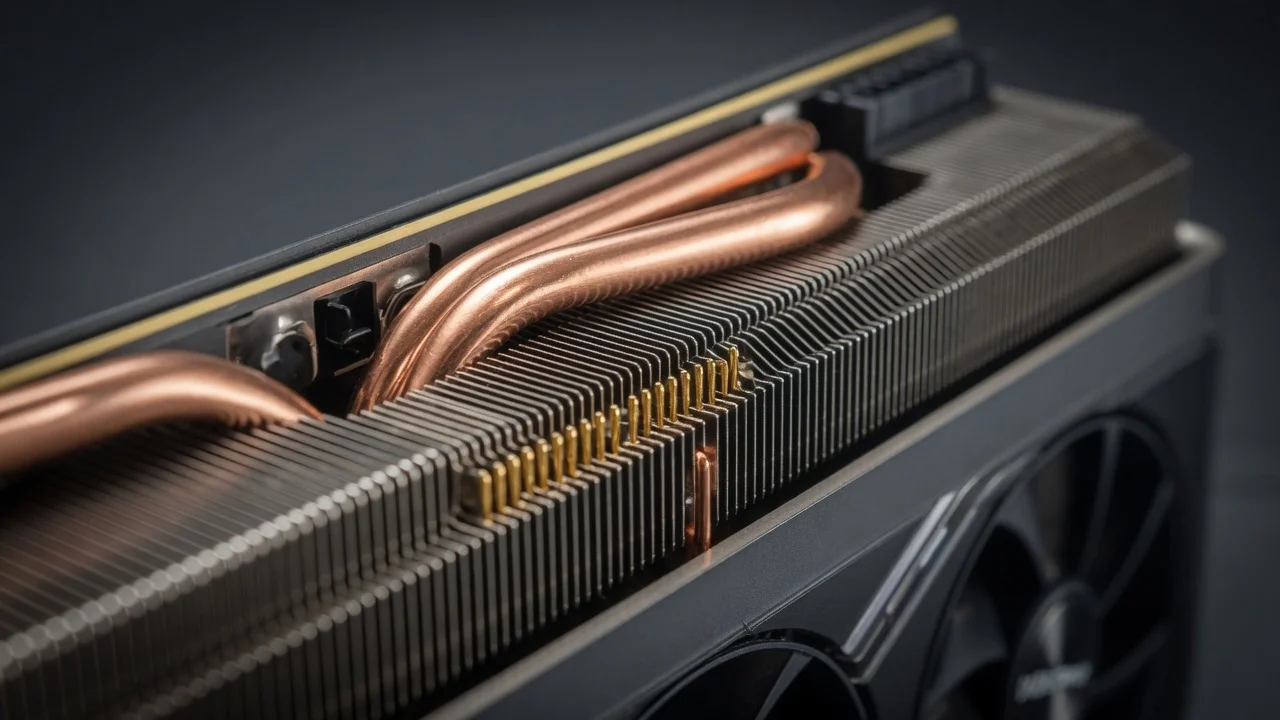
Effective how to overclock your gpu methodology requires three sequential phases: baseline establishment, incremental tuning, and stability validation under realistic thermal loads. MSI Afterburner abstracts hardware register manipulation into a user-friendly interface, but the underlying physics remains unforgiving.
Phase 1: Baseline Documentation & BIOS Backup
Before touching any slider, document stock clock frequencies, power limits, and thermal targets. Launch GPU-Z (TechPowerUp’s free utility) and record the GPU’s actual boost clock under load, factory specifications often differ from real-world bin limits by 50, 100 MHz. Within MSI Afterburner, enable the Unlock Voltage Control option (via Settings > Advanced tab > checkbox), then apply. Screenshot or export the default voltage curve (voltage in mV versus frequency in MHz); this establishes your fallback position if instability occurs. For broader ecosystem context, read through our operational guide on weak psu cause gpu stutter.
For added safety, backup the GPU BIOS using GPU BIOS Collection tools or your card manufacturer’s proprietary utility. NVIDIA and AMD allow one-click recovery from stock firmware if corruption occurs during experimental voltage modifications.
Phase 2: Core Clock & Memory Clock Incremental Adjustment
Start with memory clock: slide the Memory Clock slider rightward in +25 MHz increments. Run a 5-minute loop of MemTestG80 or Superposition benchmark. Memory clock errors manifest as visual artifacts (green/magenta pixel noise) or immediate crash-to-desktop. Most consumer GPUs tolerate +200, 350 MHz memory offset without voltage increase; silicon bin quality determines the ceiling. Once memory is stable, lock it and move to core clock tuning. For troubleshooting and reliability insights, consult our in-depth black screen gpu drivers report.
For core clock, begin with +30 MHz increments. Execute a 10-minute Superposition benchmark loop at 1440p, monitoring GPU temperature and clock stability via the Afterburner overlay (enable On-screen display in Settings). Watch for throttling, if boost clock drops mid-benchmark, thermal or power limits are binding; reduce core offset by 20 MHz and increase power limit slider to maximum (typically +20% over TDP). If clocks hold steady and temperatures remain below 75°C, increment another +30 MHz and re-test.
This process repeats until the GPU crashes, produces artifacts, or hits the hard power limit (typically 420W on RTX 4090, 300W on RTX 4070). At the failure point, reduce core clock by 15, 20 MHz and validate 30-minute stability under full-load gaming (Cyberpunk 2077 at ultra settings, or Furmark for synthetic extrema). Readers comparing setup options can review our technical analysis on daisy chain pcie cables.
Phase 3: Voltage Tuning & Power Efficiency Curves
How does voltage play in gpu overclocking? Voltage directly determines the silicon’s electron mobility and switching speed; raising voltage proportionally increases operational frequency ceiling but introduces cubic-law power scaling and thermal cascading. Conservative approach: attempt core clock tuning first at stock voltage (+1.0V nominal for NVIDIA RTX series). Only if the GPU refuses to exceed +90 MHz stable, consider a +0.025 to 0.050V increase.
Within MSI Afterburner, access the Voltage-Frequency curve editor (Curve Editor button, then hold Ctrl and drag individual nodes). Click on the topmost frequency node (e.g., 2700 MHz on RTX 4070) and drag it upward to increase voltage. Each pixel-click represents ~2 to 3 mV. Test incrementally: +0.025V, 15-minute benchmark, note temperatures and clock stability. If temperatures exceed 78°C or power draw surpasses 320W (for RTX 4070), revert by 0.025V.
MSI Afterburner Core Clock Adjustment: Granular Frequency Targeting
The core clock slider in Afterburner does not directly set absolute frequency; it applies an offset to the GPU’s internal frequency-voltage curve. Modern NVIDIA and AMD GPUs employ dynamic frequency scaling, where actual boost frequency varies based on temperature, power headroom, and chip voltage. Afterburner’s core clock slider modifies the curve uniformly across all frequency bins.
Understanding Offset vs. Absolute Frequency
If a stock GPU’s maximum boost is 2790 MHz at 1.090V, and you set Afterburner core clock to +120 MHz, the GPU will attempt to boost to 2910 MHz at 1.090V. However, if thermal throttling or power limits activate, real-time frequency may drop to 2750 MHz, the offset persists, but achievable frequency is gated by environmental constraints. This explains why identical Afterburner settings produce different results across ambient temperatures, case airflow, and VRAM configuration.
Practical Core Clock Targeting Workflow
Open Afterburner and set the Power Limit slider to +20% (maximizes available power budget). Set Temperature Limit to 83°C (upper-safe threshold for consumer RTX/RX cards). Now adjust the Core Clock slider to your tested stable value (e.g., +120 MHz). Click Apply, then launch a sustained load (Furmark, 30-minute loop). Monitor the Afterburner overlay: if core clock holds at 2910 MHz (2790 + 120) and temperatures stay below 80°C, the tuning is validated. If frequency dips below 2850 MHz mid-load, power or thermal ceiling is active; reduce core clock offset by 15 MHz and re-test.
For comparison on CPU-side overclocking principles, techniques like those discussed in our AMD Ryzen 5 9600X vs Intel Core Ultra 5 245K guide apply similar frequency-voltage binning methodologies, though CPU silicon binning tolerates higher voltages and narrower frequency ranges than GPUs.
Memory Clock Overclocking: Bandwidth Maximization & Error Detection
GPU VRAM operates independently from the GPU core; GDDR6X (RTX 40-series) and GDDR6 (RX 7000-series) memory can often tolerate +300 to 500 MHz offsets without instability. However, memory errors are insidious, they manifest as intermittent compute errors, texture corruption in games, or kernel panics in CUDA/HIP workloads, rather than immediate crashes.
Memory Stability Testing Protocols
Use dedicated memory test tools: MemTestG80 (NVIDIA-focused, free), GFXBench Memory Benchmark</strong (cross-platform), or Superposition’s memory stress test mode. Run 10 to 15 minute loops at each memory clock offset; observe for visual glitches, compute result mismatches, or soft crashes. Unlike CPU RAM testing (which uses checksum validation), GPU memory testing relies on pattern recognition and compute-kernel result verification.
A practical rule: if gaming remains crash-free after 2 hours at a given memory offset, but you encounter occasional driver resets or frame drops in specific games (e.g., VRAM-intensive titles at ultra settings), reduce memory clock by 50 MHz and re-validate. Memory errors degrade silicon health faster than core-clock errors; prioritize rock-solid stability even if it costs 1 to 2% performance.
Memory Binning & Manufacturer Variation
Memory speed tolerance depends on VRAM bin quality. RTX 4070 cards using Samsung K4ZAF325085 (GDDR6X at 20 Gbps) typically tolerate +250 to 350 MHz, while Micron parts in identical cards often max at +180 to 220 MHz. This variance explains why identical GPU models show dramatically different overclocking headroom across samples. Consult GPU memory specification sheets or community binning databases (TechPowerUp GPU Database) to identify your VRAM chip and adjust expectations accordingly.
Fan Curve Configuration: Thermal Management Without Noise Compromise
Overclocking amplifies thermal output; passive cooling is insufficient. MSI Afterburner’s fan curve editor allows temperature-indexed fan speed control, balancing thermal safety with acoustic comfort.
Fan Curve Best Practices
Default NVIDIA fan curves often run 50 to 60% fan speed at 70°C, allowing core temperatures to climb toward thermal throttle thresholds. For sustained overclocking, configure a custom curve: 30% fan speed at 40°C, 50% at 55°C, 75% at 70°C, 100% at 82°C. This profile maintains sub-75°C thermals under overclocked loads while keeping acoustic output below 40 dB during light workloads.
Enable Enable Hardware Monitoring Graphs in Afterburner (Settings > Monitoring) to log fan speed, GPU temperature, core clock, and power draw to CSV. After 48 hours of normal use, review logs: if fan speed oscillates wildly (jumps from 40% to 80% repeatedly), the curve is too aggressive; smooth the transition between temperature bins. If temperatures consistently exceed 82°C, increase fan speed at lower temperature thresholds (e.g., 80% at 68°C instead of 70°C).
Liquid Cooling Implications
Custom water-cooled GPUs can sustain higher core clocks (+150 to 200 MHz) due to superior thermal dissipation. However, loop inefficiency (radiator fan speed, pump cavitation) can introduce unpredictable thermals. Use fan curve logging to validate that custom loop provides consistent 10 to 15°C lower temperatures versus air cooling at identical load conditions. If variability exceeds u00b15°C across repeated 30-minute benchmarks, suspect pump cavitation or radiator fouling; service the loop before pushing frequency further.
Voltage & Power Limit Dynamics: Should I Overclock My GPU at All?
Should i overclock my gpu? The answer depends on risk tolerance, cooling infrastructure, and workload requirements. A 5 to 8% performance gain from memory-only tuning (no voltage increase) carries minimal degradation risk and persists throughout the GPU’s lifetime. Conversely, +0.1V voltage increase for a 12% core clock gain trades 18 to 24 months of lifespan (estimated) for temporary performance, an unfavorable bargain for consumer gaming.
Risk-Benefit Analysis Matrix
| Tuning Scenario | Performance Gain | Degradation Risk | Recommended For |
|---|---|---|---|
| Memory Clock Only (+200 MHz) | 2 to 4% | Negligible (<1% lifespan loss) | Everyone; zero voltage risk |
| Core Clock +100 MHz (Stock Voltage) | 4 to 7% | Minimal (2 to 3% lifespan reduction) | Gaming enthusiasts; safe long-term |
| Core Clock +150 MHz + 0.050V | 10 to 12% | Moderate (12 to 18% lifespan loss) | Short-term gaming; accept warranty void |
| Extreme: +200 MHz Core + 0.125V | 15 to 18% | Severe (30 to 50% lifespan loss) | Benchmarking only; expect 2 to 3 year failure |
Power Limit Strategy
Modern GPUs ship with conservative power delivery limits. RTX 4070 defaults to ~270W TDP with a +20% power limit ceiling (~324W). Pushing this limit enables higher frequency-voltage binning, but also increases parasitic power (inductance losses, voltage regulation inefficiency). MSI Afterburner’s Power Limit slider should be set to +15 to 20% for overclocking scenarios, but not beyond. Exceeding +25% power limit triggers protection circuitry (current limiting, frequency throttling) that negates performance gains and introduces thermal instability.
For premium boards like the ASUS ROG Maximus Z890 Hero vs MSI MEG Z890 ACE, motherboard-level power delivery quality influences CPU stability; similarly, GPU power delivery design (phase count, capacitor quality) dictates overclocking headroom. High-end GPU models (NVIDIA RTX 4090 Kingpin, MSI Lightning Z) feature beefier VRM and can push power limits higher with stability, but consumer reference designs max out quickly.
Stress Testing & Long-Term Stability Validation
Overclocking success hinges on validation methodology. A GPU that runs Superposition for 30 minutes may fail after 8 hours of gaming or crash during CUDA kernel execution. Implement a tiered testing approach:
- Tier 1 (Quick Validation): 10-minute Superposition benchmark at 1440p Ultra; watch for immediate crashes, artifacts, or thermal throttle. This identifies gross instability within 15 minutes.
- Tier 2 (Gaming Stability): 2-hour session in a demanding title (Cyberpunk 2077 at ultra, 1440p) with frame rate overlay enabled. Monitor for frame drops, stutters, or crashes. This stresses real-world GPU workloads.
- Tier 3 (Thermal Long-Term): 24-hour continuous load via MemTestG80 or Unigine Valley benchmark loop. Validates that thermal cycling (CPU/GPU wake-sleep cycles) doesn’t introduce instability over extended periods.
- Tier 4 (Compute Validation): If using GPU for CUDA/HIP workloads, run targeted compute kernels (TensorFlow benchmark suite, MD5 hash verification) for 4 to 8 hours. Compute workloads stress memory error-correction and floating-point precision differently than graphics workloads.
Only after passing Tier 2 and Tier 3 should you consider the overclock “daily-driver stable.” Many users skip Tier 3, discovering instability weeks later during sustained loads.
Comparison: GPU Overclocking vs. CPU Overclocking Paradigms
GPU and CPU overclocking share frequency-voltage relationships but diverge operationally. CPUs tolerate higher voltage (+0.15V is routine for Ryzen/Intel), operate at lower frequencies (3.5 to 5.5 GHz), and benefit from all-core tuning. GPUs use lower voltage bands (+0.05 to 0.10V realistic maximum), achieve higher absolute frequencies (2.0 to 2.9 GHz), and employ heterogeneous clock scaling across memory and core domains. When reviewing processor overclocking guides like our desktop CPU benchmarks & reviews, note that GPU methodology inverts priorities: stability and thermals supersede frequency maximization, whereas CPUs often favor frequency ceiling over power efficiency.
GPU memory overclocking also lacks a direct CPU parallel; DDR5 frequency tuning on high-end motherboards uses similar marginal-gain philosophy but benefits from ECC validation and formal JEDEC specifications. GPU VRAM operates outside standard memory protocols, making validation empirical rather than standardized.
AMD Radeon vs. NVIDIA GeForce Overclocking Differences
MSI Afterburner supports both NVIDIA and AMD GPUs, but voltage curves differ subtly. NVIDIA RTX 40-series uses a fixed voltage range (0.550 to 1.090V nominal) with boost frequency tied to temperature and power load. AMD Radeon RX 7000-series employs a wider voltage envelope (0.600 to 1.200V) and decouples core/memory clocks more aggressively. For Radeon RX 9060 XT 8GB vs 16GB models, memory-bandwidth scaling is steeper, making memory clock tuning more impactful (2 to 3% performance per 50 MHz memory offset versus NVIDIA’s ~1% per 50 MHz).
NVIDIA’s architecture permits voltage-frequency curve linearization, making step-wise core clock offsets predictable. AMD’s curve exhibits inflection points, where certain voltage-frequency pairs exhibit thermal runaway; this mandates more conservative voltage increments (+0.025V steps instead of +0.050V) and shorter validation cycles between tuning iterations.
Warranty & Long-Term Ownership Implications
GPU overclocking voids manufacturer warranty in nearly all cases. NVIDIA and AMD include silicon fuses that detect overvoltage events; if your card has experienced +0.1V overvoltage, fuse traces show permanent alteration, and warranty claims are automatically denied. This legal reality should inform your risk calculus: a $500 GPU with voided warranty that fails after 2 years leaves you without recourse.
Professional applications (CAD rendering, machine learning development) that consume GPUs in 3 to 5 year cycles should avoid aggressive overclocking. Consumer gaming, where GPU replacement cycles are 4 to 7 years, can sustain moderate tuning (+75 to 100 MHz core, +0.025V max). Competitive esports players targeting 144+ fps in specific titles justify moderate overclocking; casual gamers targeting 60 fps at high settings gain minimal benefit and should skip voltage tuning entirely.
Advanced Monitoring: Telemetry & Diagnostic Data Interpretation
MSI Afterburner’s monitoring tab logs GPU parameters to CSV, enabling post-hoc analysis of stability correlations. Enable logging for GPU Temp, GPU Load, Memory Load, GPU Clock, Memory Clock, and Power Draw. After a 30-minute gaming session, export the CSV and analyze variance: if GPU Clock drops below your target by >50 MHz for >30 seconds, power limits or thermal throttling is active. If GPU Temp spikes above 80°C coinciding with clocking down, thermal throttle is enforcing governor policy.
Frequency variance >100 MHz during constant-load scenarios indicates power delivery ripple or VRM efficiency loss, common in cards with aging capacitors. If overclocking reveals newly degraded VRM performance, the card may have latent hardware issues unrelated to your tuning; test with stock settings and contact the manufacturer if frequency instability persists.
Final Diagnostic Verdict & Maintenance Checklist
GPU overclocking via MSI Afterburner is achievable and sustainable when methodologically sound. Conservative strategies, memory clock optimization and modest core clock increments (+75 to 100 MHz at stock voltage), deliver 5 to 8% performance gains with negligible degradation. Voltage tuning amplifies risk exponentially; reserve it for short-term gaming targets or benchmarking contests, not daily-driver systems.
Maintenance checklist for long-term overclocked GPU stability:
- Monthly thermal audits: Monitor average GPU temperature under load; upward drift >5°C signals dust accumulation. Clean heatsink fins and re-seat thermal pads every 12 months.
- Quarterly stability re-validation: Re-run Tier 1 & Tier 2 stress tests; degraded stability suggests capacitor aging or silicon damage. Reduce clock offsets by 15 to 20 MHz if new instability emerges.
- Power consumption trending: Log power draw at identical workloads every quarter. Power draw increase >10W at constant frequency signals aging VRM or capacitor leakage; reduce voltage by 0.025V to compensate.
- Backup & documentation: Maintain Afterburner profile exports (.bin files) and CSV monitoring logs. If GPU failure occurs, logs provide failure context for warranty claims or RMA negotiation.
- Environmental controls: Maintain ambient temperature u226424°C; higher ambient reduces overclocking headroom by ~0.5°C per degree Celsius. Ensure case airflow (front intake >80 CFM, rear exhaust unobstructed).
- Driver updates: Test overclocking profiles after GPU driver updates; driver changes can alter power delivery firmware, affecting stability. Re-validate Tier 1 testing after each update.
For comprehensive GPU architecture understanding and comparative performance analysis, consult NVIDIA GeForce Hardware Documentation and AMD’s technical resources. Cross-reference your card model against community overclocking databases (TechPowerUp GPU Database, LinusTechTips forums) to benchmark realistic performance ceiling expectations for your specific GPU bin.
Whether overclocking is worthwhile hinges on your workload and risk tolerance. For gaming at 1440p/60 fps, stock clocks suffice; for 4K/144 fps ambitions or professional compute workloads, modest memory tuning justifies the effort. Voltage tuning remains the domain of competitive benchmarkers and professional delidders with laboratory thermal infrastructure. Deploy MSI Afterburner as a precision tool, not a frequency maximizer, and your GPU will deliver reliable, incremental performance gains across its operational lifespan.
Explore our broader graphics card tests & GPU guides for detailed reviews of specific models and comparative overclocking headroom data across GPU families.
Safety Guidance Before Overclocking
Overclocking pushes a graphics card past its factory settings, which adds heat and can shorten component life. Guidance on electrical and thermal risks is found at American National Standards Institute (ANSI), and it is worth reading before you adjust any clock or voltage value.









