

Quick Answer: How to Remove a Push Mower Blade
Disconnect the spark plug wire (gas mower) or remove the battery pack (electric mower), then tip the mower onto its side with the air filter facing up. Wedge a block of wood between the blade tip and the inner deck wall to stop rotation, fit a socket wrench onto the center bolt, and turn counterclockwise to loosen — but check your brand first, because some models (notably older Toro and certain Craftsman units) use a reverse left-hand thread bolt that turns clockwise to loosen. Slide the blade off the spindle and note the orientation before setting it aside.

Pros
- Large-size design named in product title
- Sharpening and balancing functions listed
- Listed as a new upgraded version

Pros
- Adjustable 15-to-45-degree range in title
- Sharpening and balancing functions listed

Pros
- Sharpener and balancer functions in title
- 15-to-45-degree adjustable setting listed
- Built for lawn mower blade maintenance
Pros
- Includes replacement gaskets and a 98079-55846 spark plug
- Matches Honda HRR216 and HRS216 lawn mower models
- Designed around the 16100-Z8B-901 carburetor specification
Cons
- Restricted to select Honda GCV160 mower applications
- Installation requires basic mechanical tools and skills
Tools and Safety Gear You Need Before You Start
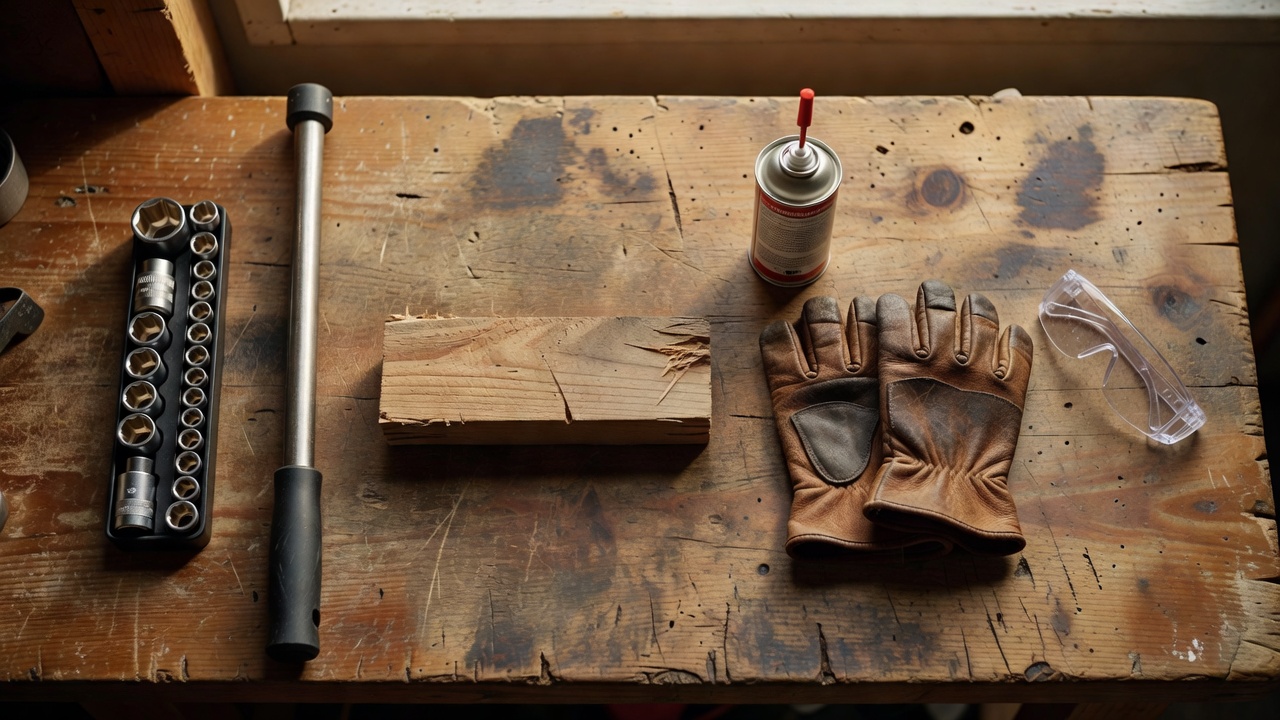
Gather every item on this list before touching the mower. Stopping mid-task to hunt for a socket is how accidents happen.
Required Tools
- Socket wrench set — a 5/8-inch socket fits the center bolt on most push mowers, but 9/16-inch and 3/4-inch sizes appear on certain brands. Confirm the size before you start.
- Breaker bar or impact wrench — blade bolts are torqued to 30–60 ft-lbs (the exact range varies by model; see your owner’s manual) and are often additionally seized by rust. A standard ratchet alone may not break the bolt free.
- Block of wood — a short 2×4 offcut works perfectly to immobilize the blade during unbolting.
- Commercial blade removal tool (optional) — clamps to the blade and deck simultaneously; eliminates the need for the wood block and keeps hands further from edges.
- Torque wrench — needed for reinstallation, not removal, but keep it nearby if you are sharpening and re-fitting the same session.
- Penetrating oil (e.g., PB Blaster or WD-40 Specialist Penetrant) — essential if the bolt is rusted or has not been removed in more than one season.
Required Safety Gear
- Heavy work gloves — leather or cut-resistant. A blade that appears dull still carries enough of an edge to cause a serious laceration. Wear gloves for every step that involves touching the blade.
- Eye protection — debris and rust fragments dislodge when breaking a seized bolt.
- Closed-toe footwear — steel-toed boots are ideal.
Is It Safe to Remove a Mower Blade Yourself?
Yes — provided you fully disable the mower before tipping it. The single greatest risk is accidental engine engagement while your hands are near the blade. Every step in this guide is ordered to eliminate that risk before any contact with the cutting deck occurs. For troubleshooting and reliability insights, consult our in-depth jbl partybox club 120 vs sony srs xv500 report.
Step 1 — Disconnect Power: Gas vs. Electric Mowers
This step is non-negotiable. Complete it before tipping the mower or touching the blade area. For troubleshooting and reliability insights, consult our in-depth jbl partybox club 120 vs sony srs xv500 report.
Gas-Powered Push Mowers
- Let the engine cool completely if the mower was recently running.
- Locate the spark plug wire — a thick rubber boot attached to a ceramic plug on the engine block, usually on the front or side of the engine.
- Grip the boot (not the wire) and pull it straight off the spark plug terminal.
- Tuck the wire away from the plug — fold it back and secure it with a zip tie or tape it to the mower handle so it cannot fall back into contact with the plug during the job.
With the spark plug wire disconnected, the ignition circuit is broken. The engine physically cannot start even if the blade is bumped or the handle bar is accidentally depressed.
Corded Electric Push Mowers
- Press the power switch to the off position.
- Unplug the power cord from the wall outlet or extension cord.
- Move the cord clear of the work area so it cannot be tripped over or accidentally reconnected.
Battery-Powered (Cordless) Electric Push Mowers
- Press the power switch to off.
- Locate the battery pack — typically a slide-in or push-button-release unit on the mower handle or under the rear panel.
- Press the release tab and slide the battery pack out completely.
- Set the battery indoors or at a distance from the mower — not on the deck or near the blade area.
For battery-electric mowers, tipping direction (covered in Step 2) is less critical from a fluid-leakage standpoint but still affects access and stability. Follow the tipping guidance below regardless of mower type. Readers comparing setup options can review our technical analysis on z890 vs x870e motherboard.
⚠ Warning: Skipping the power-disconnect step is the leading cause of hand injuries during DIY blade removal. An engine can fire on a compression stroke even without deliberate pulling of the starter cord if the blade is rotated by hand. Disconnect power first, every time.
Step 2 — Tip the Mower Correctly to Access the Blade
Gas Mowers: Tipping Direction Matters
On a gas-powered push mower, the carburetor and air filter must face upward when the mower is on its side. Tipping the mower with the air filter facing down allows engine oil to drain into the air filter and carburetor, which can cause hard starting, excessive smoke, or engine damage when the mower is returned to service. For complementary field maintenance guidelines, examine our breakdown of marshall stanmore iii vs harman kardon onyx studio 8.
To identify the correct side:
- Stand behind the mower handle and look at the engine block.
- Locate the air filter cover — a plastic or metal box, usually rectangular, attached to the side of the engine.
- Tip the mower so that side faces up.
- On most walk-behind mowers, this means tipping toward the right side as you stand behind the handle, but confirm on your specific unit before proceeding.
Fuel Considerations Before Tipping a Gas Mower
Running the fuel tank as close to empty as practical before this job reduces spillage risk. Drain remaining fuel into an approved container, or run the engine until it stops from fuel starvation. If neither is convenient, tip the mower slowly and have a rag ready to catch any seepage from the fuel cap. Keep fuel away from any ignition sources. To evaluate matched hardware tolerances, consult our detailed overview of dyson v8 cyclone vs bissell featherweight stick.
Electric Mowers: Tipping Direction
No oil or fuel spillage risk exists. Tip toward whichever side gives the most stable resting position and clearest access to the blade bolt from underneath. Place the mower on a firm, flat surface — concrete or packed gravel, not soft grass that allows the deck to shift.
Stabilizing the Mower
Once tipped, the mower must stay in position. Lean it against a wall or have a second person hold it steady. A mower that tips back onto its wheels mid-task is a pinch and crush hazard. When planning workspace deployment, consider the engineering criteria outlined in our bissell crosswave hydrosteam vs shark stainforce guide.
Step 3 — Secure the Blade So It Cannot Spin
The blade must be fully immobilized before any torque is applied to the center bolt. Attempting to hold the blade with your bare hand is unsafe regardless of glove thickness — if the wrench slips, the blade will rotate and a glove will not prevent injury.
Block of Wood Method
- With the mower stable on its side, look into the cutting deck from below. You will see the blade spanning the deck width and the center bolt or retaining nut in the middle.
- Cut or select a block of wood (a 2×4 offcut roughly 6–8 inches long works well).
- Wedge the block firmly between one tip of the blade and the inner wall of the cutting deck.
- Apply hand pressure to confirm the blade cannot rotate in either direction before reaching for the wrench.
Commercial Blade Removal Tool
A blade removal tool (available at most hardware and outdoor power equipment retailers) grips the blade and deck simultaneously with a clamp mechanism, holding the blade stationary without requiring a wood block. If you remove and sharpen blades regularly, this tool pays for itself in convenience and added safety margin.
Reminder: Put on work gloves before touching the blade at any point from this step forward. Edges that look dull still cut skin on contact.
Step 4 — Unbolt the Center Blade Bolt (Including Reverse-Thread Warning)
This is the most mechanically variable step in the process. Read the reverse-thread section before applying force.
Identify the Bolt
The center bolt (also called the blade bolt or retaining bolt) sits at the exact center of the blade, threaded into the spindle. On most consumer push mowers it is a single bolt. Some models also have a blade adapter or blade carrier plate between the bolt and blade — photograph the assembly now so you can reassemble in the correct order.
Common socket sizes:
- 5/8 inch — most common across Briggs & Stratton and Honda-engined mowers
- 9/16 inch — found on some Husqvarna and Poulan units
- 3/4 inch — appears on select larger-deck walk-behind models
Check your owner’s manual for the confirmed bolt size. Using the wrong socket size rounds the bolt head and complicates removal significantly.
Reverse-Thread Warning
⚠ Critical: Not all mower blade bolts follow the standard counterclockwise-to-loosen convention. Some brands — particularly older Toro walk-behind models and certain Craftsman units — use a left-hand (reverse) thread bolt that loosens by turning clockwise. Applying counterclockwise force to a reverse-thread bolt tightens it further and can strip the bolt head or crack the spindle. Consult your owner’s manual or the manufacturer’s service documentation for your specific model before applying force. When in doubt, apply minimal force in one direction and, if the bolt does not move at all, try the opposite direction before escalating pressure.
Standard Thread (Most Brands)
- Fit the correct socket onto the center bolt.
- Attach a breaker bar (preferred for seized bolts) or impact wrench. A standard ratchet arm may flex or slip before the bolt breaks free.
- Turn counterclockwise (lefty-loosey) with steady, increasing pressure.
- If the bolt does not move, stop. Forcing a stuck bolt without penetrating oil risks rounding the head.
Dealing with a Rusted or Stuck Bolt
- With the mower still on its side, spray penetrating oil (PB Blaster, WD-40 Specialist Penetrant, or equivalent) directly onto the bolt threads where they meet the spindle.
- Wait a minimum of 15–30 minutes. For bolts that have not been removed in several seasons, a second application after one hour is more effective.
- Reapply the socket and breaker bar. Use a controlled pull rather than a sudden jerk — slow, sustained pressure is more effective at breaking rust bonds than impact force and reduces the risk of rounding the head.
- If the bolt still will not move, an impact wrench is the appropriate next step. If the head is already rounded, a bolt extractor socket set is required.
Remove Washers and Adapters
Once the bolt is fully out, one or more washers, a blade adapter, or a blade carrier plate may come away with it or remain on the spindle. Keep all components together in a small container or bag in the order they were removed. These parts are orientation-specific and missing or reversed spacers cause blade wobble and vibration damage.
Step 5 — Remove the Blade and Note the Orientation
With the bolt and any washers or adapters removed, the blade slides off the spindle shaft. It may be slightly stiff from corrosion — grip it through gloves and pull straight down (away from the deck). Do not pry or lever it, which can damage the spindle.
Blade Orientation: Which Side Faces Down
Reinstalling a blade upside down is a common and costly mistake — an inverted blade does not cut grass; it pushes it down and causes the engine to overwork. Before setting the blade aside:
- The cutting edge (sharpened bevel) faces down, toward the ground, during operation.
- The wing or fin (the angled lift section at each blade tip that creates airflow for mulching or bagging) faces up, toward the deck.
- Manufacturer stamps or part numbers are typically on the top (deck-facing) side of the blade.
- Photograph both sides of the blade and the full spindle assembly before putting the blade down. Three seconds of documentation prevents reinstallation errors.
Inspect the Blade Before Proceeding
With the blade in hand (gloves on), examine it under good light:
- Cracks or deep gouges — a cracked blade must be replaced, not sharpened. A failing blade can shatter at speed and become a projectile.
- Heavy bends — a blade bent from striking a rock or root should be replaced. Attempting to straighten a hardened steel mower blade causes unpredictable fracture points.
- Dull or nicked edges — candidates for sharpening (see next section).
What to Do Next: Sharpen, Replace, or Reinstall
Sharpening a Removed Mower Blade
A flat file or bench grinder set to match the blade’s existing bevel angle (typically 25–45 degrees, varying by manufacturer) removes nicks and restores the edge. File or grind along the top beveled face only, working from the inner edge toward the tip in smooth strokes. After sharpening, the blade must be balanced before reinstallation — hang it on a nail through the center hole and confirm it rests level. An unbalanced blade causes severe spindle and bearing vibration that shortens engine life. Blade balancers are inexpensive tools available at hardware retailers and provide a more accurate reading than the nail method.
Replacing with a New Blade
When the existing blade is cracked, heavily bent, or worn past effective sharpening, replacement is the correct path. When sourcing a replacement:
- Match the blade length exactly to the original (measure tip to tip).
- Match the center hole diameter and shape — holes vary between round, star, and hex patterns depending on the spindle design.
- OEM (original equipment manufacturer) blades are the safest specification match. Reputable aftermarket blades are acceptable provided the length, hole pattern, and lift angle match the original.
- Bring the old blade to the retailer or note the mower model number before ordering online to confirm compatibility.
Reinstalling the Blade
Reinstallation reverses the removal sequence with one additional requirement: correct torque.
- Confirm the cutting edge will face down (toward ground) once the mower is uprighted.
- Slide the blade onto the spindle, followed by any adapters and washers in the original order (refer to your photo).
- Thread the center bolt by hand first to confirm it catches cleanly without cross-threading.
- Tighten to the torque specification in your owner’s manual — blade bolt torque commonly falls in the 30–60 ft-lbs range across consumer push mower models, but this varies significantly by brand and deck size. Do not apply a single universal figure without verifying against your model’s specification. Overtightening damages the spindle; undertightening allows the blade to shift during operation.
- Reconnect the spark plug wire (gas) or reinstall the battery pack (electric).
- Return the mower to its normal upright position before starting it. Check for any oil that may have seeped onto the deck during the tipping process and wipe it away.
Frequently Asked Questions About How To Remove Blade From Push Mower
Do I need to disconnect the spark plug every time I remove the mower blade?
Yes, every single time — no exceptions. The engine on a gas push mower can fire on a compression stroke if the blade or crankshaft is rotated even slightly. Disconnecting the spark plug wire physically breaks the ignition circuit and makes accidental starting impossible. Skipping this step for a “quick” blade swap is the scenario most associated with hand injuries during DIY mower maintenance.
Why won’t my mower blade bolt turn counterclockwise?
Two possible causes: the bolt is seized from rust (apply penetrating oil and wait 15–30 minutes before retrying), or the bolt uses a left-hand reverse thread and actually loosens by turning clockwise. Older Toro walk-behind mowers and certain Craftsman models are known to use reverse-thread blade bolts. Check your owner’s manual or manufacturer service documentation before escalating force — overtightening a reverse-thread bolt strips the spindle threads.
Which way do I tip a gas push mower to access the blade?
Tip it so the air filter and carburetor face upward. Tipping the mower the opposite way allows engine oil to drain from the crankcase into the air filter, which causes white smoke on restart, difficult starting, and potential engine damage. On most walk-behind mowers this means tipping the machine toward the right side as you stand behind the handle, but locate your air filter housing visually and confirm before tipping.
How do I know if my mower blade needs sharpening or full replacement?
Sharpen a blade that has dull or lightly nicked edges with no structural damage — it will restore clean cutting performance. Replace the blade immediately if it has any visible cracks, fracture lines, or heavy bends from impact with rocks or roots. A cracked or severely bent blade is a safety hazard: mower blades spin at 2,800–3,200 RPM and a failing blade can fracture and exit the deck at projectile speed. When in doubt, the cost of a replacement blade is always lower than the risk of running a compromised one.
For more hands-on benchmarks and buying recommendations, consult our guides on residential zero-turn lawn mower guide, as well as high-CFM commercial leaf blower guide, as well as durable ride-on lawn tractor guide, as well as automated robotic lawn mower guide.
Mechanical safety standards, operational tolerances, and protective gear guidelines align with benchmark specifications established by the American National Standards Institute (ANSI).









