How Do I Remove a Lawn Mower Blade? The Direct Answer
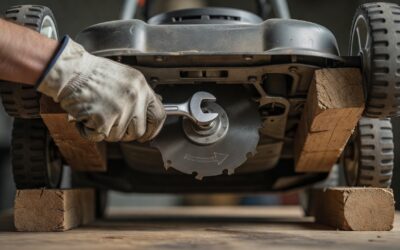
To remove a lawn mower blade, start by making the mower safe: disconnect the spark plug wire on a gas mower or remove the battery on an electric mower. Tip the mower on its side with the air filter and carburetor facing upward to prevent fuel and oil leaks. Wedge a block of wood between the blade and the mower deck to stop it from spinning, then use a socket wrench to loosen the center blade bolt. Note that some models use reverse threads, so the bolt may turn clockwise to loosen. Once the bolt is out, slide the blade off the mounting bracket. Always wear work gloves and safety goggles throughout the process.
Why Removing Your Lawn Mower Blade Is Necessary
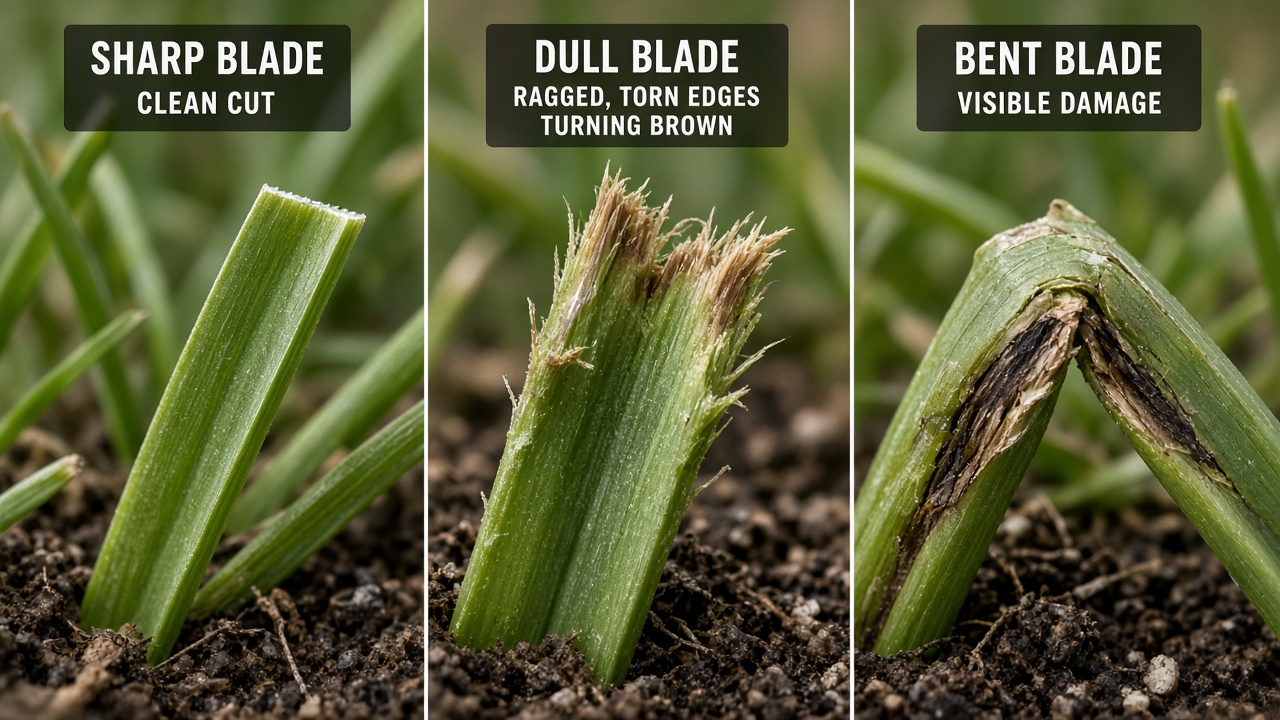
Removing the blade is an essential part of lawn mower maintenance. You will need to take the blade off for three common reasons: sharpening, replacement, and inspection.
Sharpening a Dull Blade
A dull blade tears grass instead of cutting it cleanly, leaving ragged edges that turn brown and make your lawn more vulnerable to disease. Most homeowners should sharpen the blade at least once or twice per season. If you mow frequently or have a large yard, you may need to sharpen more often. Removing the blade is required to sharpen it safely on a bench grinder or with a file, because sharpening it while mounted is awkward and dangerous.
Replacing a Damaged or Worn Blade
Blades eventually wear out. If you hit a rock, stump, or buried object, the blade can become bent, chipped, or cracked. A bent blade causes excessive vibration that can damage the mower’s engine and crankshaft. Cracks are a serious safety hazard because pieces of the blade can break off at high speed. In these cases, removal is the first step toward installing a new blade.
Inspecting for Hidden Damage
Removing the blade also gives you a chance to inspect the mounting bracket, spindle, and underside of the deck. Grass buildup, rust, and debris can hide damage that is only visible once the blade is off. Regular inspection helps you catch small problems before they become expensive repairs.
Essential Tools and Safety Gear for Blade Removal
Before you start, gather the right tools and safety equipment. Having everything ready makes the job faster and reduces the risk of injury.
Tools You Will Need
- Socket wrench or breaker bar — The blade bolt is usually tightened to a high torque, so a standard ratchet may not be enough. A breaker bar gives you extra leverage.
- Correct socket size — Most push mowers use a 13/16-inch, 15/16-inch, or 19mm socket, but sizes vary by brand. Check your owner’s manual if you are unsure.
- Block of wood — A 2×4 or similar piece of wood wedged between the blade and the deck prevents the blade from rotating while you loosen the bolt.
- Penetrating oil — Useful if the bolt is rusted or stuck. Products like WD-40 or PB Blaster can loosen corrosion.
- Work gloves — Lawn mower blades are sharp, and the cutting edge can easily slice through skin. Heavy-duty gloves protect your hands.
- Safety goggles — Debris, rust flakes, and oil can fall into your eyes while you work under the deck.
- Clean rag or shop towel — For wiping off grass clippings, oil, and grease.
- Optional: blade removal tool — Some manufacturers sell a tool that locks the blade in place, which can be easier than using a block of wood.
Safety Precautions Before You Start
- Disconnect the spark plug wire on gas mowers and secure it away from the plug so it cannot accidentally reconnect.
- Remove the battery on electric mowers, or at minimum disconnect the power source.
- Drain or run the mower dry if possible. Tipping a full gas tank can cause fuel to spill into the air filter or carburetor.
- Work on a flat, stable surface such as a driveway or garage floor.
- Never put your hands near the blade unless the power source is completely disconnected.
Step-by-Step Guide: How to Remove a Lawn Mower Blade
Follow these steps in order. The process takes about 10 to 20 minutes for most push mowers.
Step 1: Disconnect the Power Source
For a gas mower, pull the spark plug boot off the spark plug and push it to the side so it cannot touch the plug. For an electric mower, remove the safety key or disconnect the battery pack. This is the single most important safety step. Even with the mower off, the engine can fire if the spark plug is connected, and the blade can spin.
Step 2: Tip the Mower Safely
Tip the mower onto its side with the air filter and carburetor facing up. On most push mowers, this means tipping it so the exhaust side faces down. Tipping it the wrong way can cause oil and fuel to pour into the air filter, which will flood the engine and make it difficult to start later. If your mower has a full tank of gas, consider siphoning the fuel first or draining it into an approved container. For electric mowers, there is no fuel to worry about, but you should still protect the battery compartment from dirt and debris.
Step 3: Clean the Underside of the Deck
Use a scraper or putty knife to remove thick layers of grass clippings and mud from the underside of the deck. This makes it easier to see the blade and the mounting bolt, and it prevents debris from falling into your face while you work. It is also good maintenance, since a clean deck cuts better and resists rust.
Step 4: Wedge a Block of Wood to Lock the Blade
Place a sturdy block of wood between the blade and the deck housing. The wood should be wedged firmly so the blade cannot rotate when you apply force to the bolt. This is much safer than holding the blade with your hand.
Step 5: Loosen the Blade Bolt
Attach the correct socket to your wrench or breaker bar and fit it over the blade bolt. Turn the bolt to loosen it. Here is where the thread direction matters:
- Standard threads — Loosen by turning the bolt counterclockwise (to the left). Most mowers use this configuration.
- Reverse threads — Some manufacturers, including certain models from Honda and others, use reverse threads. On these, you loosen by turning the bolt clockwise (to the right).
If you are unsure which type you have, consult your owner’s manual. A good rule of thumb is to try counterclockwise first with moderate force. If the bolt does not budge and you feel it tightening, try the opposite direction. Do not force it so hard that you strip the bolt head.
Step 6: Remove the Bolt and Slide Off the Blade
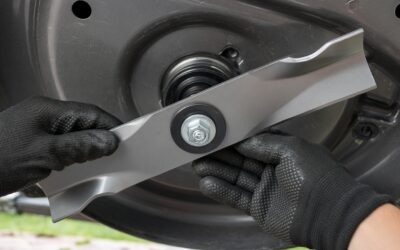
Once the bolt is loose, remove it by hand and set it aside in a safe place. Note that there may be a washer or a curved plate under the bolt. Keep these parts together so you do not lose them. Slide the blade off the mounting bracket or spindle. On some mowers, the blade fits onto a keyed shaft; on others, it simply sits against a flat plate. If the blade is stuck to the deck with dried grass or rust, tap it gently with a rubber mallet to break it free.
Step 7: What to Do If the Blade Bolt Is Stuck
If the bolt will not turn, do not give up. Try these techniques in order:
- Apply penetrating oil — Spray the bolt where it meets the blade and let it sit for 15 to 30 minutes. Reapply if needed.
- Use a breaker bar — A longer handle gives you more leverage than a standard ratchet.
- Tap the wrench handle — A few sharp taps with a hammer can help break the corrosion seal. Do not hit the bolt directly with the hammer, as this can damage the threads.
- Apply heat as a last resort — A heat gun or propane torch can expand the metal and break the bond. Use extreme caution near fuel vapors and never use an open flame near a gas tank.
Special Considerations for Different Mower Types
The basic process is similar across mower types, but there are important differences in access and preparation.
Gas Push Mowers
This is the scenario described above. The main concerns are disconnecting the spark plug and tipping the mower with the air filter and carburetor facing up. On most walk-behind mowers, the blade is held by a single center bolt. Some models have a second smaller bolt or a blade adapter, so pay attention as you disassemble.
Electric Push Mowers
Electric mowers are simpler because there is no fuel or oil to leak. Remove the safety key or disconnect the battery before tipping. The blade bolt is usually the same size and style as on a gas mower. On corded electric mowers, unplug the unit first. On battery models, remove the battery pack entirely. The blade removal process is otherwise identical.
Riding Mowers
Riding mowers are heavier and more complex. You should not tip a riding mower on its side. Instead, raise the deck using the deck lift lever, or use jack stands to safely support the mower if you need more clearance. Disconnect the spark plug wire and remove the key before working underneath. Riding mower decks typically have one blade per spindle, and some decks have two or three blades. Each blade is held by a center bolt, and you may need to remove a belt or pulley guard to access them. Because of the added weight and complexity, many owners choose to remove the entire deck from the mower and work on it at a bench. If you do this, follow the manufacturer’s instructions for deck removal and reattachment.
Mulching and Specialty Blades
Mulching blades and lift blades use the same mounting system as standard blades, so removal is identical. The main difference is that some mulching blades have a more complex shape, which can make them slightly harder to slide off if grass has packed around the mounting area. Clean the area thoroughly before removal.
After Removal: Inspection, Sharpening, and Reinstallation Tips
Once the blade is off, you can decide whether to sharpen it or replace it, and then put everything back together correctly.
How to Inspect the Old Blade
- Check for cracks — Look closely at the blade, especially around the mounting hole and where the blade attaches to the adapter. Any crack means the blade must be replaced.
- Check for bends — Lay the blade flat on a level surface. If it rocks or does not sit flat, it is bent and should be replaced.
- Check the cutting edge — If the edge is nicked, rolled, or excessively worn, sharpening may not be enough. Replacement is the safer option.
- Check for excessive wear — If the blade has lost more than about a quarter of its original width, replace it.
Sharpening Basics
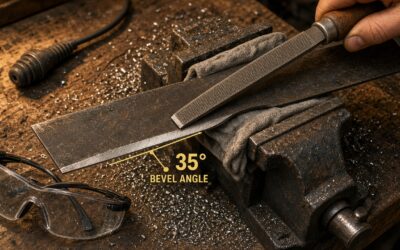
You can sharpen a blade with a bench grinder, an angle grinder, or a metal file. Maintain the original cutting angle, which is typically about 30 to 45 degrees. Sharpen both ends equally to keep the blade balanced. An unbalanced blade causes vibration that can damage the mower. If you are not confident in your sharpening skills, many hardware stores and small engine shops offer sharpening services for a low fee.
Reinstallation Tips
- Clean the mounting surface — Remove rust and grass from the spindle or adapter before reinstalling.
- Orient the blade correctly — The cutting edge should face the direction of rotation, and any stamped arrows or wording on the blade should point upward toward the deck. If you install the blade upside down, the mower will not cut properly.
- Reinstall the washer and bolt — Place any washers or plates back in the exact order you removed them.
- Tighten the bolt securely — The bolt should be tightened to the manufacturer’s recommended torque specification, which is typically in the range of 30 to 50 foot-pounds for push mowers. Check your owner’s manual for the exact figure, as specifications vary by model. If you do not have a torque wrench, tighten firmly with a socket wrench and give it one final solid pull.
- Rotate the blade by hand — After tightening, spin the blade to make sure it moves freely and does not hit the deck.
Frequently Asked Questions
Do I need to remove the spark plug wire before removing the blade?
Yes. Always disconnect the spark plug wire on a gas mower before working near the blade. Even if the mower is off, the engine can accidentally fire and rotate the blade if the plug is connected. On electric mowers, remove the safety key or battery pack instead.
Which way do I turn the lawn mower blade bolt to loosen it?
On most mowers, the blade bolt loosens counterclockwise, like a standard bolt. However, some manufacturers use reverse threads, which loosen clockwise. If the bolt does not loosen with normal force in one direction, try the opposite direction. Check your owner’s manual if you are unsure.
Do I need to drain the gas before tipping my mower on its side?
It is recommended. Tipping a mower with a full tank can cause fuel to leak into the air filter or carburetor, which can make the engine hard to start or cause it to run poorly. If you cannot drain the tank, tip the mower with the air filter and carburetor facing up and work carefully.
How do I know if my blade needs sharpening or replacing?
Sharpen the blade if the edge is dull but the blade is otherwise straight and free of cracks. Replace the blade if it is bent, cracked, chipped, or worn down significantly. A bent or cracked blade is a safety hazard and should never be reused.