Lock the mower out so it cannot start, then remove the worn blade and install a matching replacement in the same orientation. On a typical walk-behind mower, isolate the spark-plug boot, battery, or power cord, wear cut-resistant gloves, block the blade, remove the center fastener while noting hardware and blade direction, fit a compatible new blade the same way, and retighten before restoring power. Confirm tipping direction, fastener type, and lockout steps in your owner’s manual.
What this guide covers
This article describes a general sequence for replacing a single mower blade on a common walk-behind lawn mower—gas, corded electric, or battery. The goal is a safe swap: isolate power, remove a worn or damaged blade, install a compatible replacement in the correct orientation, and check the work before you mow again. It is background knowledge, not a substitute for the printed procedure that came with your machine.
Riding mowers, zero-turn mowers, robotic mowers, reel mowers, and many multi-blade decks are out of scope. Those machines often use different lockouts, more than one blade that must stay timed, heavier decks, or service positions that do not match a walk-behind. If your owner’s manual shows a different fastener, adapter, or access method, follow the manual. A successful blade change restores a sound cutting edge and lift. It does not repair a bent crankshaft, a cracked adapter, a leaking battery pack, or a deck that already vibrates for another reason.
Open the owner’s manual before you lift the deck if any of the following is true: you cannot identify the power lockout, you do not know which way the mower may be tipped, the blade uses several bolts or a quick-change cartridge, markings on the fastener or blade contradict what you expect, or the machine is not a typical single-blade walk-behind. When the manual and this article disagree, the manual wins.
Safety first: lock out power and protect yourself
A lawn-mower blade can cause severe cuts even when the engine is off. The cutting edges stay sharp, the deck can fall or roll, and a gas or electric start system can still turn the blade if someone pulls a cord, presses a bail, or reconnects power. Accidental start and a spinning or falling blade are the main injury risks. Work as if the blade could move until power is isolated and the deck is stable.
Isolate the ignition or power source
On a typical gas walk-behind, stop the engine, let it sit until it is cool enough to handle, then pull the spark-plug boot off the plug and park the boot where it cannot spring back onto the terminal. That interrupt is the usual ignition lockout for this class of mower. Do not rely on the throttle or a “stop” position alone.
On a corded electric mower, unplug the power cord from the outlet and keep the plug in view so no one reconnects it. On a battery mower, remove the key if the design uses one, then remove the battery pack or follow the maker’s disable steps. Battery platforms differ. Some packs have their own latch sequence; some decks must not be inverted. Do not invent a single electrical isolation method for every lithium pack, and do not defeat safety interlocks, kill switches, or start-prevention features.
Protect yourself and the work area
Wear cut-resistant gloves and eye protection. Ordinary fabric gloves are not enough; a sharp blade can cut through them. Closed shoes, long pants, and a stable stance help if the mower shifts. Keep children and pets away from the work area. Choose a level, firm surface with enough room to control the handle. Do not work on a slope or a slick garage floor where the machine can roll.
Never put a hand or tool into the deck while power can still be applied. Never ask someone to hold the bail, key, or plug “just in case.” Never start the engine or bump the starter to loosen a stuck blade bolt. If fuel is present, work outdoors or in a well-ventilated area and keep sparks and open flame away from the tank and carburetor. If a battery pack is swollen, cracked, or leaking, stop and use manufacturer guidance or a qualified shop rather than forcing the deck onto its side.
Tipping a gas mower the wrong way can spill fuel or send oil into the air filter or engine. Some battery and electric decks have their own limits and must not be inverted. Those details belong to your manual. Until you confirm them, treat tipping as a controlled, temporary position—not a casual flip—and never leave a raised mower unattended.
Tools, parts, and choosing a compatible replacement blade
Gather the owner’s manual first. For a typical single center-fastener blade you usually need cut-resistant gloves, eye protection, a socket or wrench that fits the blade bolt or blade nut, a scrap wood block or purpose-made blade holder to stop rotation, and a scraper or stiff brush for packed grass. Penetrating oil can help a seized fastener. A torque wrench is useful only if the manual publishes a tightening value; this article does not give a universal number because fastener size and spec vary by model.
Match the replacement to the old blade and the deck
Choose a compatible replacement by comparing it with the blade you are removing and with the deck’s job, not by guessing a popular brand. Match cutting length class, center-hole shape, mounting style (center hole plus adapter, star, or other pattern), and intended use: a mulching blade, a bagging or high-lift blade, or a general side-discharge profile. The new blade should seat fully on the blade adapter without forcing, slop, or a homemade spacer.
Keep every washer, star washer, spacer, and adapter that comes off, in order. Replace any that are cracked, rounded, missing, or badly worn. Do not improvise with hardware-store washers that do not match the stack. If the old blade is so damaged that you cannot read length or hole shape, use the model information in the manual or on the mower rather than approximating.
Stop before you buy or install if the blade is the wrong length for the deck, the center hole does not match, the adapter is cracked, or you would have to grind, drill, or stack unrelated parts to make it fit. A mismatched blade can hit the deck, throw hardware, or vibrate enough to damage the crankshaft area.
Get access to the underside of the deck
Let a hot engine cool. If the mower uses gasoline, confirm the fuel cap is secure and review the manual for draining or tipping limits. You do not need a measured drain volume for every job, but a very full tank is a reason to work extra carefully or to follow any drain step the maker specifies. Brush loose clippings off the deck so the blade, fastener, and adapter are visible and so packed grass does not hide a washer later.
Access methods are alternatives the manual may allow, not a single required pose:
- Raise the front of a walk-behind securely by the handle, with the rear wheels planted, only if you can hold the machine stable the entire time.
- Use ramps or a stable stand designed for the mower’s weight if the manual describes that service position.
- Tip the mower onto one side if the maker allows it, then chock or brace it so it cannot fall back onto you.
A widely repeated pattern for many gas walk-behinds is to keep the carburetor and air filter on the high side so oil and fuel stay out of the filter and cylinder. Treat that only as a common pattern you must confirm. It is not a universal law. Battery, electric, and some gas models have different limits. Do not lift at an improvised angle that puts the tank or battery downhill if the manual forbids that position.
Keep the mower from rolling: chock wheels, hold the handle, or have a second person stabilize the handle without reaching under the deck. Never crawl under a mower that is balanced on a jack, a stack of blocks, or a tilting handle. If you cannot get a stable, well-lit view of the blade bolt without the machine teetering, stop and change the setup or take the mower to a shop.
Remove the old blade
With power still locked out, stop the blade from turning without putting your hand in the cutting path. Wedge a wood block between the blade and the mower deck so the cutting edge cannot rotate toward your wrench. A purpose-made blade holder that clamps the blade is another option. Do not grip the blade with bare hands, and do not use your foot in the deck opening.
Record orientation and hardware order
Before the fastener comes off, note which face of the blade points toward the grass, which way the raised sails or lift vanes point, and any stamped arrows or “this side toward grass” markings. Photograph or sketch the washer stack, star washers, and blade adapter. That record is what you will copy on the new blade.
Most walk-behind center fasteners loosen counterclockwise, the same direction as a standard bolt. Some machines use a reverse thread, a nut on a stud, or a different pattern. Markings on the fastener, a left-hand-thread note in the manual, or a locking feature override the usual assumption. If the fastener will not budge and you are not sure of thread direction, stop rather than rounding the head or twisting the crankshaft.
Break the fastener free and lift the parts off
Apply steady wrench pressure while the wood block takes the rotation. A short soak with penetrating oil on a rusted blade bolt or blade nut is reasonable general practice. Avoid heat, hammer-driven impact recipes, or extractor tricks that can mushroom the fastener or damage the crankshaft end. If the bolt rounds off or the adapter turns on the shaft, that is a shop job.
Lift the fastener, then the outer washers, then the blade, then any remaining adapter pieces, in the order they come free. Keep the stack together. Inspect the shaft end and key or drive features as soon as they are visible so you do not lose a small part in the grass. Leave the wood block in place until the blade is fully off and set aside with the cutting edges pointed away from your path.
Inspect the blade, adapter, and crankshaft area
Look at the old blade as evidence, not only as scrap. Deep nicks, missing chunks, cracks near the center hole, and a clearly bent airfoil are reasons the replacement was needed. A blade that is bent like a propeller, or that shows impact on only one wing, can mean the mower hit something hard enough to stress the blade adapter or crankshaft. That is a stop-and-inspect moment. Installing a new blade on a bent shaft or a cracked adapter will not make the mower safe to use.
The adapter should sit square on the shaft. Look for rounded drive lugs, a cracked hub, a distorted center hole, or a missing key. Mounting faces should be clean metal, not packed with mud that would keep the new blade from seating. A pulley or adapter that wobbles by hand, with power still locked out, is another reason to stop.
Clean wrapping, string, and packed clippings off the shaft and the underside of the deck so they cannot hold the new blade off the adapter. A scraper and brush are enough for ordinary debris. Do not grind the crankshaft or file the adapter to “make it fit.”
Sharpening or flipping an old blade is a separate maintenance choice, and only if the blade is otherwise straight, uncracked, and thick enough at the cutting edge for the work you expect. A sharpened used blade is not the same as a new one. If the blade is bent, cracked, or already ground thin, replace it. This article does not give remaining-thickness numbers, balance-gram tolerances, or RPM limits; those belong to the blade maker or the mower manual when they are published.
Install the new blade in the correct position
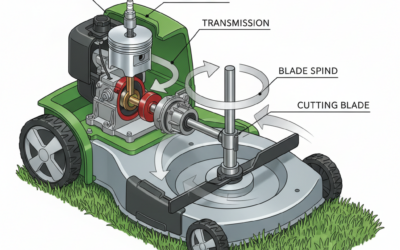
Set the new blade on the adapter the same way the old one sat. Cutting edges must face the direction of rotation so they meet the grass first. Raised sails or lift vanes usually point up into the deck so they move clippings toward the chute, bag, or mulching chamber. Copy the old blade and any embossed “this side toward grass” or similar marking. A backward blade can still spin, but it cuts poorly, lifts poorly, and can cause vibration or a dangerous loose fit if it does not seat on the adapter.
Rebuild the washer stack and adapter in the recorded order. There is no single universal washer diagram that fits every walk-behind. The center hole should drop onto the adapter without hammering. When seated, the blade should not rock on the hub, and the fastener should start by hand for several turns. If it only starts by force, you may have cross-threading, the wrong nut, or a missing spacer.
Mulching, high-lift, and dual-blade walk-behind decks add extra constraints. A mulching blade has a different profile than a bagging or high-lift blade; using the wrong style can leave clumps or starve the bag without meaning the fastener is loose. Dual blades that must stay timed, or blades that share a toothed timing gear, are a consult-the-manual item. Do not assume an aftermarket blade will mulch or bag like the original unless the packaging and your deck specifications actually match.
Tighten the fastener and check your work
The fastener must be firmly seated so the blade cannot spin on the adapter. If the owner’s manual gives a torque value and you have a torque wrench, use that published number. This article does not state a numeric torque for all walk-behind mowers. Without a published spec, aim for firm and fully seated—not brute-force that strips threads or twists the crankshaft—and get the spec from the manual or the manufacturer rather than guessing.
Hold the blade with the wood block again while you tighten so the wrench turns the nut or bolt, not the whole cutting assembly. Recheck that washers are present and that the blade still shows the correct sail direction after the final snug-up.
Checks before you restore power
With lockout still in place:
- Confirm the blade cannot shift on the adapter by hand.
- Confirm every piece of the washer stack is present and the fastener is fully engaged.
- Remove the wood block, scraper, and any tools from the deck.
- Look for fuel or oil that spilled during tipping, and for a battery pack that shifted in its tray.
- Lower the mower onto its wheels so it sits level and the handle is free.
Only then restore the spark-plug boot, battery, or power cord. Keep hands and feet away from the deck on first start. Unusual vibration, a scraping sound, or a loose rattle means shut down immediately, lock out power again, and recheck orientation and hardware. A short test cut on a small patch is enough to see whether clippings lift and whether the cut looks even. There is no guaranteed vibration threshold or run-in time that proves the job is perfect; treat new noise as a stop condition.
When the general steps do not match your mower
Stop using this walk-behind sequence and go to the manual or a technician when the machine or the mounting hardware is not what the steps assume.
- Riding mowers, zero-turns, and robotic mowers, including any deck that must be removed as a unit or serviced on a lift.
- Two or more blades that must stay timed to miss each other.
- Quick-release cartridges or tool-less blade systems that do not use a conventional center bolt.
- A toothed adapter, splined shaft, or multi-bolt pattern you cannot identify.
- Unknown reverse-thread fasteners, a fastener that only tightens the wrong way, or a rounded head.
- A bent crankshaft, ruined adapter, or wobble that remains after the blade is off.
- A battery pack you cannot isolate, a damaged pack, or a maker rule against inverting the deck.
- Any step that contradicts the printed owner’s manual or on-deck labels.
Professional service is the safer choice if you cannot lock out power with certainty, cannot stabilize the mower, cannot identify thread direction or torque, or find damage beyond a replaceable blade. Manufacturer support and the manual override this article. Do not fill the gaps by forcing a single-bolt walk-behind method onto a different machine.
Problems you may see after a blade change
New or worse vibration often traces to a backward blade, a missing washer, debris left on the adapter, a loose fastener, a bent new blade that was damaged in shipping, or a bent shaft that was already there. Lock out power and re-inspect seating and orientation before you look for unrelated engine or deck faults. Vibration that remains after the blade is correctly installed and tight is a reason to stop mowing and inspect the adapter and crankshaft area.
An uneven cut, or clippings that will not lift into the bag or chute, can mean the sails face the grass instead of the deck, the replacement is the wrong profile (for example a mulching blade where the deck expects a high-lift blade), or the blade is the wrong length class. Confirm markings and compare the new blade with the old one again. Do not keep raising engine speed to compensate.
A fastener that will not stay tight, or that felt wrong going back on, can mean a missing lock washer, a cross-threaded nut, an adapter that is spinning on the shaft, or the wrong thread direction. Do not add extra washers to “take up slack.” Lock out power, take the stack apart, and compare it with your photo or sketch. If the adapter or shaft is damaged, a new blade alone will not fix the hold.
Symptoms that suggest the wrong part rather than a tightening error include a center hole that never sat flush, a blade that hits the deck or a belt cover, a length that is obviously different from the old blade, or a mounting pattern that only lined up on one side. Remove that blade before the next start. This troubleshooting stays at re-lockout, re-inspect, and correct orientation or hardware. It does not diagnose carburetor problems, electrical faults, or a warped deck as if the blade change caused them.
Replacing a lawn mower blade is straightforward on many walk-behind machines when you isolate power, copy the old orientation, and refuse to improvise hardware. The owner’s manual remains the authority for lockout, tipping, fastener type, and torque. If those details are missing from the machine in front of you, pause and get them rather than finishing the job by habit.