

Quick Answer: How To Replace Lawn Mower Carburetor?
To replace a lawn mower carburetor: disconnect the spark plug wire, drain the fuel tank, remove the air filter housing, detach the fuel line and throttle/choke linkage, unbolt the old carburetor, mount the new one with a fresh gasket, reconnect all components in reverse order, then test-start and adjust idle speed. The full job takes 30–60 minutes on most walk-behind…

Pros
- Large-size design named in product title
- Sharpening and balancing functions listed
- Listed as a new upgraded version

Pros
- Adjustable 15-to-45-degree range in title
- Sharpening and balancing functions listed

Pros
- Sharpener and balancer functions in title
- 15-to-45-degree adjustable setting listed
- Built for lawn mower blade maintenance
Pros
- Includes replacement gaskets and a 98079-55846 spark plug
- Matches Honda HRR216 and HRS216 lawn mower models
- Designed around the 16100-Z8B-901 carburetor specification
Cons
- Restricted to select Honda GCV160 mower applications
- Installation requires basic mechanical tools and skills
How Do You Know Your Carburetor Needs Replacing (Not Just Cleaning)?
This guide is scoped to walk-behind push mowers with small single-cylinder engines — primarily Briggs & Stratton and Honda GCV series engines. Riding mowers require additional hood and deck panel disassembly and are not covered here.
Before buying a replacement carburetor, confirm the carburetor is the root cause — and confirm that a full replacement is warranted rather than a cleaning or rebuild. When planning workspace deployment, consider the engineering criteria outlined in our jbl partybox club 120 vs sony srs xv500 guide.
3-Signal Diagnostic Checklist
- Signal 1 — Won’t start despite fresh fuel and a good spark plug. Spray a short burst of carburetor cleaner or starter fluid into the air intake. If the engine fires briefly then dies, the carburetor is not delivering fuel properly. A clogged carburetor can prevent starting entirely.
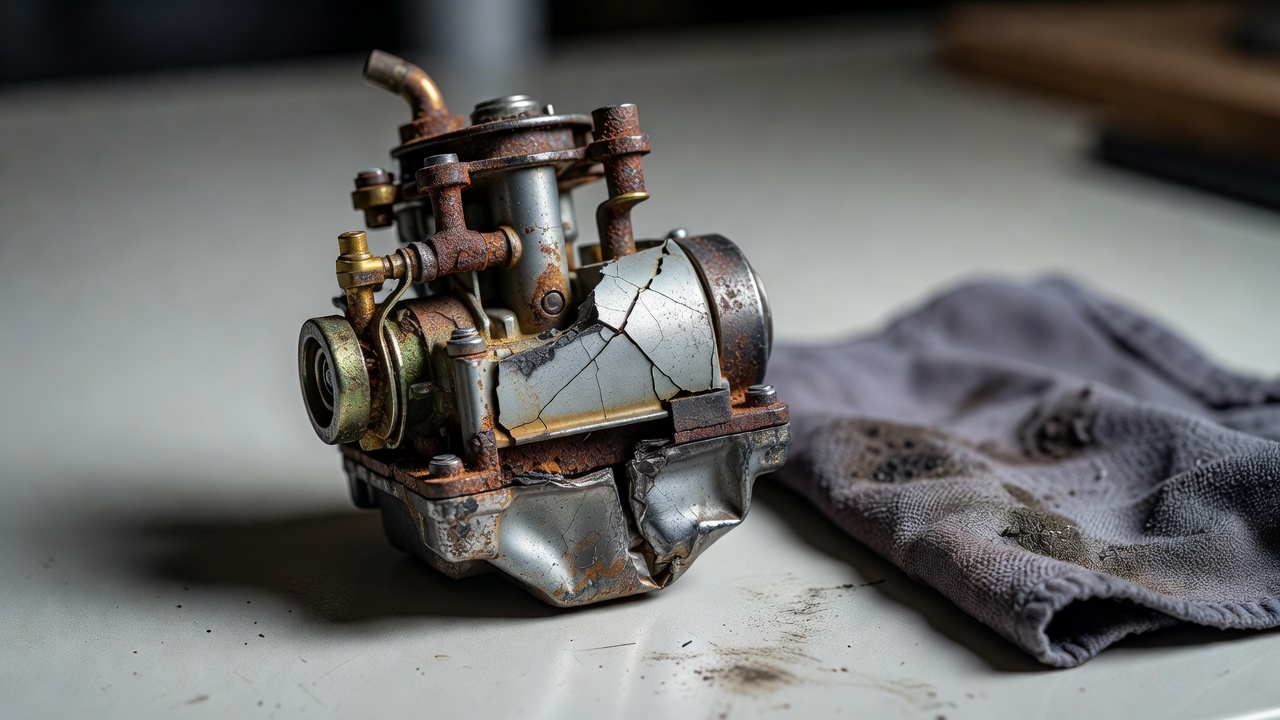
- Signal 2 — Visible physical damage. Cracks in the carburetor body, a warped mounting flange, stripped inlet fitting, or corroded internal passages that do not clear after soaking in carburetor cleaner indicate the unit is beyond cleaning.
- Signal 3 — Cleaning and rebuild kit already failed. If you have already cleaned the jets, replaced the needle, float, and gaskets with a carburetor rebuild kit and the engine still runs rough or stalls, replacement is the correct next step.
Replace vs. Rebuild vs. Clean
- Clean first if the mower ran well last season, sat over winter with old fuel, and shows no physical damage. Stale ethanol-blended fuel (E10/E15) leaves a varnish residue that blocks jets but does not destroy the carb body.
- Rebuild (carburetor rebuild kit) if internal soft parts — gaskets, needle valve, O-rings, float — are worn or stuck but the carb body is structurally sound.
- Replace when the body is cracked, the throttle shaft is worn and leaks air, the mounting flange is warped, or when cleaning and rebuilding have already failed.
What Tools and Parts Do You Need?
Tools
- Socket wrench set (8 mm and 10 mm sockets cover most push mower carb bolts)
- Flathead screwdriver (choke linkage clips, air filter housing screws)
- Phillips screwdriver (air filter cover)
- Needle-nose pliers (fuel line clamp, throttle and choke linkage springs)
- Drain pan or fuel-safe container
- Clean rags
- Optional: digital photo or phone video — photograph linkage routing before disconnecting anything
Parts
- Replacement carburetor matched to your engine model number (stamped on the engine shroud or block — e.g., Briggs & Stratton 625E series, Honda GCV160, GCV190)
- Carburetor gasket — always install a new gasket; reusing the old one risks an air leak that causes a lean-running condition
- Fuel line (inspect the existing line; replace if cracked or brittle)
- Fuel filter (replace while the fuel line is already disconnected)
Finding the Right Replacement Carburetor
Locate your engine model, type, and code numbers on the engine label. Enter these on the manufacturer’s parts lookup (Briggs & Stratton parts lookup at briggsandstratton.com, Honda Power Equipment parts at hondapowerequipment.com) or cross-reference on a parts supplier site. A carburetor rebuild kit is a bag of internal soft parts — it is not a full replacement carburetor. When planning workspace deployment, consider the engineering criteria outlined in our jbl partybox club 120 vs sony srs xv500 guide.
Safety First: Precautions Before You Start
- Disconnect the spark plug wire. Pull the rubber boot off the spark plug tip and tuck it away from the plug. This eliminates any possibility of accidental engine start while your hands are near the linkage and fuel system.
- Work in a ventilated area away from open flame. Gasoline vapors are heavier than air and accumulate at floor level.
- Drain the fuel tank. Use a hand siphon pump to remove fuel into an approved container, or run the engine until it runs out of fuel before disconnecting the fuel line. If your mower has a fuel shutoff valve on the fuel line (common on Honda GCV engines), close it before disconnecting the line to prevent spill.
- Tip the mower correctly if needed. If you need to tilt the mower for access, tip it with the air filter side up and carburetor side up — never tip toward the carburetor side — to prevent oil from entering the air filter and cylinder.
- Let the engine cool completely before starting disassembly.
Step-by-Step: How to Remove the Old Carburetor
- Remove the air filter cover and air filter. Unscrew the cover (usually one Phillips or flathead screw or a single wing nut). Pull out the foam or paper air filter element. Set aside.
-
Remove the air filter housing.
- Briggs & Stratton: The plastic air filter housing is typically held by two to three 5/16-inch or 8 mm bolts that also pass through the carburetor mounting flange into the engine block. Note this — removing the housing bolts begins carburetor removal at the same time.
- Honda GCV series: A separate plastic housing attaches with two or three bolts. Remove these, then slide the housing off the carburetor inlet.
- Photograph the throttle and choke linkage routing before touching anything. Both the throttle linkage and choke linkage are small metal rods and springs that hook into specific tabs on the carburetor. Incorrect reassembly is the single most common installation error.
-
Disconnect the throttle linkage and choke linkage. Use needle-nose pliers to unhook the small Z-bend or clip end of each rod from its tab on the carburetor. Keep these rods attached to the engine-side governor arm — do not remove them from the engine entirely.
- Briggs & Stratton: Typically one throttle rod and one choke rod, each with a Z-bend end that pops out of a hole in the carburetor throttle plate lever and choke plate lever.
- Honda GCV: Uses a combination throttle/choke cable assembly and a return spring. Slide the cable end out of its bracket slot and unhook the spring with needle-nose pliers.
- Clamp and disconnect the fuel line. Slide the spring clamp back up the fuel line using needle-nose pliers, then pull the line off the carburetor inlet fitting. Have a rag ready — residual fuel will drip. If no shutoff valve is present and the tank still contains fuel, pinch the line with locking pliers while you work.
- Remove the carburetor mounting bolts. Most push mower carburetors are held by two bolts (8 mm or 10 mm) threaded into the intake manifold or engine block. On Briggs & Stratton engines with the combined air housing/carb mounting bolts, these were already loosened in Step 2 — fully remove them now. On Honda GCV engines, two separate 8 mm bolts mount the carb to the intake manifold.
- Pull the carburetor off the mounting studs or intake manifold. It may require a gentle wiggle. Do not pry against the engine block with a screwdriver — the aluminum is soft and the gasket surface will be damaged.
- Remove the old carburetor gasket. The gasket typically stays on the engine-side mounting surface. Peel it off completely and clean the mating surface with a clean rag. Do not leave any torn gasket material — even a small fragment will cause an air leak.
Step-by-Step: How to Install the New Lawn Mower Carburetor
- Seat the new carburetor gasket. Place the new gasket dry onto the intake manifold mounting surface. Do not use gasket sealant — the gasket is designed to seal with bolt clamping force alone. Confirm all bolt holes align.
- Position the new carburetor onto the mounting studs or intake port. Hold it firmly against the gasket so the gasket does not shift. Thread the mounting bolts in by hand first.
- Torque the mounting bolts. Tighten evenly, alternating between bolts in small increments. Small engine carburetor mounting bolts on aluminum blocks strip easily — tighten firmly by hand until snug, then advance no more than a quarter turn with the socket wrench. Over-torquing cracks the carburetor body or strips the aluminum block threads.
-
Reconnect the throttle linkage and choke linkage. Refer to your photograph from Step 3 of removal. Hook the Z-bend or cable end back into the correct tab on the new carburetor.
- Briggs & Stratton: The throttle rod hooks into the throttle plate lever; the choke rod hooks into the choke plate lever. With the linkage connected, manually move the throttle control on the handle — the throttle plate inside the carb should open and close smoothly.
- Honda GCV: Route the throttle/choke cable through the bracket, seat the cable end in its slot, and rehook the return spring. Verify the choke plate closes fully when the choke lever is set to closed.
- Reconnect the fuel line. Push the line fully onto the carburetor inlet fitting — it should seat at least 1/2 inch onto the barb. Slide the spring clamp back down over the fitting with needle-nose pliers. Tug the line to confirm it does not pull off.
- Reinstall the air filter housing. Align the housing over the carburetor inlet, seat it flush, and thread the bolts in by hand before tightening. On Briggs & Stratton, the housing bolts are the same bolts that secure the carburetor — confirm the carburetor is still seated correctly against the gasket as you tighten.
- Install the air filter element and cover. Use a new or clean air filter — starting with a dirty filter after a carb swap defeats the repair.
- Reconnect the spark plug wire.
- Refill the fuel tank with fresh fuel. Use ethanol-free fuel where available — ethanol-blended fuel (E10/E15) leaves varnish deposits in carburetor passages and is a leading driver of carburetor degradation in small engines that sit unused between seasons.
How to Start and Tune the Mower After a Carburetor Replacement
First Start Procedure
- If the new carburetor has a primer bulb, press it 3 times to prime the fuel bowl.
- Set the choke to the fully closed (choke on) position.
- Set the throttle to fast/full.
- Pull the starter cord. The engine may take 2–3 pulls to draw fuel through the new carburetor and line. Do not flood the engine with excessive priming.
- Once running, move the choke to open (run) after 15–30 seconds of warm-up.
Idle Speed Adjustment
If the engine runs rough at idle, stalls at low throttle, or hunts (surges rhythmically), the idle speed screw needs adjustment. Locate the idle speed screw — a slotted screw that bears against the throttle plate lever, on the outside of the carburetor body.
- Turn the idle speed screw clockwise (in) to increase idle RPM; counterclockwise (out) to decrease.
- Adjust in small increments (1/8 turn) with the engine running until idle is smooth and stable.
- Manufacturer-recommended idle RPM for most Briggs & Stratton single-cylinder engines is approximately 1,750 RPM; Honda GCV engines idle near 2,500 RPM — consult your engine model’s operator manual for the exact specification.
Mixture Screw Adjustment (If Applicable)
Many modern small engine carburetors have fixed (non-adjustable) jets and no external mixture screws, meeting EPA emissions requirements. If your carburetor does have a low-speed mixture screw (often under a pressed-in plug on older carbs), a common baseline starting point is 1.5 turns out from lightly seated. Adjust from there in 1/8-turn increments for smoothest idle. Do not force the screw down hard when seating — the tapered needle tip is easily damaged. For additional operational safety benchmarks, see our published testing notes on z890 vs x870e motherboard.
Mower Starts but Stalls After Replacement
- Check that the choke is fully opening after warm-up — a stuck or incorrectly routed choke linkage keeps the engine running rich and causes stall.
- Verify the fuel line is fully seated and fuel flows freely — pinch the line briefly with the engine off, release, and confirm fuel reaches the bowl.
- Confirm the carburetor gasket is seated flat — an air leak causes a lean-running condition that stalls under load.
Common Mistakes to Avoid When Replacing a Lawn Mower Carburetor
| Mistake | Consequence | Prevention |
|---|---|---|
| Reusing the old carburetor gasket | Air leak causes lean mixture, rough running, or no-start | Always install the new gasket included with the replacement carb |
| Incorrect throttle or choke linkage routing | Engine won’t reach full throttle, choke stays partially closed, or governor hunts | Photograph linkage before disconnecting; verify plate movement by hand before first start |
| Over-torquing mounting bolts | Stripped threads in aluminum block or cracked carb body | Snug by hand plus a quarter turn maximum; never use an impact driver |
| Skipping spark plug wire disconnect | Risk of accidental engine start during disassembly | First step, every time — non-negotiable |
| Installing the wrong carburetor model | Mismatched jet size, inlet fitting diameter, or linkage tabs — engine runs poorly or not at all | Match replacement to engine model/type/code, not just mower brand or appearance |
| Failing to inspect the fuel line during replacement | Cracked line causes fuel leak or air ingestion immediately after repair | Inspect and replace the fuel line while the system is already open |
| Using old or ethanol-blended fuel in the refill | New carburetor varnishes within one season | Refill with fresh ethanol-free fuel; add fuel stabilizer if the mower will sit >30 days |
Everything You Need to Know: How To Replace Lawn Mower Carburetor FAQ
Can a clogged carburetor cause a lawn mower not to start at all?
Yes. A completely blocked main jet or stuck float needle prevents fuel from entering the engine entirely. If a spray of carburetor cleaner or starter fluid into the air intake causes the engine to briefly fire then die, the carburetor is not delivering fuel and is the likely cause of a no-start condition.
Do I need a new carburetor gasket when replacing a lawn mower carburetor?
Always. The old gasket compresses and deforms to the old carburetor’s flange surface. Reusing it with a new carburetor almost always results in an air leak between the carb and intake manifold, which causes a lean-running condition — the engine will idle roughly, surge, or stall under load. Most replacement carburetors include a new gasket in the box; if yours does not, order one separately before starting the job. To compare alternative configurations, check our hands-on review of marshall stanmore iii vs harman kardon onyx studio 8.
How do I find the correct replacement carburetor for my mower?
Locate the engine model number, type number, and code number printed on the engine label (on the blower housing or engine block, not the mower deck label). Enter these numbers into the manufacturer’s parts lookup tool — briggsandstratton.com for Briggs & Stratton engines, hondapowerequipment.com for Honda GCV engines. Match to the exact carburetor part number. Buying by mower brand name or visual similarity alone frequently results in a mismatch in jet sizing or linkage configuration.
Why does my lawn mower run rough after I replaced the carburetor?
The three most common causes are: (1) incorrectly routed choke linkage keeping the choke partially closed, causing a rich mixture; (2) a loose or misseated carburetor gasket creating an air leak and a lean mixture; or (3) idle speed screw needing adjustment on the new carb. Work through these in order — verify choke plate opens fully by hand, check that mounting bolts are snug and the gasket is seated, then adjust the idle speed screw in 1/8-turn increments until idle smooths out. Users looking for related component recommendations can explore our dyson v8 cyclone vs bissell featherweight stick breakdown.
For more detailed testing breakdowns and top recommendations, check our in-depth guide to residential zero-turn lawn mower guide.
For more hands-on benchmarks and buying recommendations, consult our guides on heavy-duty chainsaw buyer guide, as well as high-CFM commercial leaf blower guide, as well as durable ride-on lawn tractor guide, as well as automated robotic lawn mower guide.
Mechanical safety standards, operational tolerances, and protective gear guidelines align with benchmark specifications established by the American National Standards Institute (ANSI).









