Direct Answer: How to Replace a Lawn Mower Pull Cord
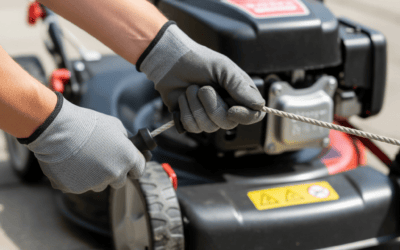
To replace a pull cord on a lawn mower, disconnect the spark plug wire for safety, locate and remove the recoil starter housing cover (usually on top of the engine), extract the old cord from the pulley, wind new nylon cord onto the pulley in the correct direction, thread it back through the housing, attach the handle, and reassemble. Most residential mowers can be completed in 20–30 minutes with a screwdriver, pliers, and replacement cord.
Understanding Your Lawn Mower’s Pull Cord System
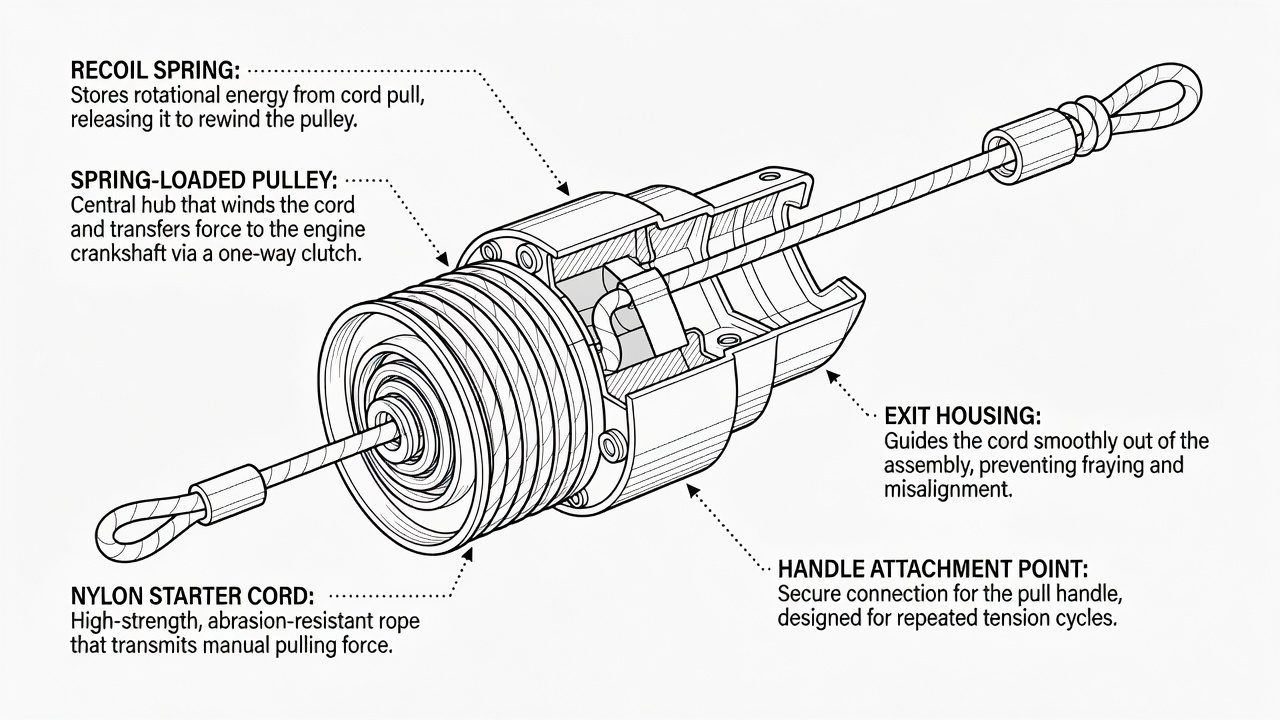
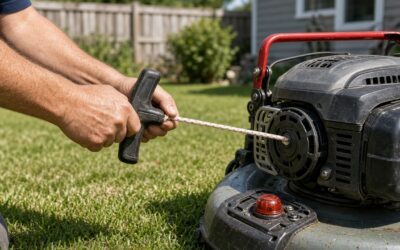
The pull cord is part of your mower’s recoil starter, a mechanical device that winds a spring-loaded cord around a pulley. When you pull the cord, it spins the engine’s crankshaft to ignite the fuel mixture. The cord itself is typically made of braided nylon and sits inside a starter housing attached to the engine block.
Pull cords fail for predictable reasons: UV exposure degrades nylon over time, repeated pulling causes fraying at stress points, and the cord can snap if it catches or tangles. Most residential lawn mower cords last 3–5 years before replacement becomes necessary. Unlike engine repairs, pull cord replacement is entirely within reach for homeowners with basic mechanical confidence.
Safety Precautions Before You Start
- Disconnect the spark plug wire from the spark plug. This prevents accidental engine ignition while you work.
- Allow the engine to cool if the mower has been running. Recoil starters can be hot immediately after use.
- Work on a flat, stable surface with good lighting. A garage or workbench is ideal.
- Do not drain fuel unless your manual specifies it. Most pull cord replacements don’t require fuel removal.
- Be aware of spring tension. The recoil spring inside the housing is under pressure. When you remove the cover, keep your fingers clear of moving parts.
Tools and Materials You’ll Need
| Tool/Material | Purpose | Notes |
|---|---|---|
| Screwdriver (flathead or Phillips) | Remove housing cover screws | Match the screw type on your mower |
| Pliers | Hold the pulley and manage cord tension | Needle-nose pliers help with tight spaces |
| Replacement pull cord (4–5 mm nylon) | Replace the old cord | Check your manual for exact diameter and length; most are 3–4 meters |
| Knot-tying tool or small hook | Thread cord through housing | Helps guide cord through tight openings |
| Tape (electrical or duct tape) | Secure cord ends during reassembly | Prevents fraying while you work |
| Safety glasses | Protect eyes from spring tension or debris | Optional but recommended |
Finding the right replacement cord: Check your mower’s owner’s manual for the exact cord diameter and length. If you’ve lost the manual, contact the manufacturer with your mower’s model number (usually on a sticker near the engine). Most residential push mowers use 4–5 mm nylon cord between 3 and 4 meters long. Hardware stores and online retailers stock universal replacement cords, but verify compatibility before purchasing.
Step-by-Step Replacement Process for Push Mowers
Step 1: Locate and Access the Recoil Starter Housing
The recoil starter assembly is mounted on top of the engine, usually toward the back. It’s the bulky plastic or metal box with the pull cord exiting from it. Use your screwdriver to remove all bolts or screws holding the starter housing cover in place. Carefully lift the cover away and set it aside—note the position of any springs or washers underneath, as they’ll need to go back in the same spots.
Step 2: Remove the Old Pull Cord
Once the housing is open, you’ll see the pulley (a round spool) in the center, with the old cord wrapped around it. The cord is typically held in place by knots at both ends: one anchoring it to the pulley and one attached to the handle. Use pliers to untie or cut the knots holding the cord to the pulley. Carefully unwrap the old cord from the pulley, winding it out slowly. If the cord is frayed or brittle, wear gloves to avoid splinters. Once fully unwound, pull the cord out of the housing entirely.
Step 3: Wind the New Cord onto the Pulley
Before winding, inspect the pulley for cracks or damage. If the pulley is damaged, the new cord will fail quickly. Assuming the pulley is sound, thread one end of your new nylon cord through the small anchor hole on the edge of the pulley. Make a secure knot inside the hole to lock the cord in place—a simple overhand knot works well, but ensure it’s tight enough that it won’t slip. Wind the cord around the pulley in the same direction as the original cord (usually clockwise when viewed from above, but check your manual). Wind it tightly and evenly, with no overlaps or gaps. Continue winding until the pulley is fully wrapped. The pulley should feel balanced and smooth as you turn it by hand.
Step 4: Thread and Secure the Cord Through the Housing
Guide the free end of the cord out through the exit hole in the housing cover. This hole is usually on the front or side of the assembly. Thread the cord slowly and smoothly—if it snags, stop and reposition rather than forcing it. Once the cord emerges from the housing, attach the handle by tying a sturdy knot at the cord’s end. A simple overhand knot works, but wrap it twice for extra security. Trim any excess cord beyond the knot. Wrap a small piece of tape around the knot to prevent fraying.
Step 5: Reassemble the Housing and Test
Carefully lower the starter housing cover back into place, ensuring the cord runs smoothly through its exit hole without binding. Replace all screws or bolts in their original positions. Tighten them snugly but don’t over-torque, as this can crack plastic housings. Reconnect the spark plug wire. Pull the cord gently a few times to ensure it moves freely without resistance. It should return to the housing smoothly via spring tension. If it feels stiff or doesn’t retract, open the housing again and check for cord kinks or binding.
Variations for Riding Mowers and Self-Propelled Models
Riding mowers: The recoil starter is typically located on the side of the engine and may be partially obscured by the mower’s frame or fuel tank. You may need to remove additional components to access it. The replacement process is identical once you’ve exposed the housing, but access can take longer.
Self-propelled push mowers: These often have the starter positioned lower on the engine or on the side. Follow the same steps, but be prepared for tighter working space. Some models require removing the blade or deck to access the housing safely.
Electric mowers: Battery-powered mowers use a motor rather than a recoil starter and do not have pull cords. If you own an electric mower, this guide doesn’t apply.
Troubleshooting Common Problems
The cord won’t wind smoothly onto the pulley
This usually means the pulley is binding or damaged. Open the housing again and inspect the pulley shaft for cracks or debris. If the shaft is bent, the pulley must be replaced—this is beyond a basic cord replacement and requires a new starter assembly. If debris is present, clean it away carefully and try again.
The pull cord feels stiff or hard to pull after replacement
Stiffness often indicates the cord is wound too tightly or the pulley is binding. Open the housing, reduce cord tension slightly by loosening the anchor knot and rewinding a bit less tightly, and ensure the pulley spins freely. If stiffness persists, the recoil spring may be damaged or overstretched—this requires professional service.
The starter doesn’t engage or the engine won’t turn over
Verify the spark plug wire is reconnected correctly. If it is, the issue may not be the cord but the recoil spring or internal starter mechanism. Try pulling the cord sharply and consistently several times. If the engine still won’t turn, the starter assembly itself may need replacement.
The cord retracts too slowly or doesn’t fully retract
This indicates a weak or damaged recoil spring. If the spring is visible through the housing, inspect it for rust or deformation. A weakened spring cannot be repaired and typically requires replacing the entire starter assembly. This is a job for a professional or an experienced DIYer comfortable with spring replacement.
When to Call a Professional
Call a professional if:
- The recoil spring is visibly damaged, rusted, or deformed.
- The pulley shaft is bent or cracked.
- The cord won’t retract at all, indicating a severely damaged spring.
- You’re uncomfortable working with spring-loaded assemblies or small mechanical components.
- Your mower’s manual advises against DIY starter work.
- The starter housing is cracked or broken.
A professional repair typically costs $80–$150, depending on your location and mower model. If you’re uncertain about any step, consulting a professional is worth the investment to avoid damaging your mower further.
Frequently Asked Questions
How long does a lawn mower pull cord last?
Most residential lawn mower pull cords last 3–5 years with regular use. Cords exposed to direct sunlight degrade faster. Annual mowing with proper storage (keeping the mower in a garage or shed) can extend cord life closer to 5 years.
Can I use a thinner or thicker cord than the original?
No. Using cord that is too thin will break under tension, and cord that is too thick won’t wind properly onto the pulley or fit through the housing exit hole. Always match the diameter specified in your manual. If you can’t find the spec, contact the manufacturer with your mower’s model number.
Do I need to drain the fuel tank before replacing the pull cord?
No, unless your manual explicitly states to do so. The recoil starter is external to the fuel system, and fuel doesn’t need to be removed for cord replacement. However, ensure the spark plug wire is disconnected to prevent accidental ignition.
What if the recoil starter spring is broken?
A broken or damaged recoil spring cannot be repaired and requires replacing the entire starter assembly. This is a more involved repair best handled by a professional or an experienced mechanic. Attempting to repair a spring can be dangerous due to the stored tension in the mechanism.