Direct Answer: How to Replace Weed Eater String
Replacing the string on a weed eater involves removing the trimmer head, extracting the old line from the spool, winding new trimmer line onto the spool in the correct direction, and reassembling the head. For most bump-feed models, the process takes 10-15 minutes and requires only scissors, the replacement line, and basic hand tools. Always consult your specific manual for brand-unique features or mechanisms.
Understanding Your Weed Eater’s Trimmer Head
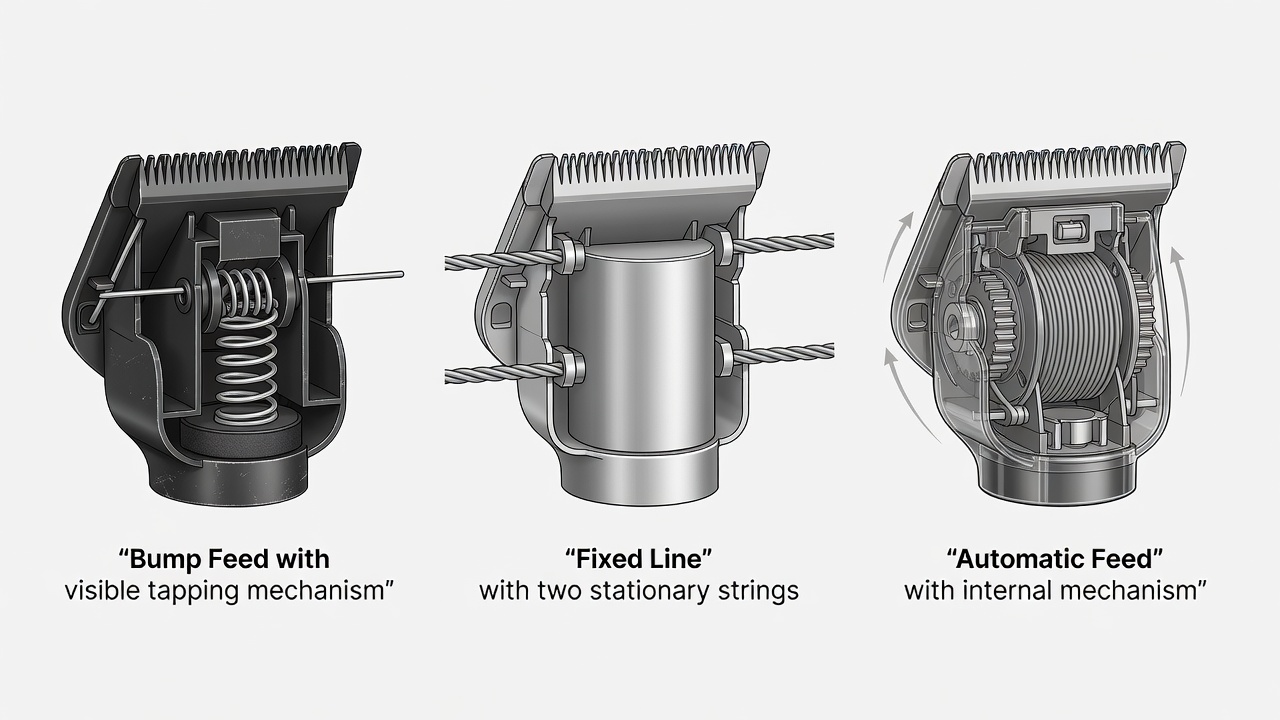
The term “weed eater” is a brand name commonly used generically for string trimmers. Understanding your trimmer head type is essential because different designs require slightly different string replacement approaches.
Common Trimmer Head Types:
- Bump Feed: The most common design. You advance the line by tapping the head on the ground, which automatically feeds more line from the spool. This is the focus of this guide.
- Fixed Line: Uses two fixed lengths of line that don’t feed automatically. Typically found on lighter-duty trimmers.
- Automatic Feed: Advanced models that feed line continuously without user intervention.
Most residential string trimmers use bump-feed spools, making them the best reference point for a universal guide. However, the fundamental principle—winding line onto a spool and securing it—remains consistent across designs.
What You’ll Need for the Job
Gather these materials and tools before starting:
- Replacement Trimmer Line: Available at hardware stores and online. Common sizes are 0.065″, 0.080″, and 0.095″ diameter. Check your trimmer’s manual or the spool itself for the correct specification. Most universal bump-feed spools accept multiple line sizes.
- Scissors or Cutting Tool: To cut the new line to the correct length. A utility knife or cordless drill with a line-cutting attachment also works.
- Small Screwdriver or Allen Wrench: May be needed to remove the spool or trimmer head, depending on your model.
- Work Gloves: Optional but recommended for grip and hand protection.
- Your Trimmer’s Manual: For model-specific instructions and line specifications.
Step-by-Step Guide to Replacing Trimmer Line
Step 1: Safety First and Access the Trimmer Head
Unplug your electric trimmer or disconnect the spark plug wire on gas models to prevent accidental starting. Allow gas trimmers to cool for 5-10 minutes if recently used. Position the trimmer so the head is easily accessible.
Most trimmer heads twist off counterclockwise by hand. Grip the shaft firmly and rotate the head until it separates. Some models require a wrench or hex key—consult your manual if it doesn’t come free by hand.
Step 2: Remove the Old Line and Spool
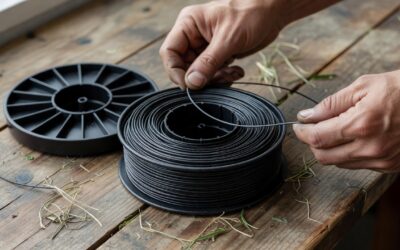
Once the head is separated, locate the spool inside. The spool is the cylindrical component where the line winds. Some spools are removable; others are fixed to the head. If removable, twist or press it free according to your manual.
Pull out any remaining old line. If line is welded or stuck, soak the spool in warm water for 2-3 minutes to soften the residue, then wipe clean. Inspect the spool for cracks or damage. If damaged, the spool or entire head may need replacement.
Step 3: Measure and Cut Your New Line
The correct line length varies by spool design but typically ranges from 15 to 25 feet. Check your manual or the spool itself for the recommended length—many spools have a line indicator or marking.
Cut your trimmer line to this length using scissors or a utility knife. Cut cleanly at a slight angle for easier threading into the spool’s line guides.
Step 4: Wind the Line Onto the Spool
This is the most critical step. Most bump-feed spools have two channels or guides where line winds. The direction matters:
- Look for an arrow embossed or printed on the spool indicating the wind direction (usually clockwise or counterclockwise).
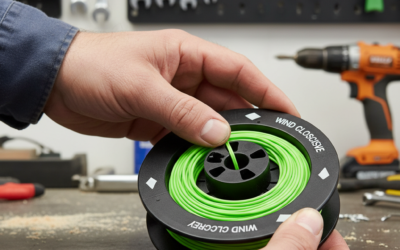
- Insert one end of the line into the first channel’s starting hole. Wind it tightly and evenly in the marked direction until you reach the end of the channel or the spool is nearly full.
- Leave approximately 4-6 inches of line free from the spool to feed through the exit port.
- Repeat with the second channel if your spool has two separate wind paths.
Common Winding Mistake: Winding in the wrong direction or too loosely causes the line to tangle or fail to feed. Ensure you maintain consistent tension and follow the marked direction precisely.
Step 5: Thread the Line Through Exit Ports and Reassemble
Most trimmer heads have small holes or notches where the line exits to cut grass. Thread the free end of each line section through these ports until about 4-5 inches extends from the head.
Snap or twist the spool back into place if removable. Reattach the trimmer head to the shaft by aligning it and twisting clockwise until snug. Do not overtighten—firm is sufficient.
Step 6: Test Before Use
Plug in or reconnect your trimmer. Hold it over a trash bin or outdoors and gently tap the head on the ground (if bump-feed) or activate the feed mechanism according to your manual. The line should advance and feed smoothly. If nothing happens, remove the head and verify that the line is properly threaded through the exit ports and wound correctly on the spool.
Troubleshooting and Pro Tips
Line Won’t Feed After Reassembly
Check these common causes:
- Line is not threaded through exit ports. Disassemble and rethread.
- Line was wound in the wrong direction. Rewind following the arrow on the spool.
- Exit ports are clogged with old line residue. Clean with a small brush or compressed air.
- Spool is too tightly wound, preventing line movement. Rewind with slightly less tension.
Line Tangles or Won’t Unwind
This typically occurs when the line was wound too loosely or crossed over itself. Prevent this by:
- Maintaining even, consistent tension while winding.
- Keeping each wind parallel and flat against the spool surface.
- Avoiding crossovers or overlapping winds.
If tangling occurs, remove the line and rewind completely.
Line Cuts or Breaks Quickly During Use
This may indicate:
- Incorrect line diameter for your trimmer. Verify the specification in your manual.
- Exit ports are sharp or damaged, fraying the line. Sand smooth if possible, or replace the trimmer head.
- You’re trimming dense brush or stones. Use appropriate line weight for your cutting tasks.
When to Replace the Entire Trimmer Head
If the spool is cracked, the head won’t accept line properly, or the exit ports are severely damaged, replacing the head is more cost-effective than continued repairs. Replacement heads are available for most trimmer models at hardware stores.
Expert Maintenance Tips
- Replace Line Proactively: Don’t wait until you’re out of line during a trimming session. Replace it before it’s completely gone to avoid costly downtime.
- Buy Quality Line: Commercial-grade trimmer line lasts longer and resists breaking better than budget options. The small extra cost pays for itself.
- Store Correctly: Keep unused trimmer line in a cool, dry location. Extreme heat or UV exposure degrades the material.
- Keep Spares On Hand: Store extra trimmer line and spools for your specific trimmer model. Bulk purchases often offer savings.
- Check Your Manual Annually: Even if you’ve replaced line before, your specific trimmer model may have unique steps or specifications worth reviewing.
Frequently Asked Questions
How often should I replace the string on my weed eater?
String replacement frequency depends on usage. Light residential use may require replacement every 2-3 months or even less frequently. Heavy or commercial use might require monthly replacement. You’ll know it’s time when the line is noticeably short, worn, or not cutting cleanly. Most users replace line as needed rather than on a strict schedule.
Can I use any diameter trimmer line on my weed eater?
No. Always use the line diameter specified in your trimmer’s manual. Common sizes are 0.065″, 0.080″, and 0.095″ diameter. Using the wrong diameter can cause feeding problems, poor cutting performance, or damage to the trimmer head. Check your manual or the spool itself for the correct specification.
Why is my new line not feeding after I’ve replaced it?
The most common cause is that the line was wound in the wrong direction or is not threaded properly through the exit ports. Remove the head, verify the line is wound according to the arrow on the spool, and ensure both ends are threaded through the head’s exit holes. Rewind if necessary and test again.
Is it normal for trimmer line to break during use?
Occasional line breakage is normal, especially in heavy brush or when hitting stones. However, frequent breakage suggests incorrect line diameter, sharp exit ports damaging the line, or excessive impact with hard objects. Verify you’re using the correct line size and avoid striking rocks or metal objects while trimming.