How to Load a Weed Wacker: Direct Answer
To load a weed wacker, turn off and disconnect the power source, then locate the trimmer head and spool. Release any line locks or tabs, cut trimmer line to the appropriate length for your model (typically 10–25 feet), and thread it through the feed holes on the spool, leaving equal lengths on both sides. Wind the line evenly onto the spool in the direction indicated by arrows (usually clockwise), maintaining tension to prevent tangling. Once fully wound, secure the line ends in the spool’s notches or clips, reassemble the head until it clicks into place, and test by tapping the head on the ground (for bump-feed models) or following model-specific reassembly steps.
Understanding How to Load a Weed Wacker
Loading a weed wacker means refilling or replacing the cutting line—a thin cord that spins at high speed to cut grass and weeds. Over time, this line wears down, breaks, or gets consumed by the automatic feed mechanism. Proper loading ensures consistent cutting performance, prevents line jams, and keeps your trimmer operating safely.
The importance of correct loading technique cannot be overstated. Improperly wound line tangles, breaks prematurely, or fails to feed, leaving you with a non-functional trimmer. Conversely, correctly loaded line feeds smoothly, lasts longer, and delivers clean cuts.
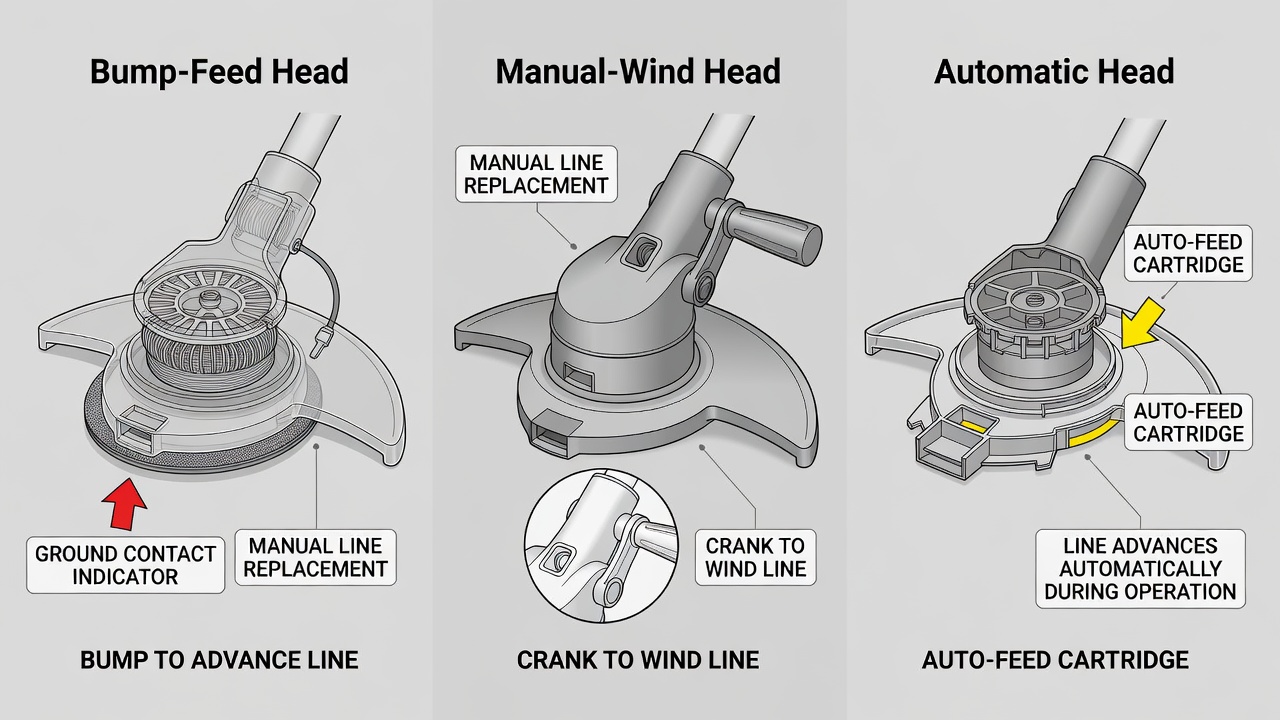
Common weed wacker head types include:
- Bump-feed heads: Tap the head on the ground to advance new line as the current line wears down. Most beginner-friendly.
- Manual-wind heads: Require manual winding of line onto the spool. More control but slower to load.
- Automatic heads: Feed line automatically as needed. Convenient but less common and model-specific.
Key Factors to Consider Before Loading
Before you begin loading, identify three critical variables to ensure success:
1. Correct Line Gauge and Diameter
Trimmer line comes in various thicknesses, measured in inches or millimeters. Common gauges range from .065 inches to .110 inches. Using the wrong gauge can damage your trimmer’s engine or result in poor cutting performance. Check your owner’s manual or the trimmer head itself—most have the correct gauge printed on the spool or housing.
2. Appropriate Line Length
The length of line you load depends on your trimmer model and spool capacity. Most residential trimmers require between 10 and 25 feet of line. Overloading the spool causes tangles and feeding problems; underloading means frequent reloading. Your owner’s manual specifies the exact length for your model.
3. Safety Precautions
Always:
- Turn off the trimmer and allow the engine to cool.
- Disconnect the spark plug wire (gas models) or unplug the battery (electric models).
- Place the trimmer on a flat, stable surface before accessing the head.
- Wear gloves to protect against cuts from sharp line or the spool.
Step-by-Step Guide to Loading a Weed Wacker
Step 1: Access the Spool and Remove Old Line
Locate the trimmer head at the bottom of the trimmer shaft. Most heads have a spool cover held in place by two clips or tabs on opposite sides. Gently squeeze or press these tabs inward and lift the cover away from the head. Some models twist the cover counterclockwise to release it.
Once the cover is off, you’ll see the spool inside. If old line remains, pull it out and discard it. Note the direction of any arrows printed on the spool—this indicates the winding direction for new line.
Step 2: Measure and Cut Trimmer Line
Cut a piece of trimmer line to the length specified in your owner’s manual. A common starting point for residential trimmers is 15 feet, but verify your specific model. Use scissors or a sharp knife to make a clean cut perpendicular to the line (not at an angle), as jagged edges can jam the feed mechanism.
If your spool has two line slots (most do), cut the line in half so you have two equal pieces, each half the total length. For example, if the manual specifies 15 feet total, cut two 7.5-foot pieces.
Step 3: Thread Line Through Feed Holes
Locate the feed holes—small openings on opposite sides of the spool where line exits during operation. Look for a notch or slot at the outer edge of the spool; this is where you start threading.
Insert one end of your line into the slot, then thread it through the feed hole on one side. Pull the line taut but do not stretch it. Repeat with the second piece of line, threading it through the opposite feed hole. You should now have two equal lengths of line extending from the spool, one on each side.
Step 4: Wind Line Onto the Spool
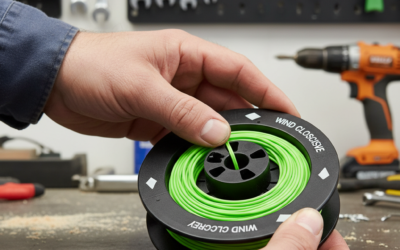
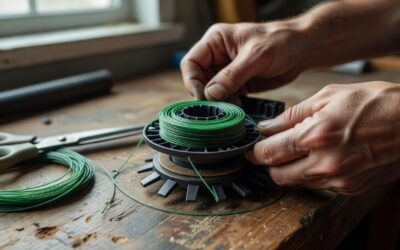
This is the most critical step. Holding the spool steady with one hand, use your other hand to wind the line evenly onto the spool in the direction indicated by arrows (usually clockwise). Maintain steady, moderate tension—the line should be snug but not stretched so hard that it might break.
Wind the line in neat, overlapping passes, ensuring each wrap sits beside the previous one rather than on top. Avoid crossing wraps over each other, as this causes tangles. As you wind, both line ends should gradually get shorter and eventually disappear into the spool.
Wind until approximately 4–6 inches of line remains visible on each side of the spool. Do not wind line to the very edge of the spool, as this prevents proper head closure.
Step 5: Secure Line Ends and Reassemble the Head
Most spools have small notches or clips around the outer edge designed to hold the line ends in place while you reassemble the head. Locate these notches (usually two, positioned opposite each other) and fit each line end into a notch, keeping slight tension on the line so it does not slip out.
Carefully place the spool back into the trimmer head, aligning any guide posts or tabs. Position the spool cover over the head and press or twist it back into place until it clicks or locks. You should hear or feel a distinct click, indicating the cover is fully seated.
Step 6: Test the Loaded Line
For bump-feed models: Reconnect the spark plug wire or battery, hold the trimmer firmly, and gently tap the spool head against the ground while the engine idles or the trimmer is at low speed. New line should feed out automatically. Tap once or twice to advance line, then turn off and unload the battery or disconnect the spark plug before making any adjustments.
For manual-wind or automatic models: Follow the specific reassembly and testing instructions in your owner’s manual, as these vary significantly by brand.
Troubleshooting and Common Mistakes
Line Tangles or Won’t Feed
Cause: Line was wound too loosely, unevenly, or with overlapping wraps. The line ends may not be properly secured in the spool notches.
Fix: Remove the head cover, unwind all line, and rewind using steady, even tension. Ensure wraps sit neatly beside each other. Check that line ends are fully seated in the notches before reassembling.
Line Breaks Immediately After Loading
Cause: Line was over-stretched during winding, cut at an angle (jagged edge), or the wrong gauge was used for your trimmer model.
Fix: Reload using a straight cut, medium tension (not overly tight), and confirm the gauge matches your owner’s manual. If breakage persists, consult the manual for correct specifications.
Line Won’t Advance or Feed
Cause: The spool head is not fully seated, line is wound in the wrong direction, or the feed holes are blocked by debris.
Fix: Reassemble the head, listening and feeling for a click. Verify the winding direction matches the arrows on the spool. Clean feed holes with a small tool to remove any grass or line fragments.
Excessive Line Tension or Cutting Resistance
Cause: Line was wound too tightly or is the wrong diameter for your trimmer.
Fix: Reload with medium tension, allowing the line to rest naturally on the spool. Verify the correct gauge in your owner’s manual.
Model-Specific Variations and Tips
Bump-Feed vs. Manual-Wind Differences
Bump-feed trimmers are the most common for residential use. Load line as described above, and the feed mechanism advances new line automatically each time you tap the head on the ground. This style requires less maintenance between uses.
Manual-wind trimmers require you to physically crank or twist the spool to advance line as it wears. Loading is similar, but you may need to tension the line differently to ensure smooth manual operation. Consult your manual for the specific method.
Brand-Specific Considerations
Some brands, such as Ryobi, Echo, and Husqvarna, incorporate proprietary loading systems. For example:
- Some models use a two-line spool that winds simultaneously in opposite directions.
- Others have fixed guide tabs that simplify line threading.
- Certain automatic models feature cartridge-style spools that you replace as a unit rather than reloading individually.
Always consult your owner’s manual for brand-specific instructions, as variations can affect the loading process and performance.
When to Replace the Entire Spool
In most cases, you simply reload line onto the existing spool. However, replace the entire spool if:
- The spool is cracked, warped, or visibly damaged.
- Line continuously jams or does not feed despite correct loading.
- The spool has lost its shape and no longer fits snugly in the head.
Replacement spools are inexpensive and available from trimmer manufacturers or hardware retailers. Identify your exact trimmer model before ordering.
Frequently Asked Questions
Q: How often should I load or replace trimmer line?
A: The frequency depends on usage. Light residential use might require reloading every few weeks or monthly, while heavy use could mean every week or more. Most users notice line has worn when cutting performance declines or the head sputters. Some bump-feed trimmers include a low-line indicator light.
Q: Can I use any trimmer line, or does it have to match my trimmer model?
A: You must use the correct gauge (diameter) for your trimmer, as specified in the owner’s manual. Using the wrong gauge can damage the feed mechanism or engine. However, most standard trimmer line from reputable brands works across similar trimmer types, as long as the gauge matches.
Q: What’s the most common mistake people make when loading a weed wacker?
A: Winding line too loosely or unevenly is the leading cause of tangles and feed problems. Many users also underestimate the importance of maintaining consistent tension during winding. Practice the first time with the manual in hand, and the process becomes second nature.
Q: Do I need to turn off the trimmer before tapping it to feed new line?
A: Yes, always turn off the trimmer and allow it to come to a complete stop before tapping the head on the ground. This is a critical safety practice. Never attempt to feed or adjust line while the engine is running or the motor is engaged.
Conclusion
Loading a weed wacker is a straightforward process once you understand the basic steps: disconnect power, access the spool, measure and cut line to the correct length, thread it through feed holes, wind it evenly with steady tension, secure the ends, and reassemble the head. The most important factors are using the correct line gauge, maintaining even tension during winding, and consulting your owner’s manual for model-specific instructions. With practice, loading becomes quick and reliable, keeping your trimmer ready for grass and weed control.