Direct Answer: How to Sharpen a Chainsaw Chain
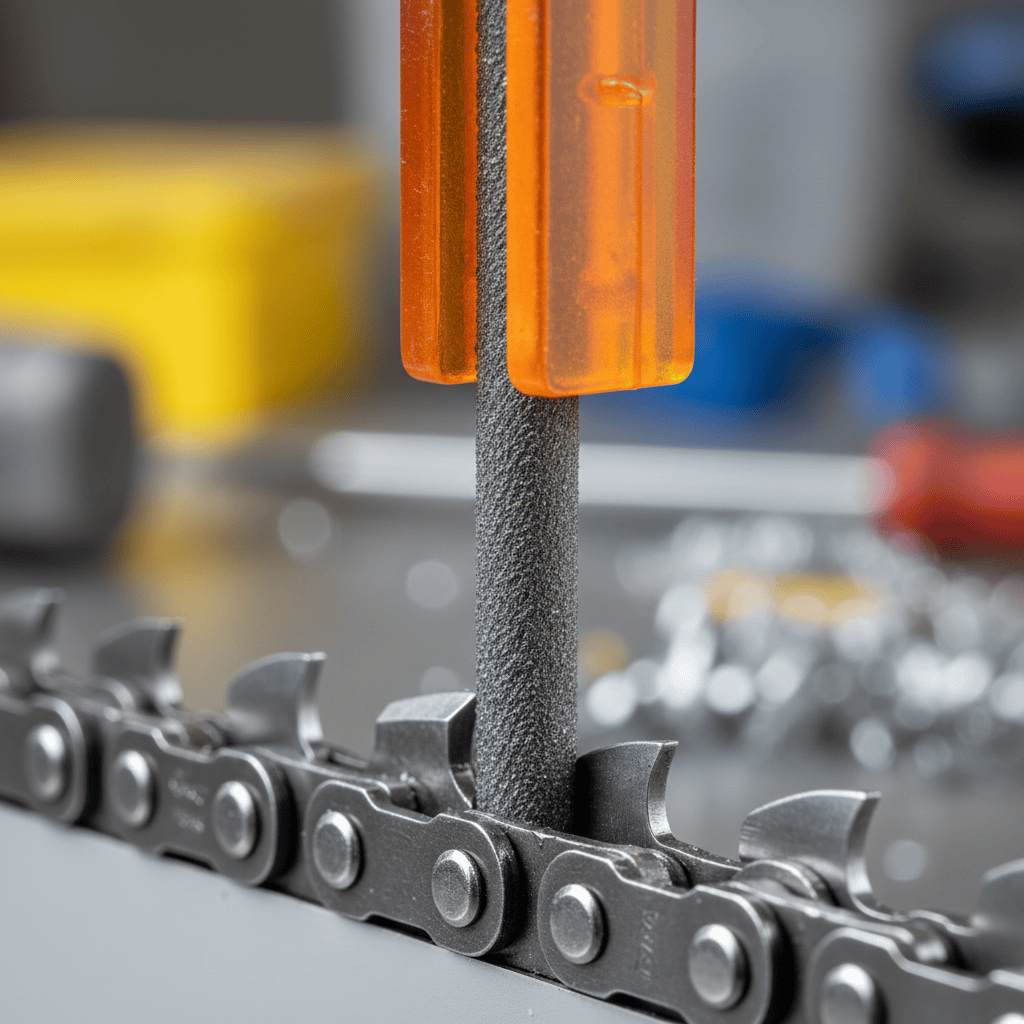
To sharpen a chainsaw chain by hand, secure the bar in a vise or bar clamp so the chain moves freely. Select the correct round file size for your chain’s pitch (typically 5/32″ for 3/8″ pitch or 3/16″ for .404″), and use a file guide to hold the file at the manufacturer’s marked angle, usually around 30 degrees. File each cutter tooth from the inside out with firm, even strokes—applying pressure only on the forward stroke—giving each tooth the same number of strokes to keep the chain balanced. After filing all cutters, use a depth gauge tool to check the rakers (depth gauges) and file them down so they sit approximately 0.025 inches below the cutter top. Finally, rotate the bar, repeat on the other side, oil the chain, and test the cut.
Why Sharpen Your Chainsaw Chain and How Often
A sharp chainsaw chain is essential for both performance and safety. A dull chain requires more force to cut, which increases engine strain, fuel consumption, and the risk of kickback—a dangerous condition where the chain suddenly jumps toward the operator. A sharp chain also produces larger wood chips and cuts more smoothly, making the work faster and less fatiguing.
You should sharpen your chain when you notice:
- The chainsaw pulls to one side while cutting straight
- The saw produces fine sawdust instead of chips
- You need to apply excessive pressure to make the saw cut
- The cut is ragged or uneven
- The engine bogs down under normal load
For regular use, sharpen your chain every 5–10 hours of cutting time, or whenever you notice a decline in cutting performance. Some users sharpen after every tank of fuel; others sharpen monthly depending on how frequently they use the saw.
Tools You Need to Sharpen a Chainsaw Chain
Hand sharpening requires a modest toolkit. Having the right tools makes the job faster and ensures consistent results.
Essential Sharpening Tools
- Round File (Feather Edge or Smooth): The core tool for filing cutter teeth. File size must match your chain’s pitch. Common sizes are 5/32″ for 3/8″ pitch chains, 3/16″ for .404″ pitch, and 7/32″ for .325″ pitch. Check your chainsaw manual or the chain packaging to confirm your pitch.
- File Guide or Holder: A plastic or metal guide that clamps around the file and sits on the cutter teeth, ensuring the file stays at the correct angle (typically 30 degrees). This prevents angled or inconsistent filing, which dulls the chain unevenly.
- Depth Gauge Tool (Raker Gauge): A small metal or plastic tool used to measure the height of the depth gauges (rakers) relative to the cutter teeth. It ensures rakers are filed to specification, usually 0.025 inches below the cutter top.
- Bar Clamp or Vise: Secures the chainsaw bar so both hands are free for filing. A wooden vise jaw or soft-jawed vise prevents damage to the bar.
- Flat File or Raker File: A smaller flat file used to lower depth gauges after they are identified with the depth gauge tool.
- Gloves and Eye Protection: Always wear cut-resistant gloves and safety glasses when handling sharp chain teeth.
How to Choose the Right File Size
Selecting the correct round file size is critical. Using the wrong size will result in poorly sharpened teeth and an unbalanced chain. Find your chain’s pitch on the chainsaw bar or in the owner’s manual. Once you have the pitch, use this reference:
| Chain Pitch | Round File Size |
|---|---|
| .325″ | 7/32″ |
| 3/8″ | 5/32″ |
| .404″ | 3/16″ |
| 3/4″ | 1/4″ |
If you are unsure, consult your chainsaw manual or contact the manufacturer. Using an incorrectly sized file will produce dull or unevenly sharpened teeth.
Step-by-Step: How to Sharpen a Chainsaw Chain by Hand
Step 1: Secure the Chainsaw Bar
Place the chainsaw in a vise with the bar held firmly so the chain can rotate freely and you have access to both sides. Ensure the engine is off and the chain brake is engaged. You may also place the chainsaw on a flat surface with the bar extending slightly over the edge and clamp the bar between pieces of wood. The bar must not move during filing, or your angles will be inconsistent.
Step 2: Identify the Filing Direction
Look at the cutter teeth on one side of the chain. Most chains have an arrow or line marked on each cutter showing the correct filing angle. Start on one side of the chain (e.g., all cutters angled to the right) and file them all before moving to the other side. This prevents confusion and ensures you file all teeth on one side uniformly.
Step 3: Install the File in the Guide and Position
Insert the round file into the file guide so it sits at the marked angle (usually 30 degrees). Clamp the guide loosely around the file. Place the guide on the first cutter tooth so the file sits just inside the tooth gullet (the space between teeth). The guide should rest on the cutter top and the previous tooth, holding the file at the correct angle automatically.
Step 4: File Each Cutter with Firm, Even Strokes
Push the file forward through the tooth with firm, even pressure, filing from the inside of the tooth outward. Lift the file on the return stroke—do not file on the backstroke, as this dulls the file and produces uneven results. Use the same number of strokes (typically 3–5, depending on how dull the chain is) for each tooth. Consistent stroke count keeps the chain balanced and prevents one side from cutting faster than the other.
Move the guide and file to the next cutter tooth on the same side. Repeat until all cutters on that side are filed. You should see a small bright spot (the new metal edge) on each tooth when properly filed.
Step 5: File the Other Side of the Chain
Rotate the chainsaw bar or reposition the clamp so you can access the cutters angled the opposite direction. File them using the same technique: the same number of strokes per tooth, the same angle, and the same direction (always pushing forward, never on the backstroke).
Step 6: Check for Consistency
After filing both sides, visually inspect the chain. All cutter teeth should have the same bright spot at the tip, indicating they were all filed to the same depth. If one tooth is noticeably different (duller or sharper), refile it to match the others.
Checking and Lowering the Depth Gauges (Rakers)
Depth gauges, also called rakers, are the small bumps in front of each cutter tooth. They control how much wood the cutter removes with each pass. If depth gauges are too high, the chain will not cut efficiently and may vibrate excessively. If they are too low, the chain may cut aggressively and increase vibration and strain on the engine.
How to Measure Depth Gauge Height
Place the depth gauge tool on the chain so it straddles the cutter tooth and rests on the depth gauge. If the raker sits above the tool’s flat surface, it is too high and needs filing. If it is flush or slightly below, it is within specification.
Filing the Depth Gauges
Using a flat file, carefully file down each raker that protrudes above the depth gauge tool. File with light strokes, checking frequently with the tool so you do not file too much. The goal is to make the raker flush with or slightly below the tool’s surface, typically about 0.025 inches below the cutter top. File all rakers on one side, then rotate the chain and file the other side.
Alternative Sharpening Methods
Electric Chainsaw Sharpeners
Electric chain sharpeners automate the filing process, holding the file at a consistent angle and moving it through each tooth. They are faster than hand filing and produce uniform results, making them ideal for users who sharpen frequently. However, they are more expensive, require electricity or a power source, and may be overkill for occasional use. Some models are portable, while others are bench-mounted.
Professional Sharpening Services
Many hardware stores, lawn care shops, and tool rental centers offer professional chain sharpening. This is a good option if you lack tools or prefer not to do it yourself. Turnaround is usually 1–2 days, and the cost is modest (typically $5–$15 per chain). The downside is that you cannot sharpen your chain immediately when it dulls during a job.
When to Replace Instead of Sharpen
If the chain has significant damage (broken teeth, bent links, or deep gouges), sharpening will not restore it. Replace the chain instead. If the chain has been sharpened many times and the teeth are very small, replacement is also more economical than continued sharpening.
Safety Tips and Common Sharpening Mistakes
Safety Best Practices
- Always wear cut-resistant gloves and eye protection when handling a sharp chain.
- Ensure the engine is off and the chain brake is engaged before beginning.
- Secure the bar firmly so it does not move during filing; a moving bar will cause uneven angles and produce a dull or unbalanced chain.
- Keep your hands and fingers away from the sharp cutter teeth and chain links.
- File in a well-lit area so you can see the teeth and guide clearly.
Common Mistakes to Avoid
- Using the Wrong File Size: This is the most common mistake and results in poorly sharpened teeth. Always verify your chain pitch before selecting a file.
- Filing at an Inconsistent Angle: Without a file guide, it is difficult to maintain the correct angle on every tooth. Use a guide to ensure consistency.
- Using Unequal Stroke Counts: Filing some teeth more than others creates an unbalanced chain that pulls to one side. Count your strokes and apply the same number to each tooth.
- Filing on the Backstroke: This dulls the file and produces a rough edge on the tooth. Always file only on the forward stroke; lift the file on the return.
- Ignoring Depth Gauges: Filing the cutters alone is not enough. Rakers that are too high prevent efficient cutting and increase engine strain. Always check and adjust depth gauges as part of sharpening.
- Over-Filing Depth Gauges: Filing rakers too low causes aggressive cutting and excessive vibration. Use the depth gauge tool to ensure you do not file more than necessary.
Frequently Asked Questions
How Long Does It Take to Sharpen a Chainsaw Chain by Hand?
Sharpening a chainsaw chain by hand typically takes 15–30 minutes, depending on how dull the chain is, how many cutters it has, and your experience level. With practice, you will complete the job faster. Electric sharpeners can reduce this to 5–10 minutes.
Can I Sharpen a Chainsaw Chain Without a File Guide?
Technically, yes, but it is not recommended. Without a file guide, maintaining the correct angle on every tooth is very difficult, and you risk creating an unbalanced chain that cuts unevenly or pulls to one side. A file guide is inexpensive (typically $10–$20) and makes a significant difference in the quality of your sharpening.
Why Does My Chain Dull Quickly Even After Sharpening?
Several factors cause premature dulling: cutting into dirt or sand (which embeds abrasive particles in the wood), hitting rocks or metal objects, a worn bar groove that misaligns the chain, or using the chainsaw at an improper angle that stresses the teeth. If your chain dulls faster than normal, inspect the wood for buried objects before cutting, clean the bar groove, and ensure you are using proper cutting technique.
What Is the Difference Between a Feather Edge and a Smooth Round File?
A feather edge (or super sharp) file has finer teeth and produces a sharper edge, making it ideal for detailed work or hardwoods. A smooth round file is more durable and works well for general-purpose chainsaw sharpening. For most users, a smooth round file is sufficient and will outlast a feather edge file.