How to Remove a Lawn Mower Blade: The Direct Answer
To safely remove a lawn mower blade: (1) Disconnect the spark plug wire to prevent accidental startup, (2) Secure the mower on a flat surface and tip it on its side with the air filter facing up, (3) Mark the blade’s orientation with paint or tape, (4) Use a wooden block to lock the blade in place, (5) Turn the bolt counterclockwise with the appropriate wrench to loosen, and (6) Lift the blade straight out. Always wear work gloves and eye protection during removal.
Why You Might Need to Remove Your Lawn Mower Blade
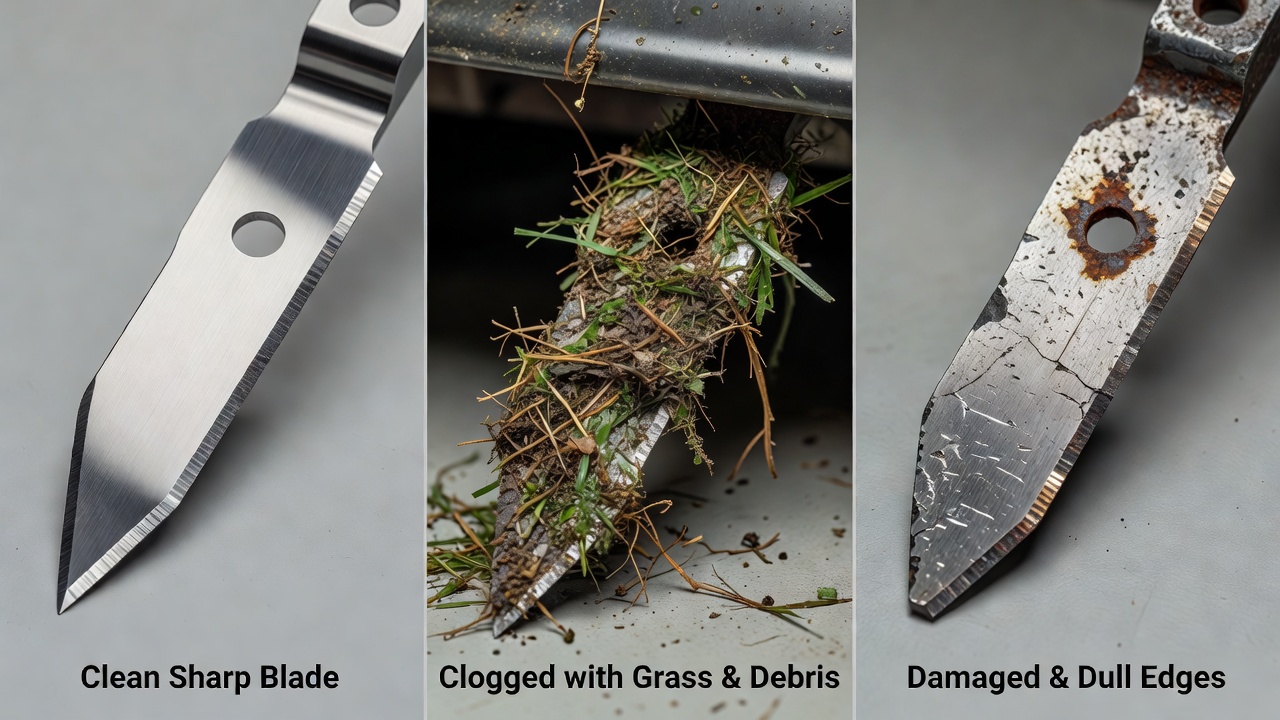
Lawn mower blades require removal for three primary reasons: cleaning debris buildup, sharpening a dull blade, and replacing a damaged blade. Grass clippings, dirt, and rust can accumulate under the blade deck, reducing cutting efficiency and causing vibration. A dull blade tears grass instead of cutting it cleanly, leaving brown tips vulnerable to disease. Bent, cracked, or severely damaged blades must be replaced entirely.
You do not need to remove the blade for routine cleaning of the mower deck—you can flush debris with a hose from above. However, removal becomes necessary when the blade itself requires inspection or maintenance, which typically occurs every 20-40 hours of mowing during the season.
Essential Safety Precautions Before Removal
Disconnecting the spark plug wire is the first and most critical step. This eliminates the risk of accidental engine startup while your hands are near the blade. Even a brief engine rotation can cause serious laceration. Remove the wire by grasping the rubber boot and twisting gently—never pull the wire itself, as this can damage the connection.
Position your mower on a flat, level surface. Tipping the mower onto its side allows access to the blade while preventing oil from draining into the air filter. Always tip the mower with the carburetor and air filter facing upward to avoid fuel and oil leakage into the engine. Use a sturdy block or brick to prevent the mower from rolling.
Protective equipment is mandatory: wear heavy work gloves to protect against cuts and sharp blade edges, and safety glasses to shield your eyes from debris and metal shavings. Never reach under the mower while it is running or immediately after stopping—the blade can continue rotating briefly due to momentum. Wait at least 5 minutes after engine shutdown before handling the blade.
How to Remove a Blade from a Push Mower
Push mowers typically have one blade located directly under the cutting deck. Access the blade by tipping the mower onto its side with the air filter facing upward. Mark the blade’s orientation on both the blade and deck using paint, tape, or a marker—this ensures you reinstall it correctly, as blade imbalance can cause dangerous vibration.
Examine the center bolt connecting the blade to the spindle. Most lawn mower blades use a standard counterclockwise bolt threading, meaning you turn the wrench to the left to loosen. However, some older or specialty mowers may use reverse threading—check your owner’s manual if uncertain. Using an appropriately sized wrench (typically 5/8-inch or 3/4-inch), place a wooden block against the blade edge to prevent rotation while you apply steady pressure to the wrench handle.
Turn the bolt counterclockwise with controlled force. Do not apply sudden jerking motions, as this can strip the threads. Once the bolt is loose enough, remove it by hand and set it on a clean surface where it will not be lost. Grasp the blade firmly by its thicker center section (never the sharp edges) and lift it straight out of the spindle shaft. Inspect the blade for damage, cracks, or bending before proceeding with cleaning, sharpening, or replacement.
Removing Blades from Riding Mowers and Zero-Turn Mowers
Larger mowers present additional complexity. Riding mowers and zero-turn mowers typically have multiple blades—usually one for each cutting deck. Some models have two or three independent decks, each with its own blade assembly. Consult your owner’s manual to identify the exact number and location of blades before beginning.
Riding mower blades are accessed from beneath the machine. You may need to raise the mower deck to its highest position for clearance. Position the mower on level ground and use jack stands rated for your mower’s weight to safely support it—never work under a mower supported only by a hydraulic jack. Zero-turn mowers with three decks require removal of all three blades for balanced maintenance; removing only one blade can cause severe vibration and equipment damage.
The removal process for each blade mirrors push mower removal: disconnect the spark plug, mark orientation, lock the blade with wood, unbolt counterclockwise, and lift straight out. However, deck designs vary widely, so check your specific manual for any unique access steps or blade orientations. Some commercial-grade mowers use proprietary quick-change blade systems—if your mower features this design, follow the manufacturer’s specific disconnection procedure.
Critical Considerations: Blade Orientation and Threading Direction
Blade orientation is one of the most common sources of reinstallation error. Lawn mower blades are asymmetrical—they have a specific direction that must face downward during operation. The blade’s cutting edges should be angled to push grass forward as the blade rotates. If reinstalled backward, the blade will not cut effectively and may cause engine strain.
This is why marking blade orientation with paint or tape before removal is essential. Draw an arrow on the blade indicating the direction it rotates, or mark the side facing downward. Some blades have manufacturer arrows or markings—preserve these visual cues.
Verify bolt threading direction before applying force. Most lawn mower blade bolts use standard right-hand threading (counterclockwise to loosen, clockwise to tighten). However, some mowers use reverse threading on one bolt to prevent it from loosening due to vibration during operation. If you feel unexpected resistance or the bolt seems to tighten when turning counterclockwise, stop immediately and check your manual. Over-tightening a blade bolt can crack the bolt, damage the spindle shaft, or cause the blade to slip during operation.
Reinstalling Your Lawn Mower Blade Correctly
Before reinstalling, inspect the spindle shaft for damage or corrosion. A damaged shaft can cause blade wobble and unsafe operation. Clean away any debris or rust using a wire brush or fine steel wool. Apply a thin coat of general-purpose lubricant to prevent future corrosion, wiping away excess before blade installation.
Align the blade’s center hole with the spindle shaft and slide the blade onto the shaft. Verify that the blade orientation matches your marking from the removal step. Replace the bolt through the blade center and into the spindle shaft. Hand-tighten the bolt first to ensure proper threading, then use the wrench to secure it firmly.
Proper torque specification is critical. Under-tightened bolts can loosen during operation, causing blade wobble and potential ejection. Over-tightened bolts can strip threads or crack the shaft. Most push mower blade bolts should be tightened to 35-50 foot-pounds of torque. Riding mower and zero-turn blade bolts typically require 50-90 foot-pounds, depending on the model. If you do not have a torque wrench, tighten the bolt until it is snug (offering firm resistance to hand turning), then give it an additional quarter-turn with the wrench. This approximates correct torque for most consumer mowers.
After tightening, verify blade balance by hand-rotating the blade gently—it should spin smoothly without wobbling. A wobbling blade indicates improper seating, incorrect bolt tension, or blade damage. Remove the blade, inspect it, and reinstall if necessary. Never operate a mower with an unbalanced blade, as this causes dangerous vibration and can damage the spindle bearing.
Handling Blade Damage and When to Seek Professional Help
Inspect your blade for signs that replacement is necessary. Visible cracks, deep gouges, or bent sections indicate the blade should be replaced rather than sharpened. A bent blade cannot be restored to proper balance and balance and will cause ongoing vibration even if carefully straightened. Rust covering more than 25% of the blade surface warrants replacement to ensure reliable cutting and prevent further deterioration.
If your blade is dull but undamaged, you have two options: sharpen it yourself or take it to a professional. Professional blade sharpening typically costs $10-25 per blade and ensures proper balance and edge geometry. If you sharpen the blade yourself, use a metal file to maintain the blade’s original angle (typically 30-45 degrees) and remove equal amounts of metal from both edges to preserve balance. Even slightly unbalanced blades cause vibration and accelerated spindle wear.
Seek professional help if the blade bolt will not loosen after applying steady wrench pressure—it may be seized due to rust or corrosion, and forcing it risks damaging the spindle shaft. If your mower has multiple blades and only one is damaged, consider replacing all blades simultaneously to ensure balanced cutting and prevent future maintenance interruptions. If you are uncertain about blade condition, blade threading direction, or your mower’s specific design, consult your owner’s manual or contact a qualified mower repair technician.
Frequently Asked Questions
Which direction do you turn the lawn mower blade bolt to remove it?
Most lawn mower blade bolts use standard counterclockwise threading, so you turn the wrench handle to the left (downward) to loosen the bolt. However, some older mowers or specific models may use reverse threading on certain bolts. Check your owner’s manual before beginning. If you feel the bolt tightening when turning left, reverse direction immediately and consult the manual.
Why is it important to mark the blade orientation before removal?
Lawn mower blades are designed to cut in only one direction. If reinstalled backward, the blade will not cut effectively and may cause engine strain or poor mowing results. Marking the blade with paint or tape ensures you return it to the correct orientation during reassembly, preventing performance issues and potential damage.
How long does blade removal typically take?
For an experienced person, blade removal takes 10-15 minutes. First-time removal may take 20-30 minutes as you locate bolts, work through safety steps, and become familiar with your mower’s design. Allow additional time if bolts are seized or difficult to access. Professional service shops typically complete blade removal and replacement in 30-45 minutes.
Can you remove a lawn mower blade without disconnecting the spark plug?
No. Disconnecting the spark plug wire is a non-negotiable safety step that eliminates the risk of accidental engine startup while your hands are near the blade. Skipping this step dramatically increases injury risk. Even brief accidental engine rotation can cause severe lacerations. Always disconnect the spark plug wire before beginning blade work.